
User's Manual


Note
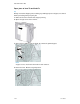
If paper is torn, check inside the machine and remove it.
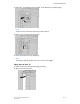
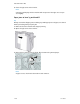
4. Return the lever 4b its original position.
5. Close the right cover on the finisher.
Note
A message will display and the machine will not operate if the right cover is open
even slightly.
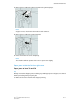
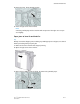
Paper jams at the optional C/Z Folder
Tip
Always ensure that all paper jams, including any small ripped pieces of paper, are cleared
before proceeding with your print jobs.
This section describes how to remedy paper jams that occur at the following locations:
• Paper jams at lever 2a and knob 3a
• Paper jams at lever 2b and knob 2c
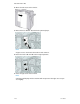
• Remove jams at knob 2c, levers 2e and 2f, and the folder output tray (2d)
• Paper jams at the folder output tray (2d) and at lever 2g
Note
Remedies differ according to the paper jam location. Follow the instructions displayed
to remove the jammed paper.
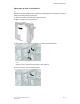
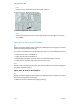
Paper jams at lever 2a and knob 3a
Tip
Always ensure that all paper jams, including any small ripped pieces of paper, are cleared
before proceeding with your print jobs.
1. Make sure that the machine has stopped printing.
User Guide18-22
Standard Finisher Plus