TA B L E O F C O N T E N T S TABLE OF CONTENTS Table of Contents Paper Jam Clearance 2 Paper Jams at the Top Left Cover 3 Paper Jams at the Left Center Cover 4 Paper Jams at the Bottom Left Cover 4 Paper Jams in Trays 1 to 4 5 Paper Jams in Tray 5 (Bypass) 5 Paper Jams in the Duplex Unit 6 Paper Jams in the Finisher 6 Paper Jams on the Finisher Top Cover 6 Paper Jams on the Finisher Interface 7 Paper Jams on the Center Tray Exit 7 Document Jams 8 Document Jams on the Left Cover (Top) 8 Jams on Original I
TA B L E O F C O N T E N T S Resolving Output Quality Problems Using Basic Copying, Added Features, and Image Quality Tabs 16 Calling for Service 20 Fault Codes 21 ii
User Guide (Troubleshooting) The DocuColor Series 2240/1632 is designed to help you find and solve problems as they happen. The printer/copier can detect problems and display the corrective action on the screen. This section describes the printer/copier faults and how to perform the appropriate recovery procedure. Sometimes you may not succeed in your efforts to clear a fault. When this happens you should call the Xerox Customer Support Center.
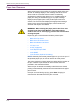
U S E R G U I D E ( TR O U B L E S H O O T I N G ) Paper Jam Clearance When paper jams in the machine, the machine stops and a tone sounds. A message display in the message area of the Touch Screen with the corrective actions to take. Occasionally, simultaneous multiple paper jams occur or multiple sheets of paper jam during an extended copy job. A paper message displays until all paper jams in the printer/copier have been cleared.
U S E R G U I D E ( TR O U B L E S H O O T I N G ) This section describes how to clear paper jams that occur at the top left cover of the machine. 1 2 Gently open the top left cover while lifting up the release lever. If the edge of the jammed paper can be reached at the output tray, pull the jammed paper in the direction of the feed-out tray. WARNING: The fuser area is very hot. Be careful when clearing a jam in this area. 3 Remove the jammed paper.
U S E R G U I D E ( TR O U B L E S H O O T I N G ) Paper Jams at the Left Center Cover This section describes how to clear paper jams that occur at the left center cover of the machine. 1 2 Gently open the left center cover while pulling the release lever. Remove the jammed paper. NOTE: If paper is torn, check for any torn pieces of paper inside the machine. 3 Gently close the left center cover.
U S E R G U I D E ( TR O U B L E S H O O T I N G ) This section describes how to clear paper jams that occur in Trays 1 to 4. 1 2 3 Open the tray where the paper jam occurred. Remove the jammed paper. Push the tray in gently until it comes to a stop. Paper Jams in Tray 5 (Bypass) This section describes how to clear paper jams that occur in Tray 5 (Bypass). 1 Inspect the paper feed entrance of Tray 5 (Bypass), and remove any jammed paper.
U S E R G U I D E ( TR O U B L E S H O O T I N G ) Paper Jams in the Duplex Unit This section describes how to clear paper jams that occur on the duplex unit. 1 2 Open the duplex cover above Tray 5 (Bypass). Remove the jammed paper. NOTE: If paper is torn, check for any torn pieces of paper inside the machine. 3 Close the duplex unit cover, and lift up Tray 5 (Bypass).
U S E R G U I D E ( TR O U B L E S H O O T I N G ) 1 2 3 USER GUIDE (TROUBLESHOOTING) Paper Jams on the Finisher Interface Move the Finisher to the right. Open the top cover on the Finisher. Remove the jammed paper. NOTE: If paper is torn, check for any torn pieces of paper inside the machine. 4 5 Close the top cover on the Finisher. Slide the Finisher back to the left. Paper Jams on the Center Tray Exit 1 2 Move the Finisher to the right. Remove the jammed paper.
U S E R G U I D E ( TR O U B L E S H O O T I N G ) Document Jams If a document jams on the DADF, the machine stops, and an error message appears on the display. Clear the document jam according to the instructions displayed, then reload the document. Document Jams on the Left Cover (Top) This section describes how to clear document jams on the left cover (top) of the DADF. 1 Pull up the handle at the center of the left cover on the DADF, and open the cover until it comes to a stop.
U S E R G U I D E ( TR O U B L E S H O O T I N G ) A message is displayed if a document jam occurs in the Original Input Area of the DADF, or on the Document Glass. Follow the instructions displayed to clear the problem. 1 2 3 4 5 If there is a document jammed in the Original Input Area, remove it gently. Gently lift up the DADF. Remove the jammed paper. Gently return the DADF to the original position.
U S E R G U I D E ( TR O U B L E S H O O T I N G ) Stapler Faults This section describes how to clear stapler faults. Follow the procedures on the following pages when copies are not stapled or when staples are bent. NOTE: To staple copies, the Finisher (optional accessory) must be installed. 1 2 3 4 5 6 Make sure that the machine has stopped, then open the front cover in the Finisher. Hold the staple cartridge by its lever, and pull the staple cartridge out to the right toward you.
U S E R G U I D E ( TR O U B L E S H O O T I N G ) Toner Cartridge Problem – – Operator mistakenly removed the wrong toner cartridge and wishes to reinsert it. Operator cannot reinstate a partially full toner cartridge after it has been removed. Suggested Solutions – Reinstall the toner cartridge using the following procedure: NOTE:The following procedure may result in dry ink spillage on the floor.
U S E R G U I D E ( TR O U B L E S H O O T I N G ) Resolving Programming Problems Problem The Control Panel Touch Screen does not respond to a touch command You cannot program a job while a screen is open Suggested Solution – Press Clear All on the Control panel – Touch a selectable button on the Touch Screen with one finger. A slight pressure is required to cause the printer/copier to react. – If the problem persists, open the Front Door of the printer/ copier.
U S E R G U I D E ( TR O U B L E S H O O T I N G ) Problem USER GUIDE (TROUBLESHOOTING) Resolving Processor Problems Suggested Solution Transparencies Load transparencies by following the instructions in the section Loading Stock, in the User Guide (Copier).
U S E R G U I D E ( TR O U B L E S H O O T I N G ) Problem Output jams when exiting the printer/ copier to the Center Output Tray (when the Finisher is installed) Suggested Solution – Ensure the paper matches the type defined for the paper tray. When the Finisher Transport is present the Center Output Tray can hold up to 200 sheets of 24 lb. (90 gsm) paper. Empty the Tray when output approaches this limit, to ensure continuous production.
U S E R G U I D E ( TR O U B L E S H O O T I N G ) Problem – Paper curl may be a result of: – The mass of toner coverage on the copy - the greater the toner mass, the greater the paper curl. – The paper weight. – The humidity conditions at the printer/copier. – You can sometimes minimize curl problems by flipping the paper over in the tray and making the copies again. If excessive curl is still present, use a heavier paper. – Ensure the paper matches the type defined for the Paper Tray.
U S E R G U I D E ( TR O U B L E S H O O T I N G ) Resolving Output Quality Problems Using Basic Copying, Added Features, and Image Quality Tabs For more information on the features on these tabs, refer to the section entitled Copier Features, in the User Guide (Copier).
U S E R G U I D E ( TR O U B L E S H O O T I N G ) Deletions on the copy edges. Copies made from photographs show color or background on output edges Suggested Solution – Edge deletion on all sides of the copy is normal, and is greatest on the lead edge of the copy. Set the Border Erase feature, Variable Erase option, to 4mm to minimize the deletion. Select the size for the original document on the Scan Options tab and an appropriate setting from the Reduce/Enlarge option from the Basic Copying tab.
U S E R G U I D E ( TR O U B L E S H O O T I N G ) Problem Background on copies Suggested Solution – Examine the input document for the source of the problem. – Ensure that the document is held flat on the Document Glass and that the document cover is closed. – From the Image Quality tab, adjust the Lighter/Darker control to lighter. – When making Black copies, select Black as the output color. Reduce the color Balance-Low Density values so that the background does not appear on the copies.
Problem Suggested Solution Corner Shift appears in the wrong area on the copy If the document is positioned on the Document Glass in the short edge direction, and the paper used for copying is in the long edge feed direction, the copy will appear to be positioning the corner shift selection in the wrong corner. Corner shift selections are referenced from the Document Glass location. NOTE:Corner Shift is also intended only for documents that are smaller than the copy paper selected.
U S E R G U I D E ( TR O U B L E S H O O T I N G ) Calling for Service There is information and support available at www.Xerox.com. There you can find answers to many of your questions, solutions to problems, order toner and supplies, and request service support. For information on clearing fault codes, refer to the section entitled Fault Codes, in this chapter. There may be times when you will not be able to correct a problem. When this happens, you should call for service.
U S E R G U I D E ( TR O U B L E S H O O T I N G ) This section describes fault codes that are displayed on the screen. Fault codes, such as those described below, are displayed when an error occurs, preventing printing from ending normally, or when trouble has occurred on the machine. When a fault has occurred, refer to the following table to remedy the problem.
U S E R G U I D E ( TR O U B L E S H O O T I N G ) Fault Code 016-701 016-702 016-735 016-737 016-739 016-740 016-741 016-742 016-743 016-748 5–22 Cause/Remedy • Cause - PCL print data could not be processed due to insufficient memory. • Remedy - Lower the resolution, or instruct printing again without setting 2 Sided printing or N Up. • Cause - PCL print data could not be processed due to insufficient space in the print page buffer.
U S E R G U I D E ( TR O U B L E S H O O T I N G ) 016-749 016-757 016-758 016-759 016-760 016-761 016-778 016-779 016-780 016-781 016-782 Cause/Remedy • Cause - A JCL command syntax error occurred. • Remedy - Confirm the print settings, or correct the JCL command. • Cause - The entered password is wrong. • Remedy - Enter the correct password. • Cause - The account is not registered as an authorized copy user. • Remedy - Contact the System Administrator.
U S E R G U I D E ( TR O U B L E S H O O T I N G ) Fault Code Cause/Remedy • Cause - Could not find the specified server path during file forwarding by Scan Services. • Remedy - Check the path name of the server currently set to the job template. • Cause - A write to server error occurred during file forwarding by Scan Services. • Remedy - Confirm that there is sufficient space in the directory on the server, and that access rights are present.