
User`s guide


Scanning From One Touch DocuMate 700
44 User’s Guide
4. Put the document on the flatbed glass and close the lid.
5. Press or click the One Touch button you set to scan with OCR.
Your scanned pages appear in the Destination Application with the text ready for editing
and other text processing.
Scan and Burn to a CD
If you have a CD burner attached to your computer, you can scan directly from your scanner
onto a CD. This feature is available only on computers running Windows XP or Windows Vista.
To scan and burn to a CD:
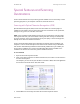
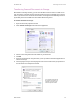
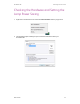
1. Open the One Touch Properties window.
2. Select Burn to CD as the Destination Application.
3. Choose a File Format and a Scan Configuration.
4. Click OK.
5. Put the document on the flatbed glass and close the lid.
6. Now start scanning using the scanning number you set to scan and burn to a CD.
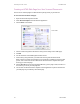
The scanner will start scanning. When finished the file will be saved to the Windows
location for CD files. An information bubble will appear in the Windows notification area
telling you that there are files waiting to be burned to CD.
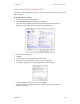
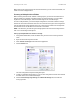
7. Open the One Touch Properties window, select Burn to CD and click the Properties button.
8. Make sure a blank CD is in the CD burner.
9. Click the Burn to CD button. The CD burner begins and your scanned documents are
written to the CD.
If other files are also waiting in this location, they will get written with the One Touch files
on the CD.