
User`s guide

Installation
22 DocuMate 765 Scanner User’s Guide
Avoid scanning the following:
The following types of documents can cause multiple-page feeding, paper
jams, or damage to the scanner.
• Plastic items such as credit cards, identification cards, overhead
projector sheets, film, and cloth or metallic sheets.
• Photographs or other coated paper as the coating can flake off during
the scan process.
• Documents with wet ink, correction fluid, or carbon paper that can
leave residue inside the scanner.
• Torn, damaged, wrinkled or perforated paper.
• Lightweight paper such as carbon-less paper or tracing paper.
• Irregular paper such as extremely thick card-stock paper, cardboard
backing, documents that are glued together, paper with tabs, paper
with glue residue, extremely smooth or glossy paper, and thermal or
heat sensitive paper.
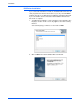
Scanning Interfaces
If you selected the recommended installation options (see page 7), then
you have several different options to scan with your Xerox DocuMate 765
scanner. Each method scans equally well, so use the one with
appropriate options for the item you are scanning.
• One Touch—When you press either the Simplex or Duplex button,
documents are scanned using the scan settings indicated by the LCD
display. The scanned images are then sent to a software application
on your computer. You can also scan using the on-screen One Touch
software interface. The One Touch software is where you configure
the scan settings for your One Touch scanning buttons. See
“Scanning from One Touch” on page 25.
• TWAIN Interface—This option uses your scanner’s TWAIN interface
to scan. Select scanning options before scanning, put the document
in the scanner, then click a button on the TWAIN interface window.
See “Scanning from TWAIN” on page 57.
• Windows Image Acquisition (WIA)—This option uses the Microsoft
Windows set of choices for scanning. Select the WIA scan settings,
put the document in the scanner, then click a button on the WIA
window. See “Scanning from WIA” on page 93.
• ISIS Interface—This option uses the ISIS interface for scanning.
Select the ISIS scan settings, put the document in the scanner, then
click a button on the ISIS window. See “Scanning from ISIS” on
page 67.