Xerox Phaser 7100 Color Printer Imprimante couleur Xerox Phaser 7100 ® ® System Administrator Guide Guide de l’administrateur système Italiano Guida per l'amministratore del sistema Deutsch Systemhandbuch Español Guía del administrador del sistema Português Guia de Administração do Sistema Русский Руководство системного администратора
© 2012 Xerox Corporation. All rights reserved. Unpublished rights reserved under the copyright laws of the United States. Contents of this publication may not be reproduced in any form without permission of Xerox Corporation.
Contents 1 Introduction Overview . . . . . . . . . . . . . . . . . . . . . . . . . . . . . . . . . . . . . . . . . . . . . . . . . . . . . . . . . . . . . . . . . . . . . . . . . . . . . . . . .8 Configuration Steps . . . . . . . . . . . . . . . . . . . . . . . . . . . . . . . . . . . . . . . . . . . . . . . . . . . . . . . . . . . . . . . . . . .8 More Information . . . . . . . . . . . . . . . . . . . . . . . . . . . . . . . . . . . . . . . . . . . . . . . . . . . . . . . . . . . . . . . . . . . . . . . .
Contents LPD . . . . . . . . . . . . . . . . . . . . . . . . . . . . . . . . . . . . . . . . . . . . . . . . . . . . . . . . . . . . . . . . . . . . . . . . . . . . . . . . . . . . Enabling LPD . . . . . . . . . . . . . . . . . . . . . . . . . . . . . . . . . . . . . . . . . . . . . . . . . . . . . . . . . . . . . . . . . . . . . . . . Configuring LPD . . . . . . . . . . . . . . . . . . . . . . . . . . . . . . . . . . . . . . . . . . . . . . . . . . . . . . . . . . . . . . . . . . . . .
Contents Overwriting Image Data . . . . . . . . . . . . . . . . . . . . . . . . . . . . . . . . . . . . . . . . . . . . . . . . . . . . . . . . . . . . . . . . . Immediate Job Overwrite . . . . . . . . . . . . . . . . . . . . . . . . . . . . . . . . . . . . . . . . . . . . . . . . . . . . . . . . . . . . IP Filtering . . . . . . . . . . . . . . . . . . . . . . . . . . . . . . . . . . . . . . . . . . . . . . . . . . . . . . . . . . . . . . . . . . . . . . . . . . . . . . Creating an IP Filter Rule. . . . .
Contents 7 Administrator Tools Monitoring Alerts and Status. . . . . . . . . . . . . . . . . . . . . . . . . . . . . . . . . . . . . . . . . . . . . . . . . . . . . . . . . . . . . Setting Up Machine Status Alerts . . . . . . . . . . . . . . . . . . . . . . . . . . . . . . . . . . . . . . . . . . . . . . . . . . . . . Setting Up Billing Meter Read Alerts . . . . . . . . . . . . . . . . . . . . . . . . . . . . . . . . . . . . . . . . . . . . . . . . . . Setting Up Supplies Data Alerts . . . . . . . . . . .
Introduction 1 This chapter includes: • Overview on page 8 • More Information on page 9 Phaser 7100 Color Printer System Administrator Guide 7
Introduction Overview This guide is designed for a system administrator with network administrator rights who has knowledge of networking concepts as well as experience creating and managing network user accounts. This guide will help you install, configure, and manage the printer on a network. Notes: • • Network features are not available if you are connected through USB. Embedded fax features are not available for all printer models.
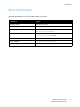
Introduction More Information See the following links for more information about your printer. Information Source Installation Guide Packaged with printer Quick Use Guide Packaged with printer and www.xerox.com/office/7100docs User Guide (PDF) Software and Documentation Disc www.xerox.com/office/7100docs Recommended Media List www.xerox.com/paper (United States) www.xerox.com/europaper (Europe) Online Support Assistant www.xerox.com/office/7100support Technical Support www.xerox.
Introduction 10 Phaser 7100 Color Printer System Administrator Guide
Initial Setup 2 This chapter includes: • Physical Connection on page 12 • Initial Setup at the Control Panel on page 13 • Accessing CentreWare Internet Services on page 14 • Enabling Services and Options on page 16 Phaser 7100 Color Printer System Administrator Guide 11
Initial Setup Physical Connection To connect your printer: 1. Connect the power cable to the printer, and plug it into an electrical outlet. 2. Connect one end of a Category 5 or better Ethernet cable to the Ethernet port in the back of the printer. Connect the other end of the cable to a correctly configured network port. 3. Turn the printer on.
Initial Setup Initial Setup at the Control Panel The Installation Wizard The first time the printer is turned on, the Installation Wizard starts. The wizard prompts you with a series of questions to help you configure basic settings for your printer. Configuration Report After you complete the installation wizard, you can print a Configuration Report. The Configuration Report lists the current settings of the printer. For details, see Accessing the Configuration Report on page 14.
Initial Setup Initial Setup in CentreWare Internet Services CentreWare Internet Services is an application on the embedded Web server of the printer. This application allows you to configure and administer the printer from a Web browser on any computer. Accessing CentreWare Internet Services Before you begin: • TCP/IP and HTTP must be enabled to access CentreWare Internet Services. If you disable either of these services, you must enable them at the printer before accessing CentreWare Internet Services.
Initial Setup 3. 4. Navigate to Configuration, then press OK. To print the report, at the prompt, press OK. Using the Configuration Overview Page The Configuration Overview page provides shortcuts to commonly accessed pages under the Properties tab. To access the Configuration Overview page, click Properties > Configuration Overview. Assigning a Name and Location to the Printer The Description page provides a place to assign a name and location to the printer for future reference.
Initial Setup Enabling Services and Options Some services and options must be enabled before they can be used. To enable these special services and options, use either the control panel or CentreWare Internet Services. Enabling Services and Options in CentreWare Internet Services 1. 2. 3. 4. 16 In CentreWare Internet Services, click Properties > Security > Feature Enablement. Type Unique Function Code. Click Apply. In Status, select Reboot Machine.
Network Configuration 3 This chapter includes: • TCP/IP on page 20 • SNMP on page 24 • SSDP on page 27 • Microsoft Networking on page 28 • LPD on page 29 • Raw TCP/IP Printing on page 30 • SMTP on page 31 • LDAP on page 32 • POP3 on page 34 • HTTP on page 35 • Proxy Server on page 36 • IPP on page 37 • UPnP Discovery on page 38 • Bonjour on page 39 • WSD on page 40 • SOAP on page 41 Phaser 7100 Color Printer System Administrator Guide 19
Network Configuration TCP/IP Transmission Control Protocol (TCP) and Internet Protocol (IP) are two protocols within the Internet Protocol Suite. IP manages the transmission of messages from one computer to another and TCP manages the actual end-to-end connections. Note: You can configure IPv4 settings at the printer control panel or through CentreWare Internet Services. You can only configure IPv6 through CentreWare Internet Services. Enabling TCP/IP Note: By default, TCP/IP is enabled.
Network Configuration Configuring IPv4 Dynamic Address Settings 1. 2. 3. 4. 5. At the printer control panel, press Menu. Navigate to Admin Menu, then press OK. Navigate to Network / Port > TCP/IP. Navigate to IPv4 Settings > Get IP Address. Select DHCP, DHCP/Autonet, BOOTP, or RARP, then press OK. Configuring DNS/DDNS Settings Domain Name System (DNS) and Dynamic Domain Name System (DDNS) is a system that maps host names to IP addresses. 1. At the printer control panel, press Menu. 2.
Network Configuration 3. Select the desired method for obtaining a dynamic IP address from the IP Address Resolution drop-down menu, or select Static to define a static IP address. Notes: • 4. If you select Static, type the IP Address, Subnet Mask, and Gateway Address in the appropriate fields. • If you select BOOTP or DHCP, you cannot change the IP address, Subnet Mask, or default gateway. • If RARP address resolution mode is selected, you cannot change the IP address. Type a valid Domain Name.
Network Configuration By default, IPv6 is disabled. CAUTION: If both IPv4 and IPv6 are disabled, you cannot access CentreWare Internet Services. You must re-enable TCP/IP at the printer control panel before you can access CentreWare Internet Services. Disabling TCP/IP or changing the IP address also disables any dependant protocols. Notes: • 3. 4. 5. The host name is the same for IPv4 and IPv6. If you change the host name for IPv6, the host name changes for IPv4 as well.
Network Configuration SNMP Simple Network Management Protocol (SNMP) is used in network management systems to monitor network-attached devices for conditions that require administrative attention. This protocol consists of a set of standards for network management including an application layer, a database schema, and a set of data objects. Agents, or software modules, reside in the SNMPv3 engine of the printer.
Network Configuration 4. Type a name up to 256 characters for the Community Name (Read / Write) or use the default value of private. SET returns the password for the SNMP SET requests to the printer. Applications that set information on the printer by using SNMP, use this password CAUTION: Any changes made to GET or SET community names for this printer require corresponding changes to GET or SET community names for each application that uses SNMP to communicate with this printer. 5.
Network Configuration 4. Type the IP address of the host running the SNMP manager application to be used to receive traps. Note: Port 162/UDP is the default port for traps. You can select v1 or v2c based on what the trap receiving system supports. 5. 6. Under Traps, select the type of Traps to be Received by the SNMP manager. Click Apply. Adding IPX Trap Destination Addresses Internetwork Packet eXchange (IPX) is a routing protocol used by Novell environments. 1.
Network Configuration SSDP Simple Service Discovery Protocol (SSDP) provides processes to allow network clients with little or no static configuration to discover network services. SSDP provides multicast discovery, server-based notification, and discovery routing options. 1. In CentreWare Internet Services, click Properties > Connectivity > Protocols. 2. Click SSDP. 3. Select Enabled (UPnP) next to SSDP Port Status. 4. Type the number of minutes between 60 and 4320 minutes for Valid Advertising Period. 5.
Network Configuration Microsoft Networking Enabling Microsoft Networking 1. 2. 3. 4. In CentreWare Internet Services, click Properties > Connectivity > Port Settings. Select Enabled next to SMB. To enable these protocols, select TCP/IP or NetBEUI. Click Apply. Configuring Microsoft Networking 1. 2. 3. 4. 5. 6. 7. 8. 9. In CentreWare Internet Services, click Properties > Connectivity > Protocols > Microsoft Networking. Select a transport protocol from the Transport drop-down list.
Network Configuration LPD The Line Printer Daemon (LPD) protocol is used to provide printer spooling and network print server functionality for operating systems such as HP-UX, Linux, and MAC OS X. Note: For information on setting up print queues on your client system, refer to your client system’s documentation. Enabling LPD 1. 2. In CentreWare Internet Services, click Properties > Connectivity > Port Settings. Select Enabled next to LPD.
Network Configuration Raw TCP/IP Printing Raw TCP/IP is a printing method used to open a TCP socket-level connection over Port 9100, to stream a print-ready file to the printer input buffer. The connection is then closed either after sensing an End Of Job character in the PDL or after expiration of a preset timeout value. Port 9100 does not require an LPR request from the computer or the use of an LPD running on the printer. Port 9100 is selected in Windows as the Standard TCP/IP port.
Network Configuration SMTP Configuring SMTP Server Settings 1. 2. In CentreWare Internet Services, click Properties > Connectivity > Protocols > SMTP Server. Under Required Information, select the method to be used to locate an SMTP server. • To allow DNS to automatically find an SMTP server on the network, select From DNS. • To map to a specific SMTP server, select STATIC. Note: If you select From DNS, ensure that DNS is configured for either IPv4 or IPv6 before you can define the SMTP server.
Network Configuration LDAP Lightweight Directory Access Protocol (LDAP) is a protocol used to process queries and updates to an information directory, also known as an LDAP directory, stored on an external server. LDAP directories are heavily optimized for read performance. Use this page to define how the printer retrieves user information from an LDAP directory. Configuring LDAP/LDAPS Server Settings 1. 2. In CentreWare Internet Services, click Properties > Connectivity > Protocols > LDAP > LDAP Server.
Network Configuration 3. 4. 5. Type Network User ID Attributes. Type Attributes of Smart Card. Click Apply. Configuring Authorization Access for LDAP 1. 2. 3. 4. In CentreWare Internet Services, click Properties > Connectivity > Protocols > LDAP > LDAP Authorization Access. Type the access information of the system administrator next to System Administrator Access. Type the access information of the accounting administrator next to Accounting Administrator Access. Click Apply.
Network Configuration POP3 Post Office Protocol, version 3 (POP3) allows email clients to retrieve email from remote servers over TCP/IP on network port 110. 1. In CentreWare Internet Services, click Properties > Connectivity > Protocols > POP3 Setup. 2. Type the appropriately formatted address and port number. The default port number is 110. 3. Select APOP Authentication next to POP Receive Password Encryption. 4. Type the Login Name assigned to the printer that will be used to log in to the POP3 server.
Network Configuration HTTP Hypertext Transfer Protocol (HTTP) is a request-response standard protocol between clients and servers. Clients making HTTP requests are referred to as User Agents (UAs), and servers responding to these requests for resources such as HTML pages, are referred to as origin servers. There can be any number of intermediaries, such as tunnels, proxies, or gateways between UAs and origin servers. Enabling HTTP By default, HTTP is enabled.
Network Configuration Proxy Server A proxy server acts as a go-between for clients seeking services and servers that provide them. The proxy server filters client requests and if the requests conform to the proxy server’s filtering rules, grants the request and allows the connection. A proxy server has two main purposes: • Keeps any devices behind it anonymous for security purposes. • Decreases the amount of time needed to access a resource by caching content, such as websites from a Web server. 1.
Network Configuration IPP Internet Printing Protocol (IPP) is used for remote printing and managing print jobs. Enabling IPP 1. 2. 3. In CentreWare Internet Services, click Properties > Connectivity > Port Settings. Select Enabled next to IPP. Click Apply. Configuring IPP 1. 2. 3. 4. 5. 6. In CentreWare Internet Services, click Properties > Connectivity > Protocols > IPP. Next to Add Port Number, type the port number to be used by the printer. The default port number is 80.
Network Configuration UPnP Discovery The Universal Plug and Play discovery protocol is used to identify the available network devices and establish network services. 1. In CentreWare Internet Services, click Properties > Connectivity > Protocols. 2. Click UPnP Discovery. 3. Select Enabled next to UPnP Port Status. 4. Next to Port Number, type a value between 1 and 65535. The default value is 180. 5. Click Apply to save the new settings or click Undo to retain the previous settings.
Network Configuration Bonjour To view the Host Name and Printer Name automatically assigned to this machine under Bonjour, do the following: 1. In CentreWare Internet Services, click Properties > Connectivity > Protocols. 2. Click Bonjour. Note: If Bonjour is not displayed in the Properties tab, click Port Settings and check Bonjour. Click Apply.
Network Configuration WSD Web Services for Devices (WSD) is the technology from Microsoft that provides a standard method for discovering and using network connected devices. It is supported by Windows Vista and Windows Server 2008. WSD is one of the several supported communication protocols. Before you begin, ensure that the printer and client computers are on the same IP subnet. Enabling WSD 1. 2. 3. In CentreWare Internet Services, click Properties > Connectivity > Port Settings.
Network Configuration SOAP Simple Object Access Protocol is used to exchange structured information for applying Web Services in computer networks. Configuring SOAP 1. 2. 3. 4. In CentreWare Internet Services, click Properties > Connectivity > Protocols > SOAP. Select Enabled to enable the port status. Type the Port Number. The default port number is 80. Click Apply.
Network Configuration 42 Phaser 7100 Color Printer System Administrator Guide
Security 4 This chapter includes: • Setting up Access Rights on page 44 • Digital Certificates on page 48 • Secure HTTP and SSL/TLS on page 50 • IPsec on page 51 • 802.1X on page 52 • Overwriting Image Data on page 54 • IP Filtering on page 55 • Restricting Access to Job Information on page 56 See also: www.xerox.
Security Setting up Access Rights Overview You can control access to the printer’s services and features by setting up authentication, authorization, and personalization. Authentication Authentication is the process of confirming the identity of a user by comparing information provided by the user, such as their user name and password, against another source of user information such as an LDAP directory.
Security Local Authentication Setting Up Local Authentication To configure local authentication: 1. In CentreWare Internet Services, click Properties > Security > Authentication Configuration. 2. On the Authentication Configuration page, next to Login Type, select Login to Local Accounts. 3. To allow users without accounts to access the printer, select Enabled next to Non-account Print. 4. Click Apply, then click Reboot Machine.
Security 3. 4. 5. 6. 7. To display user ID characters as asterisks at the control panel, select Hide next to Mask User ID. Type the number of allowed login attempts (1–600) next to Failed Access Log. Type 0 to allow an unlimited number of login attempts. If the maximum number of allowed attempts is exceeded, the printer is locked and must be restarted. To allow users to log in without case sensitivity, select Non-Case Sensitive next to User ID for Login.
Security 4. 5. Type Attribute of Smart Card. Click Apply.
Security Digital Certificates A digital certificate must be installed on the printer before you can enable secure HTTP (SSL). A digital certificate is the data used to verify the identity of the holder or sender of the certificate. A certificate includes the following data: • Information about the person, organization, or computer that the certificate is issued to, including the name, location, email address and other contact information.
Security Creating a Request 1. 2. 3. 4. 5. 6. 7. 8. In CentreWare Internet Services, click Properties > Security > Machine Digital Certificate Management. Click Create New Certificate. Select Certificate Signing Request (CSR). Fill out the form with your 2-Letter Country Code, State/Province Name, Locality Name, Organization Name, Organization Unit, and Email Address. Click Apply. Values from the form are used to generate a Certificate Signing Request.
Security Secure HTTP and SSL/TLS You can encrypt all data sent over HTTP by establishing an encrypted SSL connection. You can enable SSL encryption for the following services: • Configuring the printer in CentreWare Internet Services • Printing from CentreWare Internet Services • Printing using IPP • Network accounting Before you begin: • Install a digital certificate. For details, see Installing a Digital Certificate on page 48. • Ensure that the date and time configured on the printer is correct.
Security IPsec Internet Protocol Security (IPsec) is a group of protocols used to secure Internet Protocol communications by authenticating and encrypting each IP data packet.
Security 802.1X 802.1X is an Institute for Electrical and Electronics Engineers (IEEE) standard that defines a method for port-based network access control or authentication. In an 802.1X secured network, the printer must be authenticated by a central authority, typically a RADIUS server, before it can access the physical network. You can enable and configure the printer to be used in an 802.1X secured network. Before you begin: • Ensure the 802.
Security 10. Click Use this Certificate. 11. Click Reboot Machine. You can now select EAP-TLS as the 802.1X authentication method. For details, see Configuring 802.1X on page 52.
Security Overwriting Image Data To ensure that the image data on the printer’s hard drive cannot be accessed, you can delete and overwrite image data. Image data is any and all in-process or temporary user data on the hard drive, such as current jobs, queued jobs, temporary scan files, but not saved jobs or folders. By default, the printer deletes and overwrites each job three times after it finishes processing. Note: Install the Productivity Kit to use this feature.
Security IP Filtering You can prevent unauthorized network access by only allowing data to be transmitted to and from specific IP addresses and ports. Creating an IP Filter Rule 1. 2. 3. 4. 5. 6. 7. 8. In CentreWare Internet Services, click Properties > Security > IP Filtering. Under IPv4 Filtering or IPv6 Filtering, select Enabled. Click Add under IPv4 Filtering or IPv6 Filtering. Type the Source IP Address. This is the IP address of the computer or device that you want to allow.
Security Restricting Access to Job Information You can control how job information is displayed at the control panel when users press the Job Status button. Hiding or Password Protecting Completed Job Information 1. 2. 3. 4. 5. In CentreWare Internet Services, click Properties > Security > Job Status Default > Completed Jobs View. Select Require Login to View Jobs or No Job Viewing next to Completed Jobs View. This prevents the users from seeing the completed job information.
Printing 5 This chapter includes: • Selecting Print Mode Options on page 58 • Managing Banner Sheet Printing Options on page 59 • Print Service Settings on page 60 • Secure Print on page 62 • UNIX, Linux, and AS/400 Printing on page 63 Phaser 7100 Color Printer System Administrator Guide 57
Printing Selecting Print Mode Options You can specify the print mode to be used on the printer for individual protocol types. 1. In CentreWare Internet Services, click Properties > Services > Printing > Print Mode. 2. Under Print Mode, select Auto, PostScript 3, HP-GL/2, PLCL 6/5e, or TIFF/JPEG. 3. Select PJL as needed.
Printing Managing Banner Sheet Printing Options You can set the printer to print a Banner Sheet with each print job. The banner sheet contains information about the user and job name. This option can be set in the print driver, in CentreWare Internet Services, or at the printer control panel. Note: Banner sheet printing must be enabled in the print driver. This type of printing must also be enabled at the control panel or in CentreWare Internet Services, otherwise the banner sheet will not be printed.
Printing Print Service Settings Allocating Memory You can improve performance by allocating memory away from the ports that are not being used, or by allocating more memory to more heavily used ports. To allocate memory for print settings in control panel: 1. At the printer control panel, press Menu. 2. Navigate to Admin Menu > Allocate Memory. 3. Specify the amount of memory allocated to the following print settings as necessary.
Printing Adjusting Image Quality To configure image quality for print settings: 1. At the printer control panel, press Menu. 2. Navigate to Admin Menu, then press OK. 3. Navigate to Image Quality to do the following: • Adjust Gradation: Use the arrow keys to adjust the gradation for Text or Photo. • Adjust Color Registration: Use the arrow keys to adjust color registration. You can automatically or manually register the colors.
Printing Secure Print Supported by the printer’s print driver, or CentreWare Internet Services Print tab, this feature directs the printing of confidential documents, or documents which should not be seen by third parties, to a User Account on the printer. The user can then access the Account, with a numeric password, at the printer, and privately print out the stored documents. Secure Print allows you to associate a 1–12 digit passcode number with a print job when sending it to the printer.
Printing UNIX, Linux, and AS/400 Printing UNIX-based printing uses LPD/LPR port 515 or port 9100 to provide printer spooling and network print server functionality. Xerox® printers can communicate using either protocol. Xerox Services for UNIX Systems (XSUS) XSUS is an application that allows you to manage and print to multiple printers in the UNIX and Linux environments. With XSUS you can: • Configure and check the status of network connected printers.
Printing Installing XSUS Before you begin: Note: You must have root or superuser privileges to install XSUS. Download the latest UNIX, Linux, or Sun Solaris software from the Support page of the Xerox website. This includes the following two .tgz files: • Printer Model Package file, which contains .ppd files for all printer models. The file name is PrinterPkgXPXX_20xx_xx_xx.tgz. • Printer Driver for your operating system. The available files are: • XeroxAIXpowerpcxpxx_x.xx.xx.tgz for the IBM RS6000 family.
Printing Printing from a Linux Workstation Ensure that CUPS is installed and running on your workstation. The instructions for installing and building CUPS are contained in the CUPS Software Administrators Manual, written and copyrighted by Easy Software Products. Note: For complete information on CUPS printing capabilities, see the CUPS Software Users Manual available at www.cups.org/documentation.php. Installing the Xerox PPD on the workstation The Xerox PPD for CUPS is available on the Xerox website.
Printing Installing the WSCO and Setting up Print Queues For detailed instructions on installing the library and setting up print queues, refer to the installation instructions that are included with the library.
Accounting 6 This chapter includes: • Local Accounting on page 68 • Xerox Standard Accounting on page 69 • Network Accounting on page 72 • Configuring Accounting Login Screen Settings on page 73 • Enabling Accounting in Print Drivers on page 74 • Enabling Accounting in Print Drivers on page 74 Phaser 7100 Color Printer System Administrator Guide 67
Accounting Local Accounting Local Accounting tracks the number of print jobs for each user that logs in to the printer. You can then generate reports listing usage data for individual users and groups. Note: You must set a System Administrator Password before setting up accounting. Configuring Local Accounting 1. 2. 3. 4. 5. 6. 7. 8. 9. In CentreWare Internet Services, click Properties > Accounting > Accounting Configuration. Next to Accounting Type, select Local Accounting.
Accounting Xerox Standard Accounting Xerox Standard Accounting (XSA) tracks the number of print jobs for each user. You can set limits to restrict the total number of jobs by type that a user can produce. You can then generate reports listing usage data for individual users and groups. When XSA is enabled, users must log in to the printer before accessing services. They must also provide their account details in the print driver before printing documents from a computer.
Accounting Creating a New User Account and Setting Usage Limits Note: You must create a group account before you can create and add user accounts. 1. 2. 3. In CentreWare Internet Services, click Properties > Accounting > Xerox Standard Accounting > Manage Accounting. Click Add New User. Type a User ID and a Name using up to 32 alphanumeric characters, for the new user. Note: Each User ID and Name must be unique. 4.
Accounting Resetting Usage Limits 1. 2. 3. In CentreWare Internet Services, click Properties > Accounting > Xerox Standard Accounting > Report and Reset. To reset all usage data to 0, click Reset Usage Data. Click OK to acknowledge the confirmation message. CAUTION: The following step will delete all the XSA accounts on the printer. 4. 5. Click Reset to Default if you want to delete all user, group, and general accounts. Click OK to acknowledge the warning message.
Accounting Network Accounting Network Accounting allows you to manage printer usage with detailed cost analysis capabilities. Print jobs are tracked at the printer and stored in a job log. All jobs require authentication of User ID and Account ID, which are logged with the job details in the job log. The user is prompted for accounting information when submitting a job to the printer. The job log information can be compiled at the accounting server and formatted into reports.
Accounting Configuring Accounting Login Screen Settings 1. 2. 3. 4. In CentreWare Internet Services, click Properties > Accounting > Accounting Login Screen Settings. Type the text next to Alternative Name for User ID. This text that will appear on the control panel to prompt a user for their user name. To display user ID characters as asterisks, select Hide next to Mask User ID. Click Apply.
Accounting Enabling Accounting in Print Drivers Jobs sent from a user’s computer can only be counted if accounting is enabled in the print driver. Enabling Accounting in a Windows Print Driver 1. 2. 3. 4. 5. 6. 7. 8. 9. From the Start menu select Printers and Faxes. Right-click the printer in the list, and select Properties > Configuration > Accounting. From the Accounting System drop-down menu, select None, Local Accounting, Xerox Standard Accounting or Auditron, or Xerox Network Accounting.
Administrator Tools 7 This chapter includes: • Monitoring Alerts and Status on page 76 • Configuring Stored File Settings on page 77 • Energy Saving Settings on page 78 • System Settings on page 79 • Taking the Printer Offline on page 80 • Smart eSolutions and Billing Information on page 81 • Cloning on page 84 • Font Management Utility on page 85 • Customizing Printer Contact Information on page 86 • Updating the Printer Software on page 87 • Date and Time Settings on page 88 • Watermarks and Annotations
Administrator Tools Monitoring Alerts and Status You can configure alert and status notices to be automatically sent as an email message to one or more recipients. Setting Up Machine Status Alerts To set up machine status alerts for email recipients: 1. In CentreWare Internet Services, click Properties > General Setup > Alert Notification > Email Notification for Machine Status. 2. Under Send Notice, select the machine status to send email notification immediately or at regular intervals. 3.
Administrator Tools Configuring Stored File Settings Note: Install the Productivity Kit to use this feature. 1. 2. 3. 4. At the printer control panel, press Menu. Navigate to Admin Menu, then press OK. Navigate to System Settings, then press Stored Jobs. Change the following settings as necessary: • Stored Job Expiration Date: Press On and select the date for how long print jobs stored on the printer are kept before being deleted.
Administrator Tools Energy Saving Settings 1. 2. 3. 4. 78 In CentreWare Internet Services, click Properties > General Setup > Energy Saver Settings. Next to Time to Low Power Mode, type the number of minutes (1–240) for which the printer can be inactive until going into Low Power Mode. Next to Time to Sleep Mode, type the number of minutes (1–240) for which the printer can be inactive until going into Sleep Mode. Click Apply.
Administrator Tools System Settings Setting Default System Settings 1. 2. 3. 4. At the printer control panel, press Menu. Navigate to Admin Menu > System Settings to set the default system settings. Change the following settings as necessary: • Start up page: Select Print to print the start up page every time you request a print job. • Alert Tone: Set the alert tone as Soft, Normal, Loud, or Off. • Auto Clear: Set the system to display when a certain amount of inactive time, in minutes, has passed.
Administrator Tools Taking the Printer Offline To prevent the printer from sending or receiving jobs over the network at any given time, you can take the printer offline. This allows you to perform printer maintenance, without any jobs being sent to the printer. When the printer is offline, any services, such as Network Scanning, are unavailable. To take the printer offline, press the Online/Offline button on the control panel. Note: Taking the printer offline does not turn the printer off.
Administrator Tools Smart eSolutions and Billing Information Smart eSolutions Smart eSolutions is a suite of features that simplifies printer ownership and administration. It provides free services to enable administration of metered billing and supplies replenishment plans for printers on a network. The suite provides the following: • MeterAssistant®: MeterAssistant® automatically submits meter reads to Xerox from network printers.
Administrator Tools Enable Smart eSolutions 1. 2. 3. 4. 5. 6. 7. In CentreWare Internet Services, click General Setup > Smart eSolutions > Registration. If the HTTP Proxy Server is not configured, click Enable Proxy Server. For details, see Proxy Server on page 36. Click Register with Xerox Communication Server. On the Xerox Communication Server page, next to Server Communication, select Enabled.
Administrator Tools View Usage and Billing Information Usage Counters The Usage Counters page displays the total number of pages printed or generated by the printer. 1. In CentreWare Internet Services, click Status > Billing and Counters > Usage Counters. The entire detailed list of pages printed or generated by the printer is displayed. 2. Click Refresh to update the page.
Administrator Tools Cloning Note: Install the Productivity Kit to use this feature. This feature allows you to save your printer settings in a clone file. You can use the clone file to copy your printer settings to another printer, or use it to back up and restore settings on your own printer. Note: If you are using the clone file to copy your printer settings to another printer, both printers must be the same model, and must have the same version of software.
Administrator Tools Font Management Utility The CentreWare Font Management Utility allows you to manage fonts on one or more printers on your network. Note: The Xerox CentreWare Font Management utility is available on the Xerox website at www.xerox.com/office/P7100drivers. You use the utility to download soft fonts, such as your company’s branded fonts or unicode fonts needed to support multiple languages, to your printer. You then can add, delete or export the fonts to a file.
Administrator Tools Customizing Printer Contact Information The support page in CentreWare Internet Services displays the contact information about service and supplies as well as for about the system administrator. You can customize this information to display your company’s contact information for the printer users. To add your custom information: 1. In CentreWare Internet Services, click the Support tab. 2. Click Change Settings. 3. Update the fields with the desired information and click Apply.
Administrator Tools Updating the Printer Software When Xerox releases a new version of the printer software or firmware, you can update your printer to incorporate the new fixes and improvements. Updating the Software Before you begin • Determine the current software version of your printer. • Download the latest software update file in the .bin format from the drivers and downloads page for your printer. • Download the Phaser 7100 Firmware Upgrade Utility from www.support.xerox.
Administrator Tools Date and Time Settings When the printer is first set up, you are asked to set the date and time. If you want to change the date and time after the initial setup, use the control panel to change the settings. To change date and time settings: 1. At the printer control panel, press the Menu button. 2. Navigate to Admin Menu, then press OK. 3. Navigate to System Settings > Machine Clock, then press OK. 4. Change the following settings as necessary: • Date: Set the date.
Administrator Tools Watermarks and Annotations A watermark inhibits the replication of a document by adding text or a background pattern to the printed page. You can configure watermarks to print dates, unique IDs, background patterns, or default text. In addition, you can set watermarks to print according to the job type. Annotations are customizable text strings printed on a document, and are similar to watermarks.
Administrator Tools • • Custom Watermark 2 Custom Watermark 3 Configuring Secure Watermark in CentreWare Internet Services 1. In CentreWare Internet Services, click Properties > Security > Watermark > Secure Watermark. 2. Under Digital Codes Settings, type appropriate values for Decoding Passcode and Custom Digital Watermark. 3. Under Force Secure Watermark, select ON to enable the forced secure watermark job type and report, if necessary. 4.
Administrator Tools 3. 4. 5. Next to Apply Layout Template, select Enabled to apply the layout template. Under Layout Template List, select one of the preset templates from the list. Click Apply.
Administrator Tools 92 Phaser 7100 Color Printer System Administrator Guide