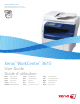
Xerox WorkCentre 3615 Black and White Multifunction Printer Imprimante multifonctions noir et blanc ® ® Xerox WorkCentre 3615 ® ® User Guide Guide d'utilisation Italiano Guida per l’utente Svenska Användarhandbok Čeština Uživatelská příručka Deutsch Benutzerhandbuch Dansk Betjeningsvejledning Polski Przewodnik użytkownika Español Guía del usuario Suomi Käyttöopas Magyar Felhasználói útmutató Português Guia do usuário Norsk Brukerhåndbok Türkçe Kullanıcı Kılavuzu Русский Руководс
© 2013 Xerox Corporation. All rights reserved. Unpublished rights reserved under the copyright laws of the United States. Contents of this publication may not be reproduced in any form without permission of Xerox Corporation.
Contents 1 Safety 11 Electrical Safety ............................................................................................................................................................. 12 General Guidelines................................................................................................................................................ 12 Power Cord ....................................................................................................................................
Contents Connecting to a Telephone Line ..................................................................................................................... 39 Configuring Network Settings .................................................................................................................................. 40 About TCP/IP and IP Addresses ...................................................................................................................... 40 Enabling the Printer for Scanning..
Contents Orientation .............................................................................................................................................................. 81 Selecting Paper Options for Printing.............................................................................................................. 82 Enabling Letterhead 2-Sided Mode ...............................................................................................................
Contents Adjusting Scanning Settings...................................................................................................................................114 Setting the Output Color ..................................................................................................................................114 Setting the Scan Resolution ............................................................................................................................
Contents Checking Page Counts.......................................................................................................................................140 Adjusting Paper Type ........................................................................................................................................141 Adjusting the Transfer Unit ............................................................................................................................141 Adjusting the Fuser ......
Contents A Specifications 185 Printer Configurations and Options .....................................................................................................................186 Available Configuration....................................................................................................................................186 Standard Features ..............................................................................................................................................
Contents Material Safety Data Sheets ..................................................................................................................................207 C Recycling and Disposal 209 All Countries ..................................................................................................................................................................210 North America .................................................................................................................
1 Safety This chapter includes: • Electrical Safety ................................................................................................................................................................ 12 • Operational Safety .......................................................................................................................................................... 14 • Maintenance Safety ..............................................................................................
Safety Electrical Safety This section includes: • General Guidelines........................................................................................................................................................... 12 • Power Cord ......................................................................................................................................................................... 12 • Emergency Turn Off .............................................................................
Safety • Do not use a ground adapter plug to connect the printer to an electrical outlet that does not have a ground connection terminal. WARNING: Avoid the potential of electrical shock by ensuring that the printer is grounded properly. Electrical products can be hazardous if misused. • • • • • • • Only use an extension cord or power strip designed to handle the electrical current capacity of the printer. Verify that the printer is plugged into an outlet that is providing the correct voltage and power.
Safety Operational Safety Your printer and supplies were designed and tested to meet strict safety requirements. These include safety agency examination, approval, and compliance with established environmental standards. Your attention to the following safety guidelines helps to ensure the continued, safe operation of your printer. Operational Guidelines • • • • • Do not remove any paper trays while the printer is printing. Do not open the doors when the printer is printing.
Safety Printer Supplies • • • • • • Use the supplies designed for your printer. The use of unsuitable materials can cause poor performance and a possible safety hazard. Follow all warnings and instructions marked on, or supplied with, the product, options, and supplies. Store all consumables in accordance with the instructions given on the package or container. Keep all consumables away from the reach of children. Never throw toner, print/drum cartridges, or toner containers into an open flame.
Safety Maintenance Safety • • • 16 Do not attempt any maintenance procedure that is not specifically described in the documentation supplied with your printer. Do not use aerosol cleaners. Clean with a dry lint-free cloth only. Do not burn any consumables or routine maintenance items. For information on Xerox supplies recycling programs, go to www.xerox.com/gwa.
Safety Printer Symbols Symbol Description Warning: Indicates a hazard which, if not avoided, could result in death or serious injury. Caution: Indicates a mandatory action to take in order to avoid damage to the property. Hot surface on or in the printer. Use caution to avoid personal injury. Do not burn the item. Do not expose the imaging unit to light for more than 10 minutes. Do not expose the imaging unit to direct sunlight. Do not touch the part or area of the printer.
Safety Environmental, Health, and Safety Contact Information For more information on Environment, Health, and Safety in relation to this Xerox product and supplies, contact the following customer help lines: United States: 1-800 828-6571 Canada: 1-800 828-6571 Europe: +44 1707 353 434 For product safety information in the United States, go to www.xerox.com/environment. For product safety information in Europe, go to www.xerox.com/environment_europe.
2 Features This chapter includes: • Parts of the Printer........................................................................................................................................................... 20 • Energy Saver Mode ......................................................................................................................................................... 25 • Information Pages...................................................................................................
Features Parts of the Printer This section includes: • Front View ........................................................................................................................................................................... 20 • Rear View ............................................................................................................................................................................ 21 • Internal Parts .................................................................
Features Rear View 1. 2. 3. 4. 5. 6. 7. Phone Connector Fax Line Connector Wireless Network Adapter Port USB Port Ethernet Connector Rear Door Duplex Unit 8. Transfer Roller 9. Fuser 10. Control Board 11. Power Switch 12. Left Side Door 13.
Features Internal Parts 1. 2. 3. 4. 22 Output Tray Paper Stop Front Door Smart Kit Drum Cartridge Toner Cartridge ® ® 5. Duplex Automatic Document Feeder 6. Document Cover 7.
Features Control Panel The control panel consists of a touch screen and buttons you press to control the functions available on the printer. The control panel: • Displays the current operating status of the printer. • Provides access to print features. • Provides access to reference materials. • Provides access to Tools and Setup menus. • Provides access to Troubleshooting menus and videos. • Prompts you to load paper, replace supplies, and clear jams. • Displays errors and warnings.
Features 12. Clear clears a number field or clears the last number of a numeric entry. 13. Redial/Pause recalls the last fax number used or inserts pauses in fax numbers.
Features Energy Saver Mode You can set the time the printer spends idle in ready mode before the printer transitions to a lower power level. Exiting Energy Saver Mode The printer automatically cancels Energy Saver mode when it receives data from a connected computer. To exit Energy Saver mode manually, press the Power Saver button on the control panel.
Features Information Pages Your printer has a printable set of information pages. These include configuration and font information, demonstration pages, and more. Configuration Report The Configuration Report lists printer information such as default settings, installed options, network settings including IP address, and font settings. Use the information on this page to help you configure network settings for your printer, and to view page counts and system settings. Printing a Configuration Report 1.
Features Administrative Features CentreWare Internet Services CentreWare Internet Services is the administration and configuration software installed on the embedded Web server in the printer. It allows you to configure and administer the printer from a Web browser. CentreWare Internet Services requires: • A TCP/IP connection between the printer and the network in Windows, Macintosh, UNIX, or Linux environments. • TCP/IP and HTTP enabled in the printer.
Features Finding the IP Address on the Configuration Report 1. 2. 3. 28 At the printer control panel, press the Machine Status button. Touch Information Pages. Touch Configuration, then touch Print. IPv4 and IPv6 address information is located in the Network Setup section of the Configuration Report under TCP/IPv4 and TCP/IPv6.
Features More Information You can obtain more information about your printer from these sources: Resource Location Installation Guide Packaged with the printer. Other documentation for your printer www.xerox.com/office/WC3615docs Recommended Media List United States: www.xerox.com/paper European Union: www.xerox.com/europaper Technical support information for your printer; including online technical support, Online Support Assistant, and driver downloads. www.xerox.
Installation and Setup 3 This chapter includes: • Installation and Setup Overview ................................................................................................................................ 32 • Selecting a Location for the Printer........................................................................................................................... 33 • Connecting the Printer ..........................................................................................................
Installation and Setup Installation and Setup Overview Before printing, your computer and the printer must be plugged in, turned on, and connected. Configure the initial settings of the printer, then install the driver software and utilities on your computer. You can connect to your printer directly from your computer using USB, or connect over a network using an Ethernet cable or wireless connection. Hardware and cabling requirements vary for the different connection methods.
Installation and Setup Selecting a Location for the Printer 1. Select a dust-free area with temperatures from 10–32°C (50–90°F), and relative humidity 15–85%. Note: Sudden temperature fluctuations can affect print quality. Rapid heating of a cold room can cause condensation inside the printer, directly interfering with image transfer. 2. Place the printer on a level, solid, non-vibrating surface with adequate strength for the weight of the printer.
Installation and Setup Connecting the Printer This section includes: • Selecting a Connection Method ................................................................................................................................. 34 • Connecting to a Computer Using USB..................................................................................................................... 35 • Connecting to a Wired Network ........................................................................................
Installation and Setup Connecting to a Computer Using USB To use USB, you must have Windows XP SP1 and later, Windows Server 2003 and later, or Macintosh OS X version 10.5 and later. To connect the printer to the computer using a USB cable: 1. Ensure that the printer is turned off. 2. Connect the B end of a standard A/B USB 2.0 cable to the USB Port on the back of the printer. 3. Attach the power cord and then plug in the printer and turn it on. 4.
Installation and Setup Connecting to a Wireless Network A wireless local area network (WLAN) provides the means to connect two or more devices in a LAN without a physical connection. The printer can connect to a wireless LAN that includes a wireless router or wireless access point. Before connecting the printer to a wireless network, the wireless router must be configured with a service set identifier (SSID), a passphrase, and security protocols.
Installation and Setup 4. To enable the wireless network adapter, disconnect the Ethernet cable from the printer. Note: Only one network connection can be active. During power on, if a network cable is detected, it is enabled and the wireless network adapter is disabled. 5. Turn on the printer. 6. In the Admin Menu, configure the Wi-Fi settings. For details, see the System Administrator Guide at www.xerox.com/office/WC3615docs.
Installation and Setup 3. 4. Locate the plastic latch release on the wireless network adapter that protrudes through the back of the chassis. To remove the wireless network adapter, reach into the chassis and push inward, then back on the latch release. CAUTION: Do not use force to pull on the wireless network adapter. If the latch is released properly, the adapter pulls out easily. Pulling on the adapter can damage it. 5. 6. 7. Close the left door, then on the back of the door, screw in the thumbscrew.
Installation and Setup Connecting to a Telephone Line 1. 2. 3. 4. Ensure that the printer is turned off. Connect a standard RJ11 cable, No. 26 American Wire Gauge (AWG) or larger, to the Line port on the back of the printer. Connect the other end of the RJ11 cable to an operating telephone line. Enable and configure the Fax functions. For details, see Configuring Fax Settings from the Control Panel.
Installation and Setup Configuring Network Settings This section includes: • About TCP/IP and IP Addresses ................................................................................................................................. 40 About TCP/IP and IP Addresses Computers and printers primarily use TCP/IP protocols to communicate over an Ethernet network. Generally, Macintosh computers use either TCP/IP or the Bonjour protocol to communicate with a network printer.
Installation and Setup Enabling the Printer for Scanning If the printer is connected to a network, you can scan to an FTP address, an email address, or a shared folder on your computer. First you must set up scanning in CentreWare Internet Services. For details, see CentreWare Internet Services on page 27. If the printer is connected with a USB cable, you can scan to a folder on your computer, or scan into an application. First you must install the scan drivers and the Express Scan Manager utility.
Installation and Setup Installing the Software This section includes: • Operating System Requirements ............................................................................................................................... 42 • Installing the Print Drivers for a Windows Network Printer ............................................................................. 42 • Installing the Print Drivers for a Windows USB Printer ...............................................................................
Installation and Setup 4. 5. 6. 7. Select your language, then click OK. Click Next. To accept the agreement, click I accept the terms, then click Next. In the Discovered Printers list, select your printer, then click Next. Note: When installing drivers for a network printer, if you do not see your printer in the list, click the IP Address or DNS Name button. In the IP Address or DNS Name field, type the IP address of your printer, then click Search to locate your printer.
Installation and Setup Installing Print Drivers for Macintosh OS X Version 10.5 and Later Install the Xerox print driver to access all features of your printer. To install the print driver software: 1. Insert the Software and Documentation disc into the appropriate drive on your computer. 2. To view the .dmg file for your printer, double-click the disc icon on your desktop. 3. Open the .dmg file, then navigate to the appropriate installer file for your operating system. 4. Open the installer file. 5.
Installation and Setup Installing Scan Drivers for Macintosh Insert the Software and Documentation disc into the appropriate drive on your computer. To view the .dmg file for your printer, double-click the disc icon on your desktop. Open the Scan Installer.dmg file, then navigate to the appropriate installer file for your operating system. 4. Open the Scan Installer package file. 5. To acknowledge the warning and introductory messages, click Continue. 6.
Installation and Setup 2. At your computer, do the following: a. Go to www.xerox.com/office/WC3615drivers and select your printer model. b. From the Operating System menu, select UNIX, then click Go. c. Select the Xerox® Services for UNIX Systems package for the correct operating system. This package is the core package and must be installed before the printer support package. d. To begin downloading, click the Start button. e.
Installation and Setup Installing the Printer as a Web Service on Devices Web Services on Devices (WSD) allow a client to discover and access a remote device and its associated services across a network. WSD supports device discovery, control, and use. To install a WSD printer using the Add Device Wizard: 1. At your computer, click Start, then select Devices and Printers. 2. To launch the Add Device Wizard, click Add a Device. 3.
4 Paper and Media This chapter includes: • Supported Paper............................................................................................................................................................... 50 • Loading Paper ................................................................................................................................................................... 54 • Loading Paper in the Bypass Tray .......................................................................
Paper and Media Supported Paper This section includes: • Recommended Media .................................................................................................................................................... 50 • Ordering Paper .................................................................................................................................................................. 50 • General Paper Loading Guidelines ..................................................................
Paper and Media Paper That Can Damage Your Printer Some paper and other media types can cause poor output quality, increased paper jams, or damage your printer.
Paper and Media Supported Paper Types and Weights Trays Paper Types Weights All Trays Plain Letterhead Hole Punched Rough Surface Colored (60–80 g/m²) Plain Thick Letterhead Hole Punched Colored (81–105 g/m²) Light Card (106–163 g/m²) Heavy Card (164–216 g/m²) Labels Bypass Tray only Envelope Supported Standard Paper Sizes Tray European Standard Sizes North American Standard Sizes All Trays A4 (210 x 297 mm, 8.3 x 11.7 in.) B5 (176 x 250 mm, 6.9 x 9.8 in.) A5 (148 x 210 mm, 5.8 x 8.3 in.
Paper and Media Supported Paper Types and Weights for Automatic 2-Sided Printing Paper Types Weights Plain Letterhead Hole Punched Colored (60–80 g/m²) Plain Thick Letterhead Hole Punched Colored (81–105 g/m²) Light Card (106–163 g/m²) Supported Standard Paper Sizes for Automatic 2-Sided Printing European Standard Sizes North American Standard Sizes A4 (210 x 297 mm, 8.3 x 11.7 in.) B5 (176 x 250 mm, 6.9 x 9.8 in.) A5 (148 x 210 mm, 5.8 x 8.3 in.) Legal (216 x 356 mm, 8.5 x 14 in.
Paper and Media Loading Paper This section includes: • Loading Paper in the Bypass Tray ............................................................................................................................. 54 • Loading Small Paper Sizes in the Bypass Tray ...................................................................................................... 57 • Configuring Trays 1–4 for the Paper Length ................................................................................................
Paper and Media 3. Flex the sheets back and forth and fan them, then align the edges of the stack on a level surface. This procedure separates any sheets that are stuck together and reduces the possibility of jams. Note: To avoid jams and misfeeds, do not remove paper from its packaging until you are ready to use it. 4. Load the paper in the tray. Load hole punched paper with the holes to the left. − For 1-sided printing, load letterhead or pre-printed face up with the top edge going into the printer.
Paper and Media − For 2-sided printing, load letterhead and pre-printed face down with the top edge facing you. Note: Do not load paper above the maximum fill line. Overfilling the tray can cause the printer to jam. 5. Adjust the width guides until they touch the edges of the paper. 6. 7. If the control panel prompts you, on the screen, verify the paper size and type. To specify the settings on the printer control panel, for Use Driver Settings for Print Job, clear the check box. a.
Paper and Media Loading Small Paper Sizes in the Bypass Tray To simplify loading paper in the bypass tray, remove the tray from the printer. 1. Open the bypass tray. 2. To remove the bypass tray from the printer, pull the tray straight out of the printer. 3. If the bypass tray is loaded with paper already, remove any paper that is a different size or type. Then, raise the paper stop.
Paper and Media 4. Move the width guides to the edges of the tray. 5. Flex the sheets back and forth and fan them, then align the edges of the stack on a level surface. This procedure separates any sheets that are stuck together and reduces the possibility of jams. Note: To avoid jams and misfeeds, do not remove paper from its packaging until you are ready to use it. 6. Load the paper in the tray. Note: Do not load paper above the maximum fill line. Overfilling the tray can cause the printer to jam.
Paper and Media 8. Adjust the paper stop until it touches the edges of the paper. 9. Slide the tray back into the printer. 10. If the control panel prompts you, on the screen, verify the paper size and type. 11. To specify the settings on the printer control panel, for Use Driver Settings for Print Job, clear the check box. a. Touch Size, then, for a standard paper size, touch an option. b. Touch Type, then, for the paper type, touch an option. c. Touch OK. 12. Verify or set the paper size and type. a.
Paper and Media 1. 2. Remove all paper from the tray. To remove the tray from the printer, pull out the tray until it stops, lift the front of the tray slightly, then pull it out. 3. To extend the tray, with one hand, hold the back of the tray. With the other hand, at the front of the tray, press the release latch and pull the ends outward until they latch. 4. To protect the paper, place the paper cover over the extended section of the paper tray. 5.
Paper and Media Loading Paper in Trays 1–4 1. To remove the tray from the printer, pull out the tray until it stops, lift the front of the tray slightly, then pull it out. 2. 3. At the back of the paper tray, press the paper lift tray down until it locks. Adjust the paper length and width guides as illustrated. 4. Flex the sheets back and forth and fan them, then align the edges of the stack on a level surface.
Paper and Media Note: Do not load paper above the maximum fill line. Overfilling the tray can cause the printer to jam. 6. Adjust the length and width guides to fit the paper. 7. Slide the tray back into the printer. 8. Push the tray in all the way. Notes: • If the tray does not go in all the way, ensure that the paper lift plate at the back of the tray is locked down. • If the tray is extended for legal size paper, the tray protrudes when it is inserted into the printer. 9.
Paper and Media 11. Verify or set the paper size and type. a. At the printer control panel, press the Machine Status button. b. Touch Tools > Tray Management > Tray Settings. c. Touch the desired tray. Note: When you select the bypass tray, the check box for Use Driver Settings for Print Job is set by default. To change the setting, clear the check box. d. e. Touch Size, then touch an option as needed. Touch Type, then touch an option as needed.
Paper and Media To set the Tray Mode: 1. At the printer control panel, press the Machine Status button. 2. Touch Tools > Tray Management > Tray Settings. 3. Touch Bypass Tray. − To specify the settings in the print driver, for Use Driver Settings for Print Job, select the check box. − To specify the settings on the printer control panel, for Use Driver Settings for Print Job, clear the check box. 4. Touch OK.
Paper and Media Loading Paper in the Bypass Tray 1. Open the bypass tray. If the bypass tray is loaded with paper already, remove any paper that is a different size or type. 2. Move the width guides to the edges of the tray. 3. Flex the sheets back and forth and fan them, then align the edges of the stack on a level surface. This procedure separates any sheets that are stuck together and reduces the possibility of jams.
Paper and Media 4. Load the paper in the tray. Load hole punched paper with the holes to the left. − For 1-sided printing, load letterhead or pre-printed face up with the top edge going into the printer. Note: Letterhead Duplex Mode allows 1-sided print jobs to be loaded in the same orientation as 2-sided print jobs. For details, see Enabling Letterhead Duplex Mode on page 82. − For 2-sided printing, load letterhead and pre-printed face down with the top edge facing you.
Paper and Media 5. Adjust the width guides until they touch the edges of the paper. 6. 7. If the control panel prompts you, on the screen, verify the paper size and type. To specify the settings on the printer control panel, for Use Driver Settings for Print Job, clear the check box. a. Touch Size, then, for a standard paper size, touch an option. b. Touch Type, then, for the paper type, touch an option. c. Touch OK. Verify or set the paper size and type. a.
Paper and Media Printing on Special Paper This section includes: • Envelopes ............................................................................................................................................................................ 68 • Labels .................................................................................................................................................................................... 72 • Glossy Cardstock .............................................
Paper and Media Loading Envelopes in the Bypass Tray 1. Open the bypass tray. 2. Move the width guides to the edges of the tray. Note: If you do not load envelopes in the bypass tray right after they have been removed from the packaging, they can bulge. Flatten them to avoid jams.
Paper and Media 3. To load envelopes, select an option: − For Number 10 envelopes, load the envelopes with the short edge going into the printer, flaps down, and flaps to the right. − For C5 envelopes, do one of the following. • Insert envelopes with the print side up, flaps open and down, and the bottom of the envelope going into the printer. • − 70 Insert envelopes with the print side up, flaps closed and down, and flaps going into the printer. For Monarch or DL envelopes do one of the following.
Paper and Media Note: Remove the Multipurpose Tray when loading Monarch or DL envelopes. For details, see Loading Small Paper Sizes in the Bypass Tray on page 57. • Insert envelopes with the short edge going into the printer, flaps down, and flaps to the right. • Insert envelopes with the print side up, flaps open and down, and the bottom of the envelope going into the printer. • Insert envelopes with the print side up, flaps closed and down, and flaps going into the printer.
Paper and Media 4. 5. 6. 7. 8. 9. 10. At the printer control panel, press the Machine Status button. Touch Tools > Tray Management > Tray Settings. Touch Bypass Tray. For Use Driver Settings for Print Job, clear the check box. Touch Size, then select an option. Touch Type, then touch Envelope. Touch OK. Labels You can print labels from any tray. Guidelines for Printing Labels • • • • • • • • • • Use labels designed for laser printing. Do not use vinyl labels.
Paper and Media Glossy Cardstock You can print Lightweight Glossy Cardstock and Heavyweight Glossy Cardstock up to 216 g/m² from any tray. Guidelines for Printing on Glossy Cardstock • • • • • • Do not open sealed packages of glossy cardstock until you are ready to load them into the printer. Leave glossy cardstock in the original wrapper, and leave the packages in the shipping carton until ready to use. Remove all other paper from the tray before loading glossy cardstock.
5 Printing This chapter includes: • Printing Overview ............................................................................................................................................................. 76 • Selecting Printing Options ............................................................................................................................................ 77 • Printing Features ......................................................................................................
Printing Printing Overview Before printing, your computer and the printer must be plugged in, turned on, and connected. Ensure that you have the correct print driver software installed on your computer. For details, see Installing the Software on page 42. 1. Select the appropriate paper. 2. Load paper in the appropriate tray. 3. At the printer control panel, specify the size and type. 4. In your software application, access the print settings.
Printing Selecting Printing Options This section includes: • Print Driver Help................................................................................................................................................................ 77 • Windows Printing Options ............................................................................................................................................ 77 • Macintosh Printing Options ....................................................................
Printing For example, if you want to print on both sides of the paper for most jobs, specify 2-sided printing in Printing Preferences. To select default printing options: 1. Navigate to the list of printers on your computer: − For Windows XP SP2 and later, click Start > Settings > Printers and Faxes. − For Windows Vista, click Start > Control Panel > Hardware and Sound > Printers. − For Windows Server 2003 and later, click Start > Settings > Printers. − For Windows 7, click Start > Devices and Printers.
Printing Macintosh Printing Options Selecting Printing Options for Macintosh To use specific printing options, change the settings before sending the job to the printer. 1. With the document open in your application, click File > Print. 2. Select your printer from the list. 3. Select Xerox® Features from the Copies & Pages menu. 4. Select the desired printing options from the drop-down lists. 5. Click Print to send the job to the printer.
Printing Printing Features This section includes: • Printing on Both Sides of the Paper .......................................................................................................................... 80 • Orientation ......................................................................................................................................................................... 81 • Selecting Paper Options for Printing........................................................................
Printing 2-Sided Page Layout Options You can specify the page layout for 2-sided printing, which determines how the printed pages turn. These settings override the application page orientation settings. To make a 2-sided printing selection, on the Page Layout tab, in the bottom left corner of the preview pane, use the arrow button. Page Layout is located on the Document Options tab. • • • 1-Sided Print prints on one side of the media.
Printing 1. 2. 3. In the print driver, on the Document Options tab, click the Orientation tab. Select an option: − Portrait orients the paper so that the text and images print across the short dimension of the paper. − Landscape orients the paper so that the text and images print across the long dimension of the paper. − Rotated Landscape orients the paper so that the content is rotated 180 degrees and with the long bottom side up. Click OK.
Printing Printing Multiple Pages to a Single Sheet When printing a multiple-page document, you can print more than one page on a single sheet of paper. Print 1, 2, 4, 6, 9, or 16 pages per side by selecting Pages Per Sheet on the Page Layout tab. Page Layout is on the Document Options tab. Printing Booklets With 2-sided printing, you can print a document in the form of a small booklet. Create booklets from any paper size that is supported for 2-sided printing.
Printing Print Quality Print quality modes: • Standard print-quality mode: 600 x 600 dpi • Enhanced print-quality mode: 1200 x 1200 dpi Lightness Lightness allows you to adjust the overall lightness or darkness of the text and images in your printed job. 1. To adjust the lightness, on the Image Options tab, move the slider to the right to lighten or to the left to darken your print job. 2. Click OK or Apply.
Printing 7. 8. 9. Click Pages, then select the pages to print the watermark: − Print on All Pages prints the watermark on all pages of your document. − Print on Page 1 Only prints the watermark only on the first page of the document. If you select a picture as a watermark, specify the lightness settings for the image. Click OK. Scaling Scaling reduces or enlarges the original document to match the selected output paper size.
Printing 1. 2. 3. 4. 5. 6. If the USB Flash drive is already inserted into the USB memory port, touch Print From > USB Memory. Browse to a file, then touch the file name or icon. Touch OK. For Paper Supply, 2-Sided Printing, Sides Per Page, and PDF Password, select an option. To enter the number of copies to print, use the keypad. Press the green Start button. Printing Special Job Types Special job types allow you to send a print job from your computer, then print it from the printer control panel.
Printing Secure Print Secure Print allows you to associate a 1–12 digit passcode number with a print job when sending it to the printer. The job is held at the printer until the same passcode is entered at the control panel. To release a Secure Print job for printing: 1. If the control panel is dark, press the Power Saver button. 2. At the printer control panel, press the Job Status button. 3. Touch Secure Jobs, then touch the user name or folder name for the secure job. 4.
Printing Using Custom Paper Sizes This section includes: • Defining Custom Paper Sizes ....................................................................................................................................... 88 • Creating and Saving Custom Paper Sizes ............................................................................................................... 88 • Printing on Custom Paper Sizes ...............................................................................................
Printing To create and save custom sizes for Macintosh: 1. In the application, click File > Page Setup. 2. Click Paper Sizes, then select Manage Paper Sizes. 3. To add a new size, in the Manage Paper Sizes window, click the plus sign (+). 4. Double-click Untitled at the top of the window and type a name for the new custom size. 5. Enter the height and width of the new custom size. 6. Click the arrow to the right of the Non-Printable Area field and select the printer from the list.
6 Copying This chapter includes: • Making Copies ................................................................................................................................................................... 92 • Adjusting Copying Options ..........................................................................................................................................
Copying Making Copies 1. 2. To clear previous control panel copy settings, press the Clear All button. Load your original documents. − Use the document glass for single pages or paper that cannot be fed using the duplex automatic document feeder. Lift the duplex automatic document feeder, then place the original face down in the upper left corner of the document glass. − 3. 4. 5. 6. 92 Use the duplex automatic document feeder for multiple or single pages.
Copying Document Glass Guidelines The document glass accommodates original sizes up to 216 x 356 mm (8.5 x 14 in.). To copy or scan the following types of originals, use the document glass rather than the duplex automatic document feeder.
Copying Duplex Automatic Document Feeder Guidelines The duplex automatic document feeder accommodates the following originals: • Width: 139.7–215.9 mm (5.5–8.5 in.) • Length: 139.7–355.6 mm (5.5–14 in.) • Weight: − 1-sided documents: 50–125 g/m² − 2-sided documents: 60–125 g/m² Follow these guidelines when loading originals into the duplex automatic document feeder: • Load originals face up so that the top of the document enters the feeder first.
Copying Adjusting Copying Options This section includes: • Basic Settings .................................................................................................................................................................... 96 • Image-Quality Settings.................................................................................................................................................. 97 • Output Adjustments .........................................................................
Copying Basic Settings This section includes: • Selecting a Paper Tray ................................................................................................................................................... 96 • Making the Image Lighter or Darker ........................................................................................................................ 96 • Setting 2-Sided Copying .....................................................................................................
Copying Image-Quality Settings This section includes: • Specifying the Original Document Type ................................................................................................................. 97 • Adjusting the Sharpness................................................................................................................................................ 97 • Auto Background Suppression ................................................................................................
Copying Output Adjustments Collating Copies You can automatically collate multi-page copy jobs. For example, when making three 1-sided copies of a six-page document, the copies are printed in this order: 1, 2, 3, 4, 5, 6; 1, 2, 3, 4, 5, 6; 1, 2, 3, 4, 5, 6 Uncollated copies print in the following order: 1, 1, 1, 2, 2, 2, 3, 3, 3, 4, 4, 4, 5, 5, 5, 6, 6, 6 To select a collating option: 1. At the printer control panel, press the Services Home button. 2. Touch Copy. 3. Touch the Output tab. 4.
Copying Printing Multiple Pages per Side To print multiple pages per side: 1. At the printer control panel, press the Services Home button. 2. Touch Copy. 3. Touch the Output tab. 4. Touch Pages Per Side. 5. Touch one of the following: − Off copies one original image onto one side of a page. This is the default setting. − Auto copies two original pages, reduces the images, and prints them onto one side of a page.
7 Scanning This chapter includes: • Loading Documents for Scanning ...........................................................................................................................102 • Scanning to a USB Flash Drive ..................................................................................................................................104 • Scanning to a Folder on a USB Connected Windows Computer .................................................................
Scanning Loading Documents for Scanning Position the original document as shown. Document Glass Lift the duplex automatic document feeder, then place the original face down in the upper left corner of the document glass. Duplex Automatic Document Feeder Insert originals face up with the top of the page entering the feeder first. Adjust the paper guides so they fit against the originals. Document Glass Guidelines The document glass accommodates original sizes up to 216 x 356 mm (8.5 x 14 in.).
Scanning Duplex Automatic Document Feeder Guidelines The duplex automatic document feeder accommodates the following originals: • Width: 139.7–215.9 mm (5.5–8.5 in.) • Length: 139.7–355.6 mm (5.5–14 in.) • Weight: − 1-sided documents: 50–125 g/m² − 2-sided documents: 60–125 g/m² Follow these guidelines when loading originals into the duplex automatic document feeder: • Load originals face up so that the top of the document enters the feeder first.
Scanning Scanning to a USB Flash Drive You can scan a document and store the scanned file on a USB Flash drive. The Scan to USB function produces scans in .jpg, .pdf, and .tiff file formats. Note: Before pressing the Scan button or inserting the USB Flash drive, press the Power Saver button, then wait until the Power Saver indicator turns off. To scan to a USB Flash drive: 1. Load the original on the document glass or in the duplex automatic document feeder. 2.
Scanning Scanning to a Folder on a USB Connected Windows Computer 1. 2. 3. 4. 5. 6. 7. 8. 9. Click Start > All Programs > Xerox Office Printing. From the list, select your computer, then double-click Express Scan Manager. To accept the default Destination Path folder, click OK. To navigate to another folder, click Browse. Click OK. Load the original on the document glass or in the duplex automatic document feeder. On the printer control panel, touch Scan to. Touch PC. Change scan settings as needed.
Scanning Scanning to a Folder on a USB Connected Macintosh Computer 1. 2. 3. 4. 5. 6. 7. 8. 9. 106 Navigate to Applications > Xerox. From the list, select your computer, then double-click Express Scan Manager. To accept the default Destination Path folder, click OK. To navigate to another folder, click Browse. Click OK. Load the original on the document glass or in the duplex automatic document feeder. On the printer control panel, touch Scan to. Touch PC. Change scan settings as needed.
Scanning Scanning to a Shared Folder on a Network Computer This section includes: • Sharing a Folder on a Windows Computer...........................................................................................................107 • Sharing a Folder Using Macintosh OS X Version 10.5 and Later .................................................................108 • Adding a Folder as an Address Book Entry Using CentreWare Internet Services..................................
Scanning Sharing a Folder Using Macintosh OS X Version 10.5 and Later 1. 2. 3. 4. 5. 6. 7. 8. 9. 10. 11. 12. From the Apple menu, select System Preferences. From the Internet & Wireless menu, select Sharing. From the Service menu, select File Sharing. Under Shared Folders, click the plus icon (+). Browse to the folder that you want to share on the network, then click Add. To modify access rights for your folder, select it. The groups activate.
Scanning Adding a Folder as an Address Book Entry Using the Address Book Editor 1. 2. 3. 4. 5. 6. 7. 8. 9. 10. 11. 12. 13. On your computer, select Start > All Programs > Xerox Office Printing > WorkCentre 3615 Address Book Editor. In the left navigation pane, under Address Book, click Server. For Name, enter the name of the shared file on your computer. For Server Type, select Computer (SMB). Click Computer Settings Wizard. In the Computer Folder Settings window, click Browse.
Scanning Scanning to an Email Address Before scanning to an email address, set up the printer up with the email server information. For details, see the System Administrator Guide for your printer model: To scan an image and send it to an email address: 1. Load the original on the document glass or in the duplex automatic document feeder. 2. At the control panel, touch Printer. 3. Specify the method for selecting recipients: − New Recipient: Allows you to enter the email address manually.
Scanning Scanning to Web Services on Devices Web Services on Devices (WSD) connect your computer to the printer. Use WSD to access scanned images at your computer. Note: See Installing the Printer as a Web Service on Devices. To scan to WSD: 1. Load the original on the document glass or in the duplex automatic document feeder. 2. On the printer control panel, touch Scan to. 3. Touch WSD. 4. To select a destination, touch the computer address. 5.
Scanning Scanning Images into an Application on a USB Connected Computer This section includes: • Scanning an Image into an Application ...............................................................................................................112 • Scanning an Image Using Windows XP ................................................................................................................112 • Scanning an Image Using Windows Vista or Windows 7 .....................................................
Scanning 7. 8. 9. 10. 11. 12. 13. 14. 15. 16. 17. Select the paper source: − Document Glass − Document Feeder To preview the document or select a portion of the document to scan, select Preview. The printer scans a preview copy of the image. To select a portion of the document to scan, click and drag the corner points to resize the frame. Click Next. Type a name for this group of pictures. Select a file format. Type a path name or browse to a location for the scanned images.
Scanning Adjusting Scanning Settings This section includes: • Setting the Output Color .............................................................................................................................................114 • Setting the Scan Resolution .......................................................................................................................................114 • Selecting 2-Sided Scanning .................................................................................
Scanning To set the scan resolution: 1. At the printer control panel, press the Services Home button. 2. Touch Scan To, then select an option. 3. Under the Scan to PC tab, touch Resolution. 4. Select an option. 5. Touch OK. Selecting 2-Sided Scanning 2-Sided Scanning scans both sides of the original image. To set 2-sided scanning: 1. At the printer control panel, press the Services Home button. 2. Touch Scan To, then select an option. 3. Under the Scan to PC tab, touch 2-Sided Scanning. 4. Touch 2-Sided.
Scanning Adjusting the Contrast 1. 2. 3. 4. 5. At the printer control panel, press the Services Home button. Touch Scan To, then select an option. Touch the Quality tab. Touch Contrast, then select an option. Touch OK. Specifying the Original Size 1. 2. 3. 4. 5. At the printer control panel, press the Services Home button. Touch Scan To, then select an option. Touch the Options tab. Touch Original Size, then select a document size. Touch OK.
8 Faxing This chapter includes: • Configuring the Printer for Faxing...........................................................................................................................118 • Loading Documents for Faxing ................................................................................................................................119 • Sending a Fax from the Printer .......................................................................................................................
Faxing Configuring the Printer for Faxing Before you use the fax, you must configure the Fax Settings to make it compatible with your local connection and regulations. The Fax Settings include optional features you can use to configure the printer for faxing. For details, see the System Administrator Guide at www.xerox.com/office/WC3615docs.
Faxing Loading Documents for Faxing Position the original document as shown. Document Glass Lift the duplex automatic document feeder, then place the original face down in the upper left corner of the document glass. Duplex Automatic Document Feeder Insert originals face up with the top of the page entering the feeder first. Adjust the paper guides so they fit against the originals. Note: For details, see Duplex Automatic Document Feeder Guidelines on page 94.
Faxing Sending a Fax from the Printer 1. 2. 3. 4. 5. At the printer control panel, press the Services Home button. Touch Fax. Adjust fax settings as needed. − To adjust brightness, touch Lighten/Darken, then adjust as needed. Darken light originals, such as pencil images, and lighten dark images, such as halftone images, from newspapers or magazines. − To set the scan resolution, touch Resolution, then select an option.
Faxing Sending a Delayed Fax At the printer control panel, press the Services Home button. Touch Fax. Add fax recipients and select fax settings as needed. Touch Options. Touch Delayed Send. Touch On. To enter the number of hours or minutes that the printer waits until sending the fax, touch Hours or Minutes, then use the keypad. 8. Touch OK. 9. Touch Fax. 10. Press the green Start button. The fax is scanned and saved, then sent at the specified time. 1. 2. 3. 4. 5. 6. 7.
Faxing Sending a Cover Page with a Fax You can send a cover sheet with your fax. The cover sheet lists recipient information from the fax address book, and sender information from the Company Name Fax Line setting. For details, see the System Administrator Guide at www.xerox.com/office/WC3615docs. 1. At the printer control panel, press the Services Home button. 2. Touch Fax. 3. Add fax recipients and select fax settings as needed. 4. Touch Options. 5. Touch Cover Page. 6. Touch On. 7. Touch OK. 8.
Faxing Sending a Fax From Your Computer This section includes: • Sending a Fax Using Windows Applications........................................................................................................123 • Sending a Fax Using Macintosh Applications .....................................................................................................124 You can send a fax to the printer from an application on your computer.
Faxing Sending a Fax Using Macintosh Applications You can send a fax from many Macintosh applications by using the fax driver. To install the fax driver, see Installing the Software on page 42. 1. Access the print settings in your software application. For most software applications, press CMD+P. 2. Select your LAN fax printer from the list. 3. To access the fax driver settings, select Fax Setting. The title of the button can vary depending on your application. 4. Modify fax settings as needed.
Faxing Printing a Secure Fax When the Secure Receive setting is enabled, you must enter a password before faxes can be printed. Note: Before you can receive a Secure Fax, enable the Panel Lock and Secure Fax features. For details, see the System Administrator Guide at www.xerox.com/office/WC3615docs. 1. 2. 3. 4. At the printer control panel, press the Job Status button. Touch Secure Fax Receive. Enter the passcode. Touch OK.
Faxing Polling a Remote Fax Machine Fax Polling allows the printer to retrieve a fax stored on another fax machine that supports fax polling. To retrieve a fax from another fax machine: 1. At the printer control panel, press the Services Home button. 2. Touch Fax. 3. Touch Options. 4. Touch Polling Receive. 5. Touch On. 6. Touch OK. 7. Touch Fax. 8. Enter the fax number of the fax machine to poll. 9. Press the green Start button..
Faxing Manually Sending, Receiving, or Polling Using OnHook OnHook temporarily allows you to send, receive, or poll faxes manually. OnHook also turns on the fax modem speaker temporarily so you can hear the fax transmission sounds. This feature is helpful when dialing internationally, or when using phone systems that require you to wait for a specific audio tone. Manually Sending, Receiving, or Polling Using OnHook 1. 2. 3. 4. 5. 6. At the printer control panel, press the Services Home button. Touch Fax.
Faxing Editing the Fax Address Book This section includes: • Adding or Editing Contacts in the Fax Address Book in CentreWare Internet Services ......................128 • Adding or Editing Groups in the Fax Address Book in CentreWare Internet Services .........................128 • Adding or Editing Contacts in the Fax Address Book at the Control Panel..............................................129 • Adding or Editing Groups in the Fax Address Book at the Control Panel ..................................
Faxing Adding or Editing Contacts in the Fax Address Book at the Control Panel 1. 2. 3. 4. 5. 6. At the printer control panel, press the Machine Status button. Touch Tools > Admin Settings > Fax Address Book > Individuals. To add a contact, touch an unused contact, then touch Edit. To edit a contact, touch an existing contact, then touch Edit. Touch Name, type a name, then touch OK. Touch Fax Number, use the keypad to type a fax number, then touch OK. To insert a pause, press the Redial/Pause button (-).
9 Maintenance This chapter includes: • Cleaning the Printer ......................................................................................................................................................132 • Ordering Supplies ...........................................................................................................................................................136 • Managing the Printer .............................................................................................
Maintenance Cleaning the Printer This section includes: • General Precautions ......................................................................................................................................................132 • Cleaning the Exterior ....................................................................................................................................................133 • Cleaning the Scanner ................................................................................
Maintenance Cleaning the Exterior Clean the exterior of the printer once a month. • Wipe the paper tray, output tray, control panel, and other parts with a damp, soft cloth. • After cleaning, wipe with a dry, soft cloth. • For stubborn stains, apply a small amount of mild detergent to the cloth and gently wipe the stain off. CAUTION: Do not spray detergent directly on the printer. Liquid detergent could enter the printer through a gap and cause problems.
Maintenance 5. Wipe the surface of the document glass until it is clean and dry. Note: For best results to remove marks and streaks, use Xerox glass cleaner. 6. Wipe the white underside of the document cover until it is clean and dry. 7. 8. Close the document cover. Open the duplex automatic document feeder top cover. 9. With a dry, soft lint-free cloth or paper towel, wipe the duplex automatic document feeder feed roller and the retard pad until they are clean. 10.
Maintenance Cleaning the Feed Rollers on the Duplex Automatic Document Feeder 1. Open the duplex automatic document feeder top cover. 2. With a dry soft lint-free cloth or paper towel, wipe the feed rollers and the retard pad until they are clean. Note: If the duplex automatic document feeder feed rollers and retard pad get stained with toner or debris, they can cause stains on the documents. To remove stains, use a soft lint-free cloth dampened with a neutral detergent or water.
Maintenance Ordering Supplies This section includes: • Consumables ...................................................................................................................................................................136 • Routine Maintenance Items ......................................................................................................................................136 • When to Order Supplies ......................................................................................
Maintenance When to Order Supplies A warning appears on the control panel when supplies near their replacement time. Verify that you have replacements on hand. It is important to order these items when the messages first appear to avoid interruptions to your printing. An error message appears on the control panel when supplies must be replaced. Order supplies from your local reseller or go to www.xerox.com/office/WC3615supplies. CAUTION: Use of non-Xerox supplies is not recommended.
Maintenance Toner Cartridges This section includes: • General Precautions ......................................................................................................................................................138 • Replacing a Toner Cartridge ......................................................................................................................................138 General Precautions WARNINGS: • • • • When replacing a toner cartridge, be careful not to spill the toner.
Maintenance Note: Each toner cartridge includes installation instructions. Printer Status Message Cause and Solution Toner Low The toner cartridge is low. Order a new toner cartridge. Toner Empty. Open the Front Cover. Then replace the The toner cartridge is empty. Open the front door and Toner Cartridge. replace the toner cartridge. Recycling Supplies For more information on the Xerox® supplies recycling program, go to: www.xerox.com/gwa.
Maintenance Managing the Printer This section includes: • Checking Page Counts..................................................................................................................................................140 • Adjusting Paper Type ...................................................................................................................................................141 • Adjusting the Transfer Unit ...............................................................................
Maintenance Printing the Configuration Report 1. 2. 3. At the printer control panel, press the Machine Status button. Touch Information Pages, then touch Configuration Report. Touch Print. Viewing Meter Readings 1. 2. 3. At the printer control panel, press the Machine Status button. Touch Meter Readings. After viewing the readings, touch X to close the window or press the Services Home button to return to the Services Home menu.
Maintenance Adjusting the Fuser Use Adjust Fuser for optimum print quality across a wide range of paper types. If the toner on a print is smearing or can be rubbed off the paper, increase the offset for the paper you are using. If the toner is blistered or mottled, decrease the offset for the paper you are using. To adjust the fuser: 1. At the printer control panel, press the Machine Status button. 2. Touch Tools, then touch Admin Settings. 3. Touch Service Tools. 4. Touch Adjust Fuser. 5.
Maintenance 5. 6. Select an option: − Pitch Chart: Prints a full page halftone chart and a pitch measuring chart that you can use as a ruler to measure the distance between repeating defects. To identify the component causing the defect, compare the halftone chart, or your print sample, against the measurements shown on the chart. − Full Page Solid: Prints a 1-sided or 2-sided solid black chart that you can use to observe density variations.
Maintenance Refreshing the Toner You can use the Toner Refresh feature to use the last of the toner in a cartridge before you replace it, or to stir toner in a new cartridge. To refresh the toner: 1. At the printer control panel, press the Machine Status button. 2. Touch Tools, then touch Admin Settings. 3. Touch Service Tools. 4. Touch Toner Refresh. 5. Touch OK. The printer displays a message, then returns to the Services Home screen. Note: Do not use this procedure repeatedly.
Maintenance Initializing the Print Meter The Initializing the Print Meter feature resets the print meter count to zero. To initialize the print meter: 1. At the printer control panel, press the Machine Status button. 2. Touch Tools, then touch Admin Settings. 3. Touch Service Tools. 4. Touch Initialize Print Meter. 5. Touch Initialize. 6. Touch Yes, Initialize. The printer displays a message, then returns to the Services Home screen.
Maintenance Clearing Storage The Clear Storage feature erases all data stored in the RAM disk or optional Device Memory, including all files stored as secure prints or saved jobs. To clear storage: 1. At the printer control panel, press the Machine Status button. 2. Touch Tools, then touch Admin Settings. 3. Touch Service Tools. 4. Touch Clear Storage. 5. Select an option: − All: Erases all Secure Print and Saved Job files. − Secure Jobs: Erases all Secure Print jobs.
Maintenance Decreasing Electrostatic Memory The Decrease Electrostatic Memory feature reduces the instances of streaks along the edges of the printed output. To enable Decrease Electrostatic Memory: 1. At the printer control panel, press the Machine Status button. 2. Touch Tools, then touch Admin Settings. 3. Touch Service Tools. 4. Touch Decrease Electrostatic Memory. 5. Touch On, then touch OK. 6. To return to the Services Home menu, press the Services Home button.
Maintenance Adjusting the Touchscreen The Adjust Touchscreen feature allows you to calibrate the touch positions on the touch screen. To adjust the touch screen: 1. At the printer control panel, press the Machine Status button. 2. Touch Tools, then touch Admin Settings. 3. Touch Service Tools. 4. Touch Adjust Touchscreen. 5. Read the instructions, then touch OK. 6. Touch each cross as it appears. Note: To improve the accuracy of the adjustment, to touch the center of each cross, use a stylus. 7. 8.
Maintenance 1. 2. Always turn off the printer and wait for the printer to shut down. Disconnect the power cord from the back of the printer. CAUTION: If the optional Device Memory is not installed, any saved jobs or held jobs in the active queue are deleted when the printer powers off. WARNING: To prevent electric shock, never touch the power plug with wet hands. When removing the power cord, ensure that you pull the plug and not the cord.
Maintenance 5. When lifting the printer, grasp the areas as shown. Notes: • • When moving the printer, do not tilt it more than 10 degrees to the front, back, left, or right. Tilting the printer more than 10 degrees can cause toner spillage. When moving the printer over a long distance, remove the imaging units and toner cartridges to prevent toner from spilling. Repack the printer and its options using the original packing material and boxes or a Xerox Repackaging Kit.
10 Troubleshooting This chapter includes: • General Troubleshooting.............................................................................................................................................152 • Paper Jams .......................................................................................................................................................................157 • Getting Help ..................................................................................................
Troubleshooting General Troubleshooting This section includes: • Printer Does Not Turn On ............................................................................................................................................152 • Printer Resets or Turns Off Frequently ...................................................................................................................153 • Printer Does Not Print.............................................................................................
Troubleshooting Printer Resets or Turns Off Frequently Probable Causes Solutions The power cord is not plugged into the outlet Turn off the printer, confirm that the power cord is plugged in correctly. correctly to the printer and the outlet, then turn on the printer. A system error occurred. Turn off the printer, then turn it on again. Print the Error History from the Information Pages of the Printer Setting Utility. If the error persists, contact your Xerox representative.
Troubleshooting Printer Does Not Print Probable Causes Solutions The printer has an error. To clear the error, follow the onscreen prompts. If the error persists, contact your Xerox representative. The printer is out of paper. Load paper into the tray. A toner cartridge is empty. Replace the empty toner cartridge. The Error Indicator is blinking. • To clear the error, follow the onscreen prompts. • If the Ready Indicator is off, the printer has stopped working.
Troubleshooting Printing Takes Too Long Probable Causes Solutions The printer is set to a slower printing mode, for example, for printing on glossy or heavyweight paper. It takes more time to print on certain types of special paper. Ensure that the paper type is set properly in the driver and at the printer control panel. For details, see Print Speed on page 193. The printer is in Energy Saver mode. Wait. It takes time for printing to start when the printer is coming out of Energy Saver mode.
Troubleshooting Automatic 2-Sided Printing Problems Probable Causes Solutions Unsupported or incorrect paper. Ensure that you are using a supported paper size and weight for 2-sided printing. Envelopes and labels cannot be used for 2-sided printing. For details, see Supported Standard Types and Weights for Automatic 2-Sided Printing on page 52 and Supported Standard Paper Sizes for Automatic 2-Sided Printing on page 53. Incorrect setting.
Troubleshooting Paper Jams This section includes: • Locating Paper Jams .....................................................................................................................................................157 • Minimizing Paper Jams ................................................................................................................................................158 • Clearing Paper Jams.............................................................................................
Troubleshooting Minimizing Paper Jams The printer is designed to function with minimal paper jams using Xerox supported paper. Other paper types can cause jams. If supported paper is jamming frequently in one area, clean that area of the paper path. The following can cause paper jams: • Selecting the incorrect paper type in the print driver. • Using damaged paper. • Using unsupported paper. • Loading paper incorrectly. • Overfilling the tray. • Adjusting the paper guides improperly.
Troubleshooting Clearing Paper Jams This section includes: • Clearing Paper Jams from the Duplex Automatic Document Feeder ........................................................159 • Clearing Paper Jams from the Bypass Tray .........................................................................................................160 • Clearing Paper Jams from the Tray 1 Area ..........................................................................................................
Troubleshooting 4. To reset the interlock switch and clear the paper jam message, open and close the back door. 5. Reload the document in the duplex automatic document feeder, then adjust the guides against the edges of the paper. Clearing Paper Jams from the Bypass Tray To resolve the error displayed on the control panel you must clear all paper from the paper path. 1. Remove any paper from the bypass tray.
Troubleshooting 2. Grasp both sides of the bypass tray, then pull it straight out of the printer. 3. Pull out the tray until it stops. 4. To remove the tray, lift the front of it slightly, then pull it out of the printer. 5. Remove the jammed paper.
Troubleshooting 6. To reset the interlock switch and clear the paper jam message, open and close the back door. 7. Insert tray 1 into the printer, then push it in all the way. Note: If the tray is extended for legal size paper, the tray protrudes when it is inserted into the printer. 8. Insert the bypass tray back into the printer. Push the tray in all the way. 9. If the control panel prompts you, on the screen, verify the paper size and type. a.
Troubleshooting Clearing Paper Jams from the Tray 1 Area To resolve the error displayed on the control panel you must clear all paper from the paper path. 1. Pull out the tray until it stops. 2. Grasp both sides of the bypass tray, then pull it straight out of the printer. 3. Pull out the tray until it stops.
Troubleshooting 4. To remove the tray, lift the front of it slightly, then pull it out of the printer. 5. Remove the jammed paper. 6. To reset the interlock switch and clear the paper jam message, open and close the back door.
Troubleshooting 7. Insert tray 1 into the printer, then push it in all the way. Note: If the tray is extended for legal size paper, the tray protrudes when it is inserted into the printer. 8. Insert the bypass tray back into the printer. Push the tray in all the way. 9. If the control panel prompts you, on the screen, verify the paper size and type. a. Touch Size, then, for a standard paper size, touch an option. b. Touch Type, then, for the paper type, touch an option. c. Touch OK.
Troubleshooting Clearing Paper Jams from the Tray 2 Area To resolve the error displayed on the control panel you must clear all paper from the paper path. 1. Pull out tray 2 until it stops. 2. To remove the tray, lift the front of it slightly, then pull it out of the printer. 3. Remove any paper jammed at the front of the printer.
Troubleshooting 4. At the back of the printer, open the tray 2 door, then remove any paper jammed at the back of the printer. 5. To reset the interlock switch and clear the paper jam message, open and close the back door. 6. Insert tray 2 into the printer, then push it all the way in. Note: If the tray is extended for legal size paper, the tray protrudes when it is inserted into the printer. 7. If the control panel prompts you, on the screen, verify the paper size and type. a.
Troubleshooting Clearing Paper Jams from the Fuser Area To resolve the error displayed on the control panel you must clear all paper from the paper path. 1. To open the rear door, pull the release and lower the cover. 2. If paper is jammed in the fuser, raise both green levers to open the fuser. 3. To open the paper guide, raise the green handle.
Troubleshooting 4. Remove any jammed paper from the back of the printer. 5. Close the paper guide on the fuser. 6. Lower the levers to their original position.
Troubleshooting 7. Remove any jammed paper from the back of the printer. 8. Close the rear door.
Troubleshooting Troubleshooting Paper Jams This section includes: • Multiple Sheets Pulled Together ..............................................................................................................................171 • Paper Misfeeds................................................................................................................................................................171 • Label and Envelope Misfeeds .......................................................................
Troubleshooting Label and Envelope Misfeeds Probable Causes Solutions The label sheet is facing the wrong way in the • Load label sheets according to the instructions from the tray. manufacturer. • Load labels in the tray, face up. For details, see Loading Labels in Trays 1-4 on page 61 or Loading Labels in the Bypass Tray on page 69. Labels are missing, curled, or pulled away from the backing sheet. Do not use any sheet where labels are missing, curled, or pulled away from the backing sheet.
Troubleshooting Print-Quality Problems This section includes: • Controlling Print Quality ..............................................................................................................................................173 • Solving Print-Quality Problems..................................................................................................................................174 Your printer is designed to produce consistently high-quality prints.
Troubleshooting Paper and Media Your printer is designed to use various paper and other media types. Follow the guidelines in this section for the best print quality and to avoid jams: • Use only Xerox approved paper. For details, see Supported Paper on page 50. • Use only dry, undamaged paper. CAUTION: Some paper and other media types can cause poor output quality, increased paper jams, or damage your printer.
Troubleshooting Symptom Solutions The output is too light. • To check the toner level, check the control panel, use the print driver, or CentreWare Internet Services. If the toner cartridge is near empty, replace it. • Verify that the toner cartridge is approved for use in this printer, and replace it as needed. For best results, use a genuine Xerox toner cartridge. • Replace the paper with a recommended size and type, and confirm that your printer and print driver settings are correct.
Troubleshooting Symptom Solutions The output is blank. • Turn off the printer, then turn it on again. • If the error persists, contact your Xerox representative. Streaks appear in the output. • Replace the Smart Kit Drum Cartridge. • Contact your Xerox representative. The output has a mottled appearance. • Verify that the paper is the correct size, type, and weight. If not, change the paper settings. • Ensure that the humidity in the room is within specifications.
Troubleshooting Symptom Solutions The printed output is foggy. Clean the developer. For details, see Cleaning the Developer on page 143. Auger marks appear on the printed output. • To check the toner level, check the control panel, use the print driver, or CentreWare Internet Services. If the toner cartridge is near empty, replace it. • Verify that the toner cartridge is approved for use in this printer, and replace it as needed. For best results, use a genuine Xerox toner cartridge.
Troubleshooting Symptom Solutions The top margin is incorrect. • Ensure that the paper is loaded properly. • Ensure that the margins are set correctly in the application you are using. The printed surface of the paper is bumpy. 1. Print a solid image over the entire surface of one sheet of paper. 2. Load the printed sheet into the tray with the printed side face down. 3. Print five blank pages to remove debris from the fuser rollers. The printed areas contain white spots.
Troubleshooting ® ® Xerox WorkCentre 3615 Black and White Multifunction Printer User Guide 179
Troubleshooting Fax Problems This section includes: • Problems Sending Faxes..............................................................................................................................................180 • Problems Receiving Faxes ...........................................................................................................................................181 Note: If you cannot send and receive faxes, make sure that you are connected to an approved analog telephone line.
Troubleshooting If the problem persists, for online support information, go to www.xerox.com/office/WC3615support. Problems Receiving Faxes Symptoms Causes Solutions The received fax is blank. There is a problem with the telephone connection or with the fax machine of the caller. Verify that the printer can make clean copies. If it can, have the caller send the fax again. The sender loaded the pages incorrectly. Contact the sender. The printer answers the call, but does not accept incoming data.
Troubleshooting Getting Help This section includes: • Control Panel Messages ..............................................................................................................................................182 • Using the Integrated Troubleshooting Tools ......................................................................................................183 • Online Support Assistant ..............................................................................................................
Troubleshooting Viewing Job Status on the Control Panel To view current or saved jobs on the control panel: 1. At the control panel, press the Job Status button. In the top portion of the screen, a list of current jobs appears. 2. To view a list of secure prints, touch Secure Jobs. 3. To view a list of secure faxes received, touch Secure Fax Receive. To print a detailed list of last 20 print, copy, fax, or scan jobs that have processed: 1. At the printer control panel, press the Machine Status button. 2.
Troubleshooting Online Support Assistant Online Support Assistant is a knowledge base that provides instructions and troubleshooting help to solve your printer problems. You can find solutions for print-quality problems, paper jams, software installation issues, and more. To access the Online Support Assistant, go to www.xerox.com/office/WC3615support. Information Pages Your printer has a printable set of information pages. These include configuration and font information, demonstration pages, and more.
A Specifications This appendix includes: • Printer Configurations and Options ........................................................................................................................186 • Physical Specifications .................................................................................................................................................188 • Environmental Specifications ......................................................................................................
Specifications Printer Configurations and Options Available Configuration WorkCentre 3615DN: Network printer with copy, automatic 2-sided printing, scan, and fax functions and USB or network connectivity.
Specifications Feature Xerox® WorkCentre® 3615 Black and White Multifunction Printer File formats • JPEG • TIFF • PDF Supported scanning • • • • • • Email address book • Up to 100 email addresses • Up to 10 email groups • Up to 10 addresses per email group Control panel 4.3 inch LCD touch screen and keypad navigation Connectivity • • • • Remote access CentreWare Internet Services Scan to SMB Scan to FTP Scan to Email Scan to USB Scan to Computer (USB) WSD Scan Universal Serial Bus (USB 2.
Specifications Physical Specifications Weights and Dimensions WorkCentre 3615DN WorkCentre 3615DN with Optional 550-Sheet Feeder Width 49.5 cm (19.5 in.) 49.5 cm (19.5 in.) Depth 49.2 cm (19.4 in.) 49.2 cm (19.4 in.) Height 55.1 cm (21.7 in.) 64.6 cm (25.4 in.) Weight 21.5 kg (47.4 lb.) 21.5 kg (47.4 lb.
Specifications Configuration Specifications with Optional 550-Sheet Feeder Total Space Requirements WorkCentre 3615DN WorkCentre 3615DN with Optional 550-Sheet Feeder Width 99.5 cm (39.2 in.) 99.5 cm (39.2 in.) Depth 149.2 cm (58.7 in.) 149.2 cm (58.7 in.) Height 87.4 cm (34.3 in.) 96.9 cm (38.1 in.
Specifications Clearance Requirements Xerox® WorkCentre® 3615 Black and White Multifunction Printer Clearance Requirements with Optional 550-Sheet Feeder Xerox® WorkCentre® 3615 Black and White Multifunction Printer 190 ® ® Xerox WorkCentre 3615 Black and White Multifunction Printer User Guide
Specifications Environmental Specifications Temperature • • Operating temperature: 10–32°C (50–90°F) Optimum temperature: 15–28°C (59–82°F) Relative Humidity • • Minimum–Maximum Humidity Range: 10–85% Optimal Humidity Range: 20–70% relative humidity at 28°C (82°F) Note: Under extreme environmental conditions, such as 10°C and 85% relative humidity, defects can occur due to condensation. Elevation For optimum performance, use the printer at elevations below 3100 m (10,170 ft.).
Specifications Electrical Specifications Power Supply Voltage and Frequency Power Supply Voltage Power Supply Frequency 100–127 VAC +/-10%, (90–140 VAC) 50 Hz +/- 3 Hz 60 Hz +/- 3 Hz 220–240 VAC +/-10%, (198–264 VAC) 50 Hz +/- 3 Hz 60 Hz +/- 3 Hz Power Consumption • • • Energy Saver Mode (Sleep): 4W Ready, with fuser on: 59W Continuous printing: 698W This printer does not consume electric power when the power switch is turned off even if the printer is connected to an AC outlet.
Specifications Performance Specifications Feature Specifications Printer warm up time Power on: As fast as 19.9 seconds. Recovery from sleep mode: As fast as 9 seconds. Note: Warm up time assumes an ambient temperature of 20ºC (68°F) at 60% relative humidity. Print Speed Maximum print speeds for 1-sided continuous printing are 47 ppm for Letter (8.5 x 11") and 45 ppm for A4 (210 x 297 mm).
Specifications Controller Specifications Memory Memory Xerox® WorkCentre® 3615 Black and White Multifunction Printer Standard memory 1024 MB RAM Device memory 4 GB Device Memory (optional) Flash memory 64 MB ROM EEPROM 64 KB EPROM Fax memory 4 MB RAM SRAM 128 KB Interfaces Universal Serial Bus (USB 2.0) Ethernet 10/100/1000Base-TX IEEE802.
Regulatory Information B This appendix includes: • Basic Regulations ...........................................................................................................................................................196 • Copy Regulations ...........................................................................................................................................................200 • Fax Regulations ......................................................................................
Regulatory Information Basic Regulations Xerox has tested this printer to electromagnetic emission and immunity standards. These standards are designed to mitigate interference caused or received by this printer in a typical office environment. United States FCC Regulations This equipment has been tested and found to comply with the limits for a Class B digital device, pursuant to Part 15 of the FCC Rules.
Regulatory Information This printer, if used properly in accordance with the instructions, is not dangerous for the consumer or for the environment. To ensure compliance with European Union regulations, use shielded interface cables. A signed copy of the Declaration of Conformity for this printer can be obtained from Xerox.
Regulatory Information Power Consumption and Activation Time The amount of electricity a product consumes depends on the way the device is used. This product is designed and configured to enable you to reduce your electricity costs. After the last print it switches to Ready Mode. In this mode it can print again immediately if required. If the product is not used for a period of time, the device switches to a Power Saver Mode.
Regulatory Information Regulatory Information for 2.4 GHz Wireless Network Adapter This product contains a 2.4 GHz Wireless LAN radio transmitter module which complies with the requirements specified in FCC Part 15, Industry Canada RSS-210 and European Council Directive 99/5/EC.
Regulatory Information Copy Regulations United States Congress, by statute, has forbidden the reproduction of the following subjects under certain circumstances. Penalties of fine or imprisonment may be imposed on those guilty of making such reproductions. 1. Obligations or Securities of the United States Government, such as: − Certificates of Indebtedness. − National Bank Currency. − Coupons from Bonds. − Federal Reserve Bank Notes. − Silver Certificates. − Gold Certificates. − United States Bonds.
Regulatory Information 2. 3. 4. 5. 6. 7. 8. 9. Obligations or Securities of any Foreign Government, Bank, or Corporation. Copyrighted materials, unless permission of the copyright owner has been obtained or the reproduction falls within the “fair use” or library reproduction rights provisions of the copyright law. Further information of these provisions may be obtained from the Copyright Office, Library of Congress, Washington, D.C. 20559. Ask for Circular R21.
Regulatory Information • • • • Marks, brands, seals, wrappers, or designs used by or on behalf of the Government of Canada or of a province, the government of a state other than Canada or a department, board, Commission, or agency established by the Government of Canada or of a province or of a government of a state other than Canada Impressed or adhesive stamps used for the purpose of revenue by the Government of Canada or of a province or by the government of a state other than Canada Documents, regist
Regulatory Information Fax Regulations United States Fax Send Header Requirements The Telephone Consumer Protection Act of 1991 makes it unlawful for any person to use a computer or other electronic device, including a fax machine, to send any message unless such message clearly contains in a margin at the top or bottom of each transmitted page or on the first page of the transmission, the date and time it is sent and an identification of the business or other entity, or other individual sending the messag
Regulatory Information CAUTION: Ask your local Telephone Company for the modular jack type installed on your line. Connecting this machine to an unauthorized jack can damage telephone company equipment. You, not Xerox, assume all responsibility and/or liability for any damage caused by the connection of this machine to an unauthorized jack.
Regulatory Information WARNING: Do not attempt to make such connections yourself. Contact the appropriate electric inspection authority, or electrician, to make the ground connection. The REN assigned to each terminal device provides an indication of the maximum number of terminals allowed to be connected to a telephone interface. The termination on an interface could consist of any combination of devices.
Regulatory Information 2. 3. 4. 5. 6. Immediately disconnect this equipment should it become physically damaged, then arrange for its disposal or repair. This modem shall not be used in any manner which could constitute a nuisance to other Telecom customers. This device is equipped with pulse dialing, while the Telecom standard is DTMF tone dialing. There is no guarantee that Telecom lines will always continue to support pulse dialing.
Regulatory Information Material Safety Data Sheets For Material Safety Data information regarding your printer, go to: • North America: www.xerox.com/msds • European Union: www.xerox.com/environment_europe For the Customer Support Center phone numbers, go to www.xerox.com/office/worldcontacts.
Recycling and Disposal C This appendix includes: • All Countries .....................................................................................................................................................................210 • North America .................................................................................................................................................................211 • European Union ..............................................................................
Recycling and Disposal All Countries If you are managing the disposal of your Xerox product, please note that the printer may contain lead, mercury, perchlorate, and other materials whose disposal may be regulated due to environmental considerations. The presence of these materials is fully consistent with global regulations applicable at the time that the product was placed on the market. For recycling and disposal information, contact your local authorities.
Recycling and Disposal North America Xerox operates an equipment take-back and reuse/recycle program. Contact your Xerox representative (1-800-ASK-XEROX) to determine if this Xerox product is part of the program. For more information about Xerox environmental programs, visit www.xerox.com/environment , or for recycling and disposal information, contact your local authorities.
Recycling and Disposal European Union Some equipment may be used in both a domestic/household and a professional/business application. Domestic/Household Environment Application of this symbol on your equipment is confirmation that you should not dispose of the equipment in the normal household waste stream. In accordance with European legislation, end of life electrical and electronic equipment subject to disposal must be segregated from household waste.
Recycling and Disposal Collection and Disposal of Equipment and Batteries These symbols on the products and/or accompanying documents mean that used electrical and electronic products and batteries should not be mixed with general household waste. For proper treatment, recovery, and recycling of old products and used batteries, please take them to applicable collection points, in accordance with your national legislation and the Directive 2002/96/EC and 2006/66/EC.
Recycling and Disposal Other Countries Please contact your local waste management authority to request disposal guidance.