
Operation Manual

Internet Fax
WorkCentre™ 5735/5740/5745/5755/5765/5775/5790
Fax
104
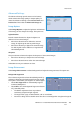
2-Sided Scanning
The 2-Sided Scanning option allows you to set whether 1 or 2 sides of your original document are
scanned. Documents must first be loaded in the document feeder to enable the 2Sided option. The
options are:
• 1Sided is used if your original documents are single-sided.
• 2Sided is used if your original documents are double-sided. The document feeder must be used to
scan your originals with this option.
• 2-Sided, Rotate Side 2 select if your original opens up like a calendar.
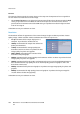
Original Type
Use this option to define the type of original being used for scanning. Making the correct selection
enhances the quality of your output image. The options are:
• Photo & Text is recommended for originals containing high quality photographs or line art and
text. Using this setting the scanned image will contain high quality pictures though the sharpness
of text and line art is slightly reduced.
• Text produces sharper edges and is recommended for text and line art.
• Photo is used specifically for originals containing photos or continuous tones without any text or
line art. Produces the best quality for photos but reduced quality text and line art.
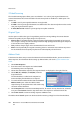
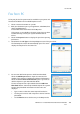
Address Book
If the device has been setup to access the Network and Internal Address Books, you can use them to
select recipients. For information about setting up address books, refer to the System Administrator
Guide.
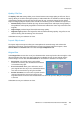
1. Select New Recipients.
2. Enter the name of the recipient and select Search.
The matching entries are displayed.
3. Select the E-mail address required. The recipient details are displayed to the right of the list.
4. Select Add (To:), Add (Cc:) or Add (Bcc:) from the
drop-down menu.
The E-mail address is added to the recipient list.
Continue adding E-mail addresses as required.
5. To search different address books select the Internal
Address Book option. Select the Address Book
required using the drop-down menu and search using
the same method described.
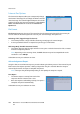
6. Select Recipient List to view the current Recipient list. To remove an entry from the list, select the
entry and select Remove from the drop-down menu. The recipient is removed from the list.
7. Select New Search to continue adding recipients or Close to exit.
The Address Book Search option can also be used when entering a Reply To or From E-mail address.