C O P Y R I G H T S Copyright © 1999–2003 by ScanSoft®, Inc. All rights reserved. No part of this publication may be transmitted, transcribed, reproduced, stored in any retrieval system or translated into any language or computer language in any form or by any means, mechanical, electronic, magnetic, optical, chemical, manual, or otherwise, without prior written consent from ScanSoft, Inc., 9 Centennial Drive, Peabody, Massachusetts 01960. Printed in the United States of America and the Netherlands.
C O N T E N T S Welcome to PaperPort Installing PaperPort Registration Learning PaperPort Using online Help Using release notes Technical Support Getting to Know PaperPort The PaperPort desktop PaperPort items The Folders pane PaperPort thumbnails The Page View window Acquiring Items Scan to the PaperPort desktop Print to PaperPort Add PaperPort folders Import files Download pictures from your camera 5 5 5 6 6 6 6 7 7 8 8 9 11 12 12 13 13 14 14 Touching Up Images 14 Image editing tools 15 PaperP
Annotating Pages Annotation tools Filing Items Work with PaperPort folders Color-code folders Work with items Add search criteria to items Finding Items Find items by their properties Use the Search pane 18 18 18 19 19 20 20 20 21 Sending Items to Other Programs 22 Adjust Send To options Customize the Send To bar Send items as E-mail attachments 23 23 24 Convert items to image formats Convert images to text Contents 17 Sharing Files Converting Items iv 16 25 25 25
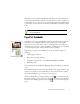
Welcome to PaperPort Welcome to the PaperPort Getting Started Guide. PaperPort provides the easiest way to turn paper into organized digital documents that everybody in an office can quickly find and use. PaperPort works with scanners, multifunction printers, and networked digital copiers to turn paper documents into digital documents. It then helps you to manage them along with all other electronic documents in one convenient and easy-to-use filing system.
Learning PaperPort This guide introduces you to PaperPort and shows you how PaperPort can help you manage your information. Additional sources of information to help you learn how to use PaperPort include online Help, Release Notes, and the ScanSoft web site. Using online Help The PaperPort online Help includes comprehensive information on features, settings, and procedures. Help is available from the PaperPort Help menu.
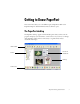
Getting to Know PaperPort This section introduces you to the different parts of PaperPort. Refer to the PaperPort Help for detailed information about all these topics. The PaperPort desktop The PaperPort desktop appears with the Folders pane when you first start the program. It displays your documents, as well as the tools you can use to manage them. PaperPort offers all the tools necessary to organize, find, and use documents and images.
PaperPort items The documents and photographs you acquire in PaperPort are called items. There are two types of items: image items and text items. Image items are scanned documents, photographs, and other digital items in an image format, such as PDF, JPEG, TIFF, or PaperPort Image (.max). You create image items from documents, photographs, line art, or other items that you scan, copy, or bring in to the PaperPort desktop. Text items are documents that contain editable text, such as Word (.
Although you cannot remove My PaperPort Documents from the Folders pane, you can delete all subfolders whenever you prefer. When you have acquired your own PaperPort items, you do not have to use the My PaperPort Document folder to store them. You can add other local and network folders to PaperPort's Folder View. To show or hide the Folders pane, click the Folders button on the Command bar.
Before you can work with an item, you must first select its thumbnail on the PaperPort desktop. A red line appears around an item to indicate that it is selected. While working with thumbnails, you can • Drag a thumbnail to reposition it on the PaperPort desktop. • Drag a thumbnail to a folder to move the item to that folder. • Double-click a thumbnail to view the item. • Press the Ctrl key and double-click a thumbnail to open the item in its source program.
The Page View window The Page View window allows you to take a closer look at your items and to touch up and annotate them. You can also enlarge or reduce the view for easy reading. To view an item in the Page View window, double-click a thumbnail, or select the item and click the Page button on the Command bar. Annotation Tools Image Editing Tools Click the PaperPort desktop button to toggle back to the PaperPort desktop at any time.
Acquiring Items There are many ways to bring images and documents into PaperPort so that you can use PaperPort’s viewing, editing, annotation, OCR, and file management tools. For example, you can: • Scan photos, pages, and other images on a scanning device. • Add folders to PaperPort that already contain images and documents. • Import files from other programs on your computer. • Print documents from other programs to the PaperPort desktop.
To scan and collate two-sided pages on your ADF scanner, flip the pages when prompted, click Scan Other Side, and PaperPort will automatically scan and collate the pages in the correct order. You can also use a high-speed, networked scanner to scan items to a networked folder and then add the folder to PaperPort. Print to PaperPort To bring items in from other programs, you can print them to the PaperPort desktop as PaperPort Image (.max) items.
Import files You can use the Import file feature to bring an image file, such as those in the PDF, BMP, JPEG, and TIFF format, created in another program to the PaperPort desktop. The image file you import becomes a PaperPort Image item on the PaperPort desktop. In addition to using the Import command, you can also copy and paste or drag and drop documents and images directly onto the PaperPort desktop. When you are finished, you can easily convert the files to a different format if desired.
Image editing tools Select image Use the Selection tool to select part of an image you want to cut, copy, or delete using the commands on the Edit menu. Use it also to select part of an image before cropping or using the Remove Red Eye tool. Rotate an image Click the Rotate tool to rotate the selected item 90 degrees to the right. Straighten an image Sometimes a document is crooked when scanned. When this occurs, you can use the Straighten and Auto Straighten tools to adjust it.
Remove stray dots Scanned images sometimes include stray dots or “speckles” The Remove Stray Dots tool automatically finds and removes such “dirt” from a page. Improve lines The Improve Lines tool darkens lines and connects broken lines in a table or form to appear darker and straighter. Annotating Pages PaperPort includes a collection of annotation tools that allow you to mark up scanned documents with information you would like to keep with that document. On PDF and PaperPort Image (.
Annotation tools You can select an annotation tool from the Annotation toolbar whenever you display an image item in the Page View window. Select Annotation Use this tool to select an annotation so that you can then move, cut, copy, or resize it on the page. Note Want to give yourself a reminder? Select the Note tool and add a resizable note much like a sticky note that you write on and then stick on paper documents. Text Adding a text label to your images is simple with the Text tool.
Filing Items Once you have acquired PaperPort folders and the items within them, you can: • Copy, move, rearrange, and rename folders to better group and organize your items. • Color-code your folders to help identify or classify your folders. • Drag and drop items from the PaperPort desktop to any folder, as well as drag and drop folders to other folders. • Specify search criteria to help you find your items later.
Work with items A key to organizing items in PaperPort is filing items in appropriate folders. You can drag and drop items from one folder to another or from the PaperPort desktop into any folder you want. When you copy an item to a new location, the original item remains in the original location. The name of each item appears below the thumbnail in thumbnail view. In a multi-page item, the name appears below the individual page names.
Finding Items PaperPort provides features to help you find your PaperPort items. You can quickly find an item by visually browsing through thumbnails on your PaperPort desktop. When you have many folders and items, PaperPort provides more powerful capabilities with SimpleSearch. SimpleSearch provides many options for specifying where and what to look for when finding an item. The information you want to find is referred to as search criteria. You can look for items by item properties.
Sharing Files PaperPort provides many tools to make it easy for you to share files, images, and documents with friends, colleagues, business associates. These tools are built-in to the program and are readily available on toolbars, menus, and command bars for quick access whenever you need them. To help you share your items with others, PaperPort makes it easy to: • E-mail items to others, simply by dragging the items to your favorite e-mail program on the PaperPort Send To bar.
Sending Items to Other Programs Drag and drop functionality makes opening your files in your favorite programs a snap. Simply choose the file you want and drop it onto the program icon on the Send To bar at the bottom of the PaperPort desktop. Common office tasks like e-mailing and faxing are now faster than ever. The Send To bar makes using scanned documents in other applications easier by automatically translating the document into a form that the receiving application can understand.
Adjust Send To options You can tune Send To options to specify how you want to use a certain program on the Send To bar. For example, you can specify the file format in which PaperPort will save an item. Customize the Send To bar You can change the way program icons appear on the Send To bar in a number of ways. Specifically, you can: • Add a program. If you have a program on your computer that is not shown on the Send To bar, you can add it to the Send To bar by using the New Program Link wizard.
Send items as E-mail attachments PaperPort works with many popular e-mail programs. To e-mail an item, simply drag and drop the item to your e-mail program on the Send To bar. The e-mail program starts, and PaperPort attaches the item to the new e-mail message. Use the e-mail link options to specify the file format of the attachments and other options. It is good practice to use an industry-standard or popular file format, such as JPEG and PDF, when sending e-mail attachments.
Converting Items Using PaperPort, you can convert scanned documents and text items to image formats, and convert images back to text. Convert items to image formats You can convert scanned documents to image formats. The Save As command allows you to save image items to any of a variety of standard image formats including, PDF, JPEG, and TIFF, as well as the native PaperPort Image format (.max).