SA Guide -- WorkCentre M24 WorkCentre M24 SA Guide Product Overview Start Install Steps Network Connectivity Print Drivers Enabling Scanning Scan to E-mail and Fax Internet Services Trouble shooting Welcome to the WorkCentre M24 guide for System Administrator's. This guide will help you install printing and other optional services on your network. Click here to begin. Click here for a Quick Install page. (Use your browser's Print function to print it for reference.
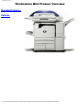
Product Overview WorkCentre M24 Product Overview Standard Features Options file:///C|/0-web/boxster/WorkCentreM24-System-Analyst-Guide/main/Specifications.
Standard Features Standard Features ● Printer engine with Integrated controller Scanner with Stand Duplex Automatic Document Feeder (DADF) Standard High Capacity A4 Tray Electronic Pre-Collation (EPC) Face-Up Output Tray Offset Catch Tray Scan to mailbox 600x600; 600x1200 & 1200x1200 printing resolution 200x200; 300x300 & 600x600 copying resolution EA1 toner - No Oil Required! - No Streaks SRA3 / 12x19", 64x220 gsm / 16-110 lb index media - Full Bleeds on A3/11x17" Up to 3,140 sheet capacity Excellent Re
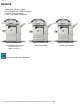
Options Options ● ● ● ● 1000 Sheet Finisher (stapler) Base Machine with stand (see below) Tandem Tray (see below) Three Tray Module (see below) Base Machine with Stand Three Tray Module (Shown with optional DADF and Finisher.) Return to Product Overview Menu file:///C|/0-web/boxster/WorkCentreM24-System-Analyst-Guide/main/options.
SA Guide -- WorkCentre M24 Welcome to the WorkCentre M24 guide for System Administrator's. This guide will help you install printing and other optional services on your network. Click here to begin. Click here for a Quick Install page. (Use your browser's Print function to print it for reference.) Click here for instructions on using this guide. file:///C|/0-web/boxster/WorkCentreM24-System-Analyst-Guide/main/GuidePage.
Step 1 - Install Installation Step 1. Connect one end of a Category 5 twisted pair cable to a live network drop. Connect the opposite end of the cable to the RJ-45 socket at the rear of the Printer. Click to continue file:///C|/0-web/boxster/WorkCentreM24-System-Analyst-Guide/main/Install_1.
Step 2 - Install Installation Step 2. Set the printer's power switch to ON and wait until the Main (multiple tabbed) screen is displayed. Click to continue file:///C|/0-web/boxster/WorkCentreM24-System-Analyst-Guide/main/Install_2.
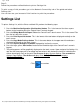
Step 3 - Install Step 3. Follow the procedure outlined below to print a Settings List. To print a copy of this procedure, go to the Network Connectivity tab of the guide and select Settings List. You can then use your browser's Print function to print the procedure. Settings List To print a Settings List, with the Printer switched ON, perform the following steps: 1. Press the Machine Configuration (Confirmation) button. This is the lowest of the three square 2. 3. 4. 5. 6. 7.
Step 4 - Install Step 4: Network All of the instructions referenced below are obtained by first opening the Network Connectivity Tab. Use the Back function of your browser to return to this step, should you Connectivity go to any of the referenced procedures now. Refer to the Settings List and verify that the appropriate ports and protocols are enabled for your Network environment.
Network Connectivity Menu Network Connectivity Install Steps A1 Settings List A6 Ethernet Speed Setting A2 Enable Internet Services A9 Parallel Port Configuration A7 SNMP Configuration A8 NOS Selection Menu Changing the Administrator Password A10 file:///C|/0-web/boxster/WorkCentreM24-System-Analyst-Guide/main/NetConnectMenu.
Installation Steps Installation Steps A1 Step 1. Connect one end of a Category 5 twisted pair cable to a live network drop. Connect the opposite end of the cable to the RJ-45 socket at the rear of the Printer. Step 2. Set the printer's power switch to ON and wait until the Main (multiple tabbed) screen is displayed. Step 3. Select "Settings List" under the Network Connectivity Tab of this guide and print a Settings List using the instructions supplied. Step 4.
Settings List Settings List A6 To print a Settings List, with the Printer switched ON, perform the following steps: 1. Press the Machine Status button. This is the lowest of the three square buttons to the immediate left of the Control Panel’s numeric keypad. 2. Press the Billing Meter/Print Report Tab on the Control Panel’s touch screen. This is the second Tab from the left side of the screen. 3. Press the Print Report/List button. This is the lowest of the two buttons displayed vertically on the 4.
Ethernet Speed Setting Ethernet Speed Setting A2 The Printer's Ethernet Interface has speed settings of 10 BASE-T/100 BASE-TX (Auto sensing), 100 BASETX, and 10 BASE-T. By default the Ethernet Port Configuration will be set to 10 BASE-T/100 BASE-TX (Auto sensing). To Change the Network Speed Go to your Printer 1. Press the rectangular Access button on the Printer Control Panel, located directly above and slightly to the right of the numeric keypad. 2.
Enable Internet Services (HTTP) Enable Internet Services (HTTP) A9 Internet Services are a series of Web (HTML) Pages located within the Printer enabling network communication settings to be conveniently configured from a web browser running on a remotely located workstation. For further details on the many functions provided by the Internet Services Web Pages, click on the Internet Services Tab on the Main Page of this System Administrator's guide. To access Internet Services Settings at the Printer 1.
Enable Internet Services (HTTP) To exit the Internet Service Selection Menu, which returns you to the Port Settings menu, press the rectangular Close button in the upper right corner of the touch screen. Exiting the Port Settings Menu and returning to the Printer's Main Menu 1. To exit the Port Settings Menu, returning to the Printer's Main screen, press the rectangular Close button in the upper right corner of the Port Settings Menu screen. 2.
Parallel Port Configuration Parallel Port Configuration A7 To view or change the settings of the Printer's parallel port, perform the following steps: To access Parallel Port Settings at the Printer 1. Press the rectangular Access button on the Printer Control Panel, located directly above and slightly to 2. 3. 4. 5. 6. 7. 8. 9. 10. the right of the numeric keypad. Press the "1" key on the numeric keypad five consecutive times. (This is the factory default "password.
Parallel Port Configuration 4. To change settings, press your selection of choice, then click the Save button (upper right hand button) on the touch screen. 5. To exit the Settings Selection screen, without making any changes, click the Cancel button (upper lefthand button) on the touch screen. PJL (Printer Job Language)Setting 1. On the Parallel Port Selections Menu, press the horizontal selection line labeled PJL. 2. Press the Change Settings button. 3.
Parallel Port Configuration 4. On the Settings screen, note which of the two square buttons is highlighted as the current setting for Bidirectional Communications. The available settings are Enabled or Disabled. To support high speed, bidirectional parallel communications, select the Enabled setting. 5. To change settings, press your setting of choice, then click the Save button (upper right-hand button) on the touch screen. 6.
SNMP Configuration SNMP Configuration A8 SNMP (Simple Network Management Protocol) provides a method to remotely monitor and diagnose printer performance on the network. Once SNMP has been enabled at the printer, SNMP Management software, running on a host computer connected to the network, polls the printer's agents for operating information and responds to traps from the printer regarding specific events.
SNMP Configuration To exit the SNMP Selection Menu, which returns you to the Port Settings Menu, press the rectangular Close button in the upper right corner of the touch screen. Exiting the Port Settings Menu and returning to the Printer's Main Menu 1. To exit the Port Settings Menu, returning to the Printer's Main screen, press the rectangular Close button in the upper right corner of the Port Settings Menu screen. 2.
Networking Environment Menu NOS Selection Select your Network Environment from this list. TCP/IP (Protocol Configuration) B1 TCP/IP (LPD Enablement) B13 TCP/IP (Dynamic Addressing) B15 TCP/IP (Port 9100) B8 Microsoft (NetBEUI) B5 Microsoft (NetBIOS over IP) B6 NetWare 4.x, 5.x (NDS) B3 NetWare 3.x (Bindery) B4 IPP (Internet Printing Protocol) B14 EtherTalk (AppleTalk) B7 file:///C|/0-web/boxster/WorkCentreM24-System-Analyst-Guide/main/NOSMenu.
TCP/IP Protocol Configuration TCP/IP Protocol Configuration B1 To view or change the settings of the Printer's TCP/IP Protocol Configuration, perform the following steps: To access the TCP/IP Protocol Settings at the Printer 1. Press the rectangular Access button on the Printer Control Panel, located directly above and slightly to 2. 3. 4. 5. 6. 7. 8. the right of the numeric keypad. Press the "1" key on the numeric keypad five consecutive times. (This is the factory default "password.
TCP/IP Protocol Configuration 4. To change settings, press your selection of choice, then click the Save button (upper right hand button) on the touch screen. 5. To exit the Settings Selection screen, without making any changes, click the Cancel button (upper lefthand button) on the touch screen. IP Address 1. Used for static IP Addressing (with "Manually Set" selected as your addressing method). On the Protocol Settings Menu, press the horizontal selection line labeled TCP/IP Address. 2.
TCP/IP Protocol Configuration the numeric keypad of the Control Panel, to enter in the appropriate IP Address. 4. To save settings, click the Save button (upper right-hand button) on the touch screen. 5. To exit the Settings screen, without making any changes, click the Cancel button (upper left-hand button) on the touch screen. IP Filter (IP Address Restriction) 1. In the Protocol Settings Menu, press the horizontal selection line labeled IP Filter. 2. Press the Change Settings button 3.
TCP/IP LPD Enablement TCP/IP LPD Enablement B13 To support TCP/IP printing through the workstation's LPR port in the case of Windows NT4, 2000, or XP, or through a print utility in the case of Windows 95/98/ME, the LPD (Line Printer Daemon) MUST be enabled at the printer. To view or change the Printer's LPD setting, perform the following steps: To access LPD Settings at the Printer 1. Press the rectangular Access button on the Printer Control Panel, located directly above and slightly to 2. 3. 4. 5. 6.
TCP/IP LPD Enablement Exiting the Port Settings Menu and returning to the Printer's Main Menu 1. To exit the Port Settings Menu, returning to the Printer's Main screen, press the rectangular Close button in the upper right corner of the Port Settings Menu screen. 2. Press the rectangular Close button in the upper right corner of the Ports and Protocols selection (twobutton) screen. 3.
TCP/IP Dynamic Addressing TCP/IP Dynamic Addressing B15 1. Open your Web browser and enter the TCP/IP address of the Printer in the Address or Location field. 2. 3. 4. 5. 6. 7. Press Enter. Click the Properties button or Tab. Click the plus symbol (+) to the left of the Protocol Settings file folder. Select TCP/IP in the directory tree. Review the available selections as displayed on your screen and explained in the TCP/IP Configuration Selection List, below.
TCP/IP Dynamic Addressing searches. Domain Names 1,2,3. Three text boxes are provided for the entry of Domains to search (for example, Xerox.com). Connect Timeout. An entry box is provided for entering a Timeout for searches of Domains. Dynamic DNS Update Box. If your DNS Server does not support dynamic IP address updates there is no need to enable this checkbox. Under the SMTP Subject Label Get SMTP Server Address check box.
Configure Port 9100 (Raw Printing) Configure Port 9100 (Raw Printing) B8 1. Open your Web browser and enter the TCP/IP address of the Printer in the Address or Location field. 2. 3. 4. 5. Press Enter. Click the Properties button or Tab. Click the plus (+) symbol to the left of the Protocol Settings file folder. Select Port 9100 in the directory tree. (1) The available selections include: Port Number, with a default value of 9100. This does not need to be changed.
Microsoft (NetBEUI) Networks Microsoft (NetBEUI) Networks B5 Before You Start 1. Print a Settings List as stated under the Network Connectivity Tab of this guide. 2. On the Settings List, verify that "SMB" is enabled. Also, verify that the default name of the NetBEUI workgroup is "Workgroup" and that the Printer has a unique name (that is, a name not the same as any other device in your workgroup). To enable "SMB," if required, follow the procedure below.
Microsoft (NetBEUI) Networks screen to have the printer reboot and enable your SMB setting. Configuring Workgroup Name or Printer Name with Internet Services 1. Open your Web browser and enter the TCP/IP address of the Printer in the Address or Location field. 2. 3. 4. 5. Press Enter. Click the Properties button or Tab. Click the plus symbol (+) to the left of the Protocol Settings file folder. Select SMB in the directory tree The available selections include: A text box indicating Workgroup name.
Microsoft (NetBIOS over IP) Networks Microsoft (NetBIOS over IP) Networks B6 Before You Start 1. Print a Settings List as stated under the Network Connectivity Tab of this guide. 2. Referring to the Settings List, verify that "SMB" is enabled. To enable "SMB" at the Printer, if required, follow the procedure below. 3. Referring to the Settings List, verify that DNS (or WINS, if using only a Windows NT network) is enabled.
Microsoft (NetBIOS over IP) Networks 16. Exit the Ports and Protocols selection screen by pressing the rectangular Close button in the upper right corner of the screen. 17. Exit the screen containing the Network Settings button by pressing the rectangular Close button in the upper right corner of the screen. 18. Finally, press the rectangular Exit button in the upper right corner of the four-button, System Settings screen to have the printer reboot and enable your SMB setting.
Microsoft (NetBIOS over IP) Networks To Set Up a Workstation to Print Directly to the Printer Refer to the setup instructions supplied for NetBIOS over IP Peer to Peer Printing under the Print Drivers Tab of this guide or, if you are an EXPERIENCED SYSTEM ADMINISTRATOR, perform the following steps: 1. On NT4 workstations, verify that the TCP/IP protocol is installed and that it is configured for DNS 2. 3. 4. 5. 6. 7. resolution of the NetBIOS Host Name.
Novell NetWare 4.x, 5.x (NDS) Networks Novell NetWare 4.x, 5.x (NDS) Networks B3 Enable the NetWare Port at the Printer 1. Press the rectangular Access button on the Printer Control Panel, located directly above and slightly to 2. 3. 4. 5. 6. 7. 8. 9. 10. 11. 12. 13. 14. 15. 16. 17. 18. the right of the numeric keypad. Press the "1" key on the numeric keypad five consecutive times. (This is the factory default "password.") Press the rectangular Confirm button on the touch screen.
Novell NetWare 4.x, 5.x (NDS) Networks assigned. If your printer services queues on multiple file servers, the Print Server name must be the same on all file servers and the Print Server password must be the same on all file servers. Configure NetWare Settings using Internet Services 1. Open your Web browser and enter the TCP/IP address of the Printer in the Address or Location field. 2. 3. 4. 5. 6. 7. 8. 9. 10. 11. 12. 13. Press Enter. Click the Properties button or Tab.
Novell NetWare 3.1x (Bindery) Networks Novell NetWare 3.1x (Bindery) Networks B4 Enable the NetWare Port at the Printer 1. Press the rectangular Access button on the Printer Control Panel, located directly above and slightly to the right of the numeric keypad. 2. Press the "1" key on the numeric keypad five consecutive times. (This is the factory default "password.") 3. Press the rectangular Confirm button on the touch screen. 4.
Novell NetWare 3.1x (Bindery) Networks printer services queues on multiple fileservers, the Print Server name must be the same on all fileservers and the Print Server password must be the same on all fileservers. Note regarding NetWare 4 (bindery): You can set up the printer on the NetWare 4 Server by performing the following steps: 1. Create a Bindery Queue 2. Create a Bindery Print Server Name 3. Assign Print Server to Queue. 4.
Novell NetWare 3.1x (Bindery) Networks file:///C|/0-web/boxster/WorkCentreM24-System-Analyst-Guide/Pages/B4_NetWare3_Bindery.
IPP Configuration IPP Configuration B14 The Internet Printing Protocol provides a convenient way to print over the Internet or Intranet using the printer's IP address. To support this type of printing, make sure that Port 9100 is enabled at the printer as stated in the Note at the bottom of the Configure Port 9100 procedure, under the Internet Services Tab of this guide.
IPP Configuration Exiting the IPP Selection Menu To exit the IPP Selection Menu, which returns you to the Port Settings Menu, press the rectangular Close button in the upper right corner of the touch screen. Exiting the Port Settings Menu and returning to the Printer's Main Menu 1. To exit the Port Settings Menu, returning to the Printer's Main screen, press the rectangular Close button in the upper right corner of the Port Settings Menu screen. 2.
EtherTalk Configuration EtherTalk (AppleTalk) Configuration B7 The EtherTalk Protocol enables workstation to Printer communications over the EtherTalk (AppleTalk) network. To access EtherTalk Settings at the Printer 1. Press the rectangular Access button on the Printer Control Panel, located directly above and slightly to 2. 3. 4. 5. 6. 7. 8. 9. 10. the right of the numeric keypad. Press the "1" key on the numeric keypad five consecutive times. (This is the factory default "password.
EtherTalk Configuration 1. To exit the Port Settings Menu, returning to the Printer's Main screen, press the rectangular Close button in the upper right corner of the Port Settings Menu screen. 2. Press the rectangular Close button in the upper right corner of the Ports and Protocols selection (twobutton) screen. 3. Press the rectangular Close button in the upper right corner of the five-button screen containing the Network Settings button. 4.
Changing the Administrator Password Changing the Administrator Password A10 There are two Administrator Passwords that control access to the Printer's feature settings. One password is a numeric password that controls access through the Printer's Control Panel. The other password is an alphanumeric password that controls access through the Printer's Internet Services (embedded HTTP server application residing in the Printer). To Change the Numeric Password on the Printer's Control Panel 1.
Changing the Administrator Password Restore Settings button to return the settings to their previous values. file:///C|/0-web/boxster/WorkCentreM24-System-Analyst-Guide/Pages/A10_Password.
Setp 5 - Install Step 5: Network The Network Connectivity Tab of the guide has a selection referred to as "NOS Selection Menu." From this menu, you can select your network connectivity protocol and obtain printer Connectivity installation instructions specific to your network environment. If you will be installing the printer in a Client/Server environment, make sure to have your Server's Operating System Manual available to refer to when required.
5a Install Step 5 ...continued NOS Selection Menu You must select the connectivity protocol for the network environment in which you will be working before you can proceed with your installation. Select your connectivity protocol from the following list: TCP/IP (Protocol Configuration) — already performed in Step 4 TCP/IP (LPD Enablement) TCP/IP (Dynamic Addressing) TCP/IP (Port 9100) Microsoft (NetBEUI) Microsoft (NetBIOS over IP) NetWare 4.x, 5.x (NDS) NetWare 3.
5a1 - TCP/IP LPD Enablement Step 5 ...continued TCP/IP LDP Enablement To support TCP/IP printing through the workstation's LPR port in the case of Windows NT4, 2000, or XP, or through a print utility in the case of Windows 95/98/ME, the LPD (Line Printer Daemon) MUST be enabled at the printer. Quick jumps to the procedures on this page: To access LPD Settings at the Printer Port Status (LPD Enablement) Exiting the LPD Selections Menu To access LPD Settings at the Printer 1.
5a1 - TCP/IP LPD Enablement 5. To exit the Settings screen, without making any changes, click the Cancel button (upper left-hand button) on the touch screen. Exiting the LPD Selections Menu To exit the LPD Selections Menu, which returns you to the Port Settings Menu, press the rectangular Close button in the upper right corner of the touch screen. Exiting the Port Settings Menu and returning to the Printer's Main Menu 1.
5b1 - TCP/IP Dynamic Addressing Step 5 ...continued TCP/IP Dynamic Addressing 1. Open your Web browser and enter the TCP/IP address of the Printer in the Address or Location field. 2. 3. 4. 5. 6. 7. Press Enter. Click the Properties button or Tab. Click the plus symbol (+) to the left of the Protocol Settings file folder. Select TCP/IP in the directory tree. Review the available selections as displayed on your screen and explained in the TCP/IP Configuration Selection List, below.
5b1 - TCP/IP Dynamic Addressing IP Address entry box. To be filled in manually ONLY when Manual addressing is selected. Subnet Mask entry box. To be filled in manually ONLY when Manual addressing is selected. Gateway entry box. To be filled in manually ONLY when Manual addressing is selected. Under the DNS Subject Label Get DNS Address check box. If enabled with a check mark, the Printer will contact the DHCP Server for the IP Addresses of up to three DNS Servers.
5b1 - TCP/IP Dynamic Addressing Select another Protocol Go on to Step 6 file:///C|/0-web/boxster/WorkCentreM24-System-Analyst-Guide/main/Install_5b1.
6 Install Step 6: Print Drivers Click The Print Drivers Tab of the guide has a selection menu from which you can select your printing environment. to see the list of printing environments. file:///C|/0-web/boxster/WorkCentreM24-System-Analyst-Guide/main/Install_6.
6a Install Step 6 ...continued Print Environment Selection Menu Select your Printing Environment from the list below: TCP/IP Peer to Peer (LPR) Printing NetBEUI Peer to Peer Printing NetBIOS over IP Peer to Peer Printing NetBIOS over IP Client/Server Printing IPP Printing (Windows 2000) NetWare 3.12 and 4.x/5.x (Bindery) Printing NetWare 4.xx (NDS) Printing EtherTalk Peer to Peer Printing file:///C|/0-web/boxster/WorkCentreM24-System-Analyst-Guide/main/Install_6a.
6a1 - TCP/IP Peer to Peer (LPR) Printing Step 6 ...continued TCP/IP Peer to Peer (LPR) Printing Quick find Print Driver Installation for: Windows 2000 Server\Professional & XP Professional Windows NT4 Workstation/Server Windows 95/98/Me Workstation Windows 2000 Server\Professional & XP Professional Print Driver Installation Before you start Obtain the Print Driver for your workstation's operating system. Drivers are available on one of the CD-ROMs that came with your Printer.
6a1 - TCP/IP Peer to Peer (LPR) Printing logged in with Administrator rights to perform this function. 3. Select Other Network File and Print Services and click Details. 4. Check the box to select Print Services for Unix. Click OK and Next. You will need to supply the Operating System Installer disk, when prompted. Close the Add/Remove Programs window. Add the Printer to the Windows 2000 or Windows XP Desktop 1. On the Windows 2000 desktop, from the Start menu, select Settings, then Printers.
6a1 - TCP/IP Peer to Peer (LPR) Printing Obtain the Print Driver for your workstation's operating system. Drivers are available on one of the CD-ROMs that came with your Printer. They are also typically available for downloading in self-extracting Zip file format from the Internet at www.xerox.com. Verify that the TCP/IP Protocol and Printing Services are installed in the workstation 1. At the Desktop, right mouse click the Network Neighborhood icon and select Properties.
6a1 - TCP/IP Peer to Peer (LPR) Printing 15. Select Not Shared unless the Printer is directly connected to your workstation and you wish to share it with other network users. Click Next. 16. Select Yes to print a Test Page. 17. Select Finish and verify that the Test Page printed out at the Printer. Configure the Print Driver 1. From the Start menu, select Settings and then Printers. 2. Right click on the Printer's icon and select Document Defaults. 3.
6a1 - TCP/IP Peer to Peer (LPR) Printing Note: As the ability to create an LPR Port is not included with Windows 95/98/Me Operating Systems, in order to create an LPR Port with these Operating Systems you need to install a Print Utility (Spooler) program on your workstation. One example of such a program is "DigiLPR." A second example is "ACITS LPR Remote Printing." 1. Install a Print Utility (Spooler) program on your workstation following the instructions that accompany the program.
6a1 - TCP/IP Peer to Peer (LPR) Printing file:///C|/0-web/boxster/WorkCentreM24-System-Analyst-Guide/main/Install_6a1.
6a2 - NetBEUI Peer to Peer Printing Step 6 ...continued NetBEUI Peer to Peer Printing Windows 95/98/Me and NT4 Workstation Print Driver Installation Before You Start 1. Obtain the Print Driver for your workstation's operating system. Drivers are available on one of the CDROMs that came with your Printer. They are also typically available for downloading in self-extracting Zip file format from the Internet at www.xerox.com. 2.
6a2 - NetBEUI Peer to Peer Printing this printer. Add the Printer to the Windows 95/98/Me & NT4 Desktop 1. 2. 3. 4. 5. 6. 7. 8. 9. 10. 11. From the Start menu, select Settings and then Printers. Double click the Add Printer button and click Next. When the Add Printer Wizard displays, select Network Printer. Select Browse to search for the printer over the network. Select the plus symbol (+) to the left of Entire Network to expand it if necessary.
Step 7 - Install Step 7: Enabling The Enabling Scanning Tab of the guide provides information on setting the machine to scan to Scanning its hard disk. Follow the configuration instructions provided. Note: For comprehensive information on the use of Internet Services as a browser-based, Internet workstation tool for configuring your printer, select the Internet Services Tab of this guide and Services click on relevant topics from the menu list. This concludes the Installation Steps.
6a3 - NetBIOS over IP Peer to Peer Printing Step 6 ...continued NetBIOS over IP Peer to Peer Printing Before You Start 1. Obtain the Print Driver for your workstation's operating system. Drivers are available on one of the CDROMs that came with your Printer. They are also typically available for downloading in self-extracting Zip file format from the Internet at www.xerox.com. 2. Print a Settings List as stated under the Network Connectivity Tab of this guide. 3.
6a3 - NetBIOS over IP Peer to Peer Printing installer disk for this workstation. 4. Click the Identification Tab and verify that this workstation has a UNIQUE Computer Name (15 characters maximum) and is a member of a workgroup (Workgroup is the default Windows workgroup name). 5. Click the Configuration Tab and select (highlight) the TCP/IP Protocol. Click the Properties button and select the NetBIOS Tab. Verify that the checkbox labeled "I want to enable NetBIOS over TCP/IP" is checked.
6a3 - NetBIOS over IP Peer to Peer Printing 1. At the Desktop, right mouse click the Network Neighborhood icon and select Properties. Click on the 2. 3. 4. 5. Protocols tab and verify that the TCP/IP protocol has been installed in the workstation. Note: If the TCP/IP Protocol is not present in the Protocol list, click the Add button, select TCP/IP Protocol from the available list, and click OK.
6a3 - NetBIOS over IP Peer to Peer Printing 1. From the Start menu, select Settings and then Printers. 2. Right click on the Printer's icon and select Document Defaults. 3. Select the correct paper size and any other default settings you wish to set for the printer. An Alternate Procedure for Setting up NetBIOS over IP Peer to Peer Printing EXPERIENCED SYSTEMS ADMINISTRATORS can use the following procedure: 1.
6a4 - NetBIOS over IP Client/Server Printing Step 6 ...continued NetBIOS over IP Client/Server Printing Before You Start 1. Obtain the Print Driver for your workstation's operating system. Drivers are available on one of the CDROMs that came with your Printer. They are also typically available for downloading in self-extracting Zip file format from the Internet at www.xerox.com. 2. Print a Settings List as stated under the Network Connectivity Tab of this guide. 3.
6a4 - NetBIOS over IP Client/Server Printing is checked. Next, click the DNS Configuration Tab and make sure that the "Enable DNS" radio button is selected. Enter in this workstation's Computer Name (from the Identification Tab) into the "Host" text box. Enter the Domain that this Host (Computer Name) resides in into the "Domain" text box (xerox.com, for example). In the boxes provided, enter the IP address of the DNS (Domain Name Service) Server.
6a4 - NetBIOS over IP Client/Server Printing 2. After verifying that the TCP/IP Protocol is present, click on TCP/IP Protocol to highlight it, and click on the Properties button of the Protocols window. If using Dynamic TCP/IP Addressing, select the radio button for Obtaining an IP Address Automatically from the DHCP Server. If using Static TCP/IP Addressing, select the radio button marked Specify an IP Address, and enter in the required IP Address, Subnet Mask, and Gateway addresses for this workstation.
6a4 - NetBIOS over IP Client/Server Printing Windows 2000 & XP Professional Workstation Print Driver Installation Verify that the Correct Protocols and Services are installed in the workstation 1. Verify that the Internet protocol (TCP/IP) is installed in the Workstation. On the Windows 2000 Desktop, right mouse click the My Network Places icon and select Properties. Right mouse click on the Local Area Connection icon and select Properties.
6a4 - NetBIOS over IP Client/Server Printing 9. 10. 11. 12. Select the .INF file, then click Open. When the "Install from Disk" screen displays, verify the path and file name are correct and click OK. Select the model that corresponds to your Printer and click Next. Enter a name for your Printer and select either Yes or No for making this printer your default Windows printer. Select Yes if you will be printing primarily to this printer from your Windows applications. Click Next. 13.
6a5 - IPP Printing (Windows 2000 & XP) Step 6 ...continued IPP Printing (Windows 2000 & XP) Note: Supported by all Windows 2000 and XP workstations, IPP (the Internet Printing Protocol) enables the convenience of printing over the Internet or Intranet through the creation of an IPP network port. This printing "service" is available for other workstation operating systems through downloads from the Microsoft web site.
6a5 - IPP Printing (Windows 2000 & XP) Add the Printer to the Windows 2000 or Windows XP Desktop 1. On the Windows 2000 desktop, from the Start menu, select Settings, then Printers. On the Windows XP desktop, from Start, select Printers and Faxes. 2. On Windows 2000, double-click Add Printer. On Windows XP, from Printer Tasks, select Add a 3. 4. 5. 6. 7. 8. 9. 10. 11. 12. 13. 14. printer. When the "Add Printer Wizard" displays, click Next. Select Network Printer and click Next.
6a6 - NetBIOS over IP Client/Server Printing Step 6 ...continued NetWare 3.12 and 4.x/5.x (Bindery) Printing Before You Start 1. Obtain the Print Driver for your workstation's operating system. Drivers are available on one of the CDROMs that came with your Printer. They are also typically available for downloading in self-extracting Zip file format from the Internet at www.xerox.com.
6a6 - NetBIOS over IP Client/Server Printing on the printer’s queue to highlight it and click the OK button. 4. Click Next to open the Manufacturers and Printers window. 5. When the Manufacturers and Printers window displays, select Have Disk… and enter in the path to your driver files. Note that you can also use the Browse button to locate the required .INF file. Click OK on the "Open" screen, if you used the Browse button. Click OK on the "Install From Disk" screen.
6a6 - NetBIOS over IP Client/Server Printing Add… button and select Client Service for NetWare. With your Operating System Installer Disk readily available, click the Have Disk… button and follow any remaining instructions. Add the Printer to the Windows 2000 and XP Desktop 1. On the Windows 2000 desktop, from the Start menu, select Settings, then Printers. On the Windows XP desktop, from Start, select Printers and Faxes. 2. On Windows 2000, double-click Add Printer.
6a7 - NetWare 4.xx (NDS) Printing Step 6 ...continued NetWare 4.xx (NDS) Printing Before You Start 1. Obtain the Print Driver for your workstation's operating system. Drivers are available on one of the CDROMs that came with your Printer. They are also typically available for downloading in self-extracting Zip file format from the Internet at www.xerox.com.
6a7 - NetWare 4.xx (NDS) Printing 3. When the Network directory window displays (immediately in Win. NT, or by clicking Browse in Win. 4. 5. 6. 7. 8. 9. 10. 11. 95/98Me), double click on the network icons (or the + sign in front of the icons) to open up the Network tree and context (country, organization, and organizational unit) to locate your printer’s queue and name. Click on the printer’s queue/name to highlight it and click the OK button. Click Next to open the Manufacturers and Printers window.
6a7 - NetWare 4.xx (NDS) Printing Connection icon and select Properties. If the Client Service for NetWare is NOT loaded, click the Install… button, then select Client as the type of network component that you wish to install. Click the Add… button and select Client Service for NetWare. With your Operating System Installer Disk readily available, click the Have Disk… button and follow any remaining instructions. Add the Printer to the Windows 2000 and XP Desktop 1.
6a8 - EtherTalk (AppleTalk) Peer to Peer Printing Step 6 ...continued EtherTalk (AppleTalk) Peer to Peer Printing Before You Start 1. Obtain the Adobe PostScript Print Driver for your Macintosh (OS 9.x) workstation. Drivers are available on one of the CD-ROMs that came with your Printer. They are also typically available for downloading in self-extracting file format from the Internet at www.xerox.com. 2. Print a Settings List as stated under the Network Connectivity Tab of this guide. 3.
6a8 - EtherTalk (AppleTalk) Peer to Peer Printing file:///C|/0-web/boxster/WorkCentreM24-System-Analyst-Guide/main/Install_6a8.
5c1 - Configure Port 9100 (Raw Printing) Step 5 ...continued Configure Port 9100 (Raw Printing) 1. Open your Web browser and enter the TCP/IP address of the Printer in the Address or Location field. 2. 3. 4. 5. Press Enter. Click the Properties button or Tab. Click the plus (+) symbol to the left of the Protocol Settings file folder. Select Port 9100 in the directory tree. (1) The available selections include: Port Number, with a default value of 9100. This does not need to be changed.
5d1 - Microsoft (NetBEUI) Networks Step 5 ...continued Microsoft (NetBEUI) Networks Before You Start 1. Print a Settings List as stated under the Network Connectivity Tab of this guide. 2. On the Settings List, verify that "SMB" is enabled. Also, verify that the default name of the NetBEUI workgroup is "Workgroup" and that the Printer has a unique name (that is, a name not the same as any other device in your workgroup). To enable "SMB," if required, follow the procedure below.
5d1 - Microsoft (NetBEUI) Networks screen to have the printer reboot and enable your SMB setting. Configuring Workgroup Name or Printer Name with Internet Services 1. Open your Web browser and enter the TCP/IP address of the Printer in the Address or Location field. 2. 3. 4. 5. Press Enter. Click the Properties button or Tab. Click the plus symbol (+) to the left of the Protocol Settings file folder. Select SMB in the directory tree The available selections include: A text box indicating Workgroup name.
5e1 - Microsoft (NetBIOS over IP) Networks Step 5 ...continued Microsoft (NetBIOS over IP) Networks Before You Start 1. Print a Settings List as stated under the Network Connectivity Tab of this guide. 2. Referring to the Settings List, verify that "SMB" is enabled. To enable "SMB" at the Printer, if required, follow the procedure below. 3. Referring to the Settings List, verify that DNS (or WINS, if using only a Windows NT network) is enabled.
5e1 - Microsoft (NetBIOS over IP) Networks 16. Exit the Ports and Protocols selection screen by pressing the rectangular Close button in the upper right corner of the screen. 17. Exit the screen containing the Network Settings button by pressing the rectangular Close button in the upper right corner of the screen. 18. Finally, press the rectangular Exit button in the upper right corner of the four-button, System Settings screen to have the printer reboot and enable your SMB setting.
5e1 - Microsoft (NetBIOS over IP) Networks 1. On NT4 workstations, verify that the TCP/IP protocol is installed and that it is configured for DNS 2. 3. 4. 5. 6. 7. resolution of the NetBIOS Host Name. Verify that BOTH Microsoft TCP/IP Printing Services and Workstation (SMB client) Services are installed. On 95/98/Me workstations, verify that the TCP/IP protocol is installed and that it is configured for DNS resolution of the NetBIOS Host Name.
5f1 - Novell NetWare 4.x, 5.x (NDS) Networks Step 5 ...continued Novell NetWare 4.x, 5.x (NDS) Networks Enable the NetWare Port at the Printer 1. Press the rectangular Access button on the Printer Control Panel, located directly above and slightly to 2. 3. 4. 5. 6. 7. 8. 9. 10. 11. 12. 13. 14. 15. 16. 17. 18. the right of the numeric keypad. Press the "1" key on the numeric keypad five consecutive times. (This is the factory default "password.") Press the rectangular Confirm button on the touch screen.
5f1 - Novell NetWare 4.x, 5.x (NDS) Networks assigned. If your printer services queues on multiple file servers, the Print Server name must be the same on all file servers and the Print Server password must be the same on all file servers. Configure NetWare Settings using Internet Services 1. Open your Web browser and enter the TCP/IP address of the Printer in the Address or Location field. 2. 3. 4. 5. 6. 7. 8. 9. 10. 11. 12. 13. Press Enter. Click the Properties button or Tab.
file:///C|/0-web/boxster/WorkCentreM24-System-Analyst-Guide/main/Install_5g1.htm Step 5 ...continued Novell NetWare 3.1x (Bindery) Networks Enable the NetWare Port at the Printer 1. Press the rectangular Access button on the Printer Control Panel, located directly above and slightly to 2. 3. 4. 5. 6. 7. 8. 9. 10. 11. 12. 13. 14. 15. 16. 17. 18. the right of the numeric keypad. Press the "1" key on the numeric keypad five consecutive times. (This is the factory default "password.
file:///C|/0-web/boxster/WorkCentreM24-System-Analyst-Guide/main/Install_5g1.htm same on all fileservers and the Print Server password must be the same on all fileservers. Note regarding NetWare 4 (bindery): You can set up the printer on the NetWare 4 Server by performing the following steps: 1. Create a Bindery Queue 2. Create a Bindery Print Server Name 3. Assign Print Server to Queue. 4. Access Quick setup and change Printer Location from Manual Load to Auto Load (Local). 6.
file:///C|/0-web/boxster/WorkCentreM24-System-Analyst-Guide/main/Install_5g1.htm Select another Protocol Go on to Step 6 file:///C|/0-web/boxster/WorkCentreM24-System-Analyst-Guide/main/Install_5g1.
5h1 - IPP Configuration Step 5 ...continued IPP Configuration The Internet Printing Protocol provides a convenient way to print over the Internet or Intranet using the printer's IP address. To support this type of printing, make sure that Port 9100 is enabled at the printer as stated in the Note at the bottom of the Configure Port 9100 procedure, under the Internet Services Tab of this guide.
5h1 - IPP Configuration button) on the touch screen. Exiting the IPP Selection Menu To exit the IPP Selection Menu, which returns you to the Port Settings Menu, press the rectangular Close button in the upper right corner of the touch screen. Exiting the Port Settings Menu and returning to the Printer's Main Menu 1. To exit the Port Settings Menu, returning to the Printer's Main screen, press the rectangular Close button in the upper right corner of the Port Settings Menu screen. 2.
5h1 - IPP Configuration Select another Protocol Go on to Step 6 file:///C|/0-web/boxster/WorkCentreM24-System-Analyst-Guide/main/Install_5h1.
file:///C|/0-web/boxster/WorkCentreM24-System-Analyst-Guide/main/Install_5i1.htm Step 5 ...continued EtherTalk Configuration The EtherTalk Protocol enables workstation to Printer communications over the EtherTalk (AppleTalk) network. To access EtherTalk Settings at the Printer 1. Press the rectangular Access button on the Printer Control Panel, located directly above and slightly to the right of the numeric keypad. 2. Press the "1" key on the numeric keypad five consecutive times.
file:///C|/0-web/boxster/WorkCentreM24-System-Analyst-Guide/main/Install_5i1.htm Exiting the Port Settings Menu and returning to the Printer's Main Menu 1. To exit the Port Settings Menu, returning to the Printer's Main screen, press the rectangular Close button in the upper right corner of the Port Settings Menu screen. 2. Press the rectangular Close button in the upper right corner of the Ports and Protocols selection (twobutton) screen. 3.
SA Guide Help Help In Using this Guide This electronic System Administrator's Guide is designed to assist you in successfully installing the Xerox WorkCentre M24 on your network. By following the pathways indicated by the installation and configuration steps. and buttons, you will be guided through typical For further reference at any time, you can access the entire SA Guide by clicking on the labeled tabs at the top of the screen, and choosing topics from the displayed menus.
Printer Drivers Install Printer Drivers Select your Printing Environment from this menu TCP/IP Peer to Peer (LPR) Printing D1 NetBEUI Peer to Peer Printing D6 NetBIOS over IP Peer to Peer Printing D7 NetBIOS over IP Client/Server Printing D4 IPP Printing (Windows 2000) D13 NetWare 3.12 and 4.x/5.x (Bindery) Printing D16 NetWare 4.xx (NDS) Printing D17 EtherTalk Peer to Peer Printing D8 file:///C|/0-web/boxster/WorkCentreM24-System-Analyst-Guide/main/PrintMenu.
TCP/IP Peer to Peer (LPR) Printing TCP/IP Peer to Peer (LPR) Printing D1 Windows 2000 Server\Professional & XP Professional Print Driver Installation Before you start Obtain the Print Driver for your workstation's operating system. Drivers are available on one of the CD-ROMs that came with your Printer. They are also typically available for downloading in self-extracting Zip file format from the Internet at www.xerox.com.
TCP/IP Peer to Peer (LPR) Printing Add the Printer to the Windows 2000 or Windows XP Desktop 1. On the Windows 2000 desktop, from the Start menu, select Settings, then Printers. On the Windows 2. 3. 4. 5. 6. 7. 8. 9. 10. 11. 12. 13. 14. 15. 16. 17. XP desktop, from Start, select Printers and Faxes. On Windows 2000, double-click Add Printer. On Windows XP, from Printer Tasks, select Add a printer. When the "Add Printer Wizard" screen displays, click Next.
TCP/IP Peer to Peer (LPR) Printing Verify that the TCP/IP Protocol and Printing Services are installed in the workstation 1. At the Desktop, right mouse click the Network Neighborhood icon and select Properties. Click on the Protocols tab and verify that the TCP/IP protocol has been loaded on the workstation. Note: If the TCP/IP Protocol is not present in the Protocol list, click the Add button, select TCP/IP Protocol from the available list, and click OK.
TCP/IP Peer to Peer (LPR) Printing Configure the Print Driver 1. From the Start menu, select Settings and then Printers. 2. Right click on the Printer's icon and select Document Defaults. 3. Select the correct paper size and any other default settings you wish to set for the printer. Windows 95/98/Me Workstation Print Driver Installation Before you start Obtain the Print Driver for your workstation's operating system. Drivers are available on one of the CD-ROMs that came with your Printer.
TCP/IP Peer to Peer (LPR) Printing workstation. One example of such a program is "DigiLPR." A second example is "ACITS LPR Remote Printing." 1. Install a Print Utility (Spooler) program on your workstation following the instructions that accompany the program. Note: Depending upon the Print Utility you use, you may need to add a local printer and then "Add Port," or you may create the printer and port in one continuous installation process.
NetBEUI Peer to Peer Printing NetBEUI Peer to Peer Printing D6 Windows 95/98/Me and NT4 Workstation Print Driver Installation Before You Start 1. Obtain the Print Driver for your workstation's operating system. Drivers are available on one of the CDROMs that came with your Printer. They are also typically available for downloading in self-extracting Zip file format from the Internet at www.xerox.com. 2. Print a Settings List as stated under the Network Connectivity Tab of this guide. 3.
NetBEUI Peer to Peer Printing Add the Printer to the Windows 95/98/Me & NT4 Desktop 1. 2. 3. 4. 5. 6. 7. 8. 9. 10. 11. From the Start menu, select Settings and then Printers. Double click the Add Printer button and click Next. When the Add Printer Wizard displays, select Network Printer. Select Browse to search for the printer over the network. Select the plus symbol (+) to the left of Entire Network to expand it if necessary.
NetBIOS over IP Peer to Peer Printing NetBIOS over IP Peer to Peer Printing D7 Before You Start 1. Obtain the Print Driver for your workstation's operating system. Drivers are available on one of the CDROMs that came with your Printer. They are also typically available for downloading in self-extracting Zip file format from the Internet at www.xerox.com. 2. Print a Settings List as stated under the Network Connectivity Tab of this guide. 3. On the Settings List, verify that "SMB" is enabled.
NetBIOS over IP Peer to Peer Printing box. Enter the Domain in which this Host (Computer Name) resides into the "Domain" text box (xerox.com, for example). In the boxes provided, enter the IP address of the DNS (Domain Name Service) Server. Finally, click the IP Address Tab and verify that this workstation is using either a dynamic or static method to obtain a valid TCP/IP Address.
NetBIOS over IP Peer to Peer Printing button for Obtaining an IP Address Automatically from the DHCP Server. If using Static TCP/IP Addressing, select the radio button marked Specify an IP Address, and enter in the required IP Address, Subnet Mask, and Gateway addresses for this workstation. Click OK when done. 3. Select the Services tab and verify that the Workstation service is installed. This is the NT workstation's client for communicating on Microsoft Networks using the SMB protocol.
NetBIOS over IP Peer to Peer Printing 1. On NT4 workstations, verify that the TCP/IP protocol is installed and that it is configured for DNS 2. 3. 4. 5. 6. 7. 8. resolution of the NetBIOS Host Name. Verify that BOTH Microsoft TCP/IP Printing Services and Workstation (SMB client) Services are installed. On Windows 2000 and XP workstations, from the "Properties selection" of the "Local Area Connection" icon, verify that the Internet Protocol (TCP/IP) is installed. Select the protocol and click Properties.
NetBIOS over IP Client/Server Printing NetBIOS over IP Client/Server Printing D4 Before You Start 1. Obtain the Print Driver for your workstation's operating system. Drivers are available on one of the CDROMs that came with your Printer. They are also typically available for downloading in self-extracting Zip file format from the Internet at www.xerox.com. 2. Print a Settings List as stated under the Network Connectivity Tab of this guide. 3. On the Settings List, verify that "SMB" is enabled.
NetBIOS over IP Client/Server Printing (xerox.com, for example). In the boxes provided, enter the IP address of the DNS (Domain Name Service) Server. Finally, click the IP Address Tab and verify that this workstation is using either a dynamic or static method to obtain a valid TCP/IP Address. Note: If you are operating a Windows Internet Naming Service Server on an NT only network, you may wish to configure WINS instead of DNS by selecting the WINS Configuration Tab.
NetBIOS over IP Client/Server Printing Addressing, select the radio button marked Specify an IP Address, and enter in the required IP Address, Subnet Mask, and Gateway addresses for this workstation. Click OK when done. 3. Select the Services tab and verify that the Workstation service is installed. This is the NT workstation's client for communicating on Microsoft Networks using the SMB protocol.
NetBIOS over IP Client/Server Printing Driver Installation Verify that the Correct Protocols and Services are installed in the workstation 1. Verify that the Internet protocol (TCP/IP) is installed in the Workstation. On the Windows 2000 Desktop, right mouse click the My Network Places icon and select Properties. Right mouse click on the Local Area Connection icon and select Properties. On the Windows XP desktop, click Start, Control Panel, and double click Network Connections.
NetBIOS over IP Client/Server Printing 11. Select the model that corresponds to your Printer and click Next. 12. Enter a name for your Printer and select either Yes or No for making this printer your default Windows printer. Select Yes if you will be printing primarily to this printer from your Windows applications. Click Next. 13. Select Yes to print a test page. Click Next. 14. Click Finish. Configure the Print Driver 1. On the Windows 2000 desktop, from the Start menu, select Settings, then Printers.
IPP Printing (Windows 2000 IPP Printing (Windows 2000 & XP) D13 Note: Supported by all Windows 2000 and XP workstations, IPP (the Internet Printing Protocol) enables the convenience of printing over the Internet or Intranet through the creation of an IPP network port. This printing "service" is available for other workstation operating systems through downloads from the Microsoft web site.
IPP Printing (Windows 2000 1. On the Windows 2000 desktop, from the Start menu, select Settings, then Printers. On the Windows 2. 3. 4. 5. 6. 7. 8. 9. 10. 11. 12. 13. 14. XP desktop, from Start, select Printers and Faxes. On Windows 2000, double-click Add Printer. On Windows XP, from Printer Tasks, select Add a printer. When the "Add Printer Wizard" displays, click Next. Select Network Printer and click Next. To create an IPP printer select Connect to a printer on the Internet…..
NetWare 3.12 (Bindery) Printing NetWare 3.12 and 4.x/5.x (Bindery) Printing D16 Before You Start 1. Obtain the Print Driver for your workstation's operating system. Drivers are available on one of the CDROMs that came with your Printer. They are also typically available for downloading in self-extracting Zip file format from the Internet at www.xerox.com. Windows 95/98/Me/NT4 Workstation Print Driver Installation Verify that the Correct Protocol and Service is installed in the workstation 1.
NetWare 3.12 (Bindery) Printing 10. Print a Test Page. Verify that it prints at the Printer. 11. Click Finish. Configure the Print Driver in Windows 95/98/Me 1. From the Start menu, select Settings and then Printers. 2. Right click on the Printer's icon and select Properties. 3. Select the correct paper size and any other default settings you wish to set for the printer. Configure the Print Driver in Windows NT4 1. From the Start menu, select Settings and then Printers. 2.
NetWare 3.12 (Bindery) Printing 4. Select Network Printer and click Next. 5. In Windows 2000, on the "Locate Your Printer" screen, select the radio button labeled "Type the printer 6. 7. 8. 9. 10. 11. 12. 13. 14. name or click next to browse for a printer." Click Next. In Windows XP, on the "Specify a Printer" screen, select the radio button labeled "Connect to this printer (or to browse for a printer, select this option and click Next).
NetWare 4.xx (NDS) Printing NetWare 4.xx (NDS) Printing D17 Before You Start 1. Obtain the Print Driver for your workstation's operating system. Drivers are available on one of the CDROMs that came with your Printer. They are also typically available for downloading in self-extracting Zip file format from the Internet at www.xerox.com. Windows 95/98/Me/NT4 Workstation Print Driver Installation Verify that the Correct Protocol and Service is installed in the workstation 1.
NetWare 4.xx (NDS) Printing 9. When prompted, accept the default printer name, or give your printer a more descriptive name. Select either Yes or No to make this printer your default Windows printer. Choose Yes if you will be printing primarily to this printer from your Windows applications. Click Next. 10. Print a Test Page. Verify that it prints at the Printer. 11. Click Finish. Configure the Print Driver in Windows 95/98/Me 1. From the Start menu, select Settings and then Printers. 2.
NetWare 4.xx (NDS) Printing 2. On Windows 2000, double-click Add Printer. On Windows XP, from Printer Tasks, select Add a 3. 4. 5. 6. 7. 8. 9. 10. 11. 12. 13. 14. printer. When the "Add Printer Wizard" displays, click Next. Select Network Printer and click Next. In Windows 2000, on the "Locate Your Printer" screen, select the radio button labeled "Type the printer name or click next to browse for a printer." Click Next.
EtherTalk (AppleTalk) Peer to Peer Printing EtherTalk (AppleTalk) Peer to Peer Printing D8 Before You Start 1. Obtain the Adobe PostScript Print Driver for your Macintosh (OS 9.x) workstation. Drivers are available on one of the CD-ROMs that came with your Printer. They are also typically available for downloading in self-extracting file format from the Internet at www.xerox.com. 2. Print a Settings List as stated under the Network Connectivity Tab of this guide. 3.
Optional Features Scanning to the Printer's Hard Drive Click Before You Start to begin. Before You Start E1 Setting Up Mail Boxes E13 Scanning to Mail Boxes E14 Retrieving Images from Mail Boxes E15 Scan Settings Overview E12 Installing and Using the Network Scanner Utility E16 file:///C|/0-web/boxster/WorkCentreM24-System-Analyst-Guide/main/Optional.
Before You Start Before You Start E1 To support retrieval of scanned documents from the Printer's "Mailboxes" to your workstation's desktop, make sure that the protocol known as "Salutation" is enabled, either from the Printer's Control Panel or through the use of Internet Services. Print a Settings List to verify that Salutation is enabled 1. Press the Machine Status button. This is the lowest of the three square buttons to the immediate left 2. 3. 4. 5. 6. 7. of the Control Panel’s numeric keypad.
Before You Start 5. 6. 7. 8. 9. 10. 11. 12. 13. 14. 15. 16. 17. 18. 19. screen). Note: If you press the left button by mistake, the Main menu will be displayed and you will have to start over at step one above. Press the System Settings button (the top left button displayed on screen). Press the Network Settings button (the top right button displayed on screen). Press the Port Settings button (the left-hand button) to access the Port Settings Menu.
Setting Up Mailboxes Setting Up Mailboxes E13 Note: Scanning to the Printer's hard drive requires the set up of individual Mailboxes to receive scanned files. Up to 200 Mailboxes can be set up to support this type of scanning. To set up Mailboxes, perform the following steps: 1. Press the rectangular Access button on the Printer Control Panel, located directly above and slightly to 2. 3. 4. 5. 6. 7. 8. 9. 10. 11. 12. 13. 14. 15. 16. 17. 18. 19. 20. 21. 22. the right of the numeric keypad.
Setting Up Mailboxes upper right corner of the screen. 23. The Main (Copy) Screen will now be displayed. file:///C|/0-web/boxster/WorkCentreM24-System-Analyst-Guide/Pages/E13_SetUp_Boxes.
Scanning to Mailboxes Scanning to Mailboxes E14 Note: Scanning to the Printer's hard drive requires the setup of individual Mailboxes to receive scanned files. Up to 200 Mailboxes can be set up to support this type of scanning. To learn how to set up an individual Mailbox, click Setting Up Mailboxes in the Scanning to the Printer's Hard Drive menu of this guide, and follow the instructions supplied. To scan to a Mailbox, perform the following steps: 1.
Retrieving Images from Mailboxes Retrieving Images from Mailboxes E15 1. Images are retrieved from Mailboxes using the Printer's Internet Services. To access the Internet 2. 3. 4. 5. 6. 7. 8. Services from your workstation, with your Internet Browser program running on your workstation enter the Printer's IP Address (as seen on the Settings List) into the Address or Location field of the browser. Press the Enter key on your keyboard.
Scan Settings Overview Scan Settings Overview E12 The following information provides an Overview of the Printer's available Scan Settings. 1. To enter the Scan mode, from the Printer's Main (Copy) Screen press the Menu button. 2. On the two-button selection screen, press the right-hand Scan/E-mail button. Note: If you press the lefthand "Copy" button by mistake you will be returned to the Main (Copy) Screen. You will then have to press the Menu button again to return to the two-button selection screen.
Scan Settings Overview Cancel button to exit the current screen without saving changes. 6. When the Scan Options is selected, two horizontal rows of three buttons each are displayed (a total of six buttons). ❍ Pressing the 2 Sided Originals button opens an Image Orientation Screen with two setting selection buttons on the left and two setting selection buttons on the right. The two left-hand buttons enable you to select either 1 Sided or 2 Sided.
Scan Settings Overview To exit the Scan Screen and return to the Main (Copy) Screen, perform the following steps: 1. Press the Menu button in the upper right corner of the three-Tabbed Scan screen. 2. On the two-button Selection screen, press the left-hand Copy button. 3. The Main (Copy) Screen will now be displayed. file:///C|/0-web/boxster/WorkCentreM24-System-Analyst-Guide/Pages/E12_ScanSettings_Overview.
Installing/Using the Network Scanner Installing and Using the Network Scanner Utility E16 To retrieve scanned documents directly from the Printer's mailbox(es) into an image-editing application such as Adobe® Photoshop®, you need to install the Network Scanner Utility (scan driver) on your workstation. By installing the Network Scanner Utility on your workstation, you can additionally use an application known as Mailbox Viewer to view and import scanned files.
Installing/Using the Network Scanner 4. From the File menu, select the command to import the image from the scanner. In Photoshop, for 5. 6. 7. 8. 9. 10. 11. 12. 13. 14. 15. example, this would be Import/Twain. If the scanner doesn't automatically display on screen allowing its selection with the Select Scanner button, perform the next six steps. Click Display. Select Use Network. Click Display other network scanners. Click Add. Supply the IP Address of the Scanner and a name if desired. Click OK.
Optional Features NOTE: Scan to E-mail and Internet Fax have similar setup procedures. The information you need to start setup, SMTP setup, and POP3 setup are common. Scan to E-mail Internet Fax Phone Fax What is it? What is it? What is it? .... Before You Start .... Before You Start .... POP3 and SMTP Setup ....
What is Scan to E-mail What is Scan to E-mail FE Scan to E-mail: ● Click enables the creation of an electronic image file by scanning an original hard copy document. The scanned image is sent as an e-mail attachment, to the specified e-mail recipient or recipients. ■ Enter a SMTP (Simple Mail Transfer Protocol) e-mail addresses for your e-mail. An SMTP compliant e-mail address format must be used. For example, anyone@anycompany.com.
Before You Start Before You Start FE1 Internet Fax / Scan to E-mail Before starting the setup: 1. Ensure the machine is fully functioning in its existing configuration. 2. Ensure the machine has access to a Network with Intranet or Internet connection, is communicating through TCP/IP, and HTTP is enabled. 3. To configure the system for Internet Fax or Scan to E-mail (SMTP or POP3) you must first obtain the following information: Note: POP3 is required for Internet Fax.
Before You Start Click to continue on to POP3 and SMTP Setup: file:///C|/0-web/boxster/WorkCentreM24-System-Analyst-Guide/Pages/fe1-beforestart.
POP3 and SMTP POP3 and SMTP Setup FE5 Internet Fax / Scan to E-mail From a Workstation (With the information you obtained in the Before You Start section): 1. 2. 3. 4. 5. 6. 7. 8. 9. 10. 11. 12. 13. 14. 15. 16. 17. Open a Web Browser and enter the TCP/IP address of the machine. Select Properties. Select Machine Details. Enter Machine E-mail Address. Verify Date and Time are correct. Select Apply New settings. (Note: this requires the Admin Password.) Select Reboot to have the new settings take effect.
POP3 and SMTP 18. Wait until the machine has returned to Ready to Copy. Click to continue on to Scan to E-mail specific: ...OR... Click to continue on to Internet Fax specific: file:///C|/0-web/boxster/WorkCentreM24-System-Analyst-Guide/Pages/fe3-pop3-smtp.
Scan to E-mail Address Book Address Book FE3 Scan to E-mail 1. 2. 3. 4. 5. 6. 7. 8. 9. 10. Press the Access button to enter System Administration Mode. On the keypad enter [11111] or current password. Touch Confirm when finished. Touch System Settings. Touch Setup Menu. Touch Address Book. Select a Address Number. Touch Create/Delete. Touch E-mail. Touch Detailed Settings. Select the items to enter information and touch Change Settings.
Troubleshooting Troubleshooting FE15 Scan to E-mail To avoid the most common mistakes, verify the following information (SMTP or POP3). SMTP POP3 IP address IP address Subnet mask Subnet mask Gateway address Gateway address Host name SMTP Server address DNS server address Machine E-mail address DNS domain name POP3 server address SMTP server address POP3 user name Machine E-mail address POP3 user password Click to continue on to Scan to E-mail / Fax home page.
What is Internet Fax What is Internet Fax FI Internet Fax: ● ● ● ● Click can send and receive the data that is scanned by the machine as attachments via the Intranet or Internet, unlike a facsimile that transmits the data via the telephone line. allows you to send documents that are scanned by the machine as attachments in the TIFF format of electronic mail. also allows you to receive E-mail's that are sent from machines equipped with Internet Fax.
What is Fax (Phone) What is Fax (Phone) FP Fax (Phone): ● Click works much the same as a standard facsimile machine. to continue on to Before You Start Fax (Phone): file:///C|/0-web/boxster/WorkCentreM24-System-Analyst-Guide/Pages/fp-what-is-it.
Before You Start Before You Start FP1 Fax (Phone) Before starting the setup: ● ● ● You cannot use this machine with a call waiting service. A facsimile located close to a main unit of a cordless phone can cause distorted images or interrupted transmission. This machine should be installed at least five meters away from the main unit of the cordless phone.
System Settings System Settings FP1 Fax (Phone) 1. 2. 3. 4. 5. 6. 7. Press the Access button to enter System Administration Mode. On the keypad enter [11111] or current password. Touch Confirm when finished. Touch System Settings. Touch System Settings, again. Touch Fax Mode Settings. Touch Local Terminal Information. Select the items to enter information and touch Change Settings. ■ Enter in a Local Name, up to 20 characters, then touch Save. ■ Enter a Company Logo, up to 30 characters, then touch Save.
Address Book Address Book FP3 Fax (Phone) 1. 2. 3. 4. 5. 6. 7. 8. 9. 10. Press the Access button to enter System Administration Mode. On the keypad enter [11111] or current password. Touch Confirm when finished. Touch System Settings. Touch Setup Menu. Touch Address Book. Select a Address Number. Touch Create/Delete. Touch FAX. Touch Detailed Settings. Select the items to enter information and touch Change Settings. ■ Fax Number, up to 128 characters, then touch Save.
Group Dial Group Dial FP5 Fax (Phone) 1. 2. 3. 4. 5. 6. 7. 8. 9. 10. Click Press the Access button to enter System Administration Mode. On the keypad enter [11111] or current password. Touch Confirm when finished. Touch System Settings. Touch Setup Menu. Touch Group Send. Select a Group number, using the keypad. Touch Create/Delete. Use the numeric keypad enter the three-digit Address Number, touch Add. When complete, touch Save. Touch Close until the System Settings screen is displayed.
Comment Comment FP7 Fax (Phone) Comments for use on a Cover note: 1. 2. 3. 4. 5. 6. 7. 8. 9. Click Press the Access button to enter System Administration Mode. On the keypad enter [11111] or current password. Touch Confirm when finished. Touch System Settings. Touch Setup Menu. Touch Comment. Select a Comment number. Touch Create/Delete. Enter a Comment, up to 18 characters, touch Save. When complete, touch Close until the System Settings screen is displayed.
Create Mailbox Create a Mailbox FP9 Fax (Phone) The machine has 200 mailboxes available. A mailbox must be created before you can use Remote Mailbox or sort received documents into mailboxes. Documents of the Mailbox Fax Receive or Private Polling are stored in the Mailbox. This is convenient for differentiating between received documents and documents to be transmitted (Private Polling). You can program a Password and a Mailbox Name and processing method for stored documents (Mailbox Options). 1. 2. 3.
Sort Mailbox Sort Mailbox FP11 Fax (Phone) Received documents are stored in the mailbox specified by the incoming line. 1. 2. 3. 4. 5. 6. 7. 8. 9. Press the Access button to enter System Administration Mode. On the keypad enter [11111] or current password. Touch Confirm when finished. Touch System Settings. Touch System Settings, again. Touch Fax Mode Settings. Select a Output Destination/File Destination Select File Destination- Line Setup. Select the Line to enter, touch Change Settings.
Other Items Settings / Defaults FP13 Fax (Phone) Common Settings: Audio Tones, Printing Priority, Reports. 1. 2. 3. 4. 5. 6. Press the Access button to enter System Administration Mode. On the keypad enter [11111] or current password. Touch Confirm when finished. Touch System Settings. Touch System Settings, again. Touch Common Settings. Touch Audio Tones. ■ Select item to change (Tone, Volume, etc...), set item, touch Save. 7. Touch Close until the Common Settings Screen is Displayed. 8.
Other Items Enlarge Presets, Scan Size default. 1. Touch a Fax Mode Settings. 2. Touch Screen Defaults. 3. Select the Line to enter or change, touch Change Settings. (See Fax Setting Defaults section for 4. 5. 6. 7. 8. 9. 10. Click values.) ■ Fax Screen Default ■ Address Book Default ■ Transmission Screen Touch Close until Fax Mode Settings is displayed. Touch Feature Defaults. Select the Line to enter or change, touch Change Settings. (See Fax Setting Defaults section for values.
Unique Fax settings Unique Fax Mode Settings FI99 Screen Defaults Fax Control 1. Fax Screen Defaults (default is 0) 1. Send Header-Polling (default is 1) Setting Value Description Setting Value Description 0 Basic Feature screen 0 Off 1 Address Book 1 On 2. Address Book Default (default is 001) Setting Value 001 to 500 Description The recipient of the specified number is displayed first. 2.
Unique Fax settings 1 Photo 2 Text & Photo 3. Lighter/Darker (default is 3) Setting Description Value 0 Lighter (-3) 1 Lighter (-2) 2 Lighter (-1) 3 Normal ( 0) 4 Darker (+1) 5 Darker (+2) 6 Darker (+3) 4. Mixed Size Originals (default is 0) Setting Description Value 0 Off 1 On 5. Communication Mode (default is 2) Setting Description Value 2 G3 Auto 3 F4800 6. Send Header (default is 1) Setting Description Value 0 Off 1 On 7.
Unique Fax settings 1 On 8. iFax Profile (default is 0) Setting Description Value 0 TIFF-S 1 TIFF-F 2 TIFF-J This item is displayed when the optional Internet Fax is available. Setting Description Value 0 A/B System 1 Inch System 13. Reduce 8.5 x11 Original to A4 (default is 0) Setting Description Value 0 Same Size 1 Reduce to A4 size 14. Pseudo-Photo Gradation Mode (default is 0) Reduce/Enlarge Presets 1.
Unique Fax settings 18 50 to 400 400.0% 50% to 400% range in 1% increments file:///C|/0-web/boxster/WorkCentreM24-System-Analyst-Guide/Pages/fi99-unique-fax-settings.
Direct Fax Direct Fax FP15 Fax (Phone) You can facsimile documents created in a computer program directly from your PC in the same way you would print a document. This is known as the Direct Fax. Recipient List 1. From the File menu of the application program, select Print to display the Print dialog box. 2. Check that the correct printer is selected, and then click Properties to display the printer properties 3. 4. 5. 6. 7. 8. 9. 10. dialog box.
Direct Fax ■ ■ ■ Click Enter a Fax Number or Address Number fax recipient to Recipient List. Click To. Click OK. to continue on to Troubleshooting: file:///C|/0-web/boxster/WorkCentreM24-System-Analyst-Guide/Pages/fp15-direct-fax.
Troubleshooting Troubleshooting FP17 Fax (Phone) Telephone line connection Check that the phone line is connected correctly. Phone line settings Print an “Expanded Features Settings List” to check that the dial is appropriate. Correct the settings if necessary. Phone number of remote machine Check the number displayed on the screen. If you are using speed dialing, print an Address Book to check the number. An error message displayed? Take the necessary measures described in the message.
Internet Fax Address Book Address Book FI3 Internet Fax 1. 2. 3. 4. 5. 6. 7. 8. 9. 10. Press the Access button to enter System Administration Mode. On the keypad enter [11111] or current password. Touch Confirm when finished. Touch System Settings. Touch Setup Menu. Touch Address Book. Select a Address Number. Touch Create/Delete. Touch iFax. Touch Detailed Settings. Select the items to enter information and touch Change Settings.
Troubleshooting Troubleshooting FI15 Internet Fax To avoid the most common mistakes, verify the following information (SMTP or POP3).
Troubleshooting Is the mail address for your machine specified correctly? Is the method for receiving E-mail appropriate for your environment? Check that the E-mail address of your machine (Machine Mail Address and SMTP Server Address) has been correctly set up. Depending on your environment, the settings for the method of receiving E-mail's (SMTP or POP) differ. Check that the method for receiving E-mail's is appropriate for your environment.
Internet Services Menu Internet Services Click Enable HTTP first, then click any item of interest. Enable HTTP C3 Overview N1.0 Services Tab N1.01 Jobs Tab N1.1 Status Tab N1.2 Properties Tab N1.3 Maintenance Tab N1.4 Support Tab N1.5 Setting TIFF Processing Properties N3.2 Setting PDL Emulations N3.3 Setting Ethernet Speed N5.0 Configure TCP/IP Settings N5.3 Configure LPD N5.6 Restricting Printer Access N5.8.2 Configure Port 9100 N5.9 Configure SMB N5.5 Configure NetWare Settings N5.2 Configure IPP N5.
Enable Internet Services (HTTP) Enable Internet Services (HTTP) C3 Internet Services are a series of Web (HTML) Pages located within the Printer enabling network communication settings to be conveniently configured from a web browser running on a remotely located workstation. For further details on the many functions provided by the Internet Services Web Pages, click on the Internet Services Tab on the Main Page of this System Administrator's guide. To access Internet Services Settings at the Printer 1.
Enable Internet Services (HTTP) To exit the Internet Service Selection Menu, which returns you to the Port Settings menu, press the rectangular Close button in the upper right corner of the touch screen. Exiting the Port Settings Menu and returning to the Printer's Main Menu 1. To exit the Port Settings Menu, returning to the Printer's Main screen, press the rectangular Close button in the upper right corner of the Port Settings Menu screen. 2.
Overview Overview N1.0 Internet Services is the embedded HTTP server application that resides in the Printer. Internet Services allows you to access Printer configuration and connectivity tools using a web browser. To access the Printer's Internet Services from your workstation, set your browser so that it will not try to access the Printer through a proxy server.
Services Tab Services Tab N1.01 The Services Tab allows you to browse for print jobs, then send the print jobs directly to the Printer by clicking a Start button. Warning: Make sure to send jobs with file formats that the Printer recognizes (PostScript files with a .ps file extension, for example). If jobs are sent to the printer with unrecognizable file extensions, the Printer will stall and require a reboot.
Jobs Tab Jobs Tab N1.1 Clicking the Jobs Button on the Main screen takes you to the Jobs Tab. At the Jobs Tab, by clicking the plus (+) sign in front of the file folder in the directory tree, you can view the processed job "History." If you click on the hot link labeled Job History Report you will see a list of jobs that have been processed from the dates indicated on the screen. The list includes jobs that have been printed, copied, and scanned.
Status Tab Status Tab N1.2 Clicking the Status Button on the Main screen takes you to the Status Tab. This Tab displays General information such as the Printer's name, IP Address, Product Name, and Status. This Tab also contains a handy Reboot button, enabling remote rebooting of the Printer when needed. The first file folder in the directory tree, labeled Trays, includes two selections: a Paper Tray and an Output Tray.
Properties Tab Properties Tab N1.3 Clicking the Properties Button on the Main screen takes you to the Properties Tab. This Tab allows you to configure the Printer's numerous job processing and network communications settings, as well as to download scanned jobs from the Printer to your desktop. The Directory Tree on the left side of the screen begins with a list of hot links, followed by three file folders, and concludes with one last hot link.
Properties Tab Table, click the rectangular Apply New Settings button, then click the Reboot button (always available on the Status Tab) to remotely reboot the Printer. Note: It is possible to have additional hot links displayed in this beginning hot links list in the Properties Tab directory.
Maintenance Tab Maintenance Tab N1.4 Clicking the Maintenance Button on the Main screen takes you to the Maintenance Tab. There is only one item in this Tab's Directory Tree, which when clicked displays an Error History Report. file:///C|/0-web/boxster/WorkCentreM24-System-Analyst-Guide/Pages/N1_4_MaintenanceTab.
Support Tab Support Tab N1.5 Clicking the Support Button on the Main screen takes you to the Support Tab, which displays a hot link (a URL). Clicking on the URL takes you to an external web site providing additional Customer support. Note that if you click the rectangular button labeled Change Settings, it is possible to change the URL used to supply additional Customer support. To have the Printer register changes made to any settings, click the rectangular Apply New Settings button.
Setting TIFF (and other PDL) Processing Properties Setting TIFF (and other PDL) Processing Properties N3.2 To set the Printer's default TIFF, PostScript, PCL, or HP-GL/2 processing properties, perform the following steps: 1. Open your Web browser and enter the TCP/IP address of the Printer in the Address or Location field. Press Enter. 2. Click the Properties button or Tab. 3. Click the third File folder in the Properties Tab directory tree, labeled Emulation Settings. 4.
Setting PDL Emulations Setting PDL Emulations N3.3 To set the PDL (Page Description Language) Emulations, used by the Printer's Input Ports, perform the following steps: 1. Open your Web browser and enter the TCP/IP address of the Printer in the Address or Location field. 2. 3. 4. 5. 6. Press Enter. Click the Properties button or Tab. Click the third File folder in the Properties Tab directory tree, labeled Emulation Settings.
Set the Ethernet Speed Set the Ethernet Speed N5.0 1. Open your Web browser and enter the TCP/IP address of the Printer in the Address or Location field. 2. 3. 4. 5. 6. Press Enter. Click the Properties button or Tab. Click the first file folder in the Directory Tree labeled Port Settings. Click the Ethernet hot link. Select your network speed from the drop-down list.
Configure TCP/IP Settings Configure TCP/IP Settings N5.3 1. Open your Web browser and enter the TCP/IP address of the Printer in the Address or Location field. 2. 3. 4. 5. 6. 7. 8. Press Enter. Click the Properties button or Tab. Click the plus symbol (+) to the left of the Protocol Settings file folder. Select TCP/IP in the directory tree. Review the available selections as displayed on your screen and explained in the TCP/IP Configuration Selection List, below.
Configure TCP/IP Settings Under the TCP/IP Subject Label Host Name. The default entry assures a name that is unique to this device on the network. Get IP Address. Use this drop-down menu to select the method to use to assign IP Addresses. Select Manual, DHCP, RARP, or BOOTP. IP Address entry box. To be filled in manually when Manual addressing is selected. Subnet Mask entry box. To be filled in manually when Manual addressing is selected. Gateway entry box.
Configure TCP/IP Settings services. All other hosts not specified in this list will be prevented from accessing the Printer's services. file:///C|/0-web/boxster/WorkCentreM24-System-Analyst-Guide/Pages/N5_3_TCPIP.
Configure LPD Configure LPD N5.6 1. Open your Web browser and enter the TCP/IP address of the Printer in the Address or Location field. 2. 3. 4. 5. Press Enter. Click the Properties button or Tab. Click the plus symbol (+) to the left of the Protocol Settings file folder. Select LPD in the directory tree. The available selections include: Port Number, with a default value of 515.
Restricting Printer Access Restricting Printer Access N.5.8.2 Using Internet Services, access to the Printer's Services can be restricted by Host IP Address. To restrict printer access, perform the following steps: 1. Open your Web browser and enter the TCP/IP address of the Printer in the Address or Location field. 2. 3. 4. 5. 6. 7. 8. 9. Press Enter. Click the Properties button or Tab. Click the plus symbol (+) to the left of the Protocol Settings file folder. Select TCP/IP in the directory tree.
Configure Port 9100 (Raw Printing) Configure Port 9100 (Raw Printing) N5.9 1. Open your Web browser and enter the TCP/IP address of the Printer in the Address or Location field. 2. 3. 4. 5. Press Enter. Click the Properties button or Tab. Click the plus (+) symbol to the left of the Protocol Settings file folder. Select Port 9100 in the directory tree. (1) The available selections include: Port Number, with a default value of 9100. This does not need to be changed.
Configure SMB Configure SMB N5.5 1. Open your Web browser and enter the TCP/IP address of the Printer in the Address or Location field. 2. 3. 4. 5. Press Enter. Click the Properties button or Tab. Click the plus symbol (+) to the left of the Protocol Settings file folder. Select SMB in the directory tree. The available selections include: A text box indicating Workgroup name. A text box indicating the SMB Host name. A text box indicating the Administrator name.
Configure NetWare Settings Configure NetWare Settings N5.2 1. Open your Web browser and enter the TCP/IP address of the Printer in the Address or Location field. 2. 3. 4. 5. Press Enter. Click the Properties button or Tab. Click the plus symbol (+) to the left of the Protocol Settings file folder. Select NetWare in the directory tree. The available selections include: A Host Name (Print Server) Text box. Use this name to create the Print Server (in Bindery) and Print Server object (in NDS).
Configure IPP Configure IPP N5.7 1. Open your Web browser and enter the TCP/IP address of the Printer in the Address or Location field. 2. 3. 4. 5. Press Enter. Click the Properties button or Tab. Click the plus (+) symbol to the left of the Protocol Settings file folder. Select IPP in the directory tree. The available selections include: Port Number, with a default value of 631. This is the port number assigned by IANA (Internet Assigned Numbers Authority). It does not need to be changed.
Configure SNMP Configure SNMP N5.4 It is possible to remotely define and modify GET (Read Only), SET (Read/Write), and Trap SNMP (Simple Network Management Protocol) community names for the Printer. You can also enter the System Administrator's Name here for packet identification purposes. SNMP Community Name properties that can be configured are: Community Name (Read Only) — This is the password for SNMP GET requests from the SNMP Manager to the Agent in the Printer.
Modify the HTTP (Internet Services) Settings Modify the HTTP (Internet Services) Settings N5.8 1. Open your Web browser and enter the TCP/IP address of the Printer in the Address or Location field. 2. 3. 4. 5. Press Enter. Click the Properties button or Tab. Click the plus symbol (+) to the left of the Protocol Settings file folder. Select HTTP in the directory tree. The available selections include: Port Number Entry Box.
Configure EtherTalk (AppleTalk) Configure EtherTalk (AppleTalk) N5.10 1. Open your Web browser and enter the TCP/IP address of the Printer in the Address or Location field. 2. 3. 4. 5. 6. 7. 8. Press Enter. Click the Properties button or Tab. Click the plus (+) symbol to the left of the Protocol Settings file folder. Select AppleTalk in the directory tree. The available selections include: - Printer Name. - Zone Name. Enter the name that you wish to assign to this Printer.
Troubleshooting Troubleshooting Select one of the available options for troubleshooting information. TCP/IP Troubleshooting T1 NetBEUI Troubleshooting T2 NetBIOS over IP Troubleshooting T3 IPP Troubleshooting T4 NetWare 3.1x Troubleshooting T5 NetWare 4.x, 5.x (NDS) Troubleshooting T6 EtherTalk Troubleshooting T7 Scanning to Hard Drive Troubleshooting T8 Click here for help using this Guide file:///C|/0-web/boxster/WorkCentreM24-System-Analyst-Guide/main/Help.
TCP/IP Troubleshooting TCP/IP Troubleshooting T1 Use the following check list to troubleshoot your network communication problem. Check Physical Media and Network Interface Cards 1. Verify that the Printer is powered ON. 2. Verify that the Printer and Workstation are using the correct cabling to communicate over the network.
TCP/IP Troubleshooting At the workstation, experiencing the communication problem, perform these tasks: 1. Open your Web browser and enter the TCP/IP address of the Printer in the Address or Location field. Press ENTER. If the Printer's Internet Services (web pages) begin to display on the workstation, you are communicating with the Printer. If NOT, make sure that your web browser is not set to use a proxy server and repeat the procedure. If unsuccessful, perform the next step. 2.
NetBEUI Troubleshooting NetBEUI Troubleshooting T2 Use the following checklist to troubleshoot your network communication problem. Check Physical Media and Network Interface Cards 1. Verify that the Printer is powered ON. 2. Verify that the Printer and Workstation are using the correct cabling to communicate over the network.
NetBEUI Troubleshooting Network Neighborhood icon ("My Network Places" in Windows Me) and select Properties. Click the Configuration Tab (95/98/Me) or the Protocols Tab (Windows NT4) and verify that the NetBEUI protocol is loaded. If it is, click the Identification Tab (95/98/Me/NT4) to determine if the name of your workstation's Workgroup is the same as the name of the printer's Workgroup. If it is, you can exit the Properties screen.
NetBIOS over IP Troubleshooting NetBIOS over IP Troubleshooting T3 Use the following check list to troubleshoot your network communication problem. Check Physical Media and Network Interface Cards 1. Verify that the Printer is powered ON. 2. Verify that the Printer and Workstation are using the correct cabling to communicate over the network.
NetBIOS over IP Troubleshooting At the DNS or WINS Server Refer to the Server Operating System documentation for the appropriate procedure to use to enable Host name to IP address resolution on the Server. Make sure that the Printer's TCP/IP (internet) Host Name and NetBIOS (SMB Host) Name (which should be identical for DNS) is being mapped to an IP Address on the Server.
NetBIOS over IP Troubleshooting Protocol, click Properties, select the NetBIOS Tab and verify that the checkbox labeled "I want to enable NetBIOS over TCP/IP" is checked. 3. Run a Command (DOS) prompt on the workstation and perform ping tests to verify successful packet transmission first to the workstation's NIC, then to the Gateway (if being used), then to the Printer's NIC. To run Ping Tests, at the Command (DOS) prompt, type: ping xxx.xxx.xxx.xxx and press ENTER.
NetBIOS over IP Troubleshooting 9. To assure successful printing, make sure that the Printer is configured to support the Page Description Language (PDL) being used by your driver. To check the PDL being used by the driver, print a test job "to file." Open and view the job in a program such as Notepad. The PDL being used by the driver will be displayed in the first few lines of Printer Language.
IPP Troubleshooting IPP Troubleshooting T4 Use the following check list to troubleshoot your network communication problem. Check Physical Media and Network Interface Cards 1. Verify that the Printer is powered ON. 2. Verify that the Printer and Workstation are using the correct cabling to communicate over the network.
IPP Troubleshooting At the Windows 2000 workstation, experiencing the communication problem, perform these tasks: Note: As IPP (the Internet Printing Protocol) is supported by all Windows 2000 workstations, the following procedure is written specifically for Windows 2000. The IPP printing "service" is available for other workstation operating systems through downloads from the Microsoft web site. In general, troubleshooting procedures for other operating systems will be similar to this one. 1.
IPP Troubleshooting Language (PDL) being used by your driver. To check the PDL being used by the driver, print a test job "to file." Open and view the job in a program such as Notepad. The PDL being used by the driver will be displayed in the first few lines of Printer Language. Next, check the Page Description Languages being supported by the Printer's ports by following the instructions supplied under the Setting PDL Emulations procedure in the Internet Services section of this guide.
NetWare 3.1x Troubleshooting NetWare 3.1x Troubleshooting T5 Use the following check list to troubleshoot your network communication problem. Check Physical Media and Network Interface Cards 1. Verify that the Printer is powered ON. 2. Verify that the Printer and Workstation are using the correct cabling to communicate over the network.
NetWare 3.1x Troubleshooting to Auto sensing, or to the specific frame type used by the Primary Server, configure the Printer with the correct Frame Type following the instructions supplied in the Configure NetWare Settings procedure in the Internet Services section of this guide. At the Windows workstation, experiencing the communication problem, perform these tasks: 1. At your 95/98/Me/NT workstation verify that the correct protocol and service is installed.
NetWare 3.1x Troubleshooting 3. Verify that the driver is using the correct Network Port to print through. On Windows desktops, select Start, Settings, Printers, right click on the Printer's icon, and select Properties. Select the Ports Tab (NT4 and 2000) or the Details Tab (95/98/Me) and verify that the Network Port being printed through includes the name of the Primary Server and Print Queue.
NetWare 3.1x Troubleshooting Under Print Queue Information, highlight Currently Attached Servers and press ENTER. If a Print Server is shown, the printer logged into the network properly. If nothing is shown, the printer did NOT log in to the network correctly. Check to see if the Printer logged into another Server, or reboot the Printer to see if it logs into this file server properly.
NetWare 3.1x Troubleshooting (RHINO2_Q, for example). From the Available Options screen select Print Server Information. From the list of displayed Print Servers, look for the server for your printer and write down its name (RHINO2_PS, for example). Press the ESCAPE key as many times as required to back out of displayed menus and screens, until the Exit Pconsole prompt is displayed. Highlight Yes and press ENTER. 5.
NetWare 3.1x Troubleshooting Using USERLIST - At the PUBLIC prompt (cd public), type userlist and press ENTER. If the printer logged into the network correctly, its Print Server name (RHINO2_PS, for example) should be displayed in the list along with the time of log in. Note: As the printer logs into the server as a user, you must NOT exceed your maximum number of Novell user licenses or the printer will fail to log in.
NetWare 4.x, 5.x (NDS) Troubleshooting NetWare 4.x, 5.x (NDS) Troubleshooting T6 Use the following check list to troubleshoot your network communication problem. Check Physical Media and Network Interface Cards 1. Verify that the Printer is powered ON. 2. Verify that the Printer and Workstation are using the correct cabling to communicate over the network.
NetWare 4.x, 5.x (NDS) Troubleshooting At the Windows workstation, experiencing the communication problem, perform these tasks: 1. At your 95/98/Me/NT workstation verify that the correct protocol and service is installed. At the Desktop, right mouse click the Network Neighborhood icon ("My Network Places" in Windows Me). Left mouse click on Properties. Click on the Protocols Tab (in Win. NT) or the Configuration Tab (in Win. 95/98/Me) to verify that the IPX/SPX Protocol has been installed.
NetWare 4.x, 5.x (NDS) Troubleshooting Start, Settings, Printers, right click on the Printer's icon, and select Properties. Select the Ports Tab (NT4 and 2000) or the Details Tab (95/98/Me) and verify that you are printing to the correct NDS Network and Print Queue. If the displayed information is incorrect, you are printing to the WRONG device on the network.
NetWare 4.x, 5.x (NDS) Troubleshooting At the PUBLIC prompt (cd public), type nlist user and press ENTER. If the printer logged into the network correctly, its Print Server name should be displayed in the list along with the time of log in. WARNING: The NLIST can be misleading if the display is not refreshed frequently, or the printer has been left on for an extended period of time.
EtherTalk Troubleshooting EtherTalk Troubleshooting T7 Use the following check list to troubleshoot your network communication problem. Check Physical Media and Network Interface Cards 1. Verify that the Printer is powered ON. 2. Verify that the Printer and Workstation are using the correct cabling to communicate over the network.
EtherTalk Troubleshooting 1. Locate the PPD (PostScript Printer Description) file on your hard drive, on your mapped network drive, 2. 3. 4. 5. 6. 7. or on the driver CD-ROM. Copy the PPD to the System Folder\Extensions\Printer Descriptions folder on your workstation. Locate the Adobe PostScript Print Driver file. Double click the Adobe PS Installer icon. Click Continue on the introduction screen. On the licensing screen, click Accept. Verify the location for the print driver file and click Install.
Scanning to Hard Drive Troubleshooting Scanning to Hard Drive Troubleshooting T8 Use the following check list to troubleshoot your network communication problem. Before you start It is assumed that you purchased the Scanning option to enable Scanning to the Hard Drive with your Printer. If you did not, contact your Xerox Representative to purchase this option. Check Physical Media and Network Interface Cards 1. Verify that the Printer is powered ON. 2.
Scanning to Hard Drive Troubleshooting 1. Verify that you have correctly set up your Mailbox as stated in the Setting Up Mailboxes procedure, in the Scanning to the Printer's Hard Drive item, under the Enabling Scanning Tab of this guide. 2. Scan a test document to your Mailbox as stated in the Scanning to Mailboxes procedure, in the Scanning to the Printer's Hard Drive item, under the Enabling Scanning Tab of this guide. At the Workstation 1.
Trademarks & Notices Trademarks & Notices Trademark Acknowledgements R1 Notices R2 Safety Notes R3 file:///C|/0-web/boxster/WorkCentreM24-System-Analyst-Guide/main/Trademarks.
Trademark Acknowledgments Trademark Acknowledgments R1 Microsoft® is a registered trademark of Microsoft Corporation. Windows NT®, Windows® 95, Windows® 98, Windows® Me, Windows® 2000, and Windows® XP are registered trademarks of Microsoft Corporation. Internet Explorer is a copyright protected program of Microsoft Corporation. Novell® and NetWare® are registered trademarks of Novell, Inc. Netscape® is a registered trademark of Netscape Communications Corporation.
Notices Notices R2 Radio Frequency Emissions FCC The following applies to the product when equipped with the Token Ring or Banyan Vines connectivity options: This equipment has been tested and found to comply with the limits for a Class A digital device, pursuant to Part 15 of the FCC Rules. These limits are designed to provide reasonable protection against harmful interference when the equipment is operated in a commercial environment.
Notices Changes or modifications to this equipment not specifically approved by Xerox Europe may void the user’s authority to operate the equipment. Shielded cables must be used with this equipment to maintain compliance with the EMC Directive 89/336/EEC. This equipment is not primarily intended for use in a domestic environment. A full declaration, defining the relevant Directives and referenced standards, can be obtained from your Xerox Europe representative.
Notices Paper Money Bonds and Obligations of certain agencies of the government, such as FHA, etc. Bonds. (U.S. Savings Bonds may be photographed only for publicity purposes in connection with the campaign for the sale of such bonds.) Internal Revenue Stamps. (If necessary to copy a legal document on which there is a canceled revenue stamp, this may be done, provided the reproduction of the document is performed for legal purposes.) Postage Stamps, canceled or uncanceled.
Notices It’s Illegal . . . in Canada Parliament, by statute, has forbidden the copying of the following subjects under certain circumstances. Penalties of fines or imprisonment may be imposed on those guilty of making such copies. 1. Current bank notes or current paper money. 2. Obligations or securities of a government or bank. 3. Exchequer bill paper or revenue paper. 4. The public seal of Canada or of a province, or the seal of a public body or authority in Canada, or of a court of law. 5.
Notices Environmental Notices . . . in Canada Terra Choice Environmental Services, Inc. of Canada has verified that this Xerox product conforms to all applicable Environmental Choice EcoLogo requirements for minimized impact to the environment. Environment Canada established the Environmental Choice program in 1988 to help consumers identify environmentally responsible products and services.
Safety Notes Safety Notes R3 This copier/printer and the recommended maintenance supplies have been designed and tested to meet strict safety requirements. Attention to the following notes will ensure the continued safe operation of your copier/printer. Electrical safety ● ● ● Use only the power cord supplied with this equipment. Plug the power cord directly into a correctly grounded electrical outlet. Do not use an extension cord.
Safety Notes Laser safety CAUTION: Use of controls, adjustments, or procedures other than those specified in this documentation may result in a hazardous exposure to laser radiation. This equipment complies with international safety standards. With specific regard to laser safety, the equipment complies with performance standards for laser products set by government, national, and international agencies as a Class 1 laser product.
Safety Notes ● may overheat. Do not attempt to override any electrical or mechanical interlock devices. WARNING: Be careful when working in areas identified with this warning symbol. These areas may be very hot and could cause personal injury. If you need any additional safety information concerning the machine or materials, contact your Xerox representative. Ozone safety This product produces ozone during normal operation. The ozone is heavier than air, and the quantity is dependent on copy volume.