User Guide P.O. Box 9604-7994 Webster, N.Y.
ENERGY STAR As an ENERGY STAR® Partner, Xerox Corporation has determined that this product meets the ENERGY STAR® guidelines for energy efficiency. © 2/2000 by Xerox Corporation. All rights reserved.
Customer Support Congratulations on acquiring your Xerox WorkCentre Pro 215. The Xerox Welcome Center is available to you if you need assistance. Fill in the required information below so it is available when calling for service. • Customer Account Number: ____________________________ • Machine Type: WorkCentre Pro 215 • Machine serial number: UU4 and the __ __ __ __ __ __. (Product Code) (Serial number) The serial number is located on the back cover of the Pro 215, to the left of the power cord.
Supplies For customers on the supplies included plan (also know as the metered plan or the cost per copy plan), please use the following: Toner Cartridge: 6R987 Drum Cartridge: 13R573 In the U.S.A. call 1-800-599-2198 In Canada call 1-800-668-0199 (English) 1-800-668-0133 (French) For customers who purchase supplies directly from Xerox Corporation, please order the following: Toner Cartridge: 6R988 Drum Cartridge: 13R573 In the U.S.A.
FCC Compliance in the USA WARNING: This equipment has been tested and found to comply with the limits for a Class B digital device, pursuant to Part 15 of the FCC Rules. These limits are designed to provide reasonable protection against harmful interference in a residential installation. This equipment generates, uses and can radiate radio frequency energy and, if not installed and used in accordance with the instructions, may cause harmful interference to radio communications.
Table of Contents Safety Notes…………………………………………………………………………………………….….1 Helpful Hints……………………………………………………………………………………………….4 Getting to Know Your Pro 215………………………………………………………………………….5 Installation………………………………………………………………………………………………….6 Control Panel……………………………………………………………………………………………..10 Power Reduction / Auto Clear…………………………………………………………………………12 Auto Copy Function……………………………………………………………………………………..12 Paper Specifications…………………………………………………………………………………….13 Loading Paper……………………………………………………………………………………….
Table of Contents Pro 215 Properties (Printer Driver)……………………………………………………………………43 Displaying the Driver Properties dialog from an application……………...…………………43 Displaying the Properties dialog from the Start Menu…………………….…………………44 Displaying the Properties dialog from the Xerox Printer Services Program (Status Monitor)……………………...……………………………………………………………………44 Properties Tabs…………………………………………………………………………………..45 On-Line Help……………..……………………………………………………………….………45 Printer Driver Help …………………………………..………………..…………………….
Safety Notes Your Pro 215 and supplies have been designed and tested to meet strict safety requirements. These include safety agency examination and approval, and compliance to established environmental standards. Please read the following instructions carefully before operating the Pro 215 and refer to them as needed to ensure the continued safe operation of your Pro 215. Follow all warnings and instructions marked on or supplied with the product.
Safety Notes This Pro 215 should be operated from the type of power source indicated on the marking label. If you are not sure of the type of power available, consult your local power company. Do not allow anything to rest on the power cord. Do not locate the Pro 215 where persons will step on the cord. The power supply cord is the disconnect device for this equipment. Insure that installation is near the outlet and is easily accessible.
Safety Notes Do not touch the green photoreceptor. Scratches or smudges that appear on the photoreceptor will result in poor copy quality and may shorten the service life. Do not put your hands into the fuser area, as you may be burned. Ozone: This product produces ozone during normal operation. The ozone produced is dependent on copy volume and is heavier than air.
Helpful Hints Care of your WorkCentre Pro 215 • Do not place heavy objects on any surface of the WorkCentre Pro 215. • Take care not to place liquids on or near the WorkCentre Pro 215. • Avoid placing clips or staples on any WorkCentre Pro 215 surface. Maintenance • Clean the Document Glass daily and as required. • Do not apply cleaning liquids or sprays directly to the WorkCentre Pro 215; apply to the cloth first. • Store paper in a dry area, on a flat surface, and in a closed cabinet.
Getting to Know Your Pro 215 Original exit area Document cover Original guides Original feeder tray Automatic Document Feeder (ADF) Control panel Document glass Exit tray Paper tray 1 Alternate paper tray paper guides Paper tray 2 Front cover Alternate Paper Tray Release latch Side cover Exit tray USB port Parallel port Lift area Serial number Power connection Power switch 5
Installation As you unpack the Pro 215, familiarize yourself with its contents. After the Pro 215 is installed, and the Ready Indicator is lit, the Pro 215 is ready to make copies. Packing material Power cord User Guide Installation Instruction CD IEEE-1284 Parallel Cable * Drum cartridge (installed in the machine) Starter toner Cartridge (2000 copies) * Note: To ensure reliability of the Pro 215 use the IEEE-1284 compliant parallel cable that is supplied with the machine.
Installation (continued) Follow the steps below to properly set up your Xerox Pro 215. 1. Remove the bag from the Pro 215. 2. Remove the pieces of tape and the packing material. Remove the tape and the packing material supporting the clear plastic 2-sided tray. 3. To ensure the 2-sided tray is in the correct position, gently push it in the direction shown by the arrow. 4. Open the Automatic Document Feeder (ADF) and remove the packing materials shown. 5.
Installation (continued) 7. Secure the paper tray button and the shipping screw in the locations shown. • Turn the paper tray button to secure its storage position. Note: Save the paper tray button and the shipping screw. They will be needed if the Pro 215 has to be moved. 8. Load paper into the tray. • Refer to the Loading Paper section for additional information. • Do not fill above the max line. 9. Push the paper tray firmly back into the Pro 215. Note: Ensure that the alternate paper tray is lowered.
Installation (continued) 14. Remove the starter toner cartridge from the silver bag. Vigorously shake the cartridge to loosen the toner. • Thoroughly shaking the cartridge will assure maximum copies per cartridge. • Xerox has included a Starter Toner Cartridge. This cartridge will last approximately 2000 copies. Purchased replacement toner cartridges will yield approximately 7500 copies. 15. Remove the toner cartridge cover. 16. Slide the toner cartridge into the Pro 215 until it locks into place. 17.
Control Panel 1 2 3 4 5 6 7 8 9 10 11 12 13 14 15 16 17 The control panel has keys and lights that are used to control and display the conditions of the Pro 215. 1. 1-Sided/2-Sided Mode: Use the 2-Sided copy feature to make one or two-sided copies from one or two-sided originals. Refer to the Making Copies on the Automatic Document Feeder section for detailed information. 2. Image Quality Mode: The image quality mode is used to maximize copy quality.
Control Panel 10. Pro 215 Diagram: Helps you locate areas that require your attention. The indicators will flash in the area requiring attention. For additional information refer to the Problem Solving section. 11. Paper Supply Selection: Press to change the selected paper supply. The selected paper supply location will be indicated by a green light on the Pro 215 diagram. 12. ADF Misfeed Indicator: This indicator will light when a misfeed occurs in the ADF. 13.
Power Reduction / Auto Clear Power Reduction Modes automatically reduce power consumed by the Pro 215 when the Pro 215 has not been used for a set period of time. There are two modes of power reduction; Power Save, and Power Shut-off. Power Save Mode – The Ready Indicator will flash and the other indicators will remain on. To copy from the Power Save mode select the desired features and press Start. The copies will be made automatically.
Paper Specifications Paper Storage Note: Paper affected by humidity, and curled paper can cause jams and copy quality problems. For reliable copier operation and good copy quality, Xerox recommends that paper be stored: • on a flat surface. • in a closed container. • in a low humidity area. • tightly wrapped, if the ream is partially used. The Specifications Chart below provides information about the types of paper that can be used at each of the paper input areas.
Loading Paper will flash in the copy quantity display and the green indicator in the copier diagram will flash when: • a paper tray is empty. • paper misfeeds: paper has not fed all the way into the copier. • a paper tray is not closed properly. If the paper has misfed, open the paper tray indicated by the flashing green light on the copier diagram and remove the misfed paper. • Do not reuse the misfed paper. • Ensure that the paper is under the corner snubbers. • Close the paper tray.
Loading Paper 4. Fan the paper and insert it into the tray. • Ensure that the paper corners are under the corner snubbers. • Do not fill above the max fill line. 5. Close the paper tray. 6. If copying, press Start to continue. If printing, the job will automatically resume. • To cancel the flashing P without restarting copying, press the Clear button.
Making Copies on the Document Glass 1. Ensure that the Pro 215 is Off-line. • The light between the two icons will be off. 2. Select the desired copy features from the control panel. 3. Select the number of copies. • Press the 10 to increase the quantity by 10. Press the 1 key to increase the quantity by 1. • To clear the selected quantity, press the Clear key. 4. Lift the Document Cover. 5. Place the original face down and align it with the registration guide on the document glass. 6.
Making Copies on the Automatic Document Feeder The Automatic Document Feeder (ADF) allows you to automatically make single-sided or two-sided copies. The ADF holds up to 30 originals (20 lb/80 gsm). Ensure originals are in good condition, and that all staples and paper clips have been removed. Use the document glass to make copies from transparencies, facsimile paper, or originals having other unusual characteristics.
Making Copies on the Automatic Document Feeder The available copy options are: Icon Original Copy Max Quantity Two-sided Single sided 100 sets Two-sided Two-sided 1 set Single sided Two-sided 1 set Single sided Single sided 100 sets Single sided original to single sided copies (1è 1) This mode will create single sided copies from your originals. 1. Place the originals face up in the ADF. 2. Select the icon and any additional features and the desired quantity. 3.
Making Copies on the Automatic Document Feeder Single sided originals to two-sided copies (1è 2) This mode will create two-sided copies from your single sided originals. 1. 2. 3. Place the originals face up in the ADF. Select the icon and any additional features. • The maximum copy quantity is 1. Reinsert the originals into the ADF for each set required. Press Start to begin copying. The Pro 215 will produce one set of two-sided copies.
Manual Two-Sided Copying Important Tip: The Pro 215 has been configured to copy onto 8.5×11/A4 paper. When copying onto any other paper size the image may not be placed properly. The default paper size for both paper trays is 8.5×11/A4. You may want to change the default setting for one or both of the trays if you find the factory settings do not meet your needs. Refer to Customizing Your Pro 215 for information about changing the default paper size. 1.
Image Quality The image quality features described on this page can be used to improve copies of documents printed on colored paper, photographs, or are of poor quality. Toner Saver Photo Text Auto Auto: Use Auto when copying from originals with a colored background or mixed text and graphics. Note: When Auto is selected, the copier automatically varies the contrast of your copies. Lighter/Darker settings are not available. Text: Use Text to copy documents containing mostly text.
Reduction/Enlargement Preset Reduction/Enlargement Press the Preset Reduction/Enlargement key to quickly select one of the 6 preset percentages. The customer settable percentage ( ) has been set at the factory for 50%. Refer to Customizing Your Pro 215 for information about changing the default percentage. Variable Percentage Press the Variable Percentage key to increase or decrease the reduction or enlargement by 1% increments. You may select any percentage from 50 – 200%.
Alternate Paper Tray The alternate paper tray can be used to feed multiple sheets of standard paper, or it can be used to feed single sheets of special or heavy papers such as note cards, transparencies, and labels. The alternate paper tray holds up to 50 sheets of 20 lb/ 80 gsm paper ranging in size from 3.5×5.5" to 8.5×14"/ A6 to 216×356mm. Load special stock as follows: Predrilled paper: holes toward the rear of the copier. Letterhead paper: face down with the top toward the left.
Envelopes Various types and sizes of envelopes can be printed/copied on the Pro 215 using the alternate paper tray. Selecting Envelopes The construction of envelopes is critical to printing performance and varies widely. Use high-quality envelopes that are thin and sharply creased. Test a few envelopes before you purchase large quantities. Sizes: Minimum: 3 x 5” / 76 x 127mm Maximum 8.5 x 14” / 216 x 356mm Hints: Try to avoid printing over the area where the envelope’s three back flaps meet.
Customizing Your Pro 215 Programmable Features The default settings for various machine features may be changed to suit your individual needs. All of these features remain set until this process is repeated. Each of the programmable features, along with its program number and options are contained in the chart below. The procedure to change the default settings follows the chart. Note: The procedures written in this manual are based on the factory default settings.
Feature Program Number Auto Contrast Adjustment: The copy contrast range may be adjusted when the copy image is consistently too light or too dark in the Auto Image Quality mode. 6 0 – Lightest 1 – Lighter 2 – Normal * 3 – Darker 4 – Darkest Paper Trail Edge Deletion: The trail edge deletion can be turned Off to accommodate originals that have print to the very bottom edge. When Off, another 4 mm will copy, however the image quality may deteriorate as it gets closer to the bottom edge.
Feature Program Number Default 1-sided/2-sided Mode: This feature allows you to select the default copy mode. 17 Top paper tray default: This feature allows you to select the default copy paper size for the upper paper tray. 18 Lower paper tray default: This feature allows you to select the default copy paper size for the lower paper tray. 19 Printer configuration list: This feature allows you to print out printer configuration.
Programmable Feature Settings 0 – 9 and 11 – 21 To change the programmable features, find the Program Number and the desired Option Number in the Programmable features chart on the previous pages. Follow the instructions below. Note: The Pro 215 must be off-line and in the Ready mode. 1. Select the Toner Saver mode. 2. Press again and hold the Image Quality key for approximately 4 to 6 seconds. • The light next to Auto mode will light. • The lights within the Pro 215 Diagram will flash. 3.
Programmable Feature Setting 10 Use the following procedure to change the preset Reduction/Enlargement default setting ( ). This feature allows you to set a specific preset reduction or enlargement between 50 – 200%. 1. Select the Toner Saver mode. 2. Press again and hold the Image Quality key for approximately 4 to 6 seconds. • The light next to Auto mode will light. • The lights within the Pro 215 Diagram will flash. 3. Press the 10 key until the number 10 is displayed. 4. Press Start.
Pro 215 Care Cleaning the Document Glass and Cover Keeping the document glass clean helps ensure the best possible copies. Xerox suggests that you clean the document glass at the start of each day and during the day as needed. CAUTION: Do not pour or spray water directly onto any part of the copier. 1. Slightly dampen a soft lint-free cloth or paper towel with water. 2. Wipe the surface of the document glass and the narrow glass adjacent to the document glass until it is clean and dry. 3.
Automatic Document Feeder Misfeed When a misfeed occurs in the feeder, the red ADF misfeed indicator flashes on the Copier Diagram, and an A1 or A2 status code will flash in the display window. The status code indicates the number of originals that must be returned to the feeder after clearing the misfeed. A1 status code- refeed the last original. A2 status code- refeed the last 2 originals. This code will disappear when copying is resumed or the clear key is pressed.
– E2 Clearing the Paper Path When a paper misfeed occurs the red misfeed indicator flashes on the copier diagram, and an E2 status code will flash in the display window. Paper misfeeds may occur in the areas shown below. Follow the steps below to locate and clear the misfeed. Fuser Area Exit Area Paper Feed Area Paper Feed Area Note: Ensure that the alternate paper tray is lowered. 1. Press the release lever to open the side cover. Caution: Do not touch the shiny drum cartridge surface.
– E2 Clearing the Paper Path (continued) Fuser Area Warning: The fuser area is hot. Take care when removing paper from the fuser area. Note: Ensure that the alternate paper tray is lowered. 1. Press the release lever to open the side cover. 2. Pull down on the fuser lever. • This will release pressure on the paper. f If paper is not seen in this area skip to the Exit Area. Caution: Do not pull paper up through the fusing unit. Unfused toner may adhere in the area, resulting in smudged copies. 3.
– E2 Clearing the Paper Path (continued) Exit Area Note: Ensure that the alternate paper tray is lowered. 1. Press the release lever to open the side cover. 2. Press the front cover release buttons to open the front cover. 3. Pull down on the fuser lever. • This will release pressure on the paper. 4. Turn the knob in the direction of the arrow to move the paper to the exit area. 5. Gently pull the paper out through the exit area. 6. Push up on the fuser lever. 7. Close the front cover and side cover.
Toner Cartridge Replacement The toner indicator on the copier diagram will light when the toner supply is low. Approximately 10 more copies can be made, but you should have a replacement cartridge in stock. When the J1 status code is displayed, the machine will stop operating until the toner cartridge is replaced. Note: Ensure that the alternate paper tray is lowered. 1. Press the release lever to open the side cover. 2. Press the front cover release buttons to open the front cover. 3.
Toner Cartridge Yield The main factor affecting toner cartridge yield is the printed area of a document. The graph is a sample representation of how the number of copies per cartridge decreases as the printed area increases. • Other factors which can affect the toner cartridge yield are: • The size of the document being copied. • Dark backgrounds. • Leaving the platen cover open. • The number of times the copier is switched on and off.
J2 Drum Cartridge Replacement The useful life of the drum cartridge is approximately 18,000 copies. The drum cartridge indicator on the machine diagram lights when the drum is near the end of life. Approximately 1,000 more copies can be made, but you should have a replacement cartridge in stock. When the J2 Status Code is displayed, the machine will stop operating until the drum cartridge is replaced. Note: Ensure that the alternate paper tray is lowered. 1.
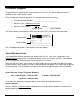
Counter access Total copies/prints remaining on the drum cartridge This counter displays the total number of copies/prints remaining on the drum in the machine. The count can be used to determine when to reorder a new drum cartridge. The count will be displayed in the display window as a sequence of 23 digit values. Example 1: 10,145 copies/prints will be displayed as 010 followed by 145 Example 2: 361 copies/prints will be displayed as 000 followed by 361 1. Select the Toner Saver mode. 2.
Printer Driver Software Installation The printer driver software is the program that runs the printer. It converts the data in the file you want to print into information that the printer can understand. It also controls communication between the printer and computer as the data is printed. You will need the following PC hardware and software in order to use the printer driver: Computer type IBM PC/AT or Compatible Computer Operating system Windows 95/98 Windows NT 4.
Installation Notes: The Printer Driver Installation software cannot be installed using the Add Printer Wizard. Please use one of the following methods depending on your operating system. IEEE 1284 Parallel Connection 1. Ensure that the computer and the Pro 215 are turned off. 2. Plug the IEEE-1284 cable into the parallel port on the Pro 215. 3. Plug the other end of the IEEE-1284 cable into the computer. 4. Ensure that the power cord is plugged into the Pro 215 and then into a grounded outlet.
Installation for Windows 95 or NT 4.0 (continued from step 7) 8. Click on the Start button and then choose the Run menu option. 9. Type D:\SETUP (or the appropriate drive letter depending on your CD-ROM Drive) in the command line box. Click on the OK button to proceed. 10. Turn on the Pro 215. 11. Follow the on-screen instructions. • If you wish to print a test page, ensure paper is loaded and then click the Yes button. Plug-n-Play (PnP) Printer Driver Installation 1.
Memory Upgrade The WorkCentre Pro 215 comes standard with 8 megabytes (MB) of random access memory (RAM). Industry standard Memory Modules are available allowing your machine to be upgraded to a maximum of 72 MB of RAM. Description Recommendation Type EDO-DIMM Package 168-pin Dimensions Height Width 42 1” 5.25” Access Time 60 nanoseconds Voltage 3.
Pro 215 Properties (Printer Driver) The purpose of this section is to provide information about how to access and use the options in the WorkCentre Pro PCL Series Printer Driver Properties dialog. Use the WorkCentre Pro PCL Properties dialog to change the settings used for printing for both PCL 5e and PCL 6 drivers.
Pro 215 Properties (Printer Driver) Displaying the Properties dialog from the Start Menu Windows 95/98 and NT 1. On the Start Menu, click Settings. On the Settings submenu, click Printers. 2. Right click on the XEROX WorkCentre Pro PCL Series printer icon and click Properties, or click Properties from the File menu. Displaying the Properties dialog from the Xerox Printer Services Program (Status Monitor) Windows 95/98 and NT 1. Click on the Properties button in the Xerox Printer Services window.
Pro 215 Properties (Printer Driver) Properties Tabs The WorkCentre Pro PCL Series Printer Driver Properties dialog contains four tabs from which you can make selections that best suit your printing requirements. Below is a brief description of each tab. Note: Refer to On-line Help for detailed information.
PCL Printer Driver Features Setting Usage/Description PCL 6 PCL 5e Number of copies Select 1-99 copies x x Page orientation Select Portrait or Landscape x x Duplex printing Print on both sides of sheet x x Paper size Select from supported paper sizes (See Technical Data) x x Custom size Identify custom sizes x Paper source Select printing from multipurpose paper feeder or manual feeder x x Resolution Select 300 or 600 dpi print resolution x x Graphic quality Select enhancemen
Creating Pro 215 Floppy Disk Installation Diskettes If floppy diskettes are required to install the WorkCentre Printer Driver Software, the user can create a set of diskettes from CD-ROM. To create a set of WorkCentre Pro Series Printer Driver floppy Diskettes, find a PC that has a floppy diskette drive with a CD-ROM drive and follow the procedure below. Four or five blank high density diskettes will be required. For Windows: 1. Insert the WorkCentre CD into the CD-ROM Drive. 2.
Enabling High Speed Printer Communications Your Xerox WorkCentre Pro Series Digital Copier/Printer has been designed to provide excellent copy and print quality with high productivity. To ensure the highest print performance, the Xerox WorkCentre Pro Series Digital Copier/Printer was designed to take advantage of high speed parallel port communications between your personal computer and your Xerox WorkCentre Pro Series Digital Copier/Printer.
Problem Solving Problem Solving Chart The following chart lists some conditions that may occur and the recommended solutions. Follow the suggested solutions until the problem is corrected. Refer to the Status Code Chart in this section for status code information. If the problem persists, please refer to the Information section for the appropriate telephone numbers. Condition Suggested solutions Ready indicator does not light. Check that the Pro 215 is plugged into an electrical receptacle.
Condition 50 Suggested solutions Image rubs off the copy easily. Ensure the unit is plugged directly into the wall, not into a power strip. Ensure the fuser pins have been removed. Replace the paper in the tray with paper from a new package. In high humidity areas do not leave paper in the Pro 215 for extended periods of time. Frequent copy paper jams. Ensure the fuser pins have been removed. Fan the stack of paper, then turn it over in the tray. Replace paper in paper tray with a fresh supply.
Problem Solving Status Code Chart Status Code Suggested Solution Ensure that there is paper in the selected paper tray. Ensure that the Paper Tray is closed properly. Paper may not have fed all the way into the Pro 215. (Refer to Loading Paper and Flashing P.) E2 Copy paper has misfed. (Refer to Clearing the Paper Path.) J1 The toner indicator on the copier diagram will light when the toner supply is low. Approximately 10 more copies can be made, but you should have a replacement cartridge in stock.
Problem Solving Printing Solution Chart Problem The Pro 215 does not print Half of the page is blank 52 Probable Cause Remedy The IEEE-1284 Parallel cable or USB cable is not connected properly. Check the cable connection. The IEEE-1284 parallel cable or USB cable is defective. Check the cable with a computer and printer that work. If printing is still not possible, replace the cable. The port setting is incorrect.
Problem Printing is too slow Probable Cause Remedy The computer parallel port may not be set for high speed communications. If your computer is equipped with an ECP parallel port, enable this mode of operation. Refer to the Enabling High Speed Printer Communications section and your computers user guide. If using Windows 95, the spool setting may be set incorrectly. Point to the Start Task bar and then click Settings then Printers. Click the Xerox WorkCentre Pro 215 with the right mouse button.
Problem Probable Cause Remedy Printing over uneven surfaces. If printing onto envelopes, change your printing layout to avoid printing over areas that have overlapping seams on the reverse side. Missing characters The paper may be too damp. Try printing with a different batch of paper. Do not open packages of paper until necessary so that the paper does not absorb too much moisture from the air. Back of printout is dirty The transfer roller may be dirty.
Technical Data Original Size: Maximum 10×14" / B4 Copy Ratio Percentages:1:1 ± 1% Preset: Zoom: 50%*, 78%, 86%,100%,129%, 200% customer programmable 50% – 200% Paper Size and Weight Tray 1 and Tray 2 5.5×8.5 to 8.5×14"/ A5 to 216×356mm 15 - 24 lb / 56 - 90 gsm Paper Tray Bypass 3.5×5.5" to 8.5×14"/ A6 to 216×356mm 14 – 34 lb / 52 – 130 gsm Copy Rate (8.5×11" / A4 and smaller) 15 copies/minute Print Rate (8.