
User's Manual


Scanning and Configuring OneTouch
Xerox
®
DocuMate
®
4799
User’s Guide
6-87
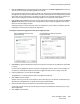
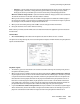
6. Select the scan configuration you want to use for scanning in the Select configuration list.
Click on the Edit button to open the Scan Configuration Properties window to configure any destination
specific scanning options.
Each destination that has per-scan configuration properties will be represented by its configuration tab in
the OneTouch Scan Configuration Properties window. Please refer to the destination instructions, as
described in the previous section(s), for configuring destination specific options.
Click on OK when you are done making changes in this window.
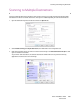
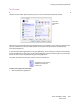
7. Click on OK on the OneTouch Properties window.
8. Load the document(s) in the scanner and start scanning with the button you set to scan to multiple
destinations.
The scanner starts scanning and when finished, the image is sent to each destination you selected in the
OneTouch Properties window.
Tech nical Note
•The Still Image Client destination cannot be used with multiple destination scanning. This destination will
be disabled when the Enable scanning to multiple destinations is selected.
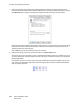
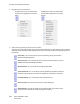
Scanning with Job Separation
Use job separation to have OneTouch create a new file each time a separator is detected when scanning a
multiple page batch. For example, if you want to scan financial statements from several different banks, you can
place a stack of statements in the scanner and OneTouch will separate each statement into a different file based
on your selected job separator.
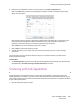
1. Open the OneTouch Properties window.