© Copyright 1999, EXI Wireless Systems Inc. All rights reserved.
EXI HALO User Manual Halo User Manual R4 User Manual Revision 4 June 1999 © Copyright 1999, EXI Wireless Systems Inc. All rights reserved. HALO is a trade mark of EXI Wireless Systems Inc. Windows and Windows 98 are trade marks of Microsoft Inc. EXI Wireless Systems Inc.
EXI HALO User Manual Halo User Manual R4 Table of Contents P 1. LIMITED WARRANTY ........................................................................................................................ 5 P 2. SYSTEM MAINTENANCE .................................................................................................................. 5 P 3. INTENDED AUDIENCE ....................................................................................................................... 6 P 4. SCOPE...
EXI HALO User Manual Halo User Manual R4 NOTICE: This equipment has been tested and found to comply with the limits of a class B digital device, pursuant to Part 15 of the FCC rules. These limits are designed to provide reasonable protection against harmful interference in a residential installation. This equipment generates, uses and can radiate radio frequency energy and, if not installed and used in accordance with the instructions, may cause harmful interference to radio communications.
EXI HALO User Manual Halo User Manual R4 P 1. Limited Warranty EXI Wireless Systems Inc.
EXI HALO User Manual Halo User Manual R4 HALO is designed to assist staff in providing a higher degree of safety for patients. It is not intended as the sole means of protection in preventing a wanderer or infant from leaving the premises. Regular checks to verify that your HALO system is operational is highly recommended. SYSTEM MAINTENANCE SHOULD INCLUDE THE FOLLOWING STEPS: All Tags should be checked for physical damage after each cleaning, disinfecting or sterilization procedure.
EXI HALO User Manual Halo User Manual R4 P 5. About Halo Infant Protection System Halo is a premium infant protection system. Halo works in conjunction with the EXI P-tag patient transponder that is capable of sensing if it has been removed from the infant. Halo is an electronic system, which, in conjunction with staff diligence, creates a secure perimeter to deter infant abductions. Halo will detect if an infant is near a controlled exit and invoke countermeasures.
EXI HALO User Manual Halo User Manual R4 P 7. System Conventions Each user in the system has a unique identity (username) and password. The Supervisor assigns both the username and password. It is suggested that both be kept between 4-8 characters to provide sufficient security and allow users to easily enter and remember their system access codes. For example: A user named Barbara Smith would have a username such as bsmith or barbs. Note that that each user should have a unique name.
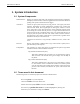
EXI HALO User Manual Halo User Manual R4 1. System Introduction 1.1. System Components HALO Software: Primary user interface that assist in the assignment and tracking of Transponders, and displays alarms and other activities in graphical format. Also stores and allows printing of all system events that have been logged. Controllers: Controls an egress point and reports any Tag presence at the egress point to the computer.
EXI HALO User Manual Halo User Manual R4 Names of dialog boxes, screens, and field titles in forms are bolded. For example, The Admit Patient dialog box is displayed. Names of buttons are bolded. For example, Click the tags button. 1.3. Computer Display Conventions The computer displays various types of information, which is color coded to differentiate between the Dealer, Supervisor and User modes.
EXI HALO User Manual Halo User Manual R4 2. User Level The Halo system provides a simple, intuitive user interface. After each step, the system will automatically take you to the next until the task is complete. 2.1. Admitting a Patient 1. Select the A d m i tt PP aa -- button on the top right of the screen. Main Screen - User Level 2. The system will ask for your Username and Password. Type in your Username as assigned by your supervisor. 3. Press the EXI Wireless Systems Inc.
EXI HALO User Manual Halo User Manual R4 4. Type in your Password 5. Press 6. The system will now ask you to choose a tag. Select the Tag Serial Number corresponding to the tag you wish to use. Enter key on the keyboard, or click on the Next button Note: Each infant tag has a unique serial number on the side of the tag. The system will list all of the available tags registered in the system but not yet assigned to an infant. 7. EXI Wireless Systems Inc.
EXI HALO User Manual Halo User Manual R4 Note: During this test, the system is verifying the tag serial number, testing the tag removal alarm and generating an activity log entry to document the test. Hint: Ensure the bottom of the tag is held stable on your skin during the test for about 10 seconds prior to removing. If the test fails, try it once more on your wrist. Once the tag is verified, the system will automatically take you to the next step in the admit process. 8.
EXI HALO User Manual Halo User Manual R4 2.2. Discharging a Patient 1. Select the 2. The system will ask for your Username and Password. Type in your username as assigned by your supervisor. 3. Press the EXI Wireless Systems Inc. D i s c h a r g e P aa -- TAB button on the top right of the screen.
EXI HALO User Manual Halo User Manual R4 4. Type in your Password 5. Press the key on the keyboard, or click on the Next button. Enter 6. Select the Patient Name you wish to discharge. Select Next. 7. The system will redisplay the Infant Name for you to verify. Select Finish if this is the correct infant. If it is not the infant you wish to discharge, select Cancel and start from step 1 again.
EXI HALO User Manual Halo User Manual R4 2.3.
EXI HALO User Manual Halo User Manual R4 2.3.1. Silencing an alarm To silence the audible alarm, select Silence in the alarm acceptance area. Note: You must accept the alarm to clear the alarm condition. Silencing simply silences the audible alarm while the incident is investigated. 2.3.2. Accepting an alarm To accept an alarm, select the alarm condition in the active alarms field. If only one alarm exists, it will automatically be selected. 1. Type in your Username 2. Press 3.
EXI HALO User Manual Halo User Manual R4 The system will log the following incident details: • Alarm type (tag removal or egress alarm) • Infant name • Tag number • Time • ID of staff member accepting the alarm • Staff member notes on alarm incident The Halo system is usually set up to create multiple detections of an alarm for security purposes. When multiple system devices see the same tag in alarm, the system will condense this into one incident for the staff member to accept.
EXI HALO User Manual Halo User Manual R4 3. Supervisor Level 3.1. Accessing Supervisor Level 1. Press the and Alt L keys on the keyboard simultaneously. 2. The system will ask for your Username and Password. 3. Enter you Username 4. Press the 5. Enter your Password 6. Select OK. The Supervisor screen will appear as shown below. TAB key on the keyboard Supervisor Tabs EXI Wireless Systems Inc.
EXI HALO User Manual Halo User Manual R4 Once in Supervisor mode, three Supervisor function tabs appear: • Activity • Tags • Users Supervisor Level Functions Supervisor tab Activity Access Supervisor only Tags Supervisor only Users Supervisor only Functions View activity logs Annotate activity logs Print logs Add or delete tags View registered tag list Disable a tag Unassign a tag Edit patient information for tag View current infant population Add or delete a user Disable or Activate a user Ch
EXI HALO User Manual Halo User Manual R4 4. Activity Log Management 4.1. Activity Logs The system allows supervisors the ability to search the historical activity log in the system.
EXI HALO User Manual Halo User Manual R4 The activity log screen will display: • The time and day of activity • The type of activity • Description of the activity • The user name associated with the activity • The user notes. 4.2. Navigating the activity log To find a particular activity event, first navigate to the day of interest by selecting the “Day” buttons. To step one day back, select To step one day forward, select The date you are viewing will appear in the leftmost column. 4.3.
EXI HALO User Manual Halo User Manual R4 4.4. Backing up Activity Logs The system is capable of storing 14,000 events in the Activity Logs. Remember that all system activities, including alarm conditions, pre-alarm conditions, door access and bypass activity are logged. After the 14,000 events are captured, subsequent events displace the first log in the list. That is, events are purged on a first-in first-out basis after the 14,000 limit is reached.
EXI HALO User Manual Halo User Manual R4 5. Managing Tags 5.1. Tags Your system requires each infant to wear a P-Tag. You should have a fleet of tags on hand that exceeds your peak demand. Each tag has a unique serial number that is on the side of the tag. The tag management tab allows a Supervisor to: • Add new tags to the system • Delete tags from the system • View the existing tag fleet and edit the properties of each • Disable or Unassign a tag • Edit patient information for an assigned tag.
EXI HALO User Manual Halo User Manual R4 5.2. Adding a new P-Tag to the system To add a new P-Tag to the system, you must first navigate to the Tags screen in Supervisor level area. You may add P-Tag’s manually or by using the Halo network to read them. To add manually: 1. Select 2. Select 3. Enter in the serial number of the new tag 4. Select OK To use the system to read the tags in: 1. Select 2. Select the nearest device in the system from the list shown on the left of the “Add Tags” panel.
EXI HALO User Manual Halo User Manual R4 5.3. Deleting a P-Tag from the system To delete a P-Tag, you must first navigate to the Tags screen in Supervisor level. Tags Screen - Supervisor Level To delete a tag: 1. Select the tag you wish to delete by navigating the mouse pointer anywhere on the line corresponding to the tag on the screen. Note: The line will change color when you have selected it (See example above) 2. Select EXI Wireless Systems Inc.
EXI HALO User Manual Halo User Manual R4 5.4. Disabling a P-Tag To disable a P-Tag, you must first navigate to the Tags screen in Supervisor level. Note: You may only disable tags that are currently assigned to an infant. To temporarily disable a P-Tag in the system: 1. Select the tag to be disabled by navigating the mouse pointer anywhere on the line corresponding to the tag on the screen. 2. Select Note: The tag disabling allows for removal of the tag from the infant without an alarm.
EXI HALO User Manual Halo User Manual R4 5.6. Editing a P-Tag Record A P-Tag record may be edited if the tag is assigned to a patient. The edit function allows a Supervisor to edit the name associated with the tag serial number. To edit a P-Tag record you must be in the Tags area in the Supervisor level. To edit a P-Tag parameter listing: 1. Select the tag to be edited by navigating the mouse pointer anywhere on the line corresponding to the tag on the screen. 2.
EXI HALO User Manual Halo User Manual R4 6. Managing System Users As a supervisor, you control who has access to the system. Every activity in the system requires a username and password that is assigned and entered into the system by a supervisor. To manage users, you must have accessed the Supervisor level of the system (See section 4.1) Select Users in the top left-hand corner of the screen using the mouse.
EXI HALO User Manual Halo User Manual R4 6.1. Adding a new user to the system To add a new user, you must first navigate to the Users screen in Supervisor level. 1. Select 2. The system will then ask you to enter in a username, password and real name. 3. Enter in the username you wish to assign to the user, followed by the 4. Press the 5. Enter in the password assigned to the new user 6. Press the 7. Enter in the common name for the user (usually their full name) 8.
EXI HALO User Manual Halo User Manual R4 6.2. Deleting a user from the system To delete a user from the system, you must first navigate to the user area in the Supervisor level. 1. Select the user you wish to delete by clicking anywhere on the line corresponding to the user on the screen 2. Select Caution!: Ensure you have selected the correct user prior to selecting delete. This step cannot be undone. 6.3.
EXI HALO User Manual Halo User Manual R4 7. Shutting and Restarting the System 7.1. Shutting down If you wish to shut down the system, you must first enter the Supervisor level (See Section 2.1). Once in Supervisor level, Press the and keys on the keyboard simultaneously. Q Alt Caution!: Once you have exited the software, the system will no longer log events. The door units will remain active and lock the exit doors if your system is designed to do so.
EXI HALO User Manual EXI Wireless Systems Inc. Halo User Manual R4 © Copyright 1999, EXI Wireless Systems Inc. All rights reserved.