XOPIZZA4 WOOD FIRED PIZZA/HEARTH OVEN I worked really hard on this manual so please read it.
UNDERCOUNTER When buying any XO appliance you can be confident you have chosen a high quality, innovative and stylish product from a company that cares about you! If you require service or have questions, Help is only a phone call away call: 973-403-8900 Talk to one of our undercounter experts. CONGRATULATIONS on purchasing your XO. Before you proceed, take just a moment to register your XO at: www.xoappliance.
where things are Before You Get Started Record your serial number Your safety matters Dimensions 4 - 7 Using Your Wood-Fired Oven Handy Tips Lighting and using the oven Controlling temperature More Cooking 8 - 13 TLC Cleaning and maintenance 14 Optional cart assembly Step by step instructions 15 26 - 27 FAQ’s F requently asked questions Optional accessories All The Rest Warranty Obtaining service 28 It’s for your own good... Honest.
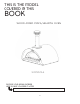
2 this is the model covered in this book WOOD-FIRED PIZZA/HEARTH OVEN XOPIZZA4 record your serial number here in case you need it later 4
your safety matters THIS APPLIANCE GENERATES EXTREME HIGH TEMPERATURES. Always use caution when lighting or using your oven. FAILURE TO FOLLOW THESE INSTRUCTIONS COULD RESULT IN SERIOUS PROPERTY DAMAGE, BODILY INJURY OR DEATH. SAVE THESE INSTRUTIONS FOR REFERENCE. CAUTION: ONLY USE THIS OVEN OUTDOORS IN A WELL VENTILATED AREA ONLY. Do not use in a garage, building, breezeway, or any other enclosed area. Keep the oven on a secure, level surface at all times.
your safety matters cont.
dimensions 34.25'' (870 mm) 5.1'' (Ø130 mm) 43.2'' (1098 mm) 20.7'' (525.4mm) 10.3'' (261.7 mm) 30.3'' (770 mm) 26.9'' (682.6 mm) 39.4'' (1000 mm) OPTIONAL XOPIZZACART1 24'' (609 mm) 1.2'' (30 mm) 12.28'' (311.8 mm) 2.76'' (70 mm) 33'' (837.7 mm) 12.67'' (321.8 mm) 2.76'' (70 mm) 28.35'' (720 mm) 39.
handy tips Some parts have a plastic film on them that protecs them during manufacture. Remove all of this protective film before any assembly or use. This will prevent it from getting trapped between parts during assembly. Failure to remove the plastic will result in it “Baking” on to the surface making it If you are having trouble removing the plastic film, warm the surface with a hair dryer. Do not use a scraper or knife as this will scratch the surface.
using the oven LOCATION: Place the oven on a flat, even, level suface away from any combustible materials. Ideally a stone or concrete surface is preferable. Consult local building and fire regulations regarding rcommended safe distancing from buildings, partitions and coverings such as pergolas and roofs. Additional parts may be required. Check for the wind direction to ensure the wind is not blowing directly into the oven. This will cause ash to blow around inside the oven and reduce temperature.
using the oven LIGHTING THE OVEN CONTINUED: 1. Place two large diameter pieces of firewood approximately 10 - 12 inches apart in the mouth of the oven pointing outward. 2. Place your tinder (i.e. wadded newspaper) between the two logs. 3. Lay a level of kindling from side to side so that it bridges the gap between the two logs on the bottom and is suspended above the newspaper tinder. There should be about 1/2” between each piece of kindling. 4.
firewood + temperature TYPES OF WOOD MATTER Hardwood comes from deciduous trees that lose their leaves in winter. These include oak, walnut, maple, beech, ash, hickory and many more varieties. The most important requirement is to use hardwood which is dry and well seasoned. If the wood is wet or green, it will be harder to light, produce more smoke and will not generate as much heat while burning. If you hear a “hissing” sound while burning, it is an indicator that the wood is still green.
temperature cont. Cooking times can also vary based on the size of and type dishes being prepared. Generally, cooking in a wood-fired oven is done by cooking the the foods that require the highest temperature and have the shortest cooking times first such as pizza. As the oven cools, other foods would follow such as grilled meats, then roasted vegetables, fish and finally breads or desserts. OPEN DOOR COOKING Open door cooking is the most common method where an active flame is present.
more cooking The XOPIZZA4 pizza/hearth oven was designed and built in Italy to cook the perfect, Italian wood-fired pizza in beautiful homes like yours. The ceramic refractory hearth stone floor of the oven can reach temperatures of 750 F in as little as 15 to 20 minutes, allowing you to create authentic pizza cooked to perfection.
a little tlc MAINTAINING YOUR XOPIZZA4 OVEN CLEANING THE EXTERIOR Clean the exterior of your oven with warm soapy water and a mild non-abrasive cleaner. Never use scrubbing pads or scrapers which can scratch and mar the finish. CLEANING THE INTERIOR Periodically check the chimney for obstructions and remove any ash or soot build up that may have accumulated in the pipe.
XOPIZZACART1 ASSEMBLY INSTRUCTIONS MANGIARE! 15
dimensions 34 1/4” 870mm 5 1/8” 130mm 19 3/32” 485mm 9 5/16” 237mm 78 7/8” 2003 10” 255mm 25 7/16” 646mm 35 5/8” 905mm 56 9/32” 1430mm 24” 610mm 30 5/16” 770mm 39 3/8” 1000mm CAUTION YOUR CART COMES WITH WHEEL BLOCKS FOR THE CASTERS WHEEL BLOCKS MUST BE USED TO PREVENT ACCIDENTAL MOVEMENT IMPORTANT: THE FINAL ASSEMBLED OVEN AND CART HAVE A COMBINED WEIGHT OF 462lbs 16
fasteners included You will need help to support the cart during assembly and team lift the oven. (16) M6 x 15 Phillips Head Screws (16) M6 x 18 Flat Washers (16) M6 Hex Nuts (26) M5 x 10 Phillips Head Screws (4) M4 x 10 Phillips Head Counter Sunk Screws (4) M4.2 x 15 Phillips Head Self Tapping Screws IMPORTANT: TIP You will also find two (2) wheel blocks to prevent the cart from accidentally moving.
building the cart Use two people to support the cart during assembly. 1. ATTACH THE FOUR (4) CASTERS TO THE BASE. Locate the base and (2) wheel supports. Align the bolt holes on the wheel supports with the bolt holes on the base. Using the M6 x 15 Phillips head screws supplied, insert (4) screws in the first corner of the base, through a wheel support - then through one of the casters. Place a flat washer onto each of the (4) screws and thread one of the M6 x 15 nuts on to hold it in place.
building the cart Use two people to support the cart during assembly. 2. ATTACH THE LEFT SIDE PANEL. (side with the sliding shelf opening) Locate the left side panel, it has a rectangular slot for the shelf. Being careful not to scratch the finish, align the bottom of the left side with the wheeled base. While one person supports it, attach the side panel to the base using (4) M5 x 10 screws. Once all (4) screws are in place - using a Phillips Head Screwdriver tighten all of the (4) screws.
building the cart Use two people to support the cart during assembly. 4. ATTACH THE RIGHT HAND SIDE Locate the right hand side, while supporting the middle shelf to avoid scratches align the cut outs on the right side and attach to the middle shelf and base using (8) M5 x 10 screws. DO NOT TIGHTEN UNTIL ALL THE SCREWS ARE IN PLACE. Make certain all the screws are tight before proceeding. 5. ATTACH THE TWO (2) TOP CROSSBARS Locate the two top crossbars - the shelf glides are already attached.
building the cart Use two people to support the cart during assembly. 6. INSTALL THE SLIDING SHELF Extend the telescoping shelf supports attached to the top rails through the square slot to expose the screw holes for attachment. Remove the protective plastic sheet from the stainless steel shelf. Align the screw holes in the telescoping shelf supports with the holes in the side of the shelf. Attach to the shelf to the supports using (4) M4 x 10 countersunk head screws.
setting the oven THE OVEN IS VERY HEAVY! TEAM LIFT TO AVOID INJURY OR DAMAGE! 7. SETTING THE OVEN WARNING - Be aware of pinch points and make place the oven safely. Remove the door and place safely out of the way before lifting. The cart has centering tabs designed to match precisely with the oven - pay close attention to these tabs during the lift and placement. 8. ATTACH THE CHIMNEY After the oven is securely in place, fit the chimney to the outlet in the top of the oven.
setting the oven THE OVEN IS VERY HEAVY! TEAM LIFT TO AVOID INJURY OR DAMAGE! 9.
the optional tool holder The Optional Tool Holder is supplied with the XOPIZZATOOL3 Set JUST TWO BRACKETS TO ATTACH The convenient tool holder is designed to screw directly to your XOPIZZACART1 and keep your large peel, small peel and brush close at hand. It even has a built-in bottle opener. The Top Bracket and Bottom Bracket each attach with two M5 x10 Phillips Head screws.
faqs QUESTION: Why does my oven produce a lot of smoke? Check to make certain the wood is not wet or green. If you hear a hissing noise while burning - that is an indicator that the wood is not dry. Do not burn softwood or birch with the bark on. Make certain that you have robust flames. Smoke is a product of incomplete combustion, builld up the fire with small dry wood and see if it clears. QUESTION: Why does the top of my pizza cook but not the crust? Pre-heat your oven longer.
optional accessories A great pizza oven needs the right tool set. The XOPIZZATOOL3 set of tools is exactly what you need to start cooking like a professional. Contains: (1) Large Pizza Peel for adding and removing pizza from the oven (1) Small Pizza Peel for rotating or moving pizza and other dishes in the oven (1) Metal Brush for clearing ash and debris from the fire away from the cooking area. (1) Handy Tool Holder Brackets designed to mount directly to the XOPIZZACART1.
THE WARRANTY Your XOPIZZA4 oven is covered by a 2 Year Parts and Labor Warranty. Should your oven require service either within warranty or beyond, call the number below or reach out to us on-line. Award-Winning Luxury Appliance Service SERVICE THAT EXCEEDS EXPECTATIONS Even the best appliances occasionally need the attention and care of a qualified service technician. At EMC Service, we see to it that service representatives and installers have much more than just a cursory glance at a service manual.