
User Manual


© XPAND, All Rights Reserved. 2 www.xpand.me
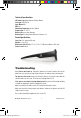
Turning On/Off Your Glasses
» Step 1 ON: Press button (1) once
» Step 2 LED light (2) will light up from off to bright
» Step 3 OFF: Press button (1) once
» Step 4 LED light (2) will light up brightly and then dim from bright to off
The glasses turn off automatically if no 3D signal from a TV or emitter is detected
for 5 minutes.
Set Your Glasses to Operate with Your 3D Device
The XPAND 3D Glasses Lite (IR) recognize your 3D device automatically.
Please note that it may take from few seconds to one minute for glasses to
synchronize with your 3D device at a very first time. After that the glasses start to
operate within a few seconds after being exposed to the same 3D IR signal.
Set Your Glasses to Operate in Dual View Mode
When the 3D device (TV, projector, etc.) is emitting a dual view image, the glasses
automatically switch to Dual View operation mode. To change the Dual View mode
between Player 1 and Player 2 view, double click on the button (1).
When double click is detected, LED light (2) indicates the eyewear mode:
Player 1: One Quick Blink
Player 2: Two Quick Blinks
Dual View not available: One Long Blink
Please note that Dual View functionality is available only with Panasonic and Philips
IR 3D TVs from 2011 or later.
Battery Low Indication
If LED light (2) is flashing with short blinks, the battery level is low. The glasses will
continue to operate normally until the battery is completely discharged.
Charging the Battery
To charge the eyewear, use the micro USB cable to connect the USB charging port
on the glasses to a powered USB port (computer or wall charger with USB compliant
output). LED (2) will stay brightly lit until charging is completed. Charging usually
takes up to two hours.
Please, fully charge the glasses prior to the first use.
Please note that the glasses can’t be used during charging.
manual-X105-IR-X1-xpand.indd 2 11/30/2012 10:28:23 AM