ET5X Enterprise Tablet Integrator Guide for Windows 10 MN-002941-03
ET5X INTEGRATOR GUIDE FOR WINDOWS 10 MN-002941-03 Rev.
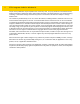
ii ET5X Integrator Guide for Windows 10 No part of this publication may be reproduced or used in any form, or by any electrical or mechanical means, without permission in writing from Zebra. This includes electronic or mechanical means, such as photocopying, recording, or information storage and retrieval systems. The material in this manual is subject to change without notice. The software is provided strictly on an “as is” basis.
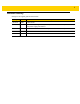
iii Revision History Changes to the original guide are listed below: Change Date Description -01 Rev A 3/2017 Initial release. -02 Rev. A 7/2017 Update battery charge times, update Expansion Back installation procedures, add new power supply part numbers. -03 Rev.A 12/2017 Remove reference to CCX V4 from specifications. Add Cold Boot procedure.
iv ET5X Integrator Guide for Windows 10
TABLE OF CONTENTS Revision History.................................................................................................................................... iii About This Guide Introduction ........................................................................................................................................... Documentation Set ......................................................................................................................... Configurations................
vi ET5X Integrator Guide for Windows 10 Insert Installation ............................................................................................................................ 2-16 Guide Installation ........................................................................................................................... 2-17 Battery Charger Installation ........................................................................................................... 2-19 Power Setup ..................
Table of Contents vii Troubleshooting ................................................................................................................................... ET5X .............................................................................................................................................. Charge Only Cradle ....................................................................................................................... Communication and Charging Cradles ..................
viii ET5X Integrator Guide for Windows 10
ABOUT THIS GUIDE Introduction This guide provides information about configuring and setting up the ET5X and accessories. NOTE Screens and windows pictured in this guide are samples and can differ from actual screens. Documentation Set The documentation set for the ET5X is divided into guides that provide information for specific user needs. • ET5X Quick Reference Guide - describes how to get the ET5X tablet up and running. • ET5X User Guide - describes how to use the ET5X tablet.
x ET5X Integrator Guide for Windows 10 Operating System Configuration Radios Display Memory Data Capture ET50NT Windows® 10 Pro WLAN: 802.11a/b/g/n WPAN: Bluetooth 10” color 4 GB RAM/ 64 GB Flash Optional SE4710 or SE4750 Expansion Backs ET55AT Windows® 10 Pro WLAN: 802.11a/b/g/n WPAN: Bluetooth WWAN: NA - LTE 10” color 4 GB RAM/ 64 GB Flash Optional SE4710 or SE4750 Expansion Backs ET55RT Windows® 10 Pro WLAN: 802.
About This Guide xi • Sequential lists (e.g., those that describe step-by-step procedures) appear as numbered lists. Related Documents and Software The following documents provide more information about the ET5X tablets. • ET5X Quick Reference Guide, p/n MN001844Axx • ET5X User Guide for Microsoft Windows 10, p/n MN-002940-xx For the latest version of this guide and all guides, go to: http://www.zebra.com/support.
xii ET5X Integrator Guide for Windows 10
CHAPTER 1 GETTING STARTED Introduction This chapter explains how to set the device up for the first time. Unpacking Carefully remove all protective material from around the ET5X and save the shipping container for later storage and shipping. Verify that you received all equipment listed below: • Table with lithium-ion battery • Quick Reference Guide. Inspect the equipment for damage. If you are missing any equipment or if you find any damaged equipment, contact the Zebra Support Center immediately.
1 - 2 ET5X Integrator Guide for Windows 10 To install a micro SIM card: 1. Press the Power button to turn off the ET55. 2. Lift the notched corner of the battery cover. Figure 1-1 Removing the Battery Cover 3. Carefully lift the battery cover off the ET55. 4. On the 8” version, push the two locking tabs up, then pull up on the tab to remove battery. On the 10” version, push the two locking tabs up (1), then, using index fingers, lift the battery up (2).
Getting Started 1 - 3 Locking Tabs 2.L IFT UP 1.R ELE AS EL OC KIN G 1.R ELE AS EL OC KIN G 2.L IFT UP Figure 1-3 5. 10” Version Removing the Battery - 10” Insert the micro SIM card with contacts facing down. 8” Version Figure 1-4 Insert SIM Card 6. Push the SIM card in and ensure that it locks into place. 7. Replace the battery. On the 10” version, ensure that the two battery latches engage.
1 - 4 ET5X Integrator Guide for Windows 10 Figure 1-5 Insert Battery CAUTION Be aware of the orientation of the battery cover. Failure to replace the battery cover properly may damage the battery cover. 8. Align the tabs on the underside of the cover with the slot around the battery well. Make sure that the notch on the battery cover is at the bottom left cover of the ET5X. Figure 1-6 9. Align Battery Cover Carefully press down around the edge of the cover.
Getting Started 1 - 5 Figure 1-7 Press Down on Battery Cover 10. Press Power button to turn on the ET55. Charging the ET5X Use the one of the available accessories to charge the ET5X. See Chapter 2, Accessories for charging accessories. The 8” tablet main battery charges from fully depleted to 90% in approximately 2.5 hours and from fully depleted to 100% in approximately 3.5 hours.
1 - 6 ET5X Integrator Guide for Windows 10 3. The device restarts. Performing a Cold Boot If the ET5X does not respond to any input, perform a cold boot: 1. Press and hold the power button for at least 10 seconds. The ET5X shuts down. 2. Press the Power button to turn on the device.
CHAPTER 2 ACCESSORIES Introduction The ET5X accessories provide a variety of product support capabilities. Table 2-1 lists the accessories available. Table 2-1 ET5X Accessories Accessory Part Number Description Cradles Charge Only Cradle CRD-ET5X-1SCG1 Charges the ET5X main battery and optional Power Pack installed in the Expansion Back. Requires power supply PWR-BGA12V50W0WW, DC line cord CBL-DC-388A1-01 and country-specific AC line cord.
2 - 2 ET5X Integrator Guide for Windows 10 Table 2-1 ET5X Accessories Accessory Part Number Description 6ORW %DWWHU\ &KDUJHU 6$& (7 ; 33. &KDUJHUV XS WR IRXU 3RZHU 3DFNV 5HTXLUHV SRZHU VXSSO\ 3:5 %*$ 9 : :: '& /LQH FRUG &%/ '& $ DQG FRXQWU\ VSHFLILF $& OLQH FRUG 5XJJHG &KDUJH &RQQHFWRU &+* (7 ; &%/ &KDUJHV WKH (7 ; PDLQ EDWWHU\ DQG RSWLRQDO 3RZHU 3DFN LQVWDOOHG LQ WKH ([SDQVLRQ %DFN 5HTXLUHV SRZHU VXSSO\ 3:5 %*$ 9 : :: '& /LQH &RUG &%/ '& $ DQG FRXQWU\ VSHFLILF
Accessories 2 - 3 Table 2-1 ET5X Accessories Accessory Part Number Description 10” Expansion Back ZBK-ET5X-10RH1-01 Provides rotating hand strap and slot for optional Power Pack. Power Pack BTRY-ET5X-PRPK1-01 Provides additional power for charging the ET5X battery using an Expansion Back. Active Stylus KT-ET5X-ASTY1-01 Provides easy writing, drawing, and navigation and accuracy with the thin tip and hovering capabilities.
2 - 4 ET5X Integrator Guide for Windows 10 Charge Only Cradle CAUTION Ensure that you follow the guidelines for battery safety described in Battery Safety Guidelines on page 4-1. This section describes how to use a Charge Only Cradle with the ET5X. The Charge Only Cradle ships with an insert that must be installed when inserting an ET5X without the protective boot installed. The Charge Only Cradle: • Provides power for operating the ET5X.
Accessories 2 - 5 Figure 2-3 Charge Only Cradle - Setup Installing the Insert The insert must be installed onto the cradle when docking an ET5X without a protective boot. 1. Align the insert over the pins. Figure 2-4 2. Align Insert with Cradle Press the insert down until it seats flush in the cradle. Charging the ET5X To charge the ET5X in the Charge Only Cradle: 1. Align the ET5X with the alignment pins on the cradle. 2. Insert the ET5X into the cradle.
2 - 6 ET5X Integrator Guide for Windows 10 Figure 2-5 Insert ET5X into Charge Only Cradle 3. The ET5X Charging LED indicates charging. 4. To remove the ET5X from the Charge Only Cradle, hold the cradle down with one hand and lift the ET5X.
Accessories 2 - 7 Charge batteries in ambient temperatures from 0°C to 40°C (32°F to 104°F) as reported by the battery. Charging is intelligently controlled by the charger. To accomplish this, for small periods of time, the charger alternately enables and disables battery charging to keep the battery at acceptable temperatures. The ET5X’s amber charge LED shows the status of the battery charging in the ET5X. See Table 1-1 on page 1-5 for charging status indications.
2 - 8 ET5X Integrator Guide for Windows 10 Communication and Charging Cradle CAUTION Ensure that you follow the guidelines for battery safety described in Battery Safety Guidelines on page 4-1. This section describes how to use a Communication and Charing Cradle with the ET5X. The Communication and Charging cradle: • Provides power for operating the ET5X. • Provides ports for connecting USB devices to the tablet, video output and connection to a LAN.
Accessories 2 - 9 Figure 2-9 Communication and Charging Cradle - Setup Installing the Insert The insert must be installed onto the cradle when docking an ET5X without a protective boot. 1. Align the insert over the pins. Figure 2-10 2. Align Insert with Cradle Press the insert down until it seats flush in the cradle. Charging the ET5X To charge the ET5X in the Communication and Charging Cradle: 1. Open the bottom access door and hold it to the back of the tablet. 2.
2 - 10 ET5X Integrator Guide for Windows 10 Figure 2-11 Insert ET5X with Rugged Frame into Communication and Charging Cradle 4. The ET5X Charging LED indicates charging. 5. To remove the ET5X from the Communication and Charging Cradle, press the release button on the right side of the cradle and lift the ET5X. Use thumb to hold down the cradle.
Accessories 2 - 11 Figure 2-12 Remove ET5X from Communication and Charging Cradles Charge batteries in ambient temperatures from 0°C to 40°C (32°F to 104°F) as reported by the battery. Charging is intelligently controlled by the charger. To accomplish this, for small periods of time, the charger alternately enables and disables battery charging to keep the battery at acceptable temperatures. The ET5X’s amber charge LED shows the status of the battery charging in the ET5X.
2 - 12 ET5X Integrator Guide for Windows 10 Rugged Communication and Charging Cradle CAUTION Ensure that you follow the guidelines for battery safety described in Battery Safety Guidelines on page 4-1. This section describes how to use a Rugged Communication and Charing Cradle with the ET5X. The Rugged Communication and Charging cradle: • Provides power for operating the ET5X. • Provides ports for connecting USB devices to the tablet, video output and connection to a LAN.
Accessories 2 - 13 Figure 2-15 Rugged Communication and Charging Cradle - Setup Charging the ET5X To charge the ET5X using the Rugged Communication and Charging Cradle: 1. Align the ET5X with the alignment pins on the cradle. 2. Insert the ET5X into the cradle. Note that the Rugged Communication and Charging Cradles contains a locking mechanism that locks the ET5X to the cradle.
2 - 14 ET5X Integrator Guide for Windows 10 Figure 2-16 Insert ET5X with Rugged Frame and IO Adapter into Rugged Communication and Charging Cradle 3. The ET5X Charging LED indicates charging. 4. To remove the ET5X from the Rugged Communication and Charging Cradle, press the release button on the right side of the cradle and lift the ET5X. Use thumb to hold down the cradle.
Accessories 2 - 15 Figure 2-17 Remove ET5X from Rugged Communication and Charging Cradles Charge batteries in ambient temperatures from 0°C to 40°C (32°F to 104°F) as reported by the battery. Charging is intelligently controlled by the charger. To accomplish this, for small periods of time, the charger alternately enables and disables battery charging to keep the battery at acceptable temperatures. The ET5X’s amber charge LED shows the status of the battery charging in the ET5X.
2 - 16 ET5X Integrator Guide for Windows 10 4-Slot Charge Only Cradle CAUTION Ensure that you follow the guidelines for battery safety described in Battery Safety Guidelines on page 4-1. • Provides 5 VDC power for operating the ET5X. • Simultaneously charges up to four ET5Xs and up to four Power Packs using the optional Battery Charger Adapter. See the ET5X Integrator Guide for information on installing the 4-Slot Battery Charger onto the cradle.
Accessories 2 - 17 Figure 2-19 Install Insert in Slot Guide Installation The cradle comes with four 8” tablets guide and four 10” tablet guides. Install the appropriate guides for the tablets. 1. Align the two tabs on the guide with the two slots in the cradle.
2 - 18 ET5X Integrator Guide for Windows 10 *XLGH 7DE Figure 2-20 2. Align Guide with Cradle Place the guide down onto the cradle and then rotate the guide until it snaps into the cradle.
Accessories 2 - 19 Battery Charger Installation Install optional 4-Slot Battery Charger onto cradle: 1. Align the mounting holes on the bottom of the charger with the four studs on the cradle. Figure 2-22 2. Install 4-Slot Battery Charger Place the charger on the cradle and then slide toward the front of the cradle.
2 - 20 ET5X Integrator Guide for Windows 10 Power Setup PWRS-14000-241R Figure 2-23 Power Setup with Optional Charger Insert Tablet into Slot ET5X without Rugged Frame 1. Install insert into slot. 2. Align the two alignment holes on the bottom of the tablet with the two alignment pins in the slot.
Accessories 2 - 21 Figure 2-24 3. Insert ET5X without Rugged Frame into Slot Place the ET5X down into the slot with display facing away from Battery Charger. ET5X with Rugged Frame 1. If applicable, remove insert from slot. 2. Slide ET5X over slot into it touches the guide.
2 - 22 ET5X Integrator Guide for Windows 10 Figure 2-25 3. Insert ET5X with Rugged Frame into Slot Place the ET5X down into the slot with display facing away from Battery Charger. Charging th Battery Charge batteries in ambient temperatures from 0°C to 40°C (32°F to 104°F) as reported by the battery. Charging is intelligently controlled by the charger.
Accessories 2 - 23 6ORW %DWWHU\ &KDUJHU CAUTION (QVXUH WKDW \RX IROORZ WKH JXLGHOLQHV IRU EDWWHU\ VDIHW\ GHVFULEHG LQ %DWWHU\ 6DIHW\ *XLGHOLQHV RQ SDJH 7KH 6ORW %DWWHU\ &KDUJHU • 3URYLGHV 9'& SRZHU IRU FKDUJLQJ WKH 3RZHU 3DFNV • 6LPXOWDQHRXVO\ FKDUJHV XS WR IRXU 3RZHU 3DFNV 7R FKDUJH D 3RZHU 3DFN Figure 2-26 4-Slot Battery Charger
2 - 24 ET5X Integrator Guide for Windows 10 Figure 2-27 Insert Power Pack :KHQ FKDUJLQJ WKH 3RZHU 3DFN &KDUJH /HYHO ,QGLFDWRUV LQGLFDWH WKH FKDUJH OHYHO &KDUJH /HYHO ,QGLFDWRUV Figure 2-28 Table 3 Power Pack Charge LEDs 3RZHU 3DFN &KDUJH 6WDWXV ,QGLFDWRUV 3RZHU 3DFN ,QGLFDWRUV 'HVFULSWLRQ 3RZHU QRW DSSOLHG WR 3RZHU 3DFN &KDUJH OHYHO LV EHWZHHQ DQG &KDUJH OHYHO LV EHWZHHQ DQG 6ROLG *UHHQ /(' %OLQNLQJ *UHHQ /(' %OLQNLQJ 5HG /('
Accessories 2 - 25 Table 3 3RZHU 3DFN &KDUJH 6WDWXV ,QGLFDWRUV &RQWLQXHG 3RZHU 3DFN ,QGLFDWRUV 'HVFULSWLRQ &KDQJH OHYHO LV EHWZHHQ DQG &KDUJH OHYHO LV EHWZHHQ DQG &KDUJH OHYHO LV EHWZHHQ DQG )XOO\ FKDUJHG &KDUJLQJ HUURU 6ROLG *UHHQ /(' %OLQNLQJ *UHHQ /(' %OLQNLQJ 5HG /(' &KDUJH EDWWHULHV LQ DPELHQW WHPSHUDWXUHV IURP r& WR r& r) WR r) DV UHSRUWHG E\ WKH EDWWHU\ &KDUJLQJ LV LQWHOOLJHQWO\ FRQWUROOHG E\ WKH FKDUJHU 7R DFFRPSOLVK WKLV IRU VPDOO SHULRGV RI WLPH WKH
2 - 26 ET5X Integrator Guide for Windows 10 Rugged Frame The Rugged Frame (8 inch and 10 inch) adds additional protection to the ET5X. Use the Rugged I/O Adapter when docking the ET5X into the Rugged Communications and Charging Cradle. 1. Open the access cover. Figure 2-29 2. If installing the Rugged IO Adapter, pull the access cover away from the ET5X until it separates from the ET5X. Figure 2-30 3. Open Access Door Remove Access Door Insert the Rugged IO Adapter onto the tablet.
Accessories 2 - 27 Interface Connector Rugged IO Adapter Figure 2-31 Insert Rugged IO Adapter 4. Remove the Rugged Frame and screws from box. 5. Separate the top and bottom sections of the Rugged Frame. 6. Place the bottom section on a flat surface. Figure 2-32 Protective Boot Assembly 7. Place the ET5X into the bottom section. 8. Align the top section over the bottom section. 9. Press the top section down onto the bottom section. 10.
2 - 28 ET5X Integrator Guide for Windows 10 Figure 2-33 Secure 8” Rugged Frame Figure 2-34 Secure 10” Rugged Frame 11. Torque the screws to 12 N-cm.
Accessories 2 - 29 Expansion Back The Expansion Backs provide data capture and or Power Pack slot for the ET5X. Installation To install an Expansion back: 1. Power off the ET5X. 2. Remove battery cover and store in safe place. Figure 2-35 3. Remove Battery Cover On 8” version only, remove rubber gasket.
2 - 30 ET5X Integrator Guide for Windows 10 Power Pack Slot Cover Interface Connector Figure 2-37 4. Align Expansion Back with 8” Configuration Align expansion back with device. Ensure that the power pack slot cover is aligned with the bottom of the device and the interface connector on expansion back aligns with interface connector on device.
Accessories 2 - 31 Screws (4) Figure 2-39 5. Secure Screws Using a T6 Torx screwdriver, secure expansion back to device using four screws. Torque to 14 n-cm. Programming the SE4710/SE4750 Expansion Backs NOTE The Expansion Backs use decoder PL3307. Program the imager in the Expansion Backs using the Zebra 123Scan2 application. Download the Zebra 123Scan2 application from the Support Central web site. HID Keyboard Emulation Bar Code By default, the Expansion Back imager is set to HID mode.
2 - 32 ET5X Integrator Guide for Windows 10 Figure 2-41 4. Open Straps Pull the strap end without the eyelet through the slot on the Expansion Back. Figure 2-42 Remove Strap 5. Rotate the disk 180°. 6. Slide the pad off the hand strap. 7. Pull the eyelet end through the slot on the Expansion Back.
Accessories 2 - 33 Figure 2-43 Pull Eyelet End 8. Remove pad from new replacement hand strap. 9. Rotate the disk so that one of the slots is aligned with the Power Pack opening. 10. Feed the new hand strap through the slot at the Power Pack opening. Eyelet Hook Material Disk Slot Hook Material Disk Slot Hand Strap Disk Power Pack Opening Figure 2-44 Feed New Strap 11. Slide pad onto hand strap with the stylus holder facing up.
2 - 34 ET5X Integrator Guide for Windows 10 12. Fold the eyelet end of the strap up and press hook and loop material together. Pad Stylus Holder Figure 2-45 Secure Eyelet End 13. Rotate disk 180° so that the empty slot is aligned with the Power Pack opening. 14. Feed strap through the slot. Figure 2-46 Feed Strap 15. Fold the end of the strap up and press hook and loop material together.
Accessories 2 - 35 Figure 2-47 Secure Strap Attaching the Stylus to the Expansion Back The Expansion Backs provide a holder for the stylus. To install the stylus onto the Expansion Back with th option tether: 1. Insert one loop of the tether into the hole in the stylus end cap. Figure 2-48 2. Insert Loop Feed the other end of the tether through the loop. Figure 2-49 Feed Tether Through Loop 3. Pull the tether all the way through the loop. 4.
2 - 36 ET5X Integrator Guide for Windows 10 Figure 2-50 Feed Stylus through Loop 6. Pull the stylus all the way through the loop. 7. Slide the stylus into the holder for storing the stylus. Insert Stylus into Holder Removal 7R UHPRYH DQ ([SDQVLRQ %DFN CAUTION 5HPRYH SRZHU EHIRUH UHPRYLQJ WKH ([SDQVLRQ %DFN 1. 3RZHU RII WKH (7 ; 2. 8VLQJ D 7 7RU[ VFUHZGULYHU UHPRYH IRXU VFUHZV VHFXULQJ H[SDQVLRQ EDFN WR GHYLFH 6FUHZV Figure 2-51 3.
Accessories 2 - 37 Figure 2-52 4. Lift Expansion Back 2Q ರ YHUVLRQ RQO\ UHSODFH UXEEHU JDVNHW UHPRYHG GXULQJ LQVWDOODWLRQ 5XEEHU *DVNHW Figure 2-53 5. Rubber Gasket Replacement 5HSODFH EDWWHU\ FRYHU Figure 2-54 Align Battery Cover
2 - 38 ET5X Integrator Guide for Windows 10 6. &DUHIXOO\ SUHVV GRZQ DURXQG WKH HGJH RI WKH FRYHU 0DNH VXUH WKDW WKH FRYHU LV VHDWHG SURSHUO\ Figure 2-55 7.
CHAPTER 3 SOFTWARE Introduction This chapter provides instructions on how to reset and update the tablet, and to install applications. Factory Reset Restores Windows to original factory settings without deleting any of your personal files, apps installed from Windows Store, or personalization settings. To restore the ET5X: 1. Touch Settings > Update and security > Recovery. 2. Under Reset this PC, touch Get started. Figure 3-1 Reset Option Dialog Box 3.
3 - 2 ET5X Integrator Guide for Windows 10 NOTE Apps installed from the Windows Store are automatically reinstalled after the refresh is complete. Apps installed from sources other than the Windows Store are removed and have to be manually installed. A list of apps removed during this process is created on the desktop after the process is complete. After refreshing the ET5X, apps installed from the Window Store are automatically reinstalled using a mobile broadband or Wi-Fi internet connection.
Software 3 - 3 Figure 3-2 Format Dialog Box 3. In the File system drop down, select FAT32. 4. In the Volume label text box, enter BOOTME. 5. Click Start. Figure 3-3 6. Format Confirmation Dialog Box Click OK. Figure 3-4 Format Complete Dialog Box 7. Click OK. 8. Using Windows Explorer, copy the contents from the System Update package onto the thumb drive.
3 - 4 ET5X Integrator Guide for Windows 10 Figure 3-5 9. Copy Boot Files to Thumb Drive Ensure that all the files copied successfully. CAUTION Carefully follow the host computer’s instructions to unmount the thumb drive and disconnect the drive correctly to avoid losing information. 10. On the host computer, unmount the thumb drive. Setup Using Communication Dock The following is required: • ET5X tablet • USB keyboard • Communication Dock with power supply. • Bootable installation USB thumb drive. 1.
Software 3 - 5 • USB Hub with external power supply • USB cable • USB charger • Bootable installation USB thumb drive. 1. Connect power to the ET5X. 2. Connect power supply to USB hub. 3. Connect the USB keyboard connector into a USB hub. 4. On the ET5X, open the access door on the right side of the device. 5. Connect USB cable from the USB port to the USB hub. 6. Plug the bootable USB thumb drive into the USB hub.
3 - 6 ET5X Integrator Guide for Windows 10 Figure 3-6 9. Choose How You’ll Connect Screen Touch Next. 10. Enter account information and then touch Next.The Meet Cortana screen appears.
Software 3 - 7 Figure 3-7 Meet Cortana Screen 11. Touch Use Cortana to enable Cortana or Not Now to disable Cortana. Cortana can be enabled later. 12. The Windows Home screen appears.
3 - 8 ET5X Integrator Guide for Windows 10 Figure 3-8 Windows Home Screen (Internet Connection) Figure 3-9 Windows Home Screen (No Internet Connection)
Software 3 - 9 13. In the Taskbar, touch 14. Touch . . 15. Touch Eject (drive name). 16. After the message Safe To Remove Hardware message appears, remove the thumb drive from the tablet. Checking Versions Use the following to check the versions for: • ULPMC • BIOS • Operating system. Check ULPMC Version To check the current ULPMC version: 1. Setup tablet with USB hub or cradle. See Setup Using Communication Dock on page 3-4 or Setup Using a USB Hub on page 3-4. 2. Reboot the ET5X. 3.
3 - 10 ET5X Integrator Guide for Windows 10 8. Use the arrow keys to select Continue. 9. Press Enter to reboot the tablet. Check BIOS Version To check the current version of the BIOS: 1. On the Start screen, touch (all apps). 2. Scroll down to Windows System folder. 3. Touch the folder to expand it. 4. Touch Command Prompt. 5. In the Command window, type msinfo32. 6. Press Enter key. The System Information window appears.
Software 3 - 11 Figure 3-12 Release Information The release version appears on the screen: WIN8-ZEBRA-R1.0-012-x64. Data Capture Application Development For scanner resources, go to the Zebra Barcode Scanner Drivers and Utilities web page, https://www.zebra.com/us/en/products/software/scanning-systems/scanner-drivers-and-utilities.html. Application Installation Install programs from the Internet, or a network.
3 - 12 ET5X Integrator Guide for Windows 10
CHAPTER 4 MAINTENANCE AND TROUBLESHOOTING Introduction This chapter includes instructions on cleaning and storing the ET5X, battery maintenance and provides troubleshooting solutions for potential problems during ET5X operations. Maintaining the ET5X For trouble-free service, observe the following tips when using the ET5X: • Protect the ET5X from temperature extremes. • Do not store or use the ET5X in any location that is extremely dusty, damp, or wet.
4 - 2 ET5X Integrator Guide for Windows 10 • Do not disassemble or open, crush, bend or deform, puncture, or shred. • Severe impact from dropping any battery-operated device on a hard surface could cause the battery to overheat. • Do not short circuit a battery or allow metallic or conductive objects to contact the battery terminals.
Maintenance and Troubleshooting 4 - 3 Display The display can be wiped down with the alcohol wipes, but care should be taken not to allow any pooling of liquid around the edges of the display. Immediately dried the display with a soft, non-abrasive cloth to prevent streaking. Power Connector 1. Remove the main battery from ET5X. 2. Dip the cotton portion of the cotton tipped applicator in isopropyl alcohol. 3. Repeat at least three times. 4.
4 - 4 ET5X Integrator Guide for Windows 10 2. Dip the cotton portion of the cotton tipped applicator in isopropyl alcohol. 3. Rub the cotton portion of the cotton tipped applicator along the pins of the connector. Slowly move the applicator back-and-forth from one side of the connector to the other. Do not let any cotton residue on the connector. 4. Spray compressed air in the connector area by pointing the tube/nozzle about ½ inch away from the surface.
Maintenance and Troubleshooting 4 - 5 Troubleshooting ET5X Table 4-1 Troubleshooting the ET5X Problem ET5X does not turn on. Cause Solution Battery not charged. Charge the battery in the ET5X. Battery not installed properly. Ensure battery is installed properly. System crash. If the ET5X still does not turn on, perform a cold boot. See Performing a Cold Boot on page 1-6. Battery failed. Replace battery. If the ET5X still does not operate, try a cold boot. See Performing a Cold Boot on page 1-6.
4 - 6 ET5X Integrator Guide for Windows 10 Charge Only Cradle Table 4-2 Troubleshooting the Charge only Cradle Symptom ET5X battery is not charging. Possible Cause Solution ET5X was removed from cradle or cradle was unplugged from AC power. Ensure cradle is receiving power. Ensure ET5X is seated correctly. Confirm main battery is charging. The battery fully charges in approximately three hours. Battery is faulty. Verify that other batteries charge properly. If so, replace the faulty battery.
Maintenance and Troubleshooting 4 - 7 Table 4-3 Troubleshooting the Communication and Charging Cradles (Continued) Symptom ET5X does not lock into cradle. Possible Cause Solution Access cover closed. Open ET5X access cover and re-insert ET5X onto cradle. ET5X with Rugged Frame and IO Adapter does not mate with Communication and Charging Cradle. Use Rugged Communication and Charging Cradle.
4 - 8 ET5X Integrator Guide for Windows 10
APPENDIX A SPECIFICATIONS Technical Specifications The following tables summarize the ET5X’s intended operating environment and general technical hardware specifications. ET5X The following table summarizes the ET5X’s intended operating environment. Table A-1 Technical Specifications Item Description Physical and Environmental Characteristics Dimensions 8” Configuration: 228 mm W x 150 mm H x 12.5 mm D (9.0 in. L x 5.9 in. W x 0.5 in. H) 10” Configuration: (269 mm W x 181 mm H x 12.5 mm D) 10.6 in.
A - 2 ET5X Integrator Guide for Windows 10 Table A-1 Technical Specifications (Continued) Item Description Expansion Integrated connector to easily add accessories. Connectivity Docking connector: USB 3.0, HDMI, charging; rugged connector for use with rugged dock Interfaces: full-size USB2.0 connector, audio jack 3.
Specifications A - 3 Table A-1 Technical Specifications (Continued) Item Description Drop Specification Standard: 1 m (3.28 ft.) drop to concrete without rugged frame With optional rugged frame: 1.8 m (5.9 ft.) to concrete per MIL STD 810G Vibration Operational: random vibration 10-1000 Hz 1.9g RMS, 1 hour duration per axis. Non-operational: random vibration 10-1000Hz, 4.
A - 4 ET5X Integrator Guide for Windows 10 Table A-1 Technical Specifications (Continued) Item Description Sensors Gyroscope Maintains orientation based on principles of conservation of angular momentum Motion Sensor 3-axis accelerometer that enables motion-sensing applications for dynamic screen orientation and power management. Ambient Light Sensor Automatically adjusts display brightness, keypad and display backlight.
Specifications A - 5 Table A-2 SE4710 Decode Ranges (Continued) Bar Code Type Near Distance Far Distance Typical Typical 10 mil Data Matrix 2.9 in / 7.4 cm 10.1 in / 25.7 cm 100% UPCA 1.8 in / 4.6 cm* 26.0 in / 66.0 cm 20.0mil Code 39 2.0 in / 5.08 cm* 30.0 in / 76.2 cm 20 mil QR Code 3.2 in / 8.1 cm 15.8 in / 40.1 cm *Limited by width of bar code in field of view. Note: Photographic quality bar code at 15° tilt pitch angle under 30 fcd ambient illumination.
A - 6 ET5X Integrator Guide for Windows 10 SE4750 MR Decode Ranges Table A-4 SE4750 MR Decode Distances Near Distance (in, typical) Bar Code Type Far Distance (in, typical) 5 mil Code 128 7.4 16.0 5 mil PDF417 8.1 13.1 7.5 mil Data Matrix 8.3 12.8 10 mil Data Matrix 7.0 17.0 13 mil UPCA 2.3* 38.0 15 mil Code 128 4.0* 40.0 20 mil Code 39 2.1* 54.0 100 mil Code 39 11.0 172.0 160 mil Data Matrix 11.5 138.0 * Limited by width of bar code in field of view.
Specifications A - 7 Accessory Specifications Charge Only Cradle Table A-5 Charge Only Cradle Technical Specifications Feature Description Dimensions Height: 7.9 cm (3.1 in.) Width: 14.2 cm (5.6 in.) Depth: 11.9 cm (4.7 in.) Weight 550 g (19.
A - 8 ET5X Integrator Guide for Windows 10 Rugged Communication and Charging Cradle Table A-7 Rugged Communication and Charging Cradle Technical Specifications Feature Description Dimensions Height: 7.9 cm (3.1 in.) Width: 14.2 cm (5.6 in.) Depth: 11.9 cm (4.7 in.) Weight 550 g (19.
Specifications A - 9 Table A-9 8” SE4710 Expansion Back Technical Specifications Feature Description Dimensions Height: 137 mm (5.4 in.) Width: 157.5 mm (6.2 in.) Depth: 54 mm (2.1 in.) Weight 273 g (9.6 oz) Operating Temperature 0°C to 50°C (32°F to 122°F) Storage Temperature -20°C to 60°C (-40°F to 158°F) Humidity 5% to 95% non-condensing Drop 1.2 m (4 ft) drop to plywood over concrete per MIL-STD 810G across operating temperatures with rugged frame.
A - 10 ET5X Integrator Guide for Windows 10 Table A-11 10” Expansion Back Technical Specifications (Continued) Feature Description Operating Temperature 0°C to 50°C (32°F to 122°F) Storage Temperature -20°C to 60°C (-40°F to 158°F) Humidity 5% to 95% non-condensing Drop 1.0 m (3.28 ft) drop to plywood over concrete per MIL-STD 810G across operating temperatures with rugged frame.
Specifications A - 11 Table A-13 10” SE4750 Expansion Back Technical Specifications (Continued) Feature Description Drop 1.0 m (3.28 ft) drop to plywood over concrete per MIL-STD 810G across operating temperatures with rugged frame.
A - 12 ET5X Integrator Guide for Windows 10
INDEX Numerics A accessories four slot charge only cradle . . . . . . . . 2-8, 2-12, 2-23 single slot serial/USB cradle . . . . . . . . . . . . . . . . 2-4 specifications . . . . . . . . . . . . . . . . . . . . . . . . . . . A-7 F four slot charge only cradle . . . . . . . . . . . 2-8, 2-12, 2-23 G getting started . . . . . . . . . . . . . . . . . . . . . . . . . . . . . . 1-1 H B humidity . . . . . . . . . . . . . . . . . . . . . . . . . . . . . . . . . . . A-2 battery charging temperature . . . . .
Index - 2 ET5X Integrator Guide for Windows 10 R radios . . . . . . . . . . . . . . . . . . . . . . . . . . . . . . . . . . . . . . .ix related documents . . . . . . . . . . . . . . . . . . . . . . . . . . . . .xi related software . . . . . . . . . . . . . . . . . . . . . . . . . . . . . . .xi S single slot serial/USB cradle . . . . . . . . . . . . . . . . . . . 2-4 specifications . . . . . . . . . . . . . . . . . . . . . . . . . . . . . . . A-1 starting the tablet . . . . . . . . . . . . . . . . . . . .
Index - 3
Index - 4 ET5X Integrator Guide for Windows 10
Zebra Technologies Corporation, Inc. 3 Overlook Point Lincolnshire, IL 60069, U.S.A. http://www.zebra.com © 2017 ZIH Corp and/or its affiliates. All rights reserved. ZEBRA and the stylized Zebra head are trademarks of ZIH Corp, registered in many jurisdictions worldwide. All other trademarks are the property of their respective owners.