Operation Manual
Manuals
Brands
Xplova Manuals
Car
E5 GPS
31
32
33
34
35
36
37
38
39
40
Table Of Contents
Getting Started
Features of the Xplova E5
Getting to Know the Xplova E5
Xplova E5 Front View
Xplova E5 Rear View
Accessories
Optional Accessories
Charging the Xplova E5
Mounting the Xplova E5
Connecting to Sensors
Using Xplova E5
Powering Up the Xplova E5
Acquiring GPS Signal
The LCD Screen
Idle Mode
Using the Button Controls
Button Operation Description
Adjusting the Backlight
Selecting Data Display
Upper Screen Data (Data 1)
Lower Screen Data (Data 2)
Creating Personal Profile
Selecting Bike Profile
Marking Lap / Location
Resetting Recording
Changing the Settings
Using the Menu
The Menu Tree
Menu Button Controls Description
RECORD Menu
WARNING Menu
GPS Menu
ALT (Altitude) Menu
SOUND Menu
S-PAUSE (Smart Pause) Menu
Bike Menu
HRM (Heart Rate Monitor) Menu
USER Menu
TIME Menu
UNIT Menu
F-RESET (Factory Reset) Menu
Using the Accessories
Heart Rate Monitor (Optional)
Pairing the Heart Rate Monitor
Wearing the Heart Rate Monitor
Changing the Heart Rate Monitor Battery
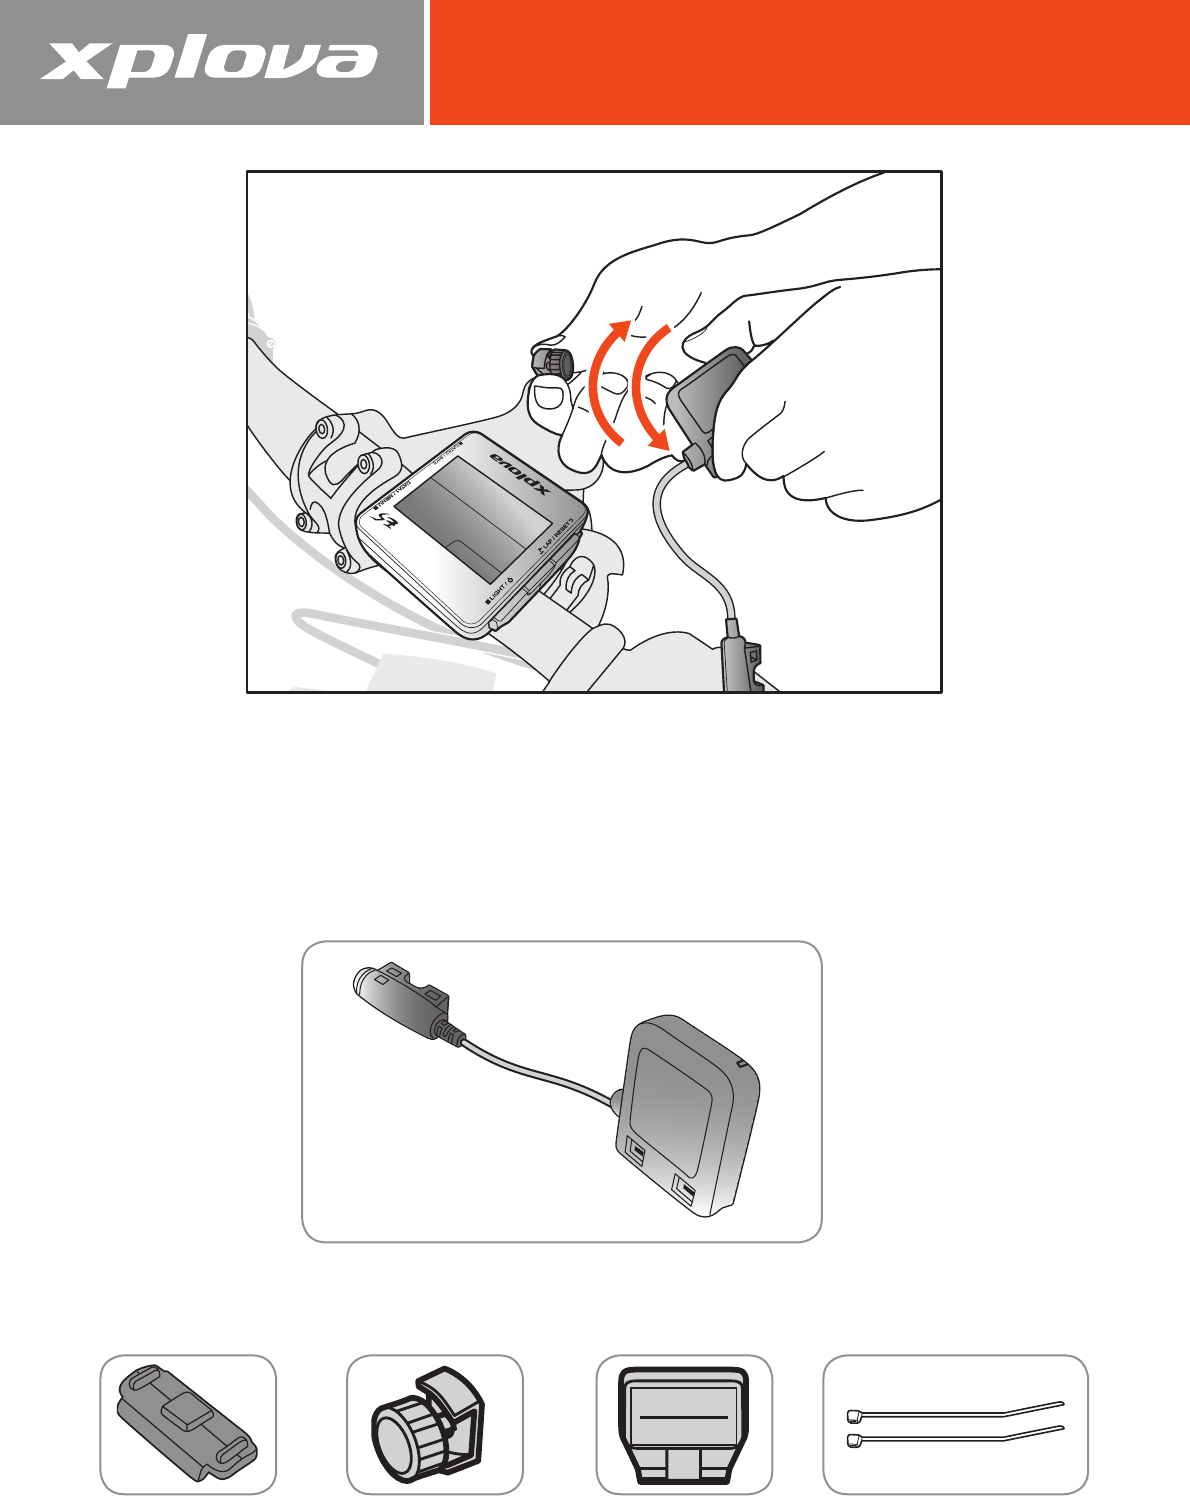
Combo Cadence Sensor (optional)
Pairing the Combo Cadence Sensor
Combo Cadence Sensor Parts
Installing the Combo Cadence Sensor
Changing the Combo Cadence Battery
Power Meter (optional)
Pairing with the Power Meter
Calibrating the Power Meter
Using Web Applications
Sharing Your Activities
What Can You Do?
Updating the Xplova E5 Software
Downloading the Software
Updating the Software
Appendix
Specifications
Wheel Size Table
Declarations of Conformity
32
A popup indicates when the combo cadence is paired.
Combo C
aden
ce Sensor P
arts
Before installing the sensor, make sure you have the following components:
CADENCE
Combo Cadence Sensor
Rubber base
CADENCE
MAGENT
Cadence Magnet
Speed Magnet
Cable Ties
1
...
...
30
31
32
33
34
...
...
44