us · TIIEIIEl'OflE/1 � MEAT 1C UTTING BAND1 SAW WITH 1GRIND,ER 1 ITIEr.� # 65039 OWNERS A UAL AND SAFETY 'STRUC " ll/J[ES"fl{mS w PLEASE CALI!.. C!J.lllSTOMElR SERVOC:E: 909.628.
IMPORTANT SAFETY INFORMATION Read all safety warnings and instructions. Failure to follow the warnings and instructions may result in electric shock, ire and/or serious injury. Save all warnings and instructions for future reference. SAFETY The warning and safety instructions appearing in this manual are not meant to cover all possible conditions and situations that may occur. Common sense, caution and care must be exercised when operating or cleaning tools and equipment.
SPECIFICATIONS
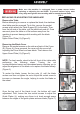
Do not plug this unit into a power source until assembly is complete. To assemble the stand and motor, review the components diagram as shown in Figure 1 and the Parts List on page 12. You may choose to begin assembling the stand first then add all other components. The motor housing an be attached last. Once assembled, attach the rubber feet to the four corners of the stand. The feet will help reduce vibration when the saw is in use.
Make sure the machine is unplugged from a power source before replacing or adjusting the saw blade. To prevent serious injury, wear heavy-duty work gloves when working with or around the saw blade. REPLACING OR ADJUSTING THE SAW BLADE Remove the Table Before attempting to remove or replace the blade, the stainless steel table must be removed. To do this, remove the socket screws which attach the Table Support (D) to the table. Then, from the left side of the table, pull the table back and off.
Do not use sharp tools when assembling the power switch, as they may damage the insulation on the wires. If you are unfamiliar with electrical work, contact a professional electrician to perform the install. ASSEMBLING THE POWER SWITCH The ON/OFF power switch is located in the upper corner of the stand. Attach the switch to the side of the steel stand using two nuts, bolts and washers. NOTE: Be sure ON is at the top.
ASSEMBLING THE FENCE AND PUSHER Before and after use, wash all parts with warm soapy water. Wear protective gloves, clothing and eye protection while operating the Band Saw. Saw blade and grinder knife are sharp! Use care when using and cleaning the product to prevent injury. Dull blades require extra effort, which leads to blade breakage, resulting in possible injury to the user or bystanders.
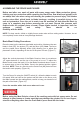
MEAT GRINDER USE Figure 20 Attach the Meat Grinder to the machine (MM). Slide the sausage casing over Tube. The sausage casing is now ready to be filled with the meat of your choice. (Figure 20) As shown in Figure 20, fill the Meat Grinder Intake (OO) with meat. Slowly press the meat into the intake. Feeding the meat into the intake will result in the meat being pumped out of the intake and into the sausage casing. Keep pressing until the sausage casing is full.
5 '""1C:::l l5 ,..,..l "u �• � 10 I> �o H 1 1 ,r_,., 103 5 . 40 ••