
User Manual
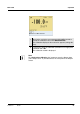
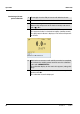
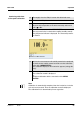

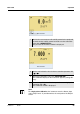
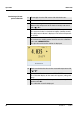
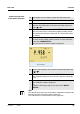
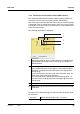
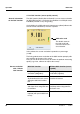
Table Of Contents
- 1 Overview
- 2 Safety
- 3 Commissioning
- 4 Operation
- 4.1 Switching on the meter
- 4.2 Login with a user name
- 4.3 General operating principles
- 4.4 Sensor-independent settings
- 4.5 Sensor info
- 4.6 Channel display
- 4.7 pH value
- 4.7.1 General information
- 4.7.2 Measuring the pH value
- 4.7.3 Settings for pH measurements
- 4.7.4 pH calibration
- 4.7.5 Calibration interval
- 4.7.6 Carrying out an automatic calibration (AutoCal)
- 4.7.7 Carrying out a manual calibration (ConCal)
- 4.7.8 Displaying calibration records
- 4.7.9 Continuous measurement control (CMC function)
- 4.7.10 QSC function (sensor quality control)
- 4.8 ORP voltage
- 4.9 Dissolved oxygen
- 4.10 Conductivity
- 4.11 Data storage
- 4.12 Transmitting data (USB interfaces)
- 4.12.1 Outputting current measurement data
- 4.12.2 Transmitting data (to a PC)
- 4.12.3 Connecting the PC / USB-B interface (USB Device)
- 4.12.4 Options for data transmission to a PC (USB-B interface)
- 4.12.5 Connecting the USB memory device / USB-A interface (USB Host)
- 4.12.6 Data transmission to a USB memory device (USB-A interface)
- 4.13 Reset
- 5 Maintenance, cleaning, disposal
- 6 What to do if...
- 7 Technical data
- 8 Lists
- 9 Appendix: Firmware update
Multi 3430 Operation
57
ba75865e11 02/2011
Continuing with three-
to five-point calibration
Note
After the fifth buffer has been measured the calibration is automatically
finished. Then the calibration record is displayed.
The calibration line is determined by linear regression.
19 Thoroughly rinse the IDS pH sensor with deionized water.
20 Immerse the IDS pH sensor in the next buffer solution.
21 When measuring without temperature sensor:
Measure the temperature of the buffer manually and enter it
with <S><T>.
22 Start the measurement with <MENU/ENTER>.
The measured value is checked for stability (stability control).
The [AR] status indicator is displayed. The measured parame-
ter flashes.
23 Wait for the measurement with stability control to be completed
or terminate the stability control and take over the calibration
value with <MENU/ENTER>.
The pH value of the buffer solution is displayed.
24 Set the nominal buffer value for the measured temperature with
<S><T>.
25 Accept the calibration value with <MENU/ENTER>.
The calibration display for the next buffer appears (voltage dis-
play).
26 If necessary, use <M> to finish the calibration.
The calibration record is displayed.
or
Continue calibrating using the next buffer with <MENU/
ENTER>.
30.09.2010 08:00