
Operation Manual

30 Mixing and Monitoring
02R User’s Guide
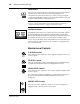
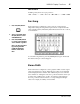
SOLO Button
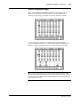
You can monitor input channels in isolation by pressing the [SOLO] button.
The LEDs in the center of the selected channel [ON] buttons are
extinguished. You select the channel(s) you want to solo by pressing the
corresponding [ON] button. When you press the [SOLO] button again, the
originally selected LEDs are illuminated again.
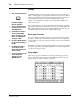
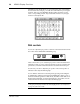
TALKBACK Buttons
The talkback system allows you to talk to musicians in the studio without
leaving the 02R. Press the [T/B] button and start talking. The [SLATE]
button sends the talkback signal to the main buses as well as the stereo bus,
for example, allowing you to record a memo before recording a take.
You can also record 100 Hz, 1 kHz, and 10 kHz sine waves and white noise
tones by using the oscillator function. See “Oscillator” on page 209 of the
User’s Guide for details.
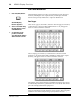
Monitor Level Controls
C-R LEVEL Control
This control is used to adjust the volume output through the control room
monitor outputs.
T/B LEVEL Control
This control adjusts the volume of the talkback signal. The talkback signal
is picked up by the built-in microphone right below the control.
STUDIO LEVEL Control
This control is used to adjust the overall volume output through the studio
monitor outputs.
If you are using a headphone amplifier to provide studio monitoring, you
may need a unit that allows individual adjustment of each set of
headphones.
PHONES LEVEL Control
This control is used to adjust the volume of a set of stereo headphones
plugged into the connector just above the control.
Note: If the 02R is connected to other units with the digital cascade kit
(CD8-CS), only the [SOLO] button on the cascade master unit is valid. See
“Digital Cascade Kit (CD8-CS)” on page 229 of the User’s Guide
SOLO
SLATE T/B
TALKBACK
C-R
LEVEL
010
T/B LEVEL
010
STUDIO
LEVEL
010
PHONES
LEVEL
010