Read this manual carefully before operating this vehicle.
U1GBE0E0.book Page 1 Wednesday, June 26, 2013 4:04 PM EAU46091 Read this manual carefully before operating this vehicle. This manual should stay with this vehicle if it is sold.
U1GBE0E0.book Page 1 Wednesday, June 26, 2013 4:04 PM INTRODUCTION EAU10114 Welcome to the Yamaha world of motorcycling! As the owner of the NS50F, you are benefiting from Yamaha’s vast experience and newest technology regarding the design and manufacture of high-quality products, which have earned Yamaha a reputation for dependability. Please take the time to read this manual thoroughly, so as to enjoy all advantages of your NS50F.
U1GBE0E0.book Page 1 Wednesday, June 26, 2013 4:04 PM IMPORTANT MANUAL INFORMATION EAU10134 Particularly important information is distinguished in this manual by the following notations: This is the safety alert symbol. It is used to alert you to potential personal injury hazards. Obey all safety messages that follow this symbol to avoid possible injury or death. WARNING A WARNING indicates a hazardous situation which, if not avoided, could result in death or serious injury.
U1GBE0E0.book Page 2 Wednesday, June 26, 2013 4:04 PM IMPORTANT MANUAL INFORMATION EAUM1012 NS50F OWNER’S MANUAL ©2013 by MBK INDUSTRIE 1st edition, May 2013 All rights reserved Any reprinting or unauthorized use without the written permission of MBK INDUSTRIE is expressly prohibited. Printed in France.
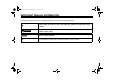
U1GBE0E0.book Page 1 Wednesday, June 26, 2013 4:04 PM TABLE OF CONTENTS SAFETY INFORMATION .................. 1-1 Further safe-riding points ............... 1-5 DESCRIPTION .................................. 2-1 Left view ......................................... 2-1 Right view....................................... 2-2 Controls and instruments ............... 2-3 INSTRUMENT AND CONTROL FUNCTIONS...................................... 3-1 Main switch/steering lock...............
U1GBE0E0.book Page 2 Wednesday, June 26, 2013 4:04 PM TABLE OF CONTENTS SPECIFICATIONS..............................8-1 CONSUMER INFORMATION............9-1 Identification numbers.....................
U1GBE0E0.book Page 1 Wednesday, June 26, 2013 4:04 PM SAFETY INFORMATION EAUT1019 1 Be a Responsible Owner As the vehicle’s owner, you are responsible for the safe and proper operation of your scooter. Scooters are single-track vehicles. Their safe use and operation are dependent upon the use of proper riding techniques as well as the expertise of the operator. Every operator should know the following requirements before riding this scooter.
U1GBE0E0.book Page 2 Wednesday, June 26, 2013 4:04 PM SAFETY INFORMATION Many accidents involve inexperienced operators. In fact, many operators who have been involved in accidents do not even have a current driver’s license. • Make sure that you are qualified and that you only lend your scooter to other qualified operators. • Know your skills and limits. Staying within your limits may help you to avoid an accident.
U1GBE0E0.book Page 3 Wednesday, June 26, 2013 4:04 PM SAFETY INFORMATION 1 Avoid Carbon Monoxide Poisoning All engine exhaust contains carbon monoxide, a deadly gas. Breathing carbon monoxide can cause headaches, dizziness, drowsiness, nausea, confusion, and eventually death. Carbon Monoxide is a colorless, odorless, tasteless gas which may be present even if you do not see or smell any engine exhaust.
U1GBE0E0.book Page 4 Wednesday, June 26, 2013 4:04 PM SAFETY INFORMATION Genuine Yamaha Accessories Choosing accessories for your vehicle is an important decision. Genuine Yamaha accessories, which are available only from a Yamaha dealer, have been designed, tested, and approved by Yamaha for use on your vehicle. Many companies with no connection to Yamaha manufacture parts and accessories or offer other modifications for Yamaha vehicles.
U1GBE0E0.book Page 5 Wednesday, June 26, 2013 4:04 PM SAFETY INFORMATION 1 Aftermarket Tires and Rims The tires and rims that came with your scooter were designed to match the performance capabilities and to provide the best combination of handling, braking, and comfort. Other tires, rims, sizes, and combinations may not be appropriate. Refer to page 6-15 for tire specifications and more information on replacing your tires.
U1GBE0E0.book Page 6 Wednesday, June 26, 2013 4:04 PM SAFETY INFORMATION Always wear a helmet, gloves, trousers (tapered around the cuff and ankle so they do not flap), and a brightly colored jacket. Do not carry too much luggage on the scooter. An overloaded scooter is unstable. Use a strong cord to secure any luggage to the carrier (if equipped). A loose load will affect the stability of the scooter and could divert your attention from the road. (See page 1-3.
U1GBE0E0.book Page 1 Wednesday, June 26, 2013 4:04 PM DESCRIPTION EAU10411 Left view 1 3 4 2 5 2 7 1. 2. 3. 4. 5. 6. 7.
U1GBE0E0.book Page 2 Wednesday, June 26, 2013 4:04 PM DESCRIPTION EAU10421 Right view 1 2 3 4 2 9 8 7 1. 2. 3. 4. 5. 6. 7. 8. 6 5 9.
U1GBE0E0.book Page 3 Wednesday, June 26, 2013 4:04 PM DESCRIPTION EAU10431 Controls and instruments 1 2 4 3 2 1. 2. 3. 4. 5. 6.
U1GBE0E0.book Page 1 Wednesday, June 26, 2013 4:04 PM INSTRUMENT AND CONTROL FUNCTIONS EAU10462 Main switch/steering lock EAU47792 (off) All electrical systems are off. The key can be removed. To lock the steering EWA15351 WARNING Never turn the key to “ ” or “ ” while the vehicle is moving. Otherwise the electrical systems will be switched off, which may result in loss of control or an accident.
U1GBE0E0.book Page 2 Wednesday, June 26, 2013 4:04 PM INSTRUMENT AND CONTROL FUNCTIONS To unlock the steering EAU49394 Indicator lights and warning lights 2 3 OIL CHAN GE 1 3 4 1. Push. 2. Turn. Push the key in, and then turn it to “ while still pushing it. 5 ZAUM1062 ” 1. 2. 3. 4. 5.
U1GBE0E0.book Page 3 Wednesday, June 26, 2013 4:04 PM INSTRUMENT AND CONTROL FUNCTIONS If the warning light does not come on initially when the key is turned to “ ”, or if the warning light remains on, have a Yamaha dealer check the electrical circuit. If the warning light does not come on initially when the key is turned to “ ”, or if the warning light remains on, have a Yamaha dealer check the electrical circuit.
U1GBE0E0.book Page 4 Wednesday, June 26, 2013 4:04 PM INSTRUMENT AND CONTROL FUNCTIONS 3 Be sure to stop the vehicle before making any setting changes to the multi-function display. Changing settings while riding can distract the operator and increase the risk of an accident.
U1GBE0E0.book Page 5 Wednesday, June 26, 2013 4:04 PM INSTRUMENT AND CONTROL FUNCTIONS Odometer and tripmeter modes Pushing the “RESET/SELECT“ button switches the display between the odometer mode “ODO” and the tripmeter “TRIP” in the following order: ODO → TRIP → ODO RESET/ SELECT RESET/ SELECT Oil change indicator “OIL CHANGE” This indicator comes on at the initial 1000 km (600 mi), then at 3000 km (1800 mi) and every 3000 km (1800 mi) thereafter to indicate that the engine oil should be changed.
U1GBE0E0.book Page 6 Wednesday, June 26, 2013 4:04 PM INSTRUMENT AND CONTROL FUNCTIONS EAU1234E TIP The display segment containing the letter ‘E’ (Empty) stays on continuously and is not an indicator of fuel level in the fuel tank. Handlebar switches OIL CHAN GE Left 3 OIL CHAN GE ZAUM1067 12 3 ZAUM0918 1. Horn switch “ ” 2. Turn signal switch “ / ” 3. Dimmer switch “ / ” ZAUM1066 Right Self-diagnosis device This model is equipped with a self-diagnosis device for the fuel electrical circuit.
U1GBE0E0.book Page 7 Wednesday, June 26, 2013 4:04 PM INSTRUMENT AND CONTROL FUNCTIONS EAU12401 Dimmer switch “ / ” Set this switch to “ ” for the high beam and to “ ” for the low beam. EAU12902 Front brake lever EAU12952 Rear brake lever 1 1 EAU12461 Turn signal switch “ / ” To signal a right-hand turn, push this switch to “ ”. To signal a left-hand turn, push this switch to “ ”. When released, the switch returns to the center position.
U1GBE0E0.book Page 8 Wednesday, June 26, 2013 4:04 PM INSTRUMENT AND CONTROL FUNCTIONS EAUM3261 Fuel tank cap EWA11092 Make sure that the fuel tank cap is properly closed after filling fuel. Leaking fuel is a fire hazard. 3 EAU13222 Fuel WARNING Make sure there is sufficient gasoline in the tank. EWA10882 WARNING Gasoline and gasoline vapors are extremely flammable. To avoid fires and explosions and to reduce the risk of injury when refueling, follow these instructions. 1 ZAUM1068 1.
U1GBE0E0.book Page 9 Monday, July 15, 2013 11:45 AM INSTRUMENT AND CONTROL FUNCTIONS ately. If gasoline spills on your skin, wash with soap and water. If gasoline spills on your clothing, change your clothes. 1 2 EAU54601 ZAUM0923 1. Fuel tank filler tube 2. Maximum fuel level 3. Wipe up any spilled fuel immediately. NOTICE: Immediately wipe off spilled fuel with a clean, dry, soft cloth, since fuel may deteriorate painted surfaces or plastic parts. [ECA10072] 4.
U1GBE0E0.book Page 10 Wednesday, June 26, 2013 4:04 PM INSTRUMENT AND CONTROL FUNCTIONS EAU13434 NOTICE This model is equipped with a catalytic converter in the exhaust system. Use only unleaded gasoline. The use of leaded gasoline will cause unrepairable damage to the catalytic converter. EWA10863 WARNING 3 ECA10702 Catalytic converter The exhaust system is hot after operation.
U1GBE0E0.book Page 11 Wednesday, June 26, 2013 4:04 PM INSTRUMENT AND CONTROL FUNCTIONS EAUM2831 Seats 1 1 2 3 ZAUM0943 ZAUM1070 1. Open. 1. Passenger seat TIP Do not push inward when turning the key. To close the passenger seat 1. Fold the passenger seat down, and then push it down to lock it in place. 2. Remove the key from the main switch if the scooter will be left unattended. ZAUM0926 1. Passenger seat 2. Rider seat Passenger seat To open the passenger seat 1.
U1GBE0E0.book Page 12 Wednesday, June 26, 2013 4:04 PM INSTRUMENT AND CONTROL FUNCTIONS EAUM2801 Storage compartment 1 1 3 ZAUM0925 1. Rider seat ZAUM0927 To close the rider seat 1. Fold the rider seat down. 2. Close the passenger seat. TIP Make sure that the rider seat is properly secured before riding. 1. Storage compartment There is a storage compartment under the rider seat. (See page 3-11.) EWA10962 WARNING Do not exceed the load limit of 3 kg (7 lb) for the storage compartment.
U1GBE0E0.book Page 13 Wednesday, June 26, 2013 4:04 PM INSTRUMENT AND CONTROL FUNCTIONS Do not leave your scooter unattended with the seat open.
U1GBE0E0.book Page 1 Wednesday, June 26, 2013 4:04 PM FOR YOUR SAFETY – PRE-OPERATION CHECKS EAU15598 Inspect your vehicle each time you use it to make sure the vehicle is in safe operating condition. Always follow the inspection and maintenance procedures and schedules described in the Owner’s Manual. EWA11152 WARNING Failure to inspect or maintain the vehicle properly increases the possibility of an accident or equipment damage. Do not operate the vehicle if you find any problem.
U1GBE0E0.book Page 2 Wednesday, June 26, 2013 4:04 PM FOR YOUR SAFETY – PRE-OPERATION CHECKS ITEM CHECKS PAGE Rear brake • Check operation. • If soft or spongy, have Yamaha dealer bleed hydraulic system. • Check brake pads for wear. • Replace if necessary. • Check fluid level in reservoir. • If necessary, add specified brake fluid to specified level. • Check hydraulic system for leakage. Throttle grip • Make sure that operation is smooth. • Check throttle grip free play.
U1GBE0E0.book Page 1 Wednesday, June 26, 2013 4:04 PM OPERATION AND IMPORTANT RIDING POINTS EAU15952 EAUM3150 EAUM3161 Starting a cold engine Read the Owner’s Manual carefully to become familiar with all controls. If there is a control or function you do not understand, ask your Yamaha dealer. EWA10272 WARNING Failure to familiarize yourself with the controls can lead to loss of control, which could cause an accident or injury.
U1GBE0E0.book Page 2 Wednesday, June 26, 2013 4:04 PM OPERATION AND IMPORTANT RIDING POINTS 3. Start the engine by pushing the start switch while applying the front or rear brake. If the engine does not start, release the start switch, wait a few seconds, and then try again. Each starting attempt should be as short as possible to preserve the battery. Do not crank the engine more than 5 seconds on any one attempt. If the engine does not start with the starter motor, try using the kickstarter.
U1GBE0E0.book Page 3 Wednesday, June 26, 2013 4:04 PM OPERATION AND IMPORTANT RIDING POINTS EAU16794 Braking Front EAU16821 Tips for reducing fuel consumption EWA10301 WARNING 5 Avoid braking hard or suddenly (especially when leaning over to one side), otherwise the scooter may skid or overturn. Railroad crossings, streetcar rails, iron plates on road construction sites, and manhole covers become extremely slippery when wet.
U1GBE0E0.book Page 4 Wednesday, June 26, 2013 4:04 PM OPERATION AND IMPORTANT RIDING POINTS EAU16831 Engine break-in There is never a more important period in the life of your engine than the period between 0 and 1000 km (600 mi). For this reason, you should read the following material carefully. Since the engine is brand new, do not put an excessive load on it for the first 1000 km (600 mi). The various parts in the engine wear and polish themselves to the correct operating clearances.
U1GBE0E0.book Page 1 Wednesday, June 26, 2013 4:04 PM PERIODIC MAINTENANCE AND ADJUSTMENT EAU17245 EWA15123 EAU17303 Turn off the engine when performing maintenance unless otherwise specified. A running engine has moving parts that can catch on body parts or clothing and electrical parts that can cause shocks or fires. Running the engine while servicing can lead to eye injury, burns, fire, or carbon monoxide poisoning – possibly leading to death.
U1GBE0E0.book Page 2 Wednesday, June 26, 2013 4:04 PM PERIODIC MAINTENANCE AND ADJUSTMENT EAU46872 TIP The annual checks must be performed every year, except if a kilometer-based maintenance, or for the UK, a mileage-based maintenance, is performed instead. From 30000 km (17500 mi), repeat the maintenance intervals starting from 6000 km (3500 mi). Items marked with an asterisk should be performed by a Yamaha dealer as they require special tools, data and technical skills.
U1GBE0E0.book Page 3 Wednesday, June 26, 2013 4:04 PM PERIODIC MAINTENANCE AND ADJUSTMENT EAU1771A General maintenance and lubrication chart ODOMETER READING NO. ITEM CHECK OR MAINTENANCE JOB 1 * Air filter element • Replace. 2 • Clean. Air filter check hose 3 * Battery 4 * Front brake 1000 km (600 mi) √ • Check electrolyte level and specific gravity. • Make sure that the breather hose is properly routed. • Check operation, fluid level and vehicle for fluid leakage.
U1GBE0E0.book Page 4 Wednesday, June 26, 2013 4:04 PM PERIODIC MAINTENANCE AND ADJUSTMENT ODOMETER READING NO. ITEM 10 * Wheel bearings 11 * Steering bearings 12 * Chassis fasteners CHECK OR MAINTENANCE JOB 1000 km (600 mi) • Check bearing for looseness or damage. • Check bearing play and steering for roughness. √ 6000 km (3500 mi) 12000 km (7000 mi) 18000 km (10500 mi) 24000 km (14000 mi) √ √ √ √ √ √ √ √ • Lubricate with lithium-soapbased grease.
U1GBE0E0.book Page 5 Wednesday, June 26, 2013 4:04 PM PERIODIC MAINTENANCE AND ADJUSTMENT ODOMETER READING NO. 21 ITEM Final transmission oil 1000 km (600 mi) 6000 km (3500 mi) • Check vehicle for oil leakage. √ √ • Change. √ √ 22 * V-belt • Replace. Front and rear 23 * brake switches • Check operation.
U1GBE0E0.book Page 6 Wednesday, June 26, 2013 4:04 PM PERIODIC MAINTENANCE AND ADJUSTMENT EAU18742 1 Removing and installing the cowling and panel The cowling and panel shown need to be removed to perform some of the maintenance jobs described in this chapter. Refer to this section each time the cowling or panel needs to be removed and installed. 1 ZAUM0271 ZAUM1072 1. Screw 1. Screw 2. Panel A To install the cowling Place the cowling in the original position, and then install the screws.
U1GBE0E0.book Page 7 Wednesday, June 26, 2013 4:04 PM PERIODIC MAINTENANCE AND ADJUSTMENT EAUM3251 Checking the spark plug The spark plug is an important engine component, which is easy to check. Since heat and deposits will cause any spark plug to slowly erode, the spark plug should be removed and checked in accordance with the periodic maintenance and lubrication chart. In addition, the condition of the spark plug can reveal the condition of the engine. 6 To remove the spark plug 1. Remove panel A.
U1GBE0E0.book Page 8 Wednesday, June 26, 2013 4:04 PM PERIODIC MAINTENANCE AND ADJUSTMENT 2. Check the spark plug for electrode erosion and excessive carbon or other deposits, and replace it if necessary. Specified spark plug: NGK/CR7E To install the spark plug 1. Measure the spark plug gap with a wire thickness gauge and, if necessary, adjust the gap to specification. 1 ZAUM0037 1. Spark plug gap Spark plug gap: 0.7–0.8 mm (0.028–0.031 in) 2.
U1GBE0E0.book Page 9 Wednesday, June 26, 2013 4:04 PM PERIODIC MAINTENANCE AND ADJUSTMENT EAUM3170 Engine oil and oil strainer The engine oil level should be checked before each ride. In addition, the oil must be changed and the oil strainer cleaned at the intervals specified in the periodic maintenance and lubrication chart. 6 To check the engine oil level 1. Place the scooter on the centerstand. A slight tilt to the side can result in a false reading. 2.
U1GBE0E0.book Page 10 Wednesday, June 26, 2013 4:04 PM PERIODIC MAINTENANCE AND ADJUSTMENT Tightening torque: Engine oil drain bolt A: 23 Nm (2.3 m·kgf, 17 ft·lbf) Engine oil drain bolt B: 32 Nm (3.2 m·kgf, 23 ft·lbf) 8. Refill with the specified amount of the recommended engine oil, and then install and tighten the oil filler cap. 1. 2. 3. 4. Engine oil drain bolt B Strainer Compression spring O-ring 4. Clean the oil strainer with solvent, and then check it for damage and replace it if necessary. 5.
U1GBE0E0.book Page 11 Wednesday, June 26, 2013 4:04 PM PERIODIC MAINTENANCE AND ADJUSTMENT 2. Release the button, and the oil change indicator will go off. 6 EAUT1562 Final transmission oil The final transmission case must be checked for oil leakage before each ride. If any leakage is found, have a Yamaha dealer check and repair the scooter. In addition, the final transmission oil must be changed as follows at the intervals specified in the periodic maintenance and lubrication chart. 1.
U1GBE0E0.book Page 12 Wednesday, June 26, 2013 4:04 PM PERIODIC MAINTENANCE AND ADJUSTMENT 7. Check the final transmission case for oil leakage. If oil is leaking, check for the cause. EAU20071 Coolant The coolant level should be checked before each ride. In addition, the coolant must be changed at the intervals specified in the periodic maintenance and lubrication chart. EAUM3180 To check the coolant level 1. Place the vehicle on a level surface and hold it in an upright position.
U1GBE0E0.book Page 13 Wednesday, June 26, 2013 4:04 PM PERIODIC MAINTENANCE AND ADJUSTMENT wise the cooling system will not be protected against frost and corrosion. If water has been added to the coolant, have a Yamaha dealer check the antifreeze content of the coolant as soon as possible, otherwise the effectiveness of the coolant will be reduced. [ECA10473] EAU33032 Changing the coolant The coolant must be changed at the intervals specified in the periodic maintenance and lubrication chart.
U1GBE0E0.book Page 14 Wednesday, June 26, 2013 4:04 PM PERIODIC MAINTENANCE AND ADJUSTMENT To replace the air filter element 1. Remove the air filter case cover by removing the screws. 2. Pull the air filter element out. 3. Insert a new air filter element into the air filter case as shown. NOTICE: Make sure that the air filter element is properly seated in the air filter case.
U1GBE0E0.book Page 15 Wednesday, June 26, 2013 4:04 PM PERIODIC MAINTENANCE AND ADJUSTMENT EAU21877 Tires Tires are the only contact between the vehicle and the road. Safety in all conditions of riding depends on a relatively small area of road contact. Therefore, it is essential to maintain the tires in good condition at all times and replace them at the appropriate time with the specified tires.
U1GBE0E0.book Page 16 Wednesday, June 26, 2013 4:04 PM PERIODIC MAINTENANCE AND ADJUSTMENT Tire inspection 1 2 ZAUM0054 1. Tire tread depth 2. Tire sidewall The tires must be checked before each ride. If the center tread depth reaches the specified limit, if the tire has a nail or glass fragments in it, or if the sidewall is cracked, have a Yamaha dealer replace the tire immediately. Minimum tire tread depth (front and rear): 1.6 mm (0.
U1GBE0E0.book Page 17 Wednesday, June 26, 2013 4:04 PM PERIODIC MAINTENANCE AND ADJUSTMENT EAU21963 Cast wheels 6 To maximize the performance, durability, and safe operation of your vehicle, note the following points regarding the specified wheels. The wheel rims should be checked for cracks, bends, warpage or other damage before each ride. If any damage is found, have a Yamaha dealer replace the wheel. Do not attempt even the smallest repair to the wheel. A deformed or cracked wheel must be replaced.
U1GBE0E0.book Page 18 Wednesday, June 26, 2013 4:04 PM PERIODIC MAINTENANCE AND ADJUSTMENT Checking the front and rear brake pads indicator groove has almost disappeared, have a Yamaha dealer replace the brake pads as a set. The front and rear brake pads must be checked for wear at the intervals specified in the periodic maintenance and lubrication chart.
U1GBE0E0.book Page 19 Wednesday, June 26, 2013 4:04 PM PERIODIC MAINTENANCE AND ADJUSTMENT Use only the specified brake fluid; otherwise, the rubber seals may deteriorate, causing leakage. Refill with the same type of brake fluid. Adding a brake fluid other than DOT 4 may result in a harmful chemical reaction. Be careful that water does not enter the brake fluid reservoir when refilling. Water will significantly lower the boiling point of the fluid and may result in vapor lock.
U1GBE0E0.book Page 20 Wednesday, June 26, 2013 4:04 PM PERIODIC MAINTENANCE AND ADJUSTMENT EAUM1361 Changing the brake fluid Have a Yamaha dealer change the brake fluid at the intervals specified in the periodic maintenance and lubrication chart. In addition, have the brake hose replaced every four years or whenever it is damaged or leaking.
U1GBE0E0.book Page 21 Wednesday, June 26, 2013 4:04 PM PERIODIC MAINTENANCE AND ADJUSTMENT EAU23173 Lubricating the front and rear brake levers EAU23193 Recommended lubricant: Silicone grease Checking and lubricating the centerstand Front brake lever 1 ZAUM0455 1. Centerstand ZAUM1094 The operation of the centerstand should be checked before each ride, and the pivots and metal-to-metal contact surfaces should be lubricated if necessary.
U1GBE0E0.book Page 22 Wednesday, June 26, 2013 4:04 PM PERIODIC MAINTENANCE AND ADJUSTMENT EAU23273 Recommended lubricant: Lithium-soap-based grease Checking the front fork The condition and operation of the front fork must be checked as follows at the intervals specified in the periodic maintenance and lubrication chart. To check the condition Check the inner tubes for scratches, damage and excessive oil leakage. ZAUM0932 ECA10591 To check the operation 1.
U1GBE0E0.book Page 23 Wednesday, June 26, 2013 4:04 PM PERIODIC MAINTENANCE AND ADJUSTMENT EAU45512 Checking the steering 6 Worn or loose steering bearings may cause danger. Therefore, the operation of the steering must be checked as follows at the intervals specified in the periodic maintenance and lubrication chart. 1. Place the vehicle on the centerstand. WARNING! To avoid injury, securely support the vehicle so there is no danger of it falling over. [EWA10752] 2.
U1GBE0E0.book Page 24 Wednesday, June 26, 2013 4:04 PM PERIODIC MAINTENANCE AND ADJUSTMENT TIP Make sure that the scooter is positioned straight up when checking the electrolyte level. 2. Remove panel A. (See page 6-6.) 3. Check the electrolyte level in the battery. 1 UPPER LOWER + 2 ZAUM0106 1. Maximum level mark 2. Minimum level mark TIP The electrolyte should be between the minimum and maximum level marks. 4.
U1GBE0E0.book Page 25 Wednesday, June 26, 2013 4:04 PM PERIODIC MAINTENANCE AND ADJUSTMENT 6 is turned to “ ”, then connect the positive lead before connecting the negative lead. [ECA17721] 4. After installation, make sure that the battery leads are properly connected to the battery terminals and that the breather hose is properly routed, in good condition, and not obstructed.
U1GBE0E0.book Page 26 Wednesday, June 26, 2013 4:04 PM PERIODIC MAINTENANCE AND ADJUSTMENT EAUS1403 Replacing the headlight bulb If the headlight bulb burns out, replace it as follows. ECA10651 NOTICE Take care not to damage the following parts: Headlight bulb Do not touch the glass part of the headlight bulb to keep it free from oil, otherwise the transparency of the glass, the luminosity of the bulb, and the bulb life will be adversely affected.
U1GBE0E0.book Page 27 Wednesday, June 26, 2013 4:04 PM PERIODIC MAINTENANCE AND ADJUSTMENT 8. Connect the headlight coupler. 9. Install the cowling. 10. Have a Yamaha dealer adjust the headlight beam if necessary. EAU24134 Replacing the tail/brake light bulb 1. Remove the tail/brake light lens by removing the screws. 1. Remove the turn signal light lens by removing the screw. ZAUM0938 ZAUM0937 6 EAU24205 Replacing a turn signal light bulb 2.
U1GBE0E0.book Page 28 Wednesday, June 26, 2013 4:04 PM PERIODIC MAINTENANCE AND ADJUSTMENT 3. Insert a new bulb into the socket, push it in, and then turn it clockwise until it stops. 4. Install the lens by installing the screw. NOTICE: Do not overtighten the screw, otherwise the lens may break. [ECA11192] EAU24331 License plate light If the license plate light does not come on, have a Yamaha dealer check the electrical circuit or replace the bulb.
U1GBE0E0.book Page 29 Wednesday, June 26, 2013 4:04 PM PERIODIC MAINTENANCE AND ADJUSTMENT EAU25882 Troubleshooting 1. Auxiliary light bulb 5. Insert a new bulb into the socket. 6. Install the socket (together with the bulb) by pushing it in. 7. Install the cowling. 6 Although Yamaha scooters receive a thorough inspection before shipment from the factory, trouble may occur during operation.
U1GBE0E0.book Page 30 Wednesday, June 26, 2013 4:04 PM PERIODIC MAINTENANCE AND ADJUSTMENT EAUM3290 Troubleshooting charts Starting problems or poor engine performance 1. Fuel There is enough fuel. Check the battery. There is no fuel. Supply fuel. Check the fuel level in the fuel tank. 2. Battery The engine does not start. Check the battery. The engine turns over quickly. The battery is good. The engine turns over slowly.
U1GBE0E0.book Page 31 Wednesday, June 26, 2013 4:04 PM PERIODIC MAINTENANCE AND ADJUSTMENT Engine overheating EWAT1041 WARNING Do not remove the radiator cap when the engine and radiator are hot. Scalding hot fluid and steam may be blown out under pressure, which could cause serious injury. Be sure to wait until the engine has cooled. Place a thick rag, like a towel, over the radiator cap, and then slowly rotate the cap counterclockwise to the detent to allow any residual pressure to escape.
U1GBE0E0.book Page 1 Wednesday, June 26, 2013 4:04 PM SCOOTER CARE AND STORAGE EAU37834 Matte color caution EAU26096 Care ECA15193 NOTICE Some models are equipped with matte colored finished parts. Be sure to consult a Yamaha dealer for advice on what products to use before cleaning the vehicle. Using a brush, harsh chemical products or cleaning compounds when cleaning these parts will scratch or damage their surface. Wax also should not be applied to any matte colored finished parts.
U1GBE0E0.book Page 2 Wednesday, June 26, 2013 4:04 PM SCOOTER CARE AND STORAGE 7 off any detergent residue using plenty of water, as it is harmful to plastic parts. Do not use any harsh chemical products on plastic parts. Be sure to avoid using cloths or sponges which have been in contact with strong or abrasive cleaning products, solvent or thinner, fuel (gasoline), rust removers or inhibitors, brake fluid, antifreeze or electrolyte.
U1GBE0E0.book Page 3 Wednesday, June 26, 2013 4:04 PM SCOOTER CARE AND STORAGE windshield which does not affect your visibility and which cannot be easily recognized. After cleaning 1. Dry the scooter with a chamois or an absorbing cloth. 2. Use a chrome polish to shine chrome, aluminum and stainlesssteel parts, including the exhaust system. (Even the thermally induced discoloring of stainlesssteel exhaust systems can be removed through polishing.) 3.
U1GBE0E0.book Page 4 Wednesday, June 26, 2013 4:04 PM SCOOTER CARE AND STORAGE EAU36564 Storage Short-term Always store your scooter in a cool, dry place and, if necessary, protect it against dust with a porous cover. Be sure the engine and the exhaust system are cool before covering the scooter. ECA10821 NOTICE 7 Storing the scooter in a poorly ventilated room or covering it with a tarp, while it is still wet, will allow water and humidity to seep in and cause rust.
U1GBE0E0.book Page 1 Monday, July 15, 2013 11:45 AM SPECIFICATIONS Dimensions: Overall length: 1876 mm (73.9 in) Overall width: 706 mm (27.8 in) Overall height: 1154 mm (45.4 in) Seat height: 817 mm (32.2 in) Wheelbase: 1274 mm (50.2 in) Ground clearance: 118 mm (4.65 in) Minimum turning radius: 2000 mm (78.7 in) Weight: Curb weight: 97 kg (214 lb) Engine: Engine type: Liquid cooled 4-stroke, SOHC Cylinder arrangement: Single cylinder Displacement: 49 cm³ Bore × stroke: 38.0 × 43.5 mm (1.50 × 1.
U1GBE0E0.book Page 2 Wednesday, June 26, 2013 4:04 PM SPECIFICATIONS Chassis: Frame type: Underbone Caster angle: 27.00 ° Trail: 172 mm (6.
U1GBE0E0.book Page 3 Wednesday, June 26, 2013 4:04 PM SPECIFICATIONS Bulb voltage, wattage × quantity: Headlight: 12 V, 35.0 W/35.0 W × 1 Tail/brake light: 12 V, 5.0 W/21.0 W × 1 Front turn signal light: 12 V, 10.0 W × 2 Rear turn signal light: 12 V, 10.0 W × 2 Auxiliary light: 12 V, 5.0 W × 1 (CHE) License plate light: 12 V, 5.
U1GBE0E0.book Page 1 Wednesday, June 26, 2013 4:04 PM CONSUMER INFORMATION EAU48613 Identification numbers Record the vehicle identification number and model label information in the spaces provided below for assistance when ordering spare parts from a Yamaha dealer or for reference in case the vehicle is stolen. EAU26411 Vehicle identification number EAUM2811 Model label 1 1 VEHICLE IDENTIFICATION NUMBER: ZAUM1077 ZAUM0287 MODEL LABEL INFORMATION: 1. Vehicle identification number 1.
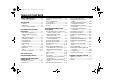
U1GBE0E0.book Page 1 Wednesday, June 26, 2013 4:04 PM INDEX A B Battery .................................................. 6-23 Brake fluid, changing............................ 6-20 Brake fluid level, checking.................... 6-18 Brake lever, front .................................... 3-7 Brake lever, rear ..................................... 3-7 Brake levers, lubricating ....................... 6-21 Braking ................................................... 5-3 H Handlebar switches .............
A5-yoko_Blank.
A5-yoko_Blank.
Original instructions MBK Industrie Z.I. de Rouvroy 02100 Saint Quentin PRINTED IN FRANCE 2013.