Disklavier Control Unit DKC-900 Owner’s manual Mode d’emploi Benutzerhandbuch Manual de instrucciones Manuale di istruzioni EN FR DE ES IT
FCC INFORMATION (U.S.A.) 1. IMPORTANT NOTICE: DO NOT MODIFY THIS UNIT! This product, when installed as indicated in the instructions contained in this manual, meets FCC requirements. Modifications not expressly approved by Yamaha may void your authority, granted by the FCC, to use the product. 2. IMPORTANT: When connecting this product to accessories and/or another product use only high quality shielded cables. Cable/s supplied with this product MUST be used. Follow all installation instructions.
Explanation of Graphical Symbols The lightning flash with arrowhead symbol within an equilateral triangle is intended to alert the user to the presence of uninsulated “dangerous voltage” within the product’s enclosure that may be of sufficient magnitude to constitute a risk of electric shock to persons. CAUTION RISK OF ELECTRIC SHOCK DO NOT OPEN CAUTION: TO REDUCE THE RISK OF ELECTRIC SHOCK, DO NOT REMOVE COVER (OR BACK). NO USER-SERVICEABLE PARTS INSIDE. REFER SERVICING TO QUALIFIED SERVICE PERSONNEL.
Explication des symboles graphiques ATTENTION RISQUE D'ÉLECTROCUTION NE PAS OUVRIR ATTENTION : POUR RÉDUIRE LES RISQUES D'ÉLECTROCUTION, NE PAS RETIRER LE CAPOT (OU LE DOS). NE CONTIENT PAS DE PIÈCES NÉCESSITANT L'INTERVENTION DE L'UTILISATEUR. POUR TOUTE INTERVENTION, FAIRE APPEL À DES PROFESSIONNELS QUALIFIÉS.
Information for users on collection and disposal of old equipment: This symbol on the products, packaging, and/or accompanying documents means that used electrical and electronic products should not be mixed with general household waste. For proper treatment, recovery and recycling of old products, please take them to applicable collection points, in accordance with your national legislation.
Verbraucherinformation zur Sammlung und Entsorgung alter Elektrogeräte Befindet sich dieses Symbol auf den Produkten, der Verpackung und/oder beiliegenden Unterlagen, so sollten benutzte elektrische Geräte nicht mit dem normalen Haushaltsabfall entsorgt werden. In Übereinstimmung mit Ihren nationalen Bestimmungen bringen Sie alte Geräte bitte zur fachgerechten Entsorgung, Wiederaufbereitung und Wiederverwendung zu den entsprechenden Sammelstellen.
English Disklavier Control Unit DKC-900 Owner’s Manual
Welcome to the Yamaha DisklavierTM! Thank you for purchasing the Disklavier Control Unit! Before using your this product, please read this manual thoroughly and retain it for future reference. About this product About the Manuals Included Accessories The following instruction manuals are available for this product. Please make sure that you have the following accessories: English Installing this product to your Disklavier piano additionally allows you to play back accompanying audio sounds.
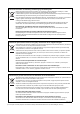
PRECAUTIONS PLEASE READ CAREFULLY BEFORE PROCEEDING Please keep this manual in a safe and handy place for future reference. For the AC Adaptor WARNING CAUTION • This AC adaptor is designed for use with only Yamaha electronic instruments. Do not use for any other purpose. • When setting up, make sure that the AC outlet is easily accessible. If some trouble or malfunction occurs, immediately turn off the power switch of the instrument and disconnect the AC adaptor from the outlet.
CAUTION Always follow the basic precautions listed below to avoid the possibility of physical injury to you or others, or damage to the instrument or other property. These precautions include, but are not limited to, the following: Power supply/AC adaptor Transportation • Do not connect the instrument to an electrical outlet using a multiple connector. Doing so can result in lower sound quality, or possibly cause overheating in the outlet. • Do not use if the power cord or plug is damaged.
Trademarks & Copyrights • The contents of this manual and the copyrights thereof are under exclusive ownership by Yamaha Corporation. • Yamaha, Disklavier, Disklavier ENSPIRE, Silent Piano, DisklavierRadio, PianoSoft, and PianoSoftPlus are trademarks of Yamaha Corporation. • SmartKey and CueTIME are trademarks of Yamaha Corporation or Yamaha Corporation of America. • Disklavier ENSPIRE software, Copyright © 2016 Yamaha Corporation.
Table of Contents About the Manuals .................................................3 Included Accessories .............................................3 Appendix XG Voice List........... A-3 XG Drum Kit List...... A-6 MIDI Data Format .... A-8 English Chapter 1 Introduction ................ 8 Main Features ........................................................8 Names of Parts and Their Functions......................9 MIDI IMPLEMENTATION CHART ....
Chapter 1 Introduction Main Features This product provides a variety of sophisticated features and advanced functions that greatly expand the capabilities of your piano—and enhance your musical enjoyment.
Chapter Introduction 1 Names of Parts and Their Functions This product consists of the following units. • Switch Box (following)...................... Turn this product on/off to control functions. • Control Center Unit (page 11) .......... It is equipped with terminals for connecting external devices. Switch Box (Front and Bottom panel) English Front panel 5 6 1 2 3 4 Bottom panel 1 [P] (Standby/On) button/indicator 4 HEADPHONE jack Turns this product on or off.
Chapter 1 Introduction Switch Box (Rear Panel) 1 2 3 4 5 1 [AUTO PLAY] switch 3 [MAINTENANCE] button For activating or deactivating the auto play function. If you leave the switch set to “ON,” playback automatically starts when the power is turned on. (Default setting: OFF) For service personnel only. Do not touch this button. 2 [AUTO OFF MODE] switch Note: This product cannot detect the USB flash drive if two or more memory devices are connected at the same time.
Chapter Introduction 1 Control Center Unit Rear panel 6 English 1 2 3 4 5 Side panel 7 1 [USB] (To DEVICE) terminal 5 [DIGITAL OUT] jack Used to connect the USB flash drive. Used to connect to the digital input jack of an external audio device using a digital coaxial cable. Note: This product cannot detect the USB flash drive if two or more memory devices are connected at the same time. 2 [LAN] port Used to connect the router or hub using an Ethernet cable.
Chapter 1 Introduction Compatible Media and File Format Compatible Device USB Flash Drive • The USB flash drive should be formatted in FAT16 or FAT32 file system. • Check that the USB flash drive is free of memory and software protection before attempting to use it, as these kinds of protection will prohibit access to the memory. • This product is USB 2.0 compliant. You can also connect USB 3.0 devices, however data will be transferred at USB 2.0 speeds.
Chapter 2 Getting Started Connecting the AC Power Cable Connect the AC power cable extending from the piano to the AC wall outlet. This connection provides power to the autoplay piano. Grand piano 2 Upright piano Connect the power cord connected to the DKC-900’s power adaptor. This connection supplies power to the control center unit and the switch box. Connect the plugs of the AC adaptor in the order shown in the illustration.
Chapter 2 Getting Started Connect powered speakers (Sold separately for Upright piano) You can connect powered speakers to the [OUTPUT] jacks as illustrated. * The audio cable should be 3m or less in length, and use an audio cable (conversion cable) that matches the shape of the INPUT LINE jack on the speaker side.
Chapter Getting Started 2 Turning the Power On/Off Turning the Power On 1 Make sure that the main switch on the power supply unit/ inlet box is turned on.
Chapter 2 Getting Started Setting the Auto Off Function You can turn the power off automatically if you do not use the product for the time specified with the ENSPIRE Controller app. 1 16 Set the [AUTO OFF MODE] switch on the rear of the switch box. Setting Description ON The auto off function is activated. The product is automatically turned off if you do not use it for the time specified with the ENSPIRE Controller app. OFF The auto off function is deactivated.
Chapter Getting Started 2 How to use the Silent Piano™ Function (For Pianos Equipped with the Silent Piano™ Function) English This product has the original mechanism of a piano that strikes strings with hammers, and also has a “Silent Piano™ function” that effectively mutes the sound. When the sound is muted, the hammers inside the piano do not strike the strings, and the piano sound is heard entirely as electronic sound from powered speaker (in Quiet mode) or the headphones (in Headphone mode).
Chapter 2 Getting Started Connecting the Product and Smart Device to a Network By connecting this product and smart device to a network, you can enjoy a variety of features through the Internet Direct Connection (IDC) services or control this product using your smart device (ENSPIRE Controller app). Internet Direct Connection (IDC) Internet Direct Connection (IDC) is a feature that allows you to connect this product directly to the Internet.
Chapter Getting Started 2 Choosing the Network Connection Method You can use one of the three methods of connections below. Select one which is most suitable for your network environment. Wireless Network Connection by WPS ( page 21) Wireless router (access point) Wireless LAN English Choose this if you have a wireless router (access point) that supports WPS. Connection will be established via a wireless router (access point).
Chapter 2 Getting Started Wired Network Connection ( page 23) Choose this if you have a wireless router (access point) that does not support WPS. Connection will be established via wireless router (access point). Wireless router (access point) Internet Ethernet cable Wireless LAN Note: Use an STP (shielded twisted pair) cable for connection. Note: To ensure proper security, when connecting this product to the Internet, be sure to connect via a router, etc.
Chapter Getting Started 2 Wireless Network Connection by WPS If your wireless router (access point) supports WPS, you can easily connect this product to a network just by following the procedures below, without making any additional settings, such as entering a password. Press the [P] (Standby/On) button to turn the power off. English 1 2 Note: To check whether your wireless router (access point) supports WPS, refer to the owner’s manual supplied with your wireless router (access point).
Chapter 2 Getting Started 7 8 9 Open the Wi-Fi setting screen on your smart device. Enable the Wi-Fi function. From the network list shown on the screen, tap on the network to which you connected this product. If necessary, enter a password, and then connect. 22 Note: For details on the Wi-Fi setting, refer to the owner’s manual supplied with your smart device.
Chapter Getting Started 2 Wired Network Connection If your wireless router (access point) does not support WPS, you can connect this product to a wireless router (access point) using an Ethernet cable. 1 Connect the wireless router (access point) to the [LAN] port on the control center unit using an Ethernet cable. Control center unit Wireless router (access point) Ethernet cable 3 Enable the DHCP server function on the wireless router (access point).
Chapter 2 Getting Started Direct Wireless Connection You can use this product as an access point to establish a direct wireless connection between this product and your smart device. 1 2 Press the [P] (Standby/On) button to turn the power off. Note: If this product is connected directly to your smart device, no Internet access is available on your smart device. Connect the USB wireless LAN adaptor (UD-WL01) to the [USB] terminal on the rear of the switch box.
Chapter Getting Started 2 Using the ENSPIRE Controller App Installing the App To connect your smart device to this product, you must install the ENSPIRE Controller app to your smart device. English Note: • The application supports iOS and Android devices. • For details on the application, refer to the description on the download site. For details, search for “ENSPIRE Controller” on the App Store or Google Play.
Chapter 3 Other Settings Updating this product Yamaha product firmware may occasionally be updated to improve functionality and operability. Certain functions may not be available with older firmware versions, so we recommend following the instructions below to update to the latest version. 1 Download the update program file. You can download the update program from the following site: https://download.yamaha.com/ 2 3 4 Copy “en_update.
Chapter Other Settings 3 Initializing Network Settings If the ENSPIRE Controller app cannot connect to this product due to the improper network settings, follow the procedure below to initialize network settings on this product. 2 Press the [P] (Standby/On) button to turn the power off. While holding down the [- VOLUME +] buttons, press the [P] (Standby/On) button. English 1 + After this product is turned on, restart the ENSPIRE Controller app.
Chapter 4 Troubleshooting If you are having difficulty operating this product, see if any of the symptoms listed below apply to your problem and follow the recommended remedy. Power Symptom Remedy This product does not turn on. Make sure that the main switch on the power supply unit is turned on. Make sure that the AC power cable is securely connected to a suitable AC wall outlet. If this product still cannot be turned on, disconnect it from the AC wall outlet, and consult your Yamaha piano dealer.
Chapter Troubleshooting 4 Network Symptom Remedy This product cannot connect to the Internet via a wireless router (access point). Make sure that the wireless router (access point) is turned on. There might be an obstacle between this product and the wireless router (access point). Move the wireless router (access point) to a location where there are no obstacles between them. English This product and the wireless router (access point) might be too far apart.
Chapter 4 Troubleshooting Error Indications The error indicator may flash in red when some error has occurred. Refer to the table below for an explanation of the indication. Example of Indication: Flashing Lighting up Indication Situation Remedy Firmware update is failed. Turn off the power of this product. Download the update program and try to update the firmware again. If the problem still persists, consult your Yamaha piano dealer.
Chapter 5 Glossary This glossary provides basic definitions of terms used frequently in this manual. LAN This is a standard or protocol by which IP addresses and other low-level network configuration information can be dynamically and automatically assigned each time a connection is made to the Internet. Short for Local Area Network, this is a data-transfer network that connects a group of computers at a single location (such as an office or home) by means of a special cable.
Chapter 5 Glossary SMF XG Abbreviation for Standard MIDI File. Yamaha XG is an extension of the GM (General MIDI) format. Its greater polyphony, more voices, and use of effects enhances the compatibility between MIDI devices. When a song in the Yamaha XG format is played on another XG-compatible tone generator or synthesizer, it plays and sounds as the original composer/creator intended. SMF Song Format A song file format supported by MIDI sequencers and music software.
Chapter 6 Specifications General Specifications USB flash drive Built-in Songs 500 songs Compatible File Formats Standard MIDI File (SMF) format 0, Standard MIDI File (SMF) format 1, WAVE, MP3 Compatible Song Formats PianoSoft, PianoSoftPlus, PianoSoftAudio, SmartKey Switch Box Buttons POWER Switches AUTO PLAY, AUTO OFF MODE, WLAN Dimension (W × D × H) 220 x 70 x 30 mm (8-11/16 x 2-3/4 x 1-3/16 inch) Control Center Unit Dimension (W × D × H) 224 x 130 x 76 mm (8-13/16 x 5-1/8 x 3 inch) C
MEMO
Disklavier Control Unit DKC-900 Appendix Appendix
XG Voice List Voice Group Piano LSB 0 1 18 40 41 0 1 0 1 32 40 41 0 1 0 1 18 32 40 45 64 0 1 32 33 34 40 41 42 45 0 1 25 35 0 1 27 64 65 0 0 0 64 0 1 45 0 1 64 97 98 0 0 96 97 0 35 96 97 0 32 33 34 35 36 37 38 40 64 65 66 67 0 24 32 33 PRG 1 1 1 1 1 2 2 3 3 3 3 3 4 4 5 5 5 5 5 5 5 6 6 6 6 6 6 6 6 6 7 7 7 7 8 8 8 8 8 9 10 11 11 12 12 12 13 13 13 13 13 14 15 15 15 16 16 16 16 17 17 17 17 17 17 17 17 17 17 17 17 17 18 18 18 18 Element 2* 1 2 2 2 2 1 2 2 2 2 2 2 2 2 1 2 2 2 2 1 2 1 2 2 2 2 2 2 2 1 1 2 2 1 1
XG Voice List Voice Group Bass Strings Ensemble Brass A-4 Voice Name TechnoBass Orbiter SquareBass RubberBass Hammer SynthBass2 MellowSyBass SequenceBass ClickSynBass SynBass2Dark SmoothSyBass ModulrSyBass DXBass XWireBass Violin SlwAtkViolin Viola Cello Contrabass Trem.Strings SlwAtTremStr SuspenseStr PizzicatoStr Orch.Harp YangChin Timpani Strings1 StereoStrngs SlwAtkStrngs ArcoStrings 60’sStrings Orchestra Orchestra2 TremOrchstra Velo.Strings Strings2 S.
XG Voice List Voice Group Synth. Pad Synth.
XG Drum Kit List : Same as Standard Kit 1 : No Sound Bank Select MSB (0-127) 127 127 127 127 127 Bank Select LSB (0-127) 0 0 0 0 0 Program Change (0-127) 0 1 8 16 24 Program Change (1-128) 1 2 9 17 25 MIDI Alternate Key Off Standard Kit1 Standard Kit2 Room Kit Rock Kit Electro Kit Group Note # Note 13 C#-1 3 Surdo Mute 14 D-1 3 Surdo Open 15 D#-1 Hi Q 16 E-1 Whip Slap 17 F-1 4 Scratch H 18 F#-1 4 Scratch L 19 G-1 Finger Snap 20 G#-1 Click Noise 21 A-1 Metronome Click 22 A#-1 Metronome Bell 23 B-1 Seq Click
XG Drum Kit List : Same as Standard Kit 1 : No Sound 126 0 1 2 SFX Kit2 Phone Call Door Squeak Door Slam Scratch Cut Scratch H 3 Wind Chime Telephone Ring 2 XG Drum Kit List Car Engine Ignition Car Tires Squeal Car Passing Car Crash Siren Train Jet Plane Starship Burst Roller Coaster Submarine Appendix Bank Select MSB (0-127) 127 127 127 127 126 Bank Select LSB (0-127) 0 0 0 0 0 Program Change (0-127) 27 32 40 48 0 Program Change (1-128) 28 33 41 49 1 MIDI Alternate Key Off Dance Kit Jazz Kit Brush Ki
MIDI Data Format MIDI Channel Message (1) Status byte MIDI Events Key Off [GM1] [GM2] Key On [GM1] [GM2] Control Change Mode Message Status 1st Data byte Data 8nH (n: Channel Number) kk 9nH (n: Channel Number) kk BnH BnH (n: Channel Number) Parameter vv Key Number (0-127) vv (00H) Bank Select MSB [GM2] 1 (01H) 5 (05H) 6 (06H) 7 (07H) 10 (0AH) 11 (0BH) 32 (20H) 38 (26H) 64 (40H) 65 (41H) 66 (42H) 67 (43H) 71 (47H) 72 (48H) 73 (49H) 74 (4AH) 75 (4BH) 76 (4
MIDI Data Format MIDI Channel Message (2) Parameters Controlled by NRPN (Non-Registered Parameter Numbers) NRPN Data Entry MSB LSB MSB LSB 01H 01H 01H 01H 01H 01H 01H 01H 01H 01H 01H 01H 14H 08H 09H 0AH 20H 21H 30H 31H 34H 35H 63H 64H 66H rrH mmH mmH mmH mmH mmH mmH mmH mmH mmH mmH mmH mmH mmH — — — — — — — — — — — — — Parameter Vibrato Rate Vibrato Depth Vibrato Delay Low Pass Filter Cutoff Frequency Low Pass Filter Resonance EQ BASS EQ TREBLE EQ BASS Frequency EQ TREBLE Frequency EG Attack Ti
MIDI Data Format MIDI Parameter Change Table MIDI Parameter Change Table (XG SYSTEM) Address (H) 00 00 Size (H) Data (H) 00 4 00-0F 00-0F 00-0F 00-0F MASTER TUNE 04 05 06 7D 7E 7F 1 1 1 1 1 1 07 00-7F 00-7F 28-58 N 00 00 MASTER VOLUME MASTER ATTENUATOR TRANSPOSE DRUM SETUP RESET XG SYSTEM ON ALL PARAMETER RESET TOTAL SIZE Parameter XG Default (H) Description -102.4…0…+102.
MIDI Data Format Address (H) 02 01 Parameter 20 2 22 23 24 25 26 27 28 29 2A 2B 2C 2D 2E 1 1 1 1 1 1 1 1 1 1 1 1 1 0F 00-7F 00-7F 00-7F 00-7F 00-7F 00-7F 00-7F 00-7F 00-7F 00-7F 00-7F 00-7F 00-7F 01-7F 00-7F CHORUS TYPE MSB CHORUS TYPE LSB CHORUS PARAMETER 1 CHORUS PARAMETER 2 CHORUS PARAMETER 3 CHORUS PARAMETER 4 CHORUS PARAMETER 5 CHORUS PARAMETER 6 CHORUS PARAMETER 7 CHORUS PARAMETER 8 CHORUS PARAMETER 9 CHORUS PARAMETER 10 CHORUS RETURN CHORUS PAN SEND CHORUS TO REVERB Refer to Effect Paramete
MIDI Data Format MIDI Parameter Change Table (MULTI EQ) Address (H) 02 40 00 01 02 03 04 05 06 07 08 09 0A 0B 0C 0D 0E 0F 10 11 12 13 14 TOTAL SIZE Size (H) Data (H) 1 1 1 1 1 1 1 1 1 1 1 1 1 1 1 1 1 1 1 1 1 15 00-04 34-4C 04-28 01-78 00-01 34-4C 0E-36 01-78 34-4C 0E-36 01-78 34-4C 0E-36 01-78 34-4C 1C-3A 01-78 00-01 Parameter EQ TYPE EQ GAIN1 EQ FREQUENCY1 EQ Q1 EQ SHAPE1 EQ GAIN2 EQ FREQUENCY2 EQ Q2 NOT USED EQ GAIN3 EQ FREQUENCY3 EQ Q3 NOT USED EQ GAIN4 EQ FREQUENCY4 EQ Q4 NOT USED EQ GAIN5 EQ
MIDI Data Format MIDI Parameter Change Table (MULTI PART) Address (H) 08 nn 00 01 02 03 04 05 06 07 08 09 1 1 1 1 1 1 1 1 1 2 00-20 00-7F 00-7F 00-7F 00-0F, 7F 00-01 00-02 00-03 28-58 00-0F 00-0F 0B 0C 0D 0E 0F 10 11 12 13 14 15 16 17 18 19 1A 1B 1C 1D 1E 1F 20 21 22 23 24 25 26 27 28 1 1 1 1 1 1 1 1 1 1 1 1 1 1 1 1 1 1 1 1 1 1 1 1 1 1 1 1 1 1 29 00-7F 00-7F 00-7F 00-7F 00-7F 00-7F 00-7F 00-7F 00-7F 00-7F 00-7F 00-7F 00-7F 00-7F 00-7F 00-7F 00-7F 00-7F 28-58 00-7F 00-7F 00-7F 00-7F 00-7F 28-58 00-
MIDI Data Format Address (H) Data (H) 53 54 55 56 57 58 59 5A 5B 5C 5D 5E 5F 60 61 62 63 64 65 66 67 68 69 6A 6B 6C 6D 6E 1 1 1 1 1 1 1 1 1 1 1 1 1 1 1 1 1 1 1 1 1 1 1 1 1 1 1 1 3F 28-58 00-7F 00-7F 00-7F 00-7F 00-7F 00-5F 28-58 00-7F 00-7F 00-7F 00-7F 00-7F 00-5F 28-58 00-7F 00-7F 00-7F 00-7F 00-7F 00-01 00-7F 00-7F 00-7F 00-7F 00-7F 01-7F 01-7F PAT PITCH CONTROL PAT LOW PASS FILTER CONTROL PAT AMPLITUDE CONTROL PAT LFO PMOD DEPTH PAT LFO FMOD DEPTH PAT LFO AMOD DEPTH AC1 CONTROLLER NUMBER AC1 PITCH
MIDI Data Format MIDI Parameter Change Table (DRUM SETUP) Address (H) 3n rr Size (H) Data (H) 00 01 02 03 04 05 06 07 08 09 0A 0B 0C 0D 0E 0F 1 1 1 1 1 1 1 1 1 1 1 1 1 1 1 1 10 00-7F 00-7F 00-7F 00-7F 00-7F 00-7F 00-7F 00-7F 00-01 00-01 00-01 00-7F 00-7F 00-7F 00-7F 00-7F PITCH COARSE PITCH FINE LEVEL ALTERNATE GROUP PAN REVERB SEND CHORUS SEND VARIATION SEND KEY ASSIGN Rcv NOTE OFF Rcv NOTE ON LOW PASS FILTER CUTOFF FREQUENCY LOW PASS FILTER RESONANCE EG ATTACK RATE EG DECAY1 RATE EG DECAY2 RATE
MIDI Data Format System Exclusive Messages (1) * Not received when Receive System Exclusive Message is set to off. * Not transmitted when Transmit System Exclusive Message is set to off. System Exclusive Messages (Universal Non Realtime Messages) MIDI Event GM1 System On [GM1] [GM2] Data Format F0 7E XN 09 11110000 01111110 0xxxnnnn 00001001 00000001 11110111 01 F0 7E XN 09 01 F7 F7 = Exclusive status = Universal Non-Real Time = When N is received N=0-F, whichever is received.
MIDI Data Format System Exclusive Messages (Preset Voice) MIDI Event Data Format String Resonance Depth F0 Sustain Sample Depth F0 Key Off Sampling Depth F0 Soft Pedal Depth F0 43 73 11110000 01000011 01110011 00000001 01010000 00010001 0000nnnn 00000010 0ddddddd 11110111 43 73 11110000 01000011 01110011 00000001 01010000 00010001 0000nnnn 00000011 0ddddddd 11110111 43 73 11110000 01000011 01110011 00000001 01010000 00010001 0000nnnn 00000100 0ddddddd 11110111 43 73 11110000 01000011 01110011 0
MEMO
MIDI IMPLEMENTATION CHART Yamaha Disklavier Model: DKC-900 Date: 01-AUG-2019 Version: 1.00 Function...
10-1 Nakazawa-cho, Naka-ku, Hamamatsu, 430-8650 Japan Manual Development Group Copyright © 2019 Yamaha Corporation Published 10/2019 MWEI-A0 YK703A0