OWNER’S MANUAL FZS6W(C) LIT-11626-20-60 4S8-28199-10
U4S810E0.
U4S810E0.book Page 1 Wednesday, October 4, 2006 5:11 PM INTRODUCTION EAU10080 Congratulations on your purchase of the Yamaha FZS6W(C). This model is the result of Yamaha’s vast experience in the production of fine sporting, touring, and pacesetting racing machines. It represents the high degree of craftsmanship and reliability that have made Yamaha a leader in these fields. This manual will give you an understanding of the operation, inspection, and basic maintenance of this motorcycle.
U4S810E0.book Page 1 Wednesday, October 4, 2006 5:11 PM IMPORTANT MANUAL INFORMATION EAU10131 Particularly important information is distinguished in this manual by the following notations: The Safety Alert Symbol means ATTENTION! BECOME ALERT! YOUR SAFETY IS INVOLVED! WARNING Failure to follow WARNING instructions could result in severe injury or death to the motorcycle operator, a bystander or a person inspecting or repairing the motorcycle.
U4S810E0.book Page 2 Wednesday, October 4, 2006 5:11 PM IMPORTANT MANUAL INFORMATION AND UNTIL YOU HAVE BEEN TRAINED IN SAFE AND PROPER RIDING TECHNIQUES. REGULAR INSPECTIONS AND CAREFUL MAINTENANCE, ALONG WITH GOOD RIDING SKILLS, WILL ENSURE THAT YOU SAFELY ENJOY THE CAPABILITIES AND THE RELIABILITY OF THIS MOTORCYCLE. *Product and specifications are subject to change without notice.
U4S810E0.book Page 3 Wednesday, October 4, 2006 5:11 PM IMPORTANT MANUAL INFORMATION EAU10192 AFFIX DEALER LABEL HERE FZS6W(C) OWNER’S MANUAL ©2006 by Yamaha Motor Corporation, U.S.A. 1st edition, September 2006 All rights reserved. Any reprinting or unauthorized use without the written permission of Yamaha Motor Corporation, U.S.A. is expressly prohibited. Printed in Japan.
U4S810E0.book Page 1 Wednesday, October 4, 2006 5:11 PM TABLE OF CONTENTS SAFETY INFORMATION ..................1-1 Location of important labels ...........1-5 DESCRIPTION ..................................2-1 Left view ..........................................2-1 Right view ........................................2-2 Controls and instruments ................2-3 INSTRUMENT AND CONTROL FUNCTIONS .......................................3-1 Main switch/steering lock ................
U4S810E0.book Page 2 Wednesday, October 4, 2006 5:11 PM TABLE OF CONTENTS Rear wheel ...................................6-39 Troubleshooting ............................6-41 Troubleshooting charts .................6-42 MOTORCYCLE CARE AND STORAGE ..........................................7-1 Matte color caution .........................7-1 Care ................................................7-1 Storage ...........................................7-3 SPECIFICATIONS .............................
U4S810E0.book Page 1 Wednesday, October 4, 2006 5:11 PM SAFETY INFORMATION EAU10281 MOTORCYCLES ARE SINGLE TRACK VEHICLES. THEIR SAFE USE AND OPERATION ARE DEPENDENT UPON THE USE OF PROPER RIDING TECHNIQUES AS WELL AS THE EXPERTISE OF THE OPERATOR. EVERY OPERATOR SHOULD KNOW THE FOLLOWING REQUIREMENTS BEFORE RIDING THIS MOTORCYCLE. HE OR SHE SHOULD: ● OBTAIN THOROUGH INSTRUCTIONS FROM A COMPETENT SOURCE ON ALL ASPECTS OF MOTORCYCLE OPERATION.
U4S810E0.book Page 2 Wednesday, October 4, 2006 5:11 PM SAFETY INFORMATION 1 ● ● due to EXCESSIVE SPEED or undercornering (insufficient lean angle for the speed). • Always obey the speed limit and never travel faster than warranted by road and traffic conditions. • Always signal before turning or changing lanes. Make sure that other motorists can see you. The posture of the operator and passenger is important for proper control.
U4S810E0.book Page 3 Wednesday, October 4, 2006 5:11 PM SAFETY INFORMATION Loading The total weight of the operator, passenger, accessories and cargo must not exceed the maximum load limit. Maximum load: FZS6W 190 kg (419 lb) FZS6WC 189 kg (417 lb) When loading within this weight limit, keep the following in mind: ● Cargo and accessory weight should be kept as low and close to the motorcycle as possible.
U4S810E0.book Page 4 Wednesday, October 4, 2006 5:11 PM SAFETY INFORMATION 1 ● tor and may limit control ability, therefore, such accessories are not recommended. Use caution when adding electrical accessories. If electrical accessories exceed the capacity of the motorcycle’s electrical system, an electric failure could result, which could cause a dangerous loss of lights or engine power. Gasoline and exhaust gas ● GASOLINE IS HIGHLY FLAMMABLE: • Always turn the engine off when refueling.
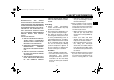
U4S810E0.book Page 5 Wednesday, October 4, 2006 5:11 PM SAFETY INFORMATION EAU10381 Location of important labels Please read the following important labels carefully before operating this vehicle.
U4S810E0.book Page 6 Wednesday, October 4, 2006 5:11 PM SAFETY INFORMATION 1 4 CAUTION Cleaning with alkaline or acid cleaner, gasoline or solvent will damage windshield. Use neutral detergent. 1 5JW-00 2 5 WARNING Improper loading can cause loss of control. Read owner’s manual for proper loading.
U4S810E0.
U4S810E0.book Page 1 Wednesday, October 4, 2006 5:11 PM DESCRIPTION EAU10410 Left view 2 1. 2. 3. 4. 5. 6. 7. 8. 9.
U4S810E0.book Page 2 Wednesday, October 4, 2006 5:11 PM DESCRIPTION EAU10420 Right view 2 1. 2. 3. 4. 5. 6. 7. 8. 9. Dipstick (page 6-11) 10.
U4S810E0.book Page 3 Wednesday, October 4, 2006 5:11 PM DESCRIPTION EAU10430 Controls and instruments 2 1. 2. 3. 4. 5. 6. 7.
U4S810E0.book Page 1 Wednesday, October 4, 2006 5:11 PM INSTRUMENT AND CONTROL FUNCTIONS EAU10460 Main switch/steering lock EAU10660 OFF All electrical systems are off. The key can be removed. To unlock the steering EAU10680 LOCK The steering is locked, and all electrical systems are off. The key can be removed. To lock the steering The main switch/steering lock controls the ignition and lighting systems, and is used to lock the steering. The various positions are described below. 3 1. Push. 2.
U4S810E0.book Page 2 Wednesday, October 4, 2006 5:11 PM INSTRUMENT AND CONTROL FUNCTIONS EAU11003 Indicator and warning lights 3 1. 2. 3. 4. 5. 6. 7.
U4S810E0.book Page 3 Wednesday, October 4, 2006 5:11 PM INSTRUMENT AND CONTROL FUNCTIONS Coolant temperature Display Conditions Under 39 °C (Under 103 °F) Message “Lo” is displayed. What to do OK. Go ahead with riding. 3 40–116 °C (104–242 °F) Temperature is displayed. OK. Go ahead with riding. 117–139 °C (243–283 °F) Temperature display flashes. Warning light comes on. Stop the vehicle and allow it to idle until the coolant temperature goes down.
U4S810E0.book Page 4 Wednesday, October 4, 2006 5:11 PM INSTRUMENT AND CONTROL FUNCTIONS EAU42770 3 Engine trouble warning light “ ” This warning light comes on when an electrical circuit monitoring the engine is defective. When this occurs, have a Yamaha dealer check the self-diagnosis system. (See page 3-4 for an explanation of the self-diagnosis device.) The electrical circuit of the warning light can be checked by turning the key to “ON”.
U4S810E0.book Page 5 Wednesday, October 4, 2006 5:11 PM INSTRUMENT AND CONTROL FUNCTIONS Tachometer 4. Push the “SELECT” button, and the minute digits will start flashing. 5. Push the “RESET” button to set the minutes. 6. Push the “SELECT” button and then release it to start the clock. Clock Odometer and tripmeter modes 1. Tachometer 2. Tachometer red zone 1. Clock 2. Speedometer The electric tachometer allows the rider to monitor the engine speed and keep it within the ideal power range.
U4S810E0.book Page 6 Wednesday, October 4, 2006 5:11 PM INSTRUMENT AND CONTROL FUNCTIONS 3 eter display will automatically change to the fuel reserve tripmeter mode “FTRIP” and start counting the distance traveled from that point.
U4S810E0.book Page 7 Wednesday, October 4, 2006 5:11 PM INSTRUMENT AND CONTROL FUNCTIONS Air intake temperature mode ● When the air intake temperature display is selected, “A” is displayed for one second, and then the air intake temperature is displayed. Self-diagnosis device ECA11590 CAUTION: If the display indicates an error code, the vehicle should be checked as soon as possible in order to avoid engine damage. LCD and tachometer brightness control mode 1.
U4S810E0.book Page 8 Wednesday, October 4, 2006 5:11 PM INSTRUMENT AND CONTROL FUNCTIONS 3 To set the brightness 1. Turn the key to “OFF”. 2. Push and hold the “SELECT” button. 3. Turn the key to “ON”, and then release the “SELECT” button after five seconds. 4. Push the “RESET” button to select the desired brightness level. 5. Push the “SELECT” button to confirm the selected brightness level. The display will return to the odometer or tripmeter mode.
U4S810E0.book Page 9 Wednesday, October 4, 2006 5:11 PM INSTRUMENT AND CONTROL FUNCTIONS ECA10050 EAU12820 Clutch lever CAUTION: EAU12870 Shift pedal See page 5-1 for starting instructions prior to starting the engine. EAU41700 The engine trouble warning light will come on when the key is turned to “ON” and the start switch is pushed, but this does not indicate a malfunction.
U4S810E0.book Page 10 Wednesday, October 4, 2006 5:11 PM INSTRUMENT AND CONTROL FUNCTIONS EAU26822 Brake lever EAU12941 EAU13072 Brake pedal Fuel tank cap 1. Brake pedal 1. Fuel tank cap lock cover 2. Unlock. The brake lever is located at the right handlebar grip. To apply the front brake, pull the lever toward the handlebar grip. 3 1. 2. 3. 4.
U4S810E0.book Page 11 Wednesday, October 4, 2006 5:11 PM INSTRUMENT AND CONTROL FUNCTIONS EAU13220 NOTE: The fuel tank cap cannot be closed unless the key is in the lock. In addition, the key cannot be removed if the cap is not properly closed and locked. Fuel ECA10070 CAUTION: Immediately wipe off spilled fuel with a clean, dry, soft cloth, since fuel may deteriorate painted surfaces or plastic parts. EWA11090 WARNING EAU13300 Make sure that the fuel tank cap is properly closed before riding. 1.
U4S810E0.book Page 12 Wednesday, October 4, 2006 5:11 PM INSTRUMENT AND CONTROL FUNCTIONS 3 knocking (or pinging) occurs, use a gasoline of a different brand or premium unleaded fuel. Use of unleaded fuel will extend spark plug life and reduce maintenance costs. Gasohol There are two types of gasohol: gasohol containing ethanol and that containing methanol. Gasohol containing ethanol can be used if the ethanol content does not exceed 10%.
U4S810E0.book Page 13 Wednesday, October 4, 2006 5:11 PM INSTRUMENT AND CONTROL FUNCTIONS EAU14281 Helmet holder EAU14451 Storage compartment 3 1. Projection 2. Seat holder 2. Push the rear of the seat down to lock it in place. 3. Remove the key. NOTE: Make sure that the seat is properly secured before riding. 1. Helmet holder 2. Unlock. 1. Storage compartment To open the helmet holder, insert the key into the lock, and then turn the key as shown.
U4S810E0.book Page 14 Wednesday, October 4, 2006 5:11 PM INSTRUMENT AND CONTROL FUNCTIONS When washing the vehicle, be careful not to let any water enter the storage compartment. EAU36462 Adjusting the shock absorber assembly This shock absorber assembly is equipped with a spring preload adjusting ring. ECA10100 CAUTION: 3 Never attempt to turn an adjusting mechanism beyond the maximum or minimum settings. Adjust the spring preload as follows. 1. Remove the seat. (See page 3-12.) 2.
U4S810E0.book Page 15 Wednesday, October 4, 2006 5:11 PM INSTRUMENT AND CONTROL FUNCTIONS 3. Install the seat. EAU15301 EWA10220 WARNING This shock absorber contains highly pressurized nitrogen gas. For proper handling, read and understand the following information before handling the shock absorber. The manufacturer cannot be held responsible for property damage or personal injury that may result from improper handling. ● Do not tamper with or attempt to open the gas cylinder.
U4S810E0.book Page 16 Wednesday, October 4, 2006 5:11 PM INSTRUMENT AND CONTROL FUNCTIONS EAU15321 Ignition circuit cut-off system 3 The ignition circuit cut-off system (comprising the sidestand switch, clutch switch and neutral switch) has the following functions. ● It prevents starting when the transmission is in gear and the sidestand is up, but the clutch lever is not pulled. ● It prevents starting when the transmission is in gear and the clutch lever is pulled, but the sidestand is still down.
U4S810E0.book Page 17 Wednesday, October 4, 2006 5:11 PM INSTRUMENT AND CONTROL FUNCTIONS With the engine turned off: 1. Move the sidestand down. 2. Make sure that the engine stop switch is turned on. 3. Turn the key on. 4. Shift the transmission into the neutral position. 5. Push the start switch. Does the engine start? YES NOTE: This check is most reliable if performed with a warmed-up engine. NO The neutral switch may be defective.
U4S810E0.book Page 1 Wednesday, October 4, 2006 5:11 PM PRE-OPERATION CHECKS EAU15592 The condition of a vehicle is the owner’s responsibility. Vital components can start to deteriorate quickly and unexpectedly, even if the vehicle remains unused (for example, as a result of exposure to the elements). Any damage, fluid leakage or loss of tire air pressure could have serious consequences.
U4S810E0.book Page 2 Wednesday, October 4, 2006 5:11 PM PRE-OPERATION CHECKS EAU15605 Pre-operation check list ITEM CHECKS PAGE Fuel • Check fuel level in fuel tank. • Refuel if necessary. • Check fuel line for leakage. 3-11 Engine oil • Check oil level in engine. • If necessary, add recommended oil to specified level. • Check vehicle for oil leakage. 6-11 Coolant • Check coolant level in reservoir. • If necessary, add recommended coolant to specified level. • Check cooling system for leakage.
U4S810E0.book Page 3 Wednesday, October 4, 2006 5:11 PM PRE-OPERATION CHECKS ITEM CHECKS PAGE Throttle grip • Make sure that operation is smooth. • Check cable free play. • If necessary, have Yamaha dealer adjust cable free play and lubricate cable and grip housing. 6-19, 6-28 Control cables • Make sure that operation is smooth. • Lubricate if necessary. Drive chain • • • • Check chain slack. Adjust if necessary. Check chain condition. Lubricate if necessary.
U4S810E0.book Page 1 Wednesday, October 4, 2006 5:11 PM OPERATION AND IMPORTANT RIDING POINTS EAU15950 EAU40191 Starting the engine EWA10270 WARNING ● ● ● Become thoroughly familiar with all operating controls and their functions before riding. Consult a Yamaha dealer regarding any control or function that you do not thoroughly understand. Never start the engine or operate it in a closed area for any length of time.
U4S810E0.book Page 2 Wednesday, October 4, 2006 5:11 PM OPERATION AND IMPORTANT RIDING POINTS ECA15490 CAUTION: ● ● 5 ● If the oil level warning light flickers or remains on after starting, immediately stop the engine, and then check the engine oil level and the vehicle for oil leakage. If necessary, add engine oil, and then check the warning light again.
U4S810E0.book Page 3 Wednesday, October 4, 2006 5:11 PM OPERATION AND IMPORTANT RIDING POINTS ECA10260 CAUTION: ● ● Even with the transmission in the neutral position, do not coast for long periods of time with the engine off, and do not tow the motorcycle for long distances. The transmission is properly lubricated only when the engine is running. Inadequate lubrication may damage the transmission.
U4S810E0.book Page 4 Wednesday, October 4, 2006 5:11 PM OPERATION AND IMPORTANT RIDING POINTS EAU16841 5 ECA10301 EAU17212 Engine break-in CAUTION: Parking There is never a more important period in the life of your engine than the period between 0 and 1600 km (1000 mi). For this reason, you should read the following material carefully. Since the engine is brand new, do not put an excessive load on it for the first 1600 km (1000 mi).
U4S810E0.book Page 1 Wednesday, October 4, 2006 5:11 PM PERIODIC MAINTENANCE AND MINOR REPAIR EAU17231 EAU17301 PERIODIC MAINTENANCE Safety is an obligation of the owner. Periodic inspection, adjustment and lubrication will keep your vehicle in the safest and most efficient condition possible. The most important points of motorcycle inspection, adjustment, and lubrication are explained on the following pages.
U4S810E0.book Page 2 Wednesday, October 4, 2006 5:11 PM PERIODIC MAINTENANCE AND MINOR REPAIR EWA10340 WARNING Modifications not approved by Yamaha may cause loss of performance, excessive emissions, and render the vehicle unsafe for use. Consult a Yamaha dealer before attempting any changes.
U4S810E0.book Page 3 Wednesday, October 4, 2006 5:11 PM PERIODIC MAINTENANCE AND MINOR REPAIR EAU17600 Periodic maintenance chart for the emission control system INITIAL No. ITEM ROUTINE 600 mi (1000 km) or 1 month ODOMETER READINGS 4000 mi (7000 km) or 6 months 8000 mi 12000 mi 16000 mi 20000 mi (13000 km) (19000 km) (25000 km) (31000 km) or or or or 12 months 18 months 24 months 30 months Fuel line • Check fuel hoses for cracks or damage. • Replace if necessary.
U4S810E0.book Page 4 Wednesday, October 4, 2006 5:11 PM PERIODIC MAINTENANCE AND MINOR REPAIR EAU32183 General maintenance and lubrication chart INITIAL No. 1 * 6 ITEM Air filter element ROUTINE 600 mi (1000 km) or 1 month ODOMETER READINGS 4000 mi (7000 km) or 6 months 8000 mi 12000 mi 16000 mi 20000 mi (13000 km) (19000 km) (25000 km) (31000 km) or or or or 12 months 18 months 24 months 30 months √ • Check condition and damage. √ √ • Replace if necessary. 2 * Clutch • Check operation.
U4S810E0.book Page 5 Wednesday, October 4, 2006 5:11 PM PERIODIC MAINTENANCE AND MINOR REPAIR INITIAL No. 9 * 10 11 * ITEM ROUTINE Swingarm pivot bearings • Check bearing assemblies for looseness. • Moderately repack with lithiumsoap-based grease. Drive chain • Check chain slack, alignment and condition. • Adjust and lubricate chain with a special O-ring chain lubricant thoroughly. Steering bearings • Check bearing assemblies for looseness.
U4S810E0.book Page 6 Wednesday, October 4, 2006 5:11 PM PERIODIC MAINTENANCE AND MINOR REPAIR INITIAL No. ITEM ROUTINE 600 mi (1000 km) or 1 month ODOMETER READINGS 4000 mi (7000 km) or 6 months 8000 mi 12000 mi 16000 mi 20000 mi (13000 km) (19000 km) (25000 km) (31000 km) or or or or 12 months 18 months 24 months 30 months 17 * Front fork • Check operation and for oil leakage. • Replace if necessary. √ √ √ √ √ 18 * Shock absorber assembly • Check operation and for oil leakage.
U4S810E0.book Page 7 Wednesday, October 4, 2006 5:11 PM PERIODIC MAINTENANCE AND MINOR REPAIR INITIAL No. ITEM 25 * Lights, signals and switches ROUTINE • Check operation. • Adjust headlight beam.
U4S810E0.book Page 8 Wednesday, October 4, 2006 5:11 PM PERIODIC MAINTENANCE AND MINOR REPAIR 2. Pull the front cowling away from the vehicle as shown, and then remove the panel. EAU18771 Removing and installing panels The panels shown need to be removed to perform some of the maintenance jobs described in this chapter. Refer to this section each time a panel needs to be removed and installed. 1. Panel D EAU42660 Panels A and B To remove one of the panels 1. Remove the bolts. 6 1. Panel A 2. Panel B 3.
U4S810E0.book Page 9 Wednesday, October 4, 2006 5:11 PM PERIODIC MAINTENANCE AND MINOR REPAIR 1. Tab 2. Slot EAU42690 Panel C To remove the panel 1. Remove panels A and B. (See page 6-8.) 2. Remove the bolts, and then take the panel off. 1. Panel C 2. Bolt 1. Panel D 2. Bolt To install the panel 1. Place the panel in the original position, and then install the bolts. 2. Install panels A and B. To install the panel 1. Place the panel in the original position, and then install the bolt.
U4S810E0.book Page 10 Wednesday, October 4, 2006 5:11 PM PERIODIC MAINTENANCE AND MINOR REPAIR EAU19642 Checking the spark plugs 6 The spark plugs are important engine components, which should be checked periodically, preferably by a Yamaha dealer. Since heat and deposits will cause any spark plug to slowly erode, they should be removed and checked in accordance with the periodic maintenance and lubrication chart. In addition, the condition of the spark plugs can reveal the condition of the engine.
U4S810E0.book Page 11 Wednesday, October 4, 2006 5:11 PM PERIODIC MAINTENANCE AND MINOR REPAIR EAU19681 Canister (for California only) EAU42620 Engine oil and oil filter cartridge The engine oil level should be checked before each ride. In addition, the oil must be changed and the oil filter cartridge replaced at the intervals specified in the periodic maintenance and lubrication chart. To check the engine oil level 1. Place the vehicle on the centerstand.
U4S810E0.book Page 12 Wednesday, October 4, 2006 5:11 PM PERIODIC MAINTENANCE AND MINOR REPAIR NOTE: An oil filter wrench is available at a Yamaha dealer. 5. Apply a thin coat of engine oil to the O-ring of the new oil filter cartridge. 1. Engine oil filler cap 6. Insert and tighten the engine oil dipstick, and then install and tighten the oil filler cap. 6 To change the engine oil (with or without oil filter cartridge replacement) 1.
U4S810E0.book Page 13 Wednesday, October 4, 2006 5:11 PM PERIODIC MAINTENANCE AND MINOR REPAIR Recommended engine oil: See page 8-1. Oil quantity: Without oil filter cartridge replacement: 2.50 L (2.64 US qt) (2.20 Imp.qt) With oil filter cartridge replacement: 2.80 L (2.96 US qt) (2.46 Imp.qt) ECA11620 1. Torque wrench CAUTION: ● Tightening torque: Oil filter cartridge: 17 Nm (1.7 m·kgf, 12 ft·lbf) 7. Install the engine oil drain bolt, and then tighten it to the specified torque.
U4S810E0.book Page 14 Wednesday, October 4, 2006 5:11 PM PERIODIC MAINTENANCE AND MINOR REPAIR EAU20070 Coolant The coolant level should be checked before each ride. In addition, the coolant must be changed at the intervals specified in the periodic maintenance and lubrication chart. NOTE: The coolant should be between the minimum and maximum level marks. EAU40151 6 To check the coolant level The coolant level should be checked as follows before each ride.
U4S810E0.book Page 15 Wednesday, October 4, 2006 5:11 PM PERIODIC MAINTENANCE AND MINOR REPAIR ● wise the cooling system will not be protected against frost and corrosion. If water has been added to the coolant, have a Yamaha dealer check the antifreeze content of the coolant as soon as possible, otherwise the effectiveness of the coolant will be reduced. 2. Place a container under the engine to collect the used coolant. 3. Remove the radiator cap retaining bolt, radiator cap retainer and radiator cap.
U4S810E0.book Page 16 Wednesday, October 4, 2006 5:11 PM PERIODIC MAINTENANCE AND MINOR REPAIR 7. Install the coolant reservoir and its reservoir cover by placing them in the original position, and then installing the bolts. 8. Remove the coolant drain bolt to drain the cooling system. 6 1. Coolant drain bolt 9. After the coolant is completely drained, thoroughly flush the cooling system with clean tap water. 10. Install the coolant drain bolt, and then tighten it to the specified torque.
U4S810E0.book Page 17 Wednesday, October 4, 2006 5:11 PM PERIODIC MAINTENANCE AND MINOR REPAIR 14. Start the engine, let it idle for several minutes, and then turn it off. 15. Remove the radiator cap to check the coolant level in the radiator. If necessary, add sufficient coolant until it reaches the top of the radiator, and then install the radiator cap, radiator cap retainer and radiator cap retaining bolt. 16. Check the coolant level in the reservoir.
U4S810E0.book Page 18 Wednesday, October 4, 2006 5:11 PM PERIODIC MAINTENANCE AND MINOR REPAIR EWA12462 WARNING ● 1. Air filter element 2. Air intake manifold ● 6. Insert a new air filter element into the air filter case. ECA10480 6 EWA12471 WARNING Before placing the fuel tank in the original position, make sure that all hoses (i.e., fuel hose, fuel tank breather hose, fuel tank overflow hose) are not damaged, that they are properly connected and routed, and that they are not pinched.
U4S810E0.book Page 19 Wednesday, October 4, 2006 5:11 PM PERIODIC MAINTENANCE AND MINOR REPAIR EAU21382 Checking the throttle cable free play EAU21401 EAU21750 Valve clearance Tires The valve clearance changes with use, resulting in improper air-fuel mixture and/or engine noise. To prevent this from occurring, the valve clearance must be adjusted by a Yamaha dealer at the intervals specified in the periodic maintenance and lubrication chart.
U4S810E0.book Page 20 Wednesday, October 4, 2006 5:11 PM PERIODIC MAINTENANCE AND MINOR REPAIR 6 Tire air pressure (measured on cold tires): 0–90 kg (0–198 lb): Front: 225 kPa (33 psi) (2.25 kgf/cm²) Rear: 250 kPa (36 psi) (2.50 kgf/cm²) FZS6W 90–190 kg (198–419 lb) FZS6WC 90–189 kg (198–417 lb): Front: 250 kPa (36 psi) (2.50 kgf/cm²) Rear: 290 kPa (42 psi) (2.90 kgf/cm²) High-speed riding: Front: 225 kPa (33 psi) (2.25 kgf/cm²) Rear: 250 kPa (36 psi) (2.
U4S810E0.book Page 21 Wednesday, October 4, 2006 5:11 PM PERIODIC MAINTENANCE AND MINOR REPAIR EWA10580 WARNING ● ● It is dangerous to ride with a worn-out tire. When a tire tread begins to show crosswise lines, have a Yamaha dealer replace the tire immediately. The replacement of all wheeland brake-related parts, including the tires, should be left to a Yamaha dealer, who has the necessary professional knowledge and experience.
U4S810E0.book Page 22 Wednesday, October 4, 2006 5:11 PM PERIODIC MAINTENANCE AND MINOR REPAIR ● ● 6 “broken in”. Therefore, it is advisable before doing any highspeed riding to ride conservatively for approximately 100 km (60 mi) after installing a new tire. The tires must be warmed up before a high-speed run. Always adjust the tire air pressure according to the operating conditions.
U4S810E0.book Page 23 Wednesday, October 4, 2006 5:11 PM PERIODIC MAINTENANCE AND MINOR REPAIR any consequences caused by the use of items which have not been approved by Yamaha. EAU22080 Adjusting the clutch lever free play NOTE: If the specified free play cannot be obtained as described above or if the clutch does not operate correctly, have a Yamaha dealer check the internal clutch mechanism. 1. Clutch lever free play adjusting bolt 2.
U4S810E0.book Page 24 Wednesday, October 4, 2006 5:11 PM PERIODIC MAINTENANCE AND MINOR REPAIR Checking the front and rear brake pads the point that a wear indicator almost touches the brake disc, have a Yamaha dealer replace the brake pads as a set. The front and rear brake pads must be checked for wear at the intervals specified in the periodic maintenance and lubrication chart. Rear brake pads EAU36501 Rear brake light switch EAU22390 EAU22500 EAU36890 Front brake pads 1.
U4S810E0.book Page 25 Wednesday, October 4, 2006 5:11 PM PERIODIC MAINTENANCE AND MINOR REPAIR EAU22580 Checking the brake fluid level Front brake 1. Minimum level mark Rear brake Before riding, check that the brake fluid is above the minimum level mark and replenish if necessary. A low brake fluid level may indicate worn brake pads and/or brake system leakage. If the brake fluid level is low, be sure to check the brake pads for wear and the brake system for leakage.
U4S810E0.book Page 26 Wednesday, October 4, 2006 5:11 PM PERIODIC MAINTENANCE AND MINOR REPAIR EAU22730 6 EAU22760 Changing the brake fluid Drive chain slack Have a Yamaha dealer change the brake fluid at the intervals specified in the NOTE after the periodic maintenance and lubrication chart. In addition, have the oil seals of the master cylinders and calipers as well as the brake hoses replaced at the intervals listed below or whenever they are damaged or leaking.
U4S810E0.book Page 27 Wednesday, October 4, 2006 5:11 PM PERIODIC MAINTENANCE AND MINOR REPAIR EAU23022 Tightening torques: Locknut: 16 Nm (1.6 m·kgf, 11 ft·lbf) Axle nut: 120 Nm (12.0 m·kgf, 85 ft·lbf) 1. 2. 3. 4.
U4S810E0.book Page 28 Wednesday, October 4, 2006 5:11 PM PERIODIC MAINTENANCE AND MINOR REPAIR ECA11110 CAUTION: Do not use engine oil or any other lubricants for the drive chain, as they may contain substances that could damage the O-rings. EAU23091 Checking and lubricating the throttle grip and cable The operation of all control cables and the condition of the cables should be checked before each ride, and the cables and cable ends should be lubricated if necessary.
U4S810E0.book Page 29 Wednesday, October 4, 2006 5:11 PM PERIODIC MAINTENANCE AND MINOR REPAIR EAU23131 Checking and lubricating the brake and shift pedals EAU23140 Recommended lubricant: Lithium-soap-based grease (all-purpose grease) Checking and lubricating the brake and clutch levers Brake lever Clutch lever 6 The operation of the brake and shift pedals should be checked before each ride, and the pedal pivots should be lubricated if necessary.
U4S810E0.book Page 30 Wednesday, October 4, 2006 5:11 PM PERIODIC MAINTENANCE AND MINOR REPAIR EAU23211 Recommended lubricant: Lithium-soap-based grease (all-purpose grease) Checking and lubricating the centerstand and sidestand EAUM1650 Lubricating the swingarm pivots The swingarm pivots must be lubricated at the intervals specified in the periodic maintenance and lubrication chart.
U4S810E0.book Page 31 Wednesday, October 4, 2006 5:11 PM PERIODIC MAINTENANCE AND MINOR REPAIR EAU23271 EAU23280 Checking the front fork Checking the steering The condition and operation of the front fork must be checked as follows at the intervals specified in the periodic maintenance and lubrication chart. Worn or loose steering bearings may cause danger. Therefore, the operation of the steering must be checked as follows at the intervals specified in the periodic maintenance and lubrication chart.
U4S810E0.book Page 32 Wednesday, October 4, 2006 5:11 PM PERIODIC MAINTENANCE AND MINOR REPAIR EAU23290 Checking the wheel bearings EAU34371 Battery The front and rear wheel bearings must be checked at the intervals specified in the periodic maintenance and lubrication chart. If there is play in the wheel hub or if the wheel does not turn smoothly, have a Yamaha dealer check the wheel bearings. 1. Positive battery terminal 2. Negative battery terminal The battery is located under the fuel tank.
U4S810E0.book Page 33 Wednesday, October 4, 2006 5:11 PM PERIODIC MAINTENANCE AND MINOR REPAIR EWA10760 WARNING ● ● Electrolyte is poisonous and dangerous since it contains sulfuric acid, which causes severe burns. Avoid any contact with skin, eyes or clothing and always shield your eyes when working near batteries. In case of contact, administer the following FIRST AID. • EXTERNAL: Flush with plenty of water. • INTERNAL: Drink large quantities of water or milk and immediately call a physician.
U4S810E0.book Page 34 Wednesday, October 4, 2006 5:11 PM PERIODIC MAINTENANCE AND MINOR REPAIR EAU32842 Replacing the fuses The main fuse is located under the fuel tank. (See page 6-17.) 1. Main fuse 2. Spare fuse 6 The fuse box is located behind panel D. (See page 6-8.) 1. 2. 3. 4. 5. 6. 7. 8. Headlight fuse Signaling system fuse Ignition fuse Radiator fan fuse Backup fuse (for odometer and clock) Fuel injection system fuse Spare fuse Taillight fuse If a fuse is blown, replace it as follows. 1.
U4S810E0.book Page 35 Wednesday, October 4, 2006 5:11 PM PERIODIC MAINTENANCE AND MINOR REPAIR ● EAU23740 Replacing the headlight bulb This model is equipped with a quartz bulb headlight. If the headlight bulb burns out, replace it as follows. 1. Disconnect the headlight coupler, and then remove the bulb cover. 1. Headlight bulb holder EWA10790 WARNING 1. Headlight coupler 2. Headlight bulb cover 2. Unhook the headlight bulb holder, and then remove the defective bulb. Headlight bulbs get very hot.
U4S810E0.book Page 36 Wednesday, October 4, 2006 5:11 PM PERIODIC MAINTENANCE AND MINOR REPAIR 4. Install the headlight bulb cover, and then connect the coupler. 5. Have a Yamaha dealer adjust the headlight beam if necessary. EAU32822 Replacing the tail/brake light bulb 1. Remove the seat. (See page 3-12.) 2. Remove the socket (together with the bulb) by turning it counterclockwise. 6 1. Tail/brake light bulb socket 2.
U4S810E0.book Page 37 Wednesday, October 4, 2006 5:11 PM PERIODIC MAINTENANCE AND MINOR REPAIR EAU43000 ECA11190 Replacing a turn signal light bulb CAUTION: Do not overtighten the screw, otherwise the lens may break. 1. Remove the turn signal light unit by removing the screw. 1. Turn signal light bulb socket 3. Remove the defective bulb by pulling it out. 1. Screw 2. Turn signal light unit 6 2. Remove the socket (together with the bulb) by turning it counterclockwise. 1. Turn signal light bulb 4.
U4S810E0.book Page 38 Wednesday, October 4, 2006 5:11 PM PERIODIC MAINTENANCE AND MINOR REPAIR EAU24310 EAU24360 Replacing the license plate light bulb Front wheel EAU43090 1. Remove the license plate light unit by removing the screws. To remove the front wheel EWA10820 WARNING ● ● 1. License plate light bulb 2. License plate light bulb socket 6 1. Screw 2. License plate light unit 2. Remove the socket (together with the bulb) by pulling it out. 3. Remove the defective bulb by pulling it out. 4.
U4S810E0.book Page 39 Wednesday, October 4, 2006 5:11 PM PERIODIC MAINTENANCE AND MINOR REPAIR 3. Remove the brake caliper (together with the reflector) on each side by removing the bolts. 2. Insert the wheel axle. 3. Install the brake caliper (together with the reflector) on each side by installing the bolts. NOTE: Make sure that there is enough space between the brake pads before installing the brake calipers onto the brake discs. 1. Brake caliper 2. Brake caliper bolt 3.
U4S810E0.book Page 40 Friday, October 6, 2006 9:10 AM PERIODIC MAINTENANCE AND MINOR REPAIR 1. Locknut 2. Drive chain slack adjusting bolt 3. Axle nut 6 5. While supporting the brake caliper and slightly lifting the wheel, pull the wheel axle out. 1. 2. 3. 4. 5. Locknut Drive chain slack adjusting bolt Wheel axle Brake caliper bracket Brake caliper NOTE: A rubber mallet may be useful to tap the wheel axle out. 6. Push the wheel forward, and then remove the drive chain from the rear sprocket.
U4S810E0.book Page 41 Friday, October 6, 2006 9:10 AM PERIODIC MAINTENANCE AND MINOR REPAIR EAU25870 NOTE: ● Make sure that the slot in the brake caliper bracket is fit over the retainer on the swingarm. ● Make sure that there is enough space between the brake pads before installing the wheel. Tightening torque: Axle nut: 120 Nm (12.0 m·kgf, 85 ft·lbf) 1. Retainer 2. Slot 2. Install the drive chain onto the rear sprocket, and then adjust the drive chain slack. (See page 6-26.) 3.
U4S810E0.book Page 42 Wednesday, October 4, 2006 5:11 PM PERIODIC MAINTENANCE AND MINOR REPAIR EAU42360 Troubleshooting charts Starting problems or poor engine performance EWA10840 WARNING Keep away open flames and do not smoke while checking or working on the fuel system. 1. Fuel There is enough fuel. Check the compression. There is no fuel. Supply fuel. There is compression. Check the ignition. There is no compression. Have a Yamaha dealer check the vehicle.
U4S810E0.book Page 43 Wednesday, October 4, 2006 5:11 PM PERIODIC MAINTENANCE AND MINOR REPAIR Engine overheating EWA10400 WARNING ● ● Do not remove the radiator cap when the engine and radiator are hot. Scalding hot fluid and steam may be blown out under pressure, which could cause serious injury. Be sure to wait until the engine has cooled.
U4S810E0.book Page 1 Wednesday, October 4, 2006 5:11 PM MOTORCYCLE CARE AND STORAGE EAU37833 Matte color caution ECA15192 CAUTION: Some models are equipped with matte colored finished parts. Be sure to consult a Yamaha dealer for advice on what products to use before cleaning the vehicle. Using a brush, harsh chemical products or cleaning compounds when cleaning these parts will scratch or damage their surface. Wax also should not be applied to any matte colored finished parts.
U4S810E0.book Page 2 Wednesday, October 4, 2006 5:11 PM MOTORCYCLE CARE AND STORAGE ● ● cleaning products, solvent or thinner, fuel (gasoline), rust removers or inhibitors, brake fluid, antifreeze or electrolyte. Do not use high-pressure washers or steam-jet cleaners since they cause water seepage and deterioration in the following areas: seals (of wheel and swingarm bearings, fork and brakes), electric components (couplers, connectors, instruments, switches and lights), breather hoses and vents.
U4S810E0.book Page 3 Wednesday, October 4, 2006 5:11 PM MOTORCYCLE CARE AND STORAGE 4. To prevent corrosion, it is recommended to apply a corrosion protection spray on all metal, including chrome- and nickel-plated, surfaces. 5. Use spray oil as a universal cleaner to remove any remaining dirt. 6. Touch up minor paint damage caused by stones, etc. 7. Wax all painted surfaces. 8. Let the motorcycle dry completely before storing or covering it.
U4S810E0.book Page 4 Wednesday, October 4, 2006 5:11 PM MOTORCYCLE CARE AND STORAGE 3. Perform the following steps to protect the cylinders, piston rings, etc. from corrosion. a. Remove the spark plug caps and spark plugs. b. Pour a teaspoonful of engine oil into each spark plug bore. c. Install the spark plug caps onto the spark plugs, and then place the spark plugs on the cylinder head so that the electrodes are grounded. (This will limit sparking during the next step.) d.
U4S810E0.book Page 1 Wednesday, October 4, 2006 5:11 PM SPECIFICATIONS Dimensions: Overall length: 2095 mm (82.5 in) Overall width: 750 mm (29.5 in) Overall height: 1210 mm (47.6 in) Seat height: 795 mm (31.3 in) Wheelbase: 1440 mm (56.7 in) Ground clearance: 145 mm (5.71 in) Minimum turning radius: 2800 mm (110.2 in) Weight: With oil and fuel: FZS6W 207.0 kg (456 lb) FZS6WC 208.
U4S810E0.book Page 2 Wednesday, October 4, 2006 5:11 PM SPECIFICATIONS Gear ratio: 1st: 37/13 (2.846) 2nd: 37/19 (1.947) 3rd: 28/18 (1.556) 4th: 32/24 (1.333) 5th: 25/21 (1.190) 6th: 26/24 (1.083) Chassis: Frame type: Diamond Caster angle: 25.00 ° Trail: 97.5 mm (3.
U4S810E0.book Page 3 Wednesday, October 4, 2006 5:11 PM SPECIFICATIONS Wheel travel: 130.0 mm (5.12 in) Electrical system: Ignition system: Transistorized coil ignition (digital) Charging system: AC magneto Battery: Model: GT12B-4 Voltage, capacity: 12 V, 10.0 Ah Headlight: Bulb type: Halogen bulb Bulb voltage, wattage × quantity: 8 Headlight: 12 V, 60 W/55.0 W × 1 Headlight: 12 V, 55.0 W × 1 Tail/brake light: 12 V, 5.0 W/21.0 W × 1 Front turn signal/position light: 12 V, 21 W/5.
U4S810E0.book Page 1 Wednesday, October 4, 2006 5:11 PM CONSUMER INFORMATION EAU26351 Identification numbers EAU26381 EAU26400 Key identification number Vehicle identification number 1. Key identification number 1. Vehicle identification number The key identification number is stamped into the key tag. Record this number in the space provided and use it for reference when ordering a new key. The vehicle identification number is stamped into the steering head pipe.
U4S810E0.book Page 2 Wednesday, October 4, 2006 5:11 PM CONSUMER INFORMATION EAU26540 Model label 1. Model label The model label is affixed to the frame under the seat. (See page 3-12.) Record the information on this label in the space provided. This information will be needed when ordering spare parts from a Yamaha dealer.
U4S810E0.book Page 3 Wednesday, October 4, 2006 5:11 PM CONSUMER INFORMATION EAU26551 Reporting safety defects If you believe that your vehicle has a defect which could cause a crash or could cause injury or death, you should immediately inform the National Highway Traffic Safety Administration (NHTSA) in addition to notifying Yamaha Motor Corporation, U.S.A.
U4S810E0.
U4S810E0.book Page 5 Wednesday, October 4, 2006 5:11 PM CONSUMER INFORMATION EAU26632 Maintenance record Copies of work orders and/or receipts for parts purchased and installed on your vehicle will be required to document that maintenance has been completed in accordance with the emissions warranty. The chart below is printed only as a reminder that maintenance work is required. It is not acceptable proof of maintenance work.
U4S810E0.
U4S810E0.book Page 7 Wednesday, October 4, 2006 5:11 PM CONSUMER INFORMATION EAU26663 YAMAHA MOTOR CORPORATION, U.S.A. STREET AND ENDURO MOTORCYCLE LIMITED WARRANTY Yamaha Motor Corporation, U.S.A. hereby warrants that new Yamaha motorcycles will be free from defects in material and workmanship for the period of time stated herein, subject to certain stated limitations.
U4S810E0.book Page 8 Wednesday, October 4, 2006 5:11 PM CONSUMER INFORMATION WARRANTY QUESTIONS AND ANSWERS CUSTOMER SERVICE Q. What costs are my responsibility during the warranty period? A. The customer’s responsibility includes all costs of normal maintenance services, non-warranty repairs, accident and collision damages, and oil, oil filters, air filters, spark plugs, and brake shoes.
U4S810E0.book Page 9 Wednesday, October 4, 2006 5:11 PM CONSUMER INFORMATION EAU26750 YAMAHA EXTENDED SERVICE (Y.E.S.) Keep your Yamaha protected even after your warranty expires with genuine Yamaha Extended Service (Y.E.S.). In addition, Travel and Recreation Interruption Protection (TRIP) is included at no extra cost.
U4S810E0.book Page 10 Wednesday, October 4, 2006 5:11 PM CONSUMER INFORMATION We urge you to act now. You’ll get the excellent benefits of TRIP coverage right away, and you’ll rest easy knowing you’ll have strong factory-backed protection even after your Yamaha Limited Warranty expires. A special note: If visiting your dealer isn’t convenient, contact Yamaha with your Primary ID number (your frame number). We’ll be happy to help you get the Y.E.S. coverage you need. Yamaha Service Marketing P.O.
U4S810E0.book Page 1 Wednesday, October 4, 2006 5:11 PM INDEX A F Accessories and replacement parts ..... 6-22 Air filter element, replacing ................... 6-17 B Battery .................................................. 6-32 Brake and clutch levers, checking and lubricating..................... 6-29 Brake and shift pedals, checking and lubricating..................... 6-29 Brake fluid, changing ............................ 6-26 Brake fluid level, checking .................... 6-25 Brake lever ...
U4S810E0.book Page 2 Wednesday, October 4, 2006 5:11 PM INDEX Turn signal indicator lights ...................... 3-2 Turn signal light bulb, replacing ............ 6-37 Turn signal switch ................................... 3-8 V Valve clearance .................................... 6-19 Vehicle identification number .................. 9-1 W Warranty, extended................................. 9-9 Warranty, limited ..................................... 9-7 Wheel bearings, checking.....................
U4S810E0.
YAMAHA MOTOR CO., LTD. PRINTED ON RECYCLED PAPER PRINTED IN JAPAN 2006.10-3.