00_BD-S477_P_cv.fm 1 ページ 2014年1月21日 火曜日 午後2時44分 The laser component in this product is capable of emitting radiation exceeding the limit for Class 1. LASER Specification: Class 1 LASER Product Wave length: 790 nm (CDs)/658 nm (DVDs)/405 nm (BDs) Laser output: max. 1 mW El componente láser de este producto es capaz de emitir radiación que sobrepasa el límite establecido para la clase 1.
Caution: Read this before operating your unit. 1 2 3 4 5 6 7 8 9 10 11 12 13 14 15 16 17 To assure the finest performance, please read this manual carefully. Keep it in a safe place for future reference. Install this sound system in a well ventilated, cool, dry, clean place-away from direct sunlight, heat sources, vibration, dust, moisture, and/or cold. For proper ventilation, allow the following minimum clearances.
Contents 1. Introduction 1 5. Additional information What you can do with this Player ..................... 2 Troubleshooting ............................................... 35 Wide variety of supported discs and file formats ........... 2 Enhanced network features............................................. 2 Easy setup and operations............................................... 2 Power ............................................................................ 35 Basic operation.................
INTRODUCTION What you can do with this Player Various discs Network streaming contents USB contents Wireless network (WPS supported) PC/NAS contents (DLNA) Smartphone contents (Miracast) ■ Wide variety of supported discs and file formats – Blu-ray Disc™, DVDs and CDs (p. 20) – BONUSVIEW™ and BD-Live™ (p. 22) – Video, music and photo files on DVD-R/RW discs, CD-R/RW discs and USB memory devices (p. 16) ■ Enhanced network features – – – – Enjoying DLNA server (PC or NAS) contents (p.
1 About discs and files – 12 cm (5”) and 8 cm (3”) discs can be played back in this Player. Do not use an 8 cm (3”) to 12 cm (5”) adapter. – Use discs that conform to compatible standards as indicated by the presence of official logos on the disc label. Playback of discs not complying with these standards is not guaranteed. In addition, the image quality or sound quality is not guaranteed even if the discs can be played back.
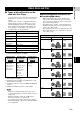
About discs and files ■ Disc precautions Region management information Destination China BD-Video Region code “C” or “ABC” DVD-Video Region number “6” or “ALL” 6 ALL Notes – Blu-ray Disc/DVD video operations and functions may be different from the explanations in this manual and some operations may be prohibited due to disc manufacturer’s settings. – If a menu screen or operating instructions are displayed during playback of a disc, follow the operating procedure displayed.
About discs and files ■ Cinavia technology 1 Introduction – Cinavia technology is a part of the content protection system included in your Blu-ray Disc Player. Note – The following messages may be displayed and playback stopped or audio outputs temporarily muted by your Blu-ray Disc player if you are playing an unauthorized copy of content that is protected by Cinavia technology. These messages are displayed in English only. Playback stopped.
Controls and functions ■ Front panel USB 1 2 3 1 p (On/Standby) Turns this Player on/Sets to standby mode. Press and hold p on the front panel for more than 5 seconds to reset this Player (system reset). 2 Disc tray door 3 Front panel display Displays various information for operational status. 4 4 (Eject) Opens/Closes the disc tray. 5 (Play/Pause) Starts or pauses a playback. 6 (Stop) Stops a playback. 7 USB connector (p.
Controls and functions ■ Remote control – will appear on the top left corner of the screen when the pressed button is not available. Note 1 – Secondary Audio Mark is displayed only when Secondary Audio Mark is set to on (p. 28). 2 3 4 5 6 7 8 7 HOME: Displays the HOME menu screen (p. 16).
Controls and functions C Control buttons 1 BD 2 3 4 5 6 7 8 PIP MIRACAST SUBTITLE E 2ND AUDIO HOME AUDIO F TOP MENU POP-UP/MENU 9 ON SCREEN RETURN B G ENTER H 0 A ZOOM R PROGRAM SHUFFLE REPEAT G Y B CD VIDEO MUSIC PHOTO 1 2 3 4 5 6 7 8 9 0 CLEAR SEARCH / : Skips backward/forward. / DVD CD VIDEO MUSIC : Searches backward/forward. The search speed will change each time you press the button (search backward/forward: 5 steps each). Press to resume normal playback.
Controls and functions Loading the batteries in the remote control Remote control sensor 3 USB 2 30° Introduction 1 1 Approximate operating range of remote control 30° 6 m (20 ft) Notes English – Change both batteries when the operation range of the remote control decreases. – Use AAA, R03, UM-4 batteries. – Make sure that the polarities are correct. Refer to the illustration inside the battery compartment.
CONNECTION Video/audio connections Make the corresponding video/audio cable connections depending on the equipment you want to use. Hints – See page 32 for information on the audio/video output formats. – Prepare commercially available cables required for connections. The type and number of cables you need vary depending on the equipment to be connected. Enjoying video/audio using a TV and an AV receiver Refer to “Connecting to a TV via an AV receiver” (p. 11).
Video/audio connections ■ Connecting to a TV via an AV receiver ■ Connecting to a TV directly Connect this Player to the TV with an HDMI cable. Connect this Player to the AV receiver and the AV receiver to the TV with HDMI cables. For details on speaker connections, refer to the owner’s manuals of the AV receiver and speakers. 2 Caution! Do not connect the power cable of this Player until all connections are completed. Do not connect the power cable of this Player until all connections are completed.
Network connection By connecting this Player to the network (wireless or wired), you can use the following features. – Playing back DLNA server (PC or NAS) contents (p. 16) – Playing back various network service contents (p. 18) – Playing BD-Live compatible discs (p. 22) – Operating this Player from mobile devices (AV CONTROLLER) (p. 19) Notes – To use the network services or BD-Live feature, a broadband internet connection is required.
Network connection ■ DLNA server setup By using DLNA, you can share multimedia contents (such as videos, music and photos) stored on your DLNA server (PC or NAS) connected to your network, and enjoy those contents with this Player. In addition, you can use your mobile device (such as a smartphone and a tablet) as a wireless controller to operate this Player through the network. To use the DLNA features, perform the following DLNA server setup after making the network connection (p. 12).
USB connection By connecting a USB memory device to the USB connector on the front or the rear panel of this Player, you can play multi-media files stored on the USB memory device (p. 16). Notes – Yamaha cannot guarantee that all brands’ USB memory devices will operate with this Player. – Connect a USB memory device to one of the USB connectors (front/rear) of this Player when using BD-Live feature (p. 23).
PLAYBACK Initial settings ■ Setting with the Easy Setup 3 Press 2/3 to select Yes, then press ENTER. Easy Setup allows you to set language, resolution, and screen aspect ratio easily. Easy Setup screen is displayed when you turn this Player on for the first time after purchase. Same setting can be performed from SETUP menu = System = Easy Setup. 3 Playback 1 When Easy Setup screen is displayed, press ENTER to start Easy Setup. 4 Press 2/3 to select one of the following setup methods, then press ENTER.
HOME menu The HOME menu allows you to perform the following basic operations of this Player. – Browsing and playing multi-media files on various discs, USB memory devices and your DLNA servers (PC or NAS) – Accessing to various network services (p. 18) – Displaying the SETUP menu (p. 24) Hints – For details on playable discs and formats, see page 3. – To play DLNA server contents on this Player, the media sharing setting (p. 13) on the DLNA server should be configured.
HOME menu Operations for viewing photos – Note that the only the file type selected on this step will be displayed in the following step. For example, if you selected Photo folder in this step, only photo files are displayed after this step. While viewing photos, the buttons on the remote control work as shown below. : Stops slide show and returns to the file browser. : Pauses a slide show. : Plays a slide show. : Moves to a next photo. : Moves to a previous photo. : Makes a slide show faster in 3 steps.
Using network services You can enjoy photos using the following network services. – Picasa Web Albums Notes – Access to content provided by third parties requires a high speed internet connection and may also require account registration and a paid subscription. – Third party content services may be changed, suspended, interrupted, or discontinued at any time without notice, and Yamaha disclaims any liability in connection with such occurrences.
Enjoying smartphone pictures and videos on the TV screen (Miracast™) Miracast is a solution for seamlessly displaying video between devices, without cables or a network connection via an access point (Wi-Fi Direct). You can do things like view pictures from a Miracast-compatible device (smartphone, etc.) on the screen of the TV connected to this Player. – To check if your device is Miracast compliant, refer to the owner’s manual of the device.
Advanced playback operation This chapter explains playback of commercially available Blu-ray Discs, DVDs, CDs, and recorded DVD-RW/R discs. Note – For the basic playback operation, see page 7. ■ On Screen menu To display On Screen menu, press ON SCREEN. After that, press 5/a/2/3 to select an item, then press ENTER to operate the desired function.
Advanced playback operation ■ Status menu This shows various settings, such as subtitles, angle settings and the title/chapter/track number currently played back. To display status menu, press STATUS. Status menu contains following menus.
Advanced playback operation ■ Program play DVD ■ Using Search CD BD DVD CD VIDEO MUSIC PHOTO This allows you to program playback order of audio disc tracks or DVD chapters. Press PROGRAM during playback to display the PROGRAM window to program playback order. You can program up to 15 tracks/chapters. This allows you to jump to the specified point during playback. Example: Programming the playback order of CD tracks 2 Press 5/a/2/3 to select one of the item below, then press ENTER.
Advanced playback operation ■ Using Picture in Picture function (secondary audio/video playback) BD-Video that includes secondary audio and video compatible with Picture in Picture can be played back with secondary audio and video simultaneously as a small video in the corner. Primary video Secondary video Notes – Yamaha cannot guarantee that all brands’ USB memory devices will operate with this Player.
SETTINGS SETUP menu The SETUP menu enables various audio/visual settings and adjustments for functions using the remote control unit. Menu/Submenu System Item Playback Security Network 24 En Page Auto Power Standby Sets the power-saving function to on/off. HDMI Control Sets this Player to receive control signal from the remote control of your TV/AV receiver. 27 Load Default Resets all settings to the default setting except Security setting. 27 Upgrade Performs upgrade of this Player.
SETUP menu Menu/Submenu TV Display Setting Video Process Audio Output Function Page Sets the screen aspect ratio of the connected TV, and adjust the video output. 29 HDMI Resolution Selects the HDMI video output resolution. 30 TV System Selects the TV System from NTSC/PAL/Multi. 30 Color Space Selects Color Space from YCbCr 4:4:4/YCbCr 4:2:2/Full RGB/RGB. 30 HDMI Deep Color Selects HDMI Deep Color from 30 bits/36 bits/48 bits/Off. 30 HDMI 1080p 24Hz Sets HDMI 1080p 24Hz to auto/off.
SETUP menu ■ Example of SETUP menu operation You need to call up the SETUP menu screen to perform settings for this Player. The following is the explanation for basic operations of the SETUP menu. 2ND AUDIO 4. Select a desired setting. Press 5/a to select On or Off, then press ENTER.
SETUP menu ■ General Setting The default settings are marked with “ * ”. System Load Default You can reset all settings of this Player to default setting except Security setting (p. 28). For details on default settings, see pages 24–31. Upgrade You can upgrade the software manually from USB Storage or Network. For details on software upgrade, refer to “Software upgrade” (p. 34).
SETUP menu Playback Disc Auto Playback You can set Disc Auto Playback to on/off. When set to on, a disc will play back automatically after loading. Country Code You can set the Country Code you live in. The password (see “Change Password” on p. 28) needs to be entered before the Country Code is set. This setting may be used for rating of Parental Control and disc playback. On*, Off Network Angle Mark You can set to display the Angle Mark ( ) when Blu-ray Disc/DVD with multiple angles is played back.
SETUP menu Proxy Setting You can set Proxy Setting. Set to Disable for normal use. Set to Enable to set the proxy setting. Disable* Sets proxy server to disable. Select this item when proxy server is not used. Enable Enables proxy host and proxy port setting. Proxy Host Sets proxy host. Proxy Port Sets proxy port. The default settings are marked with “ * ”. TV TV Screen You can set the screen aspect ratio of the connected TV, and adjust the video output. If you switch your TV (i.e.
SETUP menu HDMI Resolution You can select the HDMI video output resolution. For more details on output formats, refer to “About the HDMI video output formats” (p. 33). When set to Auto, resolution is set to the maximum resolution according to the connected TV. When set to Disc Native, the original resolution and video frequency, recorded in the Blu-ray Disc or DVD that is played back, are used. You can use a video up-converter function of an external device.
SETUP menu ■ Audio Setting The default settings are marked with “ * ”. ■ System Information Software version and MAC address (p. 39) are displayed. Audio Output HDMI You can select the output mode of HDMI terminal. For more details on output formats, refer to “About the audio output formats” (p. 32). Outputs digital signal without any processing. Secondary Audio is not output. PCM Outputs 2-channel PCM. Reencode Outputs Bitstream with Secondary Audio. Off Mutes sound.
SETUP menu ■ About the audio output formats Source format PCM 2ch PCM 5.1ch PCM 7.1ch Dolby Digital Dolby Digital Plus Dolby TrueHD DTS HDMI Bitstream PCM with SA or BCS*1 PCM 2ch without SA or BCS*1 PCM 2ch with SA or BCS*1 PCM 5.1ch without SA or BCS*1 with SA or BCS*1 without SA or BCS*1 with SA or BCS*1 without SA or BCS*1 with SA or BCS*1 without SA or BCS*1 with SA or BCS*1 without SA or BCS*1 PCM 7.
SETUP menu ■ About the HDMI video output formats When TV System is set to NTSC Contents HDMI Resolution Auto Disc Native 1080p 1080i 720p 480p/576p 480i/576i BD-Video with 1080p/24Hz content *1 1080p 24Hz 1080p 24Hz/ 60Hz *3 1080i 60Hz 720p 60Hz 480p 480i BD-Video without 1080p/24Hz content *1 *2 1080p 60Hz 1080i 60Hz 720p 60Hz 480p 480i DVD-Video *1 *2 1080p 60Hz 1080i 60Hz 720p 60Hz 480p 480i Others *1 *1 1080p 60Hz 1080i 60Hz 720p 60Hz 480p 480i When TV System is
Software upgrade New software that provides additional features or product improvements will be released as needed. We recommend upgrading the software of this Player to the latest version periodically. To check for the availability of a software upgrade, visit http://download.yamaha.com/ Note – Do not remove the USB memory device, set this Player to standby mode or unplug the power cable/network cable while the software upgrade is being performed. ■ Upgrading the software 1.
ADDITIONAL INFORMATION Troubleshooting Refer to the table below when this Player does not function properly. If the problem you are experiencing is not listed below or if the instruction below does not help, turn off this Player, disconnect the power cable, and contact the nearest authorized Yamaha dealer or service center. ■ Power Problem Possible causes and solutions No power. – Connect the AC power cable properly. – Press p on the front panel to turn on the power. The Player power is turned off.
Troubleshooting ■ Picture Problem Possible causes and solutions No picture. – Make sure that the cables are connected correctly. (p. 10) – Make sure that the connected TV or the AV receiver is set to the correct input. – With no disc inserted, or playback stopped, press and hold , and on the front panel simultaneously to set video resolution to the default value. If a picture is still not output, press and hold on the front panel for approximately 5 seconds to switch NTSC/PAL.
Troubleshooting Problem Possible causes and solutions Cannot detect the DLNA server. – Verify that this Player can connect to the network normally. Refer to “Connection Test”. (p. 28) – Turn on the connected equipment, such as broadband router or the server. – Confirm the Player and the server are connected to the same router (or access point). – Depending on the DLNA server, the Player may need to be permitted from the server. – Depending on the DLNA server, it needs to change a firewall setting.
Glossary AVCHD AVCHD is a new format (standard) for high definition video cameras that can be used to record and play highresolution HD images. BD-Live™ BD-Live is a Blu-ray Disc standard that utilizes a network connection, enabling this Player to go online to download promotional videos and other data. BDMV BDMV (Blu-ray Disc Movie) refers to one of the application formats used for BD-ROM which is one of the Blu-ray Disc specifications.
Specifications HDMI Mac address HDMI (High-Definition Multimedia Interface) is an interface that supports both video and audio on a single digital connection. The HDMI connection carries standard to high definition video signals and multichannel audio signals to AV components such as HDMI equipped TVs, in digital form without degradation. The Mac address is a unique value assigned to a network device for identification purposes.
Specifications ■ Copyright Note – Audio-visual material may consist of copyrighted works which must not be recorded without the authority of the owner of the copyright. Refer to relevant laws in your country. Java is a registered trademark of Oracle and/or its affiliates. “Blu-ray Disc™”, “Blu-ray™”, “BD-Live™”, “BONUSVIEW™”, and the logos are trademarks of the Blu-ray Disc Association. DLNA™ and DLNA CERTIFIED™ are trademarks or registered trademarks of Digital Living Network Alliance.
ADDITIONAL INFORMATION Index ■ Numerics IP Setting, SETUP menu ......................28 2ND AUDIO, remote control ................7 ■ ■ Language, SETUP menu ......................27 Last Memory, SETUP menu ................28 Load Default, SETUP menu ................27 Local Storage, SETUP menu ...............27 A Angle Mark, SETUP menu ..................28 Angle, On Screen menu .......................20 Audio output formats ...........................32 Audio Output, SETUP menu ...............
Precaución: lea las indicaciones siguientes antes de utilizar este aparato. 1 2 3 4 5 Para asegurar el mejor rendimiento de este aparato, lea atentamente este manual. Y luego guárdelo en un lugar seguro para poder consultarlo en el futuro en caso de ser necesario. Instale esta unidad en un lugar bien ventilado, fresco, seco y limpio, alejado de la luz directa del sol, fuentes de calor, vibración, polvo, humedad y/o frío.
Índice 1. Introducción 1 5. Información adicional Qué puede hacer con este reproductor ........... 2 Resolución de problemas................................ 35 Amplia variedad de discos y formatos de archivo admitidos.................................................................... 2 Características de red mejoradas .................................... 2 Configuración y operaciones sencillas ........................... 2 Alimentación.................................................................
INTRODUCCIÓN Qué puede hacer con este reproductor Diversos discos Contenido de transferencia de red Contenido USB Red inalámbrica (compatible con WPS) Contenido PC/NAS (DLNA) Contenido de teléfonos inteligentes (Miracast) ■ Amplia variedad de discos y formatos de archivo admitidos – Blu-ray Disc™, DVD y CD (pág. 20) – BONUSVIEW™ y BD-Live™ (pág. 22) – Archivos de vídeo, música y fotos en discos DVD-R/RW, discos CD-R/RW y dispositivos de memoria USB (pág.
1 Información sobre discos y archivos – En este reproductor se pueden reproducir discos de 12 cm y 8 cm. No utilice un adaptador de 8 cm a 12 cm. – Utilice discos que sean compatibles con los estándares que se indican con la presencia de logotipos oficiales en la etiqueta del disco. La reproducción de discos que no cumplan con estos estándares no está garantizada. Además, la calidad de imagen o sonido no está garantizada aunque puedan reproducirse estos discos.
Información sobre discos y archivos ■ Precauciones con los discos Información sobre la gestión de la región Destino Australia BD-Video Código de región “B” o “ABC” DVD-Video Número de región “4” o “ALL” 4 Rusia Código de región “C” o “ABC” Número de región “5” o “ALL” 5 China Código de región “C” o “ABC” ALL ALL Número de región “6” o “ALL” 6 ALL Notas – Las operaciones y funciones de vídeo Blu-ray Disc/ DVD pueden ser diferentes de las explicaciones que aparecen en este manual y algunas oper
Información sobre discos y archivos ■ Tecnología Cinavia 1 Introducción – La tecnología Cinavia forma parte del sistema de protección de los contenidos incluido en este reproductor de Blu-ray Disc. Nota – Es posible que aparezcan los siguientes mensajes y que su reproductor de Blu-ray Disc detenga la reproducción o silencie temporalmente la salida de audio si reproduce una copia no autorizada de un contenido protegido mediante la tecnología Cinavia. Estos mensajes aparecen solo en inglés.
Controles y funciones ■ Panel delantero USB 1 2 3 1 p (Encendido/en espera) Pone en marcha el reproductor/activa el modo en espera. Mantenga pulsado p en el panel delantero durante más de 5 segundos para reiniciar el reproductor (se reiniciará el sistema). 2 Puerta de la bandeja portadiscos 4 (Expulsar) Abre/cierra la bandeja portadiscos. 5 (Reproducción/Pausa) Inicia o pone en pausa la reproducción. 6 (Detener) Detiene la reproducción.
Controles y funciones ■ Mando a distancia – aparecerá en la esquina superior izquierda de la pantalla cuando la tecla pulsada no esté disponible. Nota 1 – La Marca Audio Secundario se muestra solo cuando la Marca Audio Secundario está activada (pág. 28). 7 HOME: Muestra la pantalla de menú HOME (pág. 16).
Controles y funciones C Teclas de control 1 BD 2 3 4 5 6 7 8 PIP MIRACAST SUBTITLE E 2ND AUDIO HOME AUDIO F TOP MENU POP-UP/MENU 9 ON SCREEN RETURN B G ENTER H 0 A ZOOM R PROGRAM SHUFFLE CD VIDEO MUSIC PHOTO / : Permite saltar hacia atrás/hacia adelante. / DVD CD VIDEO MUSIC : Permite buscar hacia atrás/hacia adelante. La velocidad de búsqueda cambiará cada vez que pulse la techa (buscar hacia atrás/adelante: 5 pasos cada una). Pulse para reanudar la reproducción normal.
Controles y funciones Instalación de las pilas en el mando a distancia Sensor del mando a distancia 3 USB 2 30° 1 Introducción 1 Alcance aproximado de funcionamiento del mando a distancia 30° 6m Notas Español – Cambie las dos pilas cuando note que disminuye el alcance del mando a distancia. – Utilice pilas AAA, R03, UM-4. – Asegúrese de que las polaridades son las correctas. Consulte la ilustración que encontrará en el interior del compartimento de las pilas.
CONEXIONES Conexiones de vídeo/audio Realice las conexiones de los cables de vídeo/audio correspondientes en el equipo que desee usar. Consejos – Consulte la página 32 para obtener información sobre los formatos de salida de audio/vídeo. – Prepare los cables de venta en el mercado necesarios para las conexiones. El tipo y el número de cables que necesita varían en función del equipo que se va a conectar.
Conexiones de vídeo/audio ■ Conexión con un televisor a través de un receptor de A/V ■ Conexión directa con un televisor Conecte este reproductor al televisor con un cable HDMI. Conecte este reproductor al receptor de A/V y el receptor de A/V al televisor con cables HDMI. Para más detalles sobre las conexiones de los altavoces, consulte los manuales de instrucciones del receptor de A/V y de los altavoces.
Conexión de red Si conecta este reproductor a la red (inalámbrica o con cable), puede utilizar las funciones siguientes. – Reproducción de contenido de un servidor DLNA (PC o NAS) (pág. 16) – Reproducción de distintos contenidos del servicio de red (pág. 18) – Reproducción de discos compatibles con BD-Live (pág. 22) – Uso de este reproductor desde dispositivos móviles (AV CONTROLLER) (pág.
Conexión de red ■ Configuración de servidor DLNA Notas – Para utilizar funciones DLNA, todos los dispositivos deben estar conectados a la misma red. – Para utilizar un NAS como un servidor DLNA, el NAS debe ser compatible con DLNA. 2 Conexiones Mediante el uso de DLNA, puede compartir contenido multimedia (como vídeos, música y fotos) almacenado en su servidor DLNA (PC o NAS) conectado a su red, y disfrutar de ese contenido con el reproductor.
Conexión USB Si conecta un dispositivo de memoria USB al conector USB en el panel delantero o trasero de este reproductor, puede reproducir archivos multimedia almacenados en el dispositivo de memoria USB (pág. 16). Notas – Yamaha no puede garantizar que los dispositivos de memoria USB de todas las marcas funcionen con este reproductor. – Conecte un dispositivo de memoria USB a uno de los conectores USB (delantero/trasero) de este reproductor cuando utilice la función BD-Live (pág. 23).
REPRODUCCIÓN Ajustes iniciales ■ Configuración con la Configuración Sencilla 3 Pulse 2/3 para seleccionar Sí y, a continuación, pulse ENTER. La Configuración Sencilla le permite definir fácilmente el idioma, la resolución y la relación de aspecto de la pantalla. La pantalla de la Configuración Sencilla aparece la primera vez que enciende este reproductor después de comprarlo. La misma configuración se puede realizar desde el menú SETUP = Sistema = Configuración Sencilla.
Menú HOME El menú HOME le permite realizar las siguientes operaciones básicas de este reproductor. – Búsqueda y reproducción de archivos multimedia en distintos discos, dispositivos de memoria USB y sus servidores DLNA (PC o NAS) – Acceso a diversos servicios de red (pág. 18) – Visualización del menú SETUP (pág. 24) Consejos – Para obtener información sobre los discos y formatos que se pueden reproducir, consulte la página 3.
Menú HOME Nota – Tenga en cuenta que en el siguiente paso solo se mostrarán los archivos del tipo que seleccione en este paso. Por ejemplo, si selecciona la carpeta Foto en este paso, solo se mostrarán archivos de fotos después de este paso. 4 Seleccione la carpeta que contiene el archivo que desea reproducir. Durante la visualización de fotos, los botones del mando a distancia funcionan como se indica a continuación. : Detiene el pase de diapositivas y vuelve al explorador de archivos.
Uso de servicios de red Puede disfrutar de fotos utilizando los siguientes servicios de red. – Álbumes Web de Picasa Notas – El acceso a contenidos suministrados por terceros requiere una conexión a Internet de alta velocidad y, a veces, también un registro de cuenta y una suscripción de pago. – Los servicios de contenidos de terceros pueden modificarse, suspenderse, interrumpirse o dejar de proporcionarse en cualquier momento sin previo aviso, y Yamaha no asume ninguna responsabilidad en este sentido.
Uso de imágenes y vídeos de teléfonos inteligentes en la pantalla del televisor (Miracast™) Miracast es una solución para una perfecta visualización de vídeo entre dispositivos, sin cables ni una conexión de red a través de un punto de acceso (Wi-Fi Direct). Puede realizar distintas acciones, como ver imágenes desde un dispositivo compatible con Miracast (teléfono inteligente, etc.) en la pantalla del televisor conectado a este reproductor.
Funciones avanzadas de reproducción En este capítulo se explica la reproducción de discos Blu-ray Disc, DVD y CD de venta en el mercado, así como de discos DVD-RW/R grabados. Nota – Para conocer las funciones básicas de reproducción, consulte la página 7. ■ Menú en pantalla Para mostrar el menú en pantalla, pulse ON SCREEN. A continuación, pulse 5/a/2/3 para seleccionar una opción y, después, pulse ENTER para utilizar la función deseada.
Funciones avanzadas de reproducción ■ Menú de estado Muestra varios ajustes, cómo los subtítulos, el ángulo y el número de título/capítulo/pista reproducido. Para mostrar el menú de estado, pulse STATUS. El menú de estado consta de los siguientes menús.
Funciones avanzadas de reproducción ■ Programación de la reproducción DVD CD ■ Uso de la búsqueda Esta opción le permite programar el orden de reproducción de las pistas de un disco de audio o de los capítulos de un DVD. Pulse PROGRAM durante la reproducción para mostrar la ventana PROGRAMA para programar el orden de reproducción. Puede programar hasta 15 pistas/capítulos. Esta opción le permite ir a un punto específico durante la reproducción.
Funciones avanzadas de reproducción ■ Utilización de la función Imagen en Imagen (reproducción de audio/vídeo secundario) El Vídeo BD que incluye audio y vídeo secundario compatible con Imagen en Imagen se puede reproducir con audio y vídeo secundario simultáneamente como un vídeo pequeño en la esquina. Vídeo principal Vídeo secundario – Si el espacio de almacenamiento es insuficiente, los datos no se copiarán/descargarán. Elimine datos innecesarios o utilice un dispositivo de memoria USB nuevo.
AJUSTES Menú SETUP El menú SETUP permite realizar diversos ajustes y configuraciones audiovisuales en las funciones utilizando el mando a distancia. Menú/submenú Sistema Configuración General Idioma Reproducción Seguridad Red Opción Página Activa o desactiva la función de ahorro de energía. 27 Control HDMI Configura el reproductor para que reciba la señal de control desde el mando a distancia de su televisor/receptor de A/V.
Menú SETUP Menú/submenú TV Configuración de pantalla Opción Función Página Pantalla de TV Ajusta la relación de aspecto de la pantalla del televisor conectado y ajusta la salida de vídeo. 29 Resolución HDMI Permite seleccionar la resolución de salida de vídeo HDMI. 30 Sistema de TV Permite seleccionar el sistema de TV entre NTSC/PAL/ Multi. 30 Color Space Permite seleccionar Color Space entre YCbCr 4:4:4/YCbCr 4:2:2/Full RGB/RGB.
Menú SETUP ■ Ejemplo de funcionamiento del menú SETUP Debe acceder a la pantalla del menú SETUP para realizar ajustes en el reproductor. A continuación se explican las operaciones básicas del menú SETUP. 2ND AUDIO 3. Seleccione una opción del menú. Pulse 5/a para seleccionar Reproducción Automática Disco y, a continuación, pulse ENTER o el cursor 3. AUDIO HOME TOP MENU POP-UP/MENU ENTER ON SCREEN RETURN ZOOM R PROGRAM SHUFFLE G Y REPEAT B STATUS 4. Seleccione el ajuste deseado.
Menú SETUP ■ Configuración General Cargar configuracion por defecto Puede restablecer todos los ajustes de este reproductor al ajuste predefinido, excepto el ajuste Seguridad (pág. 28). Para obtener información sobre los ajustes predeterminados, consulte las páginas 24–31. Los ajustes predeterminados están marcados con “ * ”. Actualizar Puede actualizar el software manualmente desde Almacenamiento USB o Red.
Menú SETUP Menú Puede dar prioridad al idioma del menú del disco. English, Français, 中文 , Español, Deutsch, Italiano, Nederlandse, Portugués, Danés, Svenska, Finlandés, Noruego, Polski, Русский, Corea, Japonés, Más Audio Puede dar prioridad al idioma del audio para la reproducción de Blu-ray Disc/DVD. Para obtener información sobre la configuración de las opciones, consulte “Menú” (pág. 28). Subtítulo Puede dar prioridad al idioma de los subtítulos.
Menú SETUP Prueba de conexión Puede realizar una prueba de conexión a Internet. Si la prueba falla, compruebe la “Configuración IP” (pág. 29) y vuelva a realizar la prueba. Configuración IP Puede configurar los ajustes de red. Auto* Seleccione este valor para configurar automáticamente los ajustes de red de este reproductor con el servidor DHCP. Manual Seleccione este valor para realizar la configuración de red (Dirección IP, Máscara de subred, Default Gateway y DNS) manualmente.
Menú SETUP Resolución HDMI Puede seleccionar la resolución de salida de vídeo HDMI. Para obtener más información sobre los formatos de salida, consulte “Acerca de los formatos de salida de vídeo HDMI” (pág. 33). Cuando se define en Auto, la resolución se ajusta a la resolución máxima según el televisor conectado. Cuando se define en Disco Original, se utiliza la resolución y frecuencia de vídeo original grabada en el Blu-ray Disc o DVD que se reproduce.
Menú SETUP ■ Configuración de audio ■ Sistema de Información Los ajustes predeterminados están marcados con “ * ”. Se muestran la versión del software y la dirección MAC (pág. 39). Salida de audio HDMI Puede seleccionar el modo de salida del terminal HDMI. Para obtener más información sobre los formatos de salida, consulte “Acerca de los formatos de salida de audio” (pág. 32). Permite la salida de la señal digital sin ningún procesamiento. No se produce la salida del audio secundario.
Menú SETUP ■ Acerca de los formatos de salida de audio Formato de origen PCM 2 canales PCM 5.1 canales PCM 7.1 canales Dolby Digital Dolby Digital Plus Dolby TrueHD DTS HDMI Bitstream con SA o BCS*1 PCM PCM 2 canales sin SA o BCS*1 PCM 5.1 canales sin SA o BCS*1 PCM 7.1 canales sin SA o BCS*1 con SA o BCS*1 sin SA o BCS*1 con SA o BCS*1 sin SA o BCS*1 con SA o BCS*1 sin SA o BCS*1 DTS-HD Master Audio sin SA o BCS*1 con SA o BCS*1 sin SA o BCS*1 Dolby Digital PCM 7.
Menú SETUP ■ Acerca de los formatos de salida de vídeo HDMI Si Sistema de TV se define en NTSC Índice Resolución HDMI Auto Disco Original 1080p 1080i 720p 480p/576p 480i/576i BD-Video con contenido 1080p/24 Hz *1 1080p 24 Hz 1080p 24 Hz/ 60 Hz *3 1080i 60 Hz 720p 60 Hz 480p 480i BD-Video sin contenido 1080p/24 Hz *1 *2 1080p 60 Hz 1080i 60 Hz 720p 60 Hz 480p 480i DVD-Video *1 *2 1080p 60 Hz 1080i 60 Hz 720p 60 Hz 480p 480i Otros *1 *1 1080p 60 Hz 1080i 60 Hz 720p 60 Hz
Actualización de software El nuevo software que proporciona características adicionales o mejoras del producto se comercializará según sea necesario. Se recomienda actualizar periódicamente el software de este reproductor a la versión más reciente. Para comprobar la disponibilidad de una actualización de software, visite http://download.yamaha.
INFORMACIÓN ADICIONAL Resolución de problemas Consulte la tabla que aparece a continuación cuando el reproductor no funcione correctamente. Si el problema que tiene no aparece en la lista siguiente o las instrucciones no le sirven de ayuda, apague este reproductor, desenchufe el cable de alimentación y póngase en contacto con el centro de servicio o concesionario Yamaha autorizado más cercano. ■ Alimentación Problema Posibles causas y soluciones No hay alimentación.
Resolución de problemas ■ Imagen Problema Posibles causas y soluciones No hay imagen. – Asegúrese de que los cables están correctamente conectados. (pág. 10) – Asegúrese de que el televisor o receptor de A/V conectado está ajustado a la entrada correcta. – Sin ningún disco cargado o con la reproducción parada, mantenga pulsados los botones , y del panel delantero simultáneamente para restaurar el valor predeterminado de la resolución del vídeo.
Resolución de problemas Problema Posibles causas y soluciones No se pueden descargar contenidos BDLive. – Verifique que este reproductor se puede conectar a Internet normalmente. Consulte “Prueba de conexión”. (pág. 29) – Conecte el dispositivo de memoria USB correctamente. Compruebe que el dispositivo de memoria USB está conectado al conector USB del reproductor. (pág. 14) – Compruebe si el Blu-ray Disc admite BD-Live. – Conecte el dispositivo de memoria USB con formato FAT16, FAT32 o NTFS.
Glosario AVCHD AVCHD es un nuevo formato (estándar) para cámaras de vídeo de alta definición que se puede utilizar para grabar y reproducir imágenes de alta resolución HD. BD-Live™ BD-Live es un estándar de Blu-ray Disc que utiliza una conexión de red y permite al reproductor conectarse a Internet para descargar vídeos promocionales y otros datos. BDMV BDMV (película Blu-ray Disc) es uno de los formatos de aplicación utilizados en BD-ROM, que es una de las especificaciones de Blu-ray Disc.
Especificaciones FLAC Sonido PCM lineal FLAC (Free Lossless Audio Codec, Códec libre de comprensión de audio sin pérdida) es un formato de archivo abierto para la compresión de datos de audio sin pérdida. Aunque el grado de compresión es inferior al de otros formatos de audio comprimido con pérdida, normalmente el audio es de mayor calidad. HDMI PCM lineal es un formato de grabación de señales utilizado para CD de audio y en algunos DVD y Blu-ray Disc.
Especificaciones ■ Propiedad intelectual Nota – El material audio-visual puede consistir de productos con propiedad intelectual que no se deben grabar sin la autorización del poseedor de dicha propiedad intelectual. Remítase a las leyes aplicables en su país. “Blu-ray Disc™”, “Blu-ray™”, “BD-Live™”, “BONUSVIEW™” y los logotipos son marcas comerciales de Blu-ray Disc Association. es una marca comercial de DVD Format/Logo Licensing Corporation. Fabricado con la licencia de Dolby Laboratories.
INFORMACIÓN ADICIONAL Índice ■ Numerics 2ND AUDIO, mando a distancia ...........7 Función Imagen en Imagen ..................23 Funcionamiento del menú SETUP .......26 ■ ■ A ■ B BD-Live ...............................................23 Bitrate, menú en pantalla .....................20 Botones de colores, mando a distancia ...7 Botones de control, mando a distancia ...8 Botones de cursor, mando a distancia ....7 Botones numéricos, mando a distancia ...8 Búsqueda Ins, menú en pantalla ..........
Information about third party software licenses This product incorporates the following third party software. For information (copyright, etc) about each software, please read the terms and conditions stated below. By using this product, you will be deemed to have accepted the terms and conditions.
It is not the purpose of this section to induce you to infringe any patents or other property right claims or to contest validity of any such claims; this section has the sole purpose of protecting the integrity of the free software distribution system, which is implemented by public license practices.
To “convey” a work means any kind of propagation that enables other parties to make or receive copies. Mere interaction with a user through a computer network, with no transfer of a copy, is not conveying.
c) Prohibiting misrepresentation of the origin of that material, or requiring that modified versions of such material be marked in reasonable ways as different from the original version; or d) Limiting the use for publicity purposes of names of licensors or authors of the material; or e) Declining to grant rights under trademark law for use of some trade names, trademarks, or service marks; or f) Requiring indemnification of licensors and authors of that material by anyone who conveys the material (or modif
END OF TERMS AND CONDITIONS How to Apply These Terms to Your New Programs If you develop a new program, and you want it to be of the greatest possible use to the public, the best way to achieve this is to make it free software which everyone can redistribute and change under these terms. To do so, attach the following notices to the program.
GNU LESSER GENERAL PUBLIC LICENSE TERMS AND CONDITIONS FOR COPYING, DISTRIBUTION AND MODIFICATION 0. This License Agreement applies to any software library or other program which contains a notice placed by the copyright holder or other authorized party saying it may be distributed under the terms of this Lesser General Public License (also called “this License”). Each licensee is addressed as “you”.
10. Each time you redistribute the Library (or any work based on the Library), the recipient automatically receives a license from the original licensor to copy, distribute, link with or modify the Library subject to these terms and conditions. You may not impose any further restrictions on the recipients’ exercise of the rights granted herein. You are not responsible for enforcing compliance by third parties with this License. 11.
The precise terms and conditions for copying, distribution and modification follow. Pay close attention to the difference between a “work based on the library” and a “work that uses the library”. The former contains code derived from the library, while the latter only works together with the library. Note that it is possible for a library to be covered by the ordinary General Public License rather than by this special one.
It is not the purpose of this section to induce you to infringe any patents or other property right claims or to contest validity of any such claims; this section has the sole purpose of protecting the integrity of the free software distribution system which is implemented by public license practices.
The above copyright notice and this permission notice shall be included in all copies or substantial portions of the Software. THE SOFTWARE IS PROVIDED “AS IS”, WITHOUT WARRANTY OF ANY KIND, EXPRESS OR IMPLIED, INCLUDING BUT NOT LIMITED TO THE WARRANTIES OF MERCHANTABILITY, FITNESS FOR A PARTICULAR PURPOSE AND NONINFRINGEMENT.
■ About protobuf Copyright © 2008, Google Inc. All rights reserved. Redistribution and use in source and binary forms, with or without modification, are permitted provided that the following conditions are met: 1. Redistributions of source code must retain the above copyright notice, this list of conditions and the following disclaimer. 2.
Redistribution and use in source and binary forms, with or without modification, are permitted provided that the following conditions are met: 1. Redistributions of source code must retain the above copyright notice, this list of conditions and the following disclaimer. 2. Redistributions in binary form must reproduce the above copyright notice, this list of conditions and the following disclaimer in the documentation and/or other materials provided with the distribution.
Please replace with the value from the FreeType version you actually use. Legal Terms 0. Definitions Throughout this license, the terms ‘package’, ‘FreeType Project’, and ‘FreeType archive’ refer to the set of files originally distributed by the authors (David Turner, Robert Wilhelm, and Werner Lemberg) as the ‘FreeType Project’, be they named as alpha, beta or final release.
All Rights Reserved except as specified below. Permission is hereby granted to use, copy, modify, and distribute this software (or portions thereof) for any purpose, without fee, subject to these conditions: (1) If any part of the source code for this software is distributed, then this README file must be included, with this copyright and no-warranty notice unaltered; and any additions, deletions, or changes to the original files must be clearly indicated in accompanying documentation.
00_BD-S477_P_cv.fm 1 ページ 2014年1月21日 火曜日 午後2時44分 The laser component in this product is capable of emitting radiation exceeding the limit for Class 1. LASER Specification: Class 1 LASER Product Wave length: 790 nm (CDs)/658 nm (DVDs)/405 nm (BDs) Laser output: max. 1 mW El componente láser de este producto es capaz de emitir radiación que sobrepasa el límite establecido para la clase 1.