
Specifications


40
4. Once all the audio tracks have been put together, click on the 'Burn' button. The CD can
now be written on immediately ('Burn' option) or a test can first be conducted ('Test and
burn' option). Click on 'Burn' and the option will become available. That's it!
Note: If the audio data are of '.wav', '.mp3', '.vqf' or '.aiff' format, the files will be automatically converted
into the CD-DA format before burning, one with which CD-players are able to read audio CD's.
Distribution Discs
When writing important data or
preparing data for distribution to
others, make sure that the disc can
be read properly before writing
duplicates.
Copyrights
When writing to CD-R/RW, make
sure that you are not infringing
any copyrights. It is illegal to copy
audio CDs for non-personal use.
When backing up software, please
make sure that you are not infring-
ing any software copyrights for
that product.
Warranty
Yamaha and suppliers accept no
liability for the loss of any data or
any problems caused as a result.
As a precaution, it is recommend-
ed that the discs are tested after
they have been written to.
Furthermore, under no circum-
stances does Yamaha and suppli-
ers guarantee the reliability of the
discs.
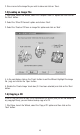
7.3) Creating a Data CD
Unlike audio CD's, which can only be completely recorded 'in one go', you can record a
number of sessions on one data CD (so-called multi-session CD's). In other words, data
can be either recorded on a new CD or can be recorded as a new session on an existing
CD.
1. Start Nero, launch the Wizard, and select the 'Compile a new CD' option. Click on 'Next'
and highlight 'Data CD' in the next dialog.