MANUALE DI ISTRUZIONI Stampato in Italia
Cover 2a 13-12-2001 16:06 Pagina 2 INFORMAZIONI FCC 1. AVVISO IMPORTANTE: NON MODIFICATE QUESTA UNITÁ! Questo apparecchio, se installato secondo le istruzioni contenute in questo manuale, segue le norme FCC. Eventuali modifiche non approvate espressamente dalla Yamaha potrebbero invalidare il vostro diritto di usare l’apparecchio. 2. IMPORTANTE: Quando collegate questo apparecchio ad accessori e/o ad un altro apparecchio, usate soltanto cavi schermati di alta qualità.
i.
ii-iv.FM Page ii Thursday, December 13, 2001 2:03 PM PRECAUZIONI PRIMA DI PROCEDERE, LEGGETE ATTENTAMENTE LE SEGUENTI AVVERTENZE PER EVITARE FERITE PERSONALI E DANNI AL DISPOSITIVO. Queste precauzioni spiegano come usare l’apparecchio correttamente ed in maniera sicura, così da evitare inconvenienti a voi o a terzi. Questa sezione è stata suddivisa in AVVERTENZA e ATTENZIONE, in base alla probabilità e alla natura di qualsiasi danno potenziale.
ii-iv.FM Page iii Thursday, December 13, 2001 2:03 PM ● Pulite regolarmente la spina di alimentazione per evitare rischi di incendio dovuti a mancato isolamento (ad esempio a causa dell’umidità). ● Non estraete l’alimentatore tirandone il cavo, e non collocate oggetti su quest’ultimo. In tal modo eviterete il rischio di scossa elettrica, incendio o malfunzionamento. ● Per evitare il rischio di scossa elettrica o di incendio, inserite completamente l’alimentatore nella presa.
ii-iv.FM Page iv Thursday, December 13, 2001 2:03 PM ● Evitate l’ascolto in cuffia ad alto volume per un periodo prolungato, poiché potreste riportare danni all’udito. ● Prima di accendere il computer, abbassate sempre il volume, poiché picchi improvvisi di suono ad alto volume possono causare danni all’udito. ● Non posizionate l’apparecchio in prossimità di fonti di interferenza magnetica (ad esempio un display) per evitare il rischio di interferenze reciproche.
v.FM Page v Thursday, December 13, 2001 2:04 PM Sommario Caratteristiche del drive CRW3200SX................................................... 1 Nome e funzione delle parti................................................................... 2 Pannello frontale..................................................................................... 2 Pannello posteriore ................................................................................. 3 Precauzioni di impiego.....................................
1-3.FM Page 1 Thursday, December 13, 2001 2:09 PM Caratteristiche del drive CRW3200SX Lettura/scrittura ad alta velocità Il drive CRW3200SX supporta una velocità di scrittura fino a 24X per dischi CD-R, e fino a 10X per la scrittura/riscrittura di dischi CD-RW. Inoltre, il drive supporta una velocità di lettura dati e di estrazione dati audio digitali fino a 40X. Suggerimento • Il metodo Partial CAV permette una velocità di scrittura di 24X per i dischi CD-R.
1-3.FM Page 2 Thursday, December 13, 2001 2:09 PM Nome e funzione delle parti Pannello frontale ➀ Slitta portadisco ➅ LED Contiene il disco. Si apre e si chiude premendo il pulsante di espulsione. (P. 20) Indica la condizione operativa del drive CRW3200SX in base al colore e al modo in cui lampeggia. ➁ Foro di espulsione manuale Serve per l’apertura forzata della slitta portadisco quando questa non può essere aperta premendo il pulsante di espulsione. (P.
1-3.FM Page 3 Thursday, December 13, 2001 2:09 PM Nome e funzione delle parti Pannello posteriore ➀ Prese LINE OUT (L/R) Collegano dispositivi audio, ad esempio altoparlanti esterni. ➁ Interruttore POWER (STANDBY/ON) Per accendere/spegnere l’apparecchio. (P. 12, 15) ➂ Connettore DC-IN Collega l’alimentatore per CA fornito. (P. 14) 3 ➃ Connettori SCSI Collegano il cavo SCSI. (P. 12) Viene usato il tipo a 50-pin half-pitch Dsub. (P.
4-8.FM Page 4 Thursday, December 13, 2001 2:27 PM Precauzioni di impiego Trattamento dei dischi Per evitare problemi, quali errori di scrittura, perdita di dati registrati o malfunzionamento del drive, quando maneggiate i dischi seguite le precauzioni qui elencate: • Non collocate i dischi in luoghi caldi o umidi o dove potrebbero essere esposti alla luce solare diretta. • Non toccate la superficie dei dischi. Quando maneggiate un disco, tenetelo per il bordo.
4-8.FM Page 5 Thursday, December 13, 2001 2:27 PM Precauzioni di impiego Dischi compatibili Dischi su cui è possibile scrivere Il drive CRW3200SX può scrivere sui seguenti dischi. Per gli ultimi aggiornamenti sui dischi di cui è già stata accertata la compatibilità con il drive, andate al sito web relativo ai drive CD-R/RW YAMAHA: URL: http://www.yamaha.co.jp/english/product/computer/ Dischi CD-R • Il CRW3200SX può scrivere su questi dischi a velocità 1X, 2X, 4X, 8X, 12X, 16X o 24X.
4-8.FM Page 6 Thursday, December 13, 2001 2:27 PM Partial CAV (Constant Angular Velocity) La scrittura su disco CD-R normalmente viene effettuata con il metodo CLV (Constant Linear Velocity). Con questo metodo, durante la scrittura la velocità di rotazione del disco viene opportunamente regolata per mantenere costante la velocità di scrittura (velocità di trasferimento dati) in qualsiasi porzione del disco.
4-8.FM Page 7 Thursday, December 13, 2001 2:27 PM Precauzioni di impiego • Spazio sull’hard disk La scrittura dei dati su un disco CD-R/RW richiede da 50 a 100 MB di spazio disponibile come area di lavoro sull’hard disk. Quando scrivete i dati su un disco CD-R/RW dopo aver creato un file immagine, vi deve essere abbastanza spazio sull’hard disk per immagazzinare il file immagine oltre all’area di lavoro (per un totale di 900 MB).
4-8.FM Page 8 Thursday, December 13, 2001 2:27 PM Per Macintosh Computer (Macintosh) • CPU: PowerPC G3, 300 MHz o più veloce • RAM: 32 MB (si raccomandano 64 MB o più) • Drive CD-ROM Note Il drive CRW3200SX non può essere usato per riavviare il computer o per la messa a punto di un sistema operativo. • Spazio sull’hard disk La scrittura dei dati su un disco CD-R/RW richiede da 50 a 100 MB di spazio disponibile come area di lavoro sull’hard disk.
9-19.FM Page 9 Thursday, December 13, 2001 3:03 PM Preparazione del drive CRW3200SX Numero di serie Il numero di serie è stampato sull’etichetta nella parte inferiore del vostro drive CRW3200SX. Quando ponete qualche domanda sul drive oppure se avete bisogno di assistenza dal servizio tecnico, dovete fornire il numero di serie. Vi preghiamo di scrivere il numero di serie nello spazio sotto indicato. Dopo l’installazione potrebbe infatti risultare difficile controllare questo numero.
9-19.FM Page 10 Thursday, December 13, 2001 3:03 PM ➀ Numero SCSI ID Ogni dispositivo SCSI collegato al computer deve essere identificato mediante il proprio numero distintivo da "0" a "7". Di solito il numero "7" è riservato per la scheda SCSI. Perciò, si raccomanda di assegnare un numero SCSI ID da "0" a "6", esclusi quelli già utilizzati da altri dispositivi.
9-19.FM Page 11 Thursday, December 13, 2001 3:03 PM Preparazione del drive CRW3200SX ➁Terminazione Un terminatore ha il compito di evitare la riflessione dei segnali SCSI nell'ultimo dispositivo della catena SCSI. I terminatori del primo e dell'ultimo dispositivo della catena SCSI dovrebbero essere inseriti (ON). Se il drive CRW3200SX non è l'ultimo dispositivo della catena SCSI, il TERMINATORE (SW 4) del dip switch dovrebbe essere posizionato su OFF.
9-19.FM Page 12 Thursday, December 13, 2001 3:03 PM 2 Collegate il drive CRW3200SX 1 Spegnete il computer e tutte le periferiche. 2 Accertatevi che l’interruttore di alimentazione sul retro del CRW3200SX indichi che il drive è spento (STANDBY). 3 Collegate il cavo SCSI ad uno qualunque dei connettori SCSI sul pannello posteriore del drive CRW3200SX. Collegate l’altra estremità del cavo SCSI al connettore della scheda SCSI del computer o di un altro dispositivo SCSI.
9-19.FM Page 13 Thursday, December 13, 2001 3:03 PM Preparazione del drive CRW3200SX Cavo SCSI • Il connettore dei cavi SCSI o delle schede di interfaccia SCSI può variare. È necessario usare un cavo SCSI con connettori adatti sia al drive CRW3200SX sia alla scheda di interfaccia SCSI. Il connettore SCSI del drive CRW3200SX è del tipo a 50-pin halfpitch D-sub.
9-19.FM Page 14 Thursday, December 13, 2001 3:03 PM 4 Collegate l’alimentatore per CA fornito nel connettore DC-IN del drive. La freccia sulla spina dell’alimentatore deve trovarsi accanto alla vite (a sinistra del connettore). Connettore DC-IN Vite 5 Freccia Collegate il cavo di alimentazione fornito all’alimentatore per CA (➀). Collegate l’altra estremità del cavo di alimentazione ad una presa di corrente (➁). ➀ Cavo di alimentazione (fornito) ➁ Continua...
9-19.FM Page 15 Thursday, December 13, 2001 3:03 PM Preparazione del drive CRW3200SX Note • Usate ESCLUSIVAMENTE l’alimentatore per CA fornito. • L’alimentatore per CA potrebbe riscaldarsi durante l’impiego in condizioni normali. • L’alimentatore consuma sempre energia (vedere tabella) mentre è collegato alla presa di corrente, anche se il drive CRW3200SX è spento. Staccate il cavo di alimentazione dalla presa di corrente se non dovete usare il drive CRW3200SX per un lungo periodo.
9-19.FM Page 16 Thursday, December 13, 2001 3:03 PM 3 Controllate che il drive CRW3200SX venga riconosciuto Dopo aver collegato il drive CRW3200SX al computer, seguite gli step descritti di seguito per verificare che il drive venga riconosciuto correttamente dal computer. Per Windows 1 Accendete il computer. 2 Verificate che il drive CRW3200SX e la scheda SCSI siano riconosciuti correttamente dal computer.
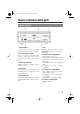
9-19.FM Page 17 Thursday, December 13, 2001 3:03 PM Preparazione del drive CRW3200SX Per Windows 2000 Professional 1 Selezionate Start sulla barra delle funzioni, quindi Settings, Control Panel, System, il tab Hardware e Device Manager. Appare la finestra di dialogo Device Manager. 2 Controllate che siano visualizzate le icone seguenti.
9-19.FM Page 18 Thursday, December 13, 2001 3:03 PM Figura 2 (dopo lo “scrolling”) b Il nome del drive non viene visualizzato o appare il simbolo o . Il drive CRW3200SX non è stato riconosciuto correttamente. Controllate i collegamenti e le impostazioni. 3 Modificate l’impostazione Sync data transfer. Per Windows 95/98/98 Second Edition/Me 1 Nella finestra di dialogo Device Manager (P. 16), selezionate YAMAHA CRW3200S Properties e quindi il tab Settings.
9-19.FM Page 19 Thursday, December 13, 2001 3:03 PM Preparazione del drive CRW3200SX Per Macintosh 1 Accendete il computer. 2 Verificate che il drive CRW3200SX e la scheda SCSI siano riconosciuti correttamente dal computer. 1 2 Selezionate Apple System Profiler nel menù Apple (mela). Selezionate il tab Devices and Volumes (per Mac OS 8.5 o successivi). Note Selezionate Select nella barra del menù, e quindi Device Information (per Mac OS 8/8.1).
20-35.FM Page 20 Thursday, December 13, 2001 3:59 PM Caricamento/espulsione di un disco Prima di procedere, controllate che il drive CRW3200SX sia acceso. 1 Aprite la slitta portadisco premendo il pulsante di espulsione. Premete il pulsante di espulsione 2 Posizionate il disco sulla slitta in maniera corretta, con l’etichetta rivolta verso l’alto. Oppure togliete il disco dalla slitta in modo da non danneggiarlo.
20-35.FM Page 21 Thursday, December 13, 2001 3:59 PM Caricamento/espulsione di un disco Espulsione manuale di un disco Se per qualche ragione la slitta portadisco non si apre, ad esempio in assenza di energia elettrica, seguite gli step sotto riportati per togliere il disco dal drive. Note L’uso frequente di questa operazione può causare un malfunzionamento del drive. 1 Preparate un oggetto sottile appuntito, come una graffetta aperta.
20-35.FM Page 22 Thursday, December 13, 2001 3:59 PM Inconvenienti e rimedi Consultate il sito web YAMAHA CD-R/RW Drive per avere i più recenti dati di supporto, comprese le informazioni sugli inconvenienti e i possibili rimedi. YAMAHA CD-R/RW Drive website URL: http://www.yamaha.co.jp/english/product/computer/ Europa URL: http://www.yamaha-it.de/ 1 Il drive CRW3200SX non si accende quando l'interruttore di alimentazione è posizionato su ON.
20-35.FM Page 23 Thursday, December 13, 2001 3:59 PM Inconvenienti e rimedi BIOS IL BIOS (Basic Input/Output System) è un programma di controllo base per l'accesso ai dati fra un computer e le periferiche (dispositivi periferici). Generalmente, il BIOS risiede sulla scheda madre del computer, un chip ROM di una scheda d'estensione, o una memoria flash. Il BIOS controlla il sistema e riconosce i dispositivi (come le porte seriali o i controller dell'hard disk) prima di avviare il sistema operativo.
20-35.FM Page 24 Thursday, December 13, 2001 3:59 PM 5 ● Sul video appare l'icona del disco? (Per Macintosh) Quando sul video appare l'icona del disco, non può essere usato il pulsante di espulsione disco. Trascinate l'icona del disco nel Trash (cestino) e lasciatela lì per "smontare" il disco e poter aprire la slitta portadisco.
20-35.FM Page 25 Thursday, December 13, 2001 3:59 PM Inconvenienti e rimedi 6 7 Non si riesce a leggere i dati da un disco. ● Il disco viene espulso senza un comando specifico? Fate riferimento al punto 5 "Il disco viene espulso senza un comando (o fuoriesce spontaneamente)”. ● Il disco è compatibile con il drive? (P. 5, 30) Accertatevi che il disco sia compatibile con il drive CRW3200SX.
20-35.FM Page 26 Thursday, December 13, 2001 3:59 PM Per Windows Me 1 Nella finestra di dialogo Device Manager (P. 16), selezionate YAMAHA CRW3200S Properties e quindi il tab Properties. 2 Togliete il segno di spunta a “Enable digital CD audio for this CD-ROM device” sotto la voce “Digital CD Playback”. Togliete il segno di spunta (Videata esemplificativa su Windows Me.) 3 Fate partire “Windows Media Player”. Sulla barra dei menù, selezionate Tools, Options e il tab CD Audio.
20-35.FM Page 27 Thursday, December 13, 2001 3:59 PM Inconvenienti e rimedi Per Windows XP 1 Seguite "Per Windows Me" a pagina 26, e togliete il segno di spunta a “Enable digital CD audio for this CD-ROM device.” 2 Avviate “Windows Media Player”. Sulla barra dei menù, selezionate Tools, Options, il tab Devices, CD-RW Drive e Properties. 3 Selezionate “Analog” sotto la voce “Playback”. Selezionate (Videata esemplificativa su Windows Media Player 8.
20-35.FM Page 28 Thursday, December 13, 2001 3:59 PM 9 Viene visualizzato il messaggio di errore “Buffer Underrun”. Se il vostro software di scrittura CD supporta la protezione Buffer Underrun, dovete attivarla. Per i dettagli, fate riferimento alla documentazione che viene fornita assieme al vostro software di scrittura CD. Per prevenire il verificarsi di un "buffer underrun" e per incrementare l'efficienza della scrittura dei dati, provate a: – ridurre la velocità di scrittura dei dati.
20-35.FM Page 29 Thursday, December 13, 2001 3:59 PM Firmware Firmware indica il software operativo progettato per il vostro drive CD-R/RW. È immagazzinato nella memoria flash del drive, in modo da poter essere riscritto. Per aumentare l’affidabilità operativa, la Yamaha continua a migliorare il “firmware” e rende possibili gli aggiornamenti mettendoli a disposizione su internet. Potete trovare informazioni sul firmware più recente consultando i siti web seguenti.
20-35.
20-35.FM Page 31 Thursday, December 13, 2001 3:59 PM Specifiche tecniche del CRW3200SX 31 Capacità dei dati 700 MB (79 min.) 650 MB (74 min.) 550 MB (63 min.) Tempo max. di registrazione in Audio Master Quality Recording 68 min. (con disco da 700 MB) 63 min. (con disco da 650 MB) Velocità di trasferimento dati (Modo 1) 1X: 150 KB/sec. 2X: 300 KB/sec. 4X: 600 KB/sec. 8X: 1,200 KB/sec. 10X: 1,500 KB/sec. Velocità di trasferimento Burst 5 MB/sec. (max, asincrono) 20 MB/sec.
20-35.FM Page 32 Thursday, December 13, 2001 3:59 PM Alimentatore per CA (AD-301205) Tensione nominale 100 – 240 V CA di ingresso Corrente nominale 1.0 A o inferiore di ingresso Tensione nominale +5 V, +12 V CC di uscita Corrente nominale 1.5 A di uscita Polarità di uscita terminale 1: 2: 3: 4: 5: +12 V CC TERRA +5 V CC TERRA +5 V CC Ambiente operativo Temperatura: +5 – +35 ºC Umidità : 25 – 80% RH (senza condensa) Dimensioni (sporgenze incluse) Larghezza: 79.5 mm Altezza: 32.
20-35.FM Page 33 Thursday, December 13, 2001 3:59 PM Specifiche tecniche del CRW3200SX Conformità sicurezza/EMC Il drive CRW3200SX è conforme alle seguenti specifiche. Paese USA Canada EU Specifiche di conformità Standard Safety Nome e numero UL60950 Information Technology Equipment Laser 21CFR1040.10 FDA Chapter 1, Subchapter J Class I Laser Product EMC Emission 47CFR15 FCC Part 15, Subpart B Peripheral Device Safety Electricity CSA C22.2 No.
20-35.FM Page 34 Thursday, December 13, 2001 3:59 PM Note tecniche Funzione Buffer Underrun Protection I drive CD-R/RW sono dotati di un buffer (memoria tampone), che immagazzina temporaneamente i dati che vengono trasferiti. Quando il buffer si svuota per un ritardo di trasferimento dati, per qualsiasi ragione, si verifica un errore di scrittura. Questa condizione viene definita “buffer underrun” e un tale errore viene definito errore Buffer Underrun.
20-35.FM Page 35 Thursday, December 13, 2001 3:59 PM Note tecniche Session-at-Once (SAO) Questo metodo viene usato per scrivere dati su un disco sulla base di una sessione per volta. A differenza del metodo Track-at-Once sopra descritto, Session-at-Once vi consente di registrare più tracce per volta sul disco. Ad esempio, CD EXTRA utilizza questo metodo per scrivere più pezzi di dati audio (o più tracce) nella prima sessione e le informazioni richieste per il computer nella seconda sessione.
3a cover.FM Page 1 Thursday, December 13, 2001 4:07 PM Distributori e uffici principali Per qualsiasi domanda, vi preghiamo di rivolgervi al rivenditore presso cui avete effettuato l’acquisto oppure ad una delle aziende qui elencate. EUROPA, EUROPA ORIENTALE e RUSSIA Yamaha Elektronik Europa GmbH IT-Sales Division Siemensstrasse 22-34, D-25462 Rellingen, GERMANY URL: http://www.yamaha-it.
MANUALE DI ISTRUZIONI Stampato in Italia