Tutorial Reference Copyright © 2002, PIXELA Corp. All rights reserved.
Create a Video CD! ImageMixer with VCD (IMxVCD) is an authoring application for creating Video CD movies. After adding your movies, you can create the movie buttons for the menu screen displayed when the Video CD is played. Design your own menu screen with custom movie button settings, background images, and music. The movie buttons are assigned selection numbers. You can play the selection button content by using the remote control of your playback device.
Copyright © 2002, PIXELA Corp. All rights reserved.
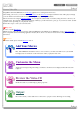
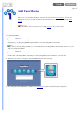
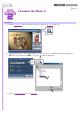
Add Your Movies The movies you add will be displayed on the Layout environment as movie buttons. You can add multiple movies for movie buttons until the capacity indicator bar is full -- up to 6 on single menu screen. Important When the number of movies reaches 97 for a single project, no more can be added. 1. Launch ImageMixer. Windows Click [Start], go to [Programs]-[PIXELA]-[ImageMixer], and select [ImageMixer with VCD].
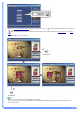
4. When the Layout environment screen is displayed, drag and drop your movies directly from desktop to the Layout environment screen. The movies that you add here to the Layout environment screen will be displayed as movie buttons on the menu screen. To add multiple movies, repeat step 3. Note Windows users can add movies through Windows Explorer. You can also specify movies to add in the dialog box displayed after clicking the [Add Movie] button in the Layout environment screen.
Copyright © 2002, PIXELA Corp. All rights reserved.
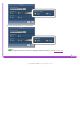
Customize the Menu (1) Preferences Style Settings ❍ ❍ Apply a style to the menu screen Specify the background for the menu screen Customize the Movie Button Labels ❍ ❍ Rename the movie buttons Modify the movie button font settings Title Settings ❍ ❍ Rename the menu screen title Modify the menu screen title font settings Copyright © 2002, PIXELA Corp. All rights reserved.
Customize the Menu (2) Preferences 1. On the Navigation Bar, click the [Preference] button to display the [Preference] dialog box. 2. Click the [Browse...] button. In Windows, select the folder for your IMxVCD/DVD project.(Macintosh Click the [OK] button. users select the workspace hard disk for your project). 3. Select the [Video/TV format:] for your Video CD .
4. Select the disk capacity for your Video CD. Note You can adjust the preference anytime by clicking the [Preference] button on the Navigation Bar. Copyright © 2002, PIXELA Corp. All rights reserved.
Customize the Menu (3) Style Settings Apply a Style to the Menu Screen 1. Click the [Style:] tab to display the [Style:] settings panel. 2. Click to select from the [Style Category]. The style template is displayed. 3. Click the style template to apply the style. Your selected style will be applied to the Layout environment screen.
Specify the Background for the Menu Screen 1. Click the [Style:] tab to display the [Style:] settings panel. 2. Follow the steps below to apply a background still image file. Important Only still images file can be applied as background images. Browse Click the [Apply background image] button to display the dialog box. Click the [Open] button. Select your still image file.
Drag and Drop Drag and drop the still image file icon directly from the desktop to the [Apply background image] button.
Note In Windows, you can also apply the background image by dragging and dropping the image from Windows Explorer. Click the [Apply BGM] button and follow the same steps as for applying background images to add audio files as music for your background image. Copyright © 2002, PIXELA Corp. All rights reserved.
Customize the Menu (4) Customize the Movie Button Labels Rename the Movie Button Labels 1. Click the [Movie Buttons] tab. 2. Select a movie button shown in the Layout environment screen to display a text box with the current button label. Click the [Text] tab to display the Movie Buttons settings panel. Enter the new movie button label. Modify the movie button font settings 1. Click the [Movie Buttons] tab. Click the [Text] tab.
2. 3. Select a movie button. Select the label font, size, and style from the dropdown menu. Click the font color preview box to display the color palette. button label. Click the [OK] button.
Copyright © 2002, PIXELA Corp. All rights reserved.
Customize the Menu (5) Title Settings for the Menu Screen Rename the menu screen title 1. Click the [Title] tab to display the [Title] settings panel. 2. The current menu screen title is displayed in the text box. Enter the new title. Modify the menu screen title font settings 1. Click the [Title] tab to display the [Title] settings panel.
2. From the dropdown menus, select your preferred title font, size, and style. 3. Click the font color preview box to display the color palette. Click the [OK] button. Select your preferred color for the title.
Copyright © 2002, PIXELA Corp. All rights reserved.
Preview the Video CD Play a preview to check the results of your authoring. To play a preview, click the [Preview/Output] button on the Navigation Bar. The Selection Numbers match the control button numbers, and they correspond to the selection numbers on the remote control of the Video CD playback device. For example, clicking button [1] of the [Preview] panel will play the movie of selection number [1] on the current menu screen.
Output Create your Video CD or Video CD image. Important Be sure to read the Precautions. Windows 1. Click the [Output] button. 2. The [Video CD Output] dialog box is displayed. Enter the disk name for your Video CD. Important For the disk name, you can enter up to 30 single-byte letters, numbers, or the underscore symbol. 3. Select the recording drive, 4. Click the [OK] button to create your Video CD. the write speed, and the recording settings.
2. The [Create Video CD Output] dialog box is displayed. Enter the disk name for the Video CD to be created. Specify a folder to save the Video CD image. Important For the disk name, you can enter up to 30 single-byte letters, numbers, or the underscore symbol. 3. Click the [OK] button to create your Video CD image. The Video CD image created will be saved as a file called [Cdimage] in the specified folder. Copyright © 2002, PIXELA Corp. All rights reserved.
Tutorial Step 1: Add Your Movies Getting Started Step 2: Customize the Menu Step 3: Preview the Video CD Step 4: Output Reference Thank you for using ImageMixer with VCD (IMxVCD). This manual will help you make the most of IMxVCD. To ensure correct use, be sure to read this manual. Check the ReadMe.txt file (for Windows) or Read Me First (for Macintosh) for any latebreaking news that we could not include here.
Caution 1. All rights for the manual and software application (hereafter, "this product") developed by PIXELA Corporation and recorded on the installation CD-ROM are the property of PIXELA Corporation. 2. Unauthorized reproduction of all or part of this product is strictly prohibited. 3. This product is subject to change without notice. 4. PIXELA Corporation does not offer any warranty for this product.
Tutorial Step 1: Add Your Movies Important Notices Step 2: Customize the Menu Step 3: Preview the Video CD Before installing IMxVCD, please read the following software licensing agreement. By installing IMxVCD, you agree to the conditions presented below.
Copyright © 2002, PIXELA Corp. All rights reserved.
Tutorial Step 1: Add Your Movies IMxVCD Functions Step 2: Customize the Menu Step 3: Preview the Video CD Create your own Video CDs! Step 4: Output Reference Getting Started Before Use Important Notices IMxVCD is authoring software for creating Video CDs that conform to the standards described below. Video CD is an abbreviation for Video Compact Disc.
Tutorial Step 1: Add Your Movies User Environment Step 2: Customize the Menu Step 3: Preview the Video CD Note that even if your operating environment meets the requirements for IMxVCD, we cannot guarantee that all functions will be available.
PowerMacG4, PowerBookG4, PowerBookG3, iBook, iMac, and the eMac series with a PowerPCG3/400, Power PCG4/400 or later processor running MacOS9.0.4 or later. Does not run in Mac OS X or Mac OS X: Classic. Memory Application operating memory of 64 MB or more (recommended: 128 MB or more) Hard Disk Capacity When you create a Video CD image, three times more memory is required than the size of the Video CD.
Tutorial Step 1: Add Your Movies Uninstallation Step 2: Customize the Menu Uninstall IMxVCD following the steps below. Step 3: Preview the Video CD Step 4: Output Reference Windows Getting Started Before Use Important Notices IMxVCD Functions User Environment Precautions Uninstallation Launching IMxVCD 1. Click [Start], go to [Settings], and select [Control Panels]. 2. Double-click [Add/Remove Programs]. 3. Select "ImageMixer with VCD " from the list and click the [Delete] button.
Tutorial Step 1: Add Your Movies Launching IMxVCD Step 2: Customize the Menu Follow the steps below to launch IMxVCD after installation on your computer. Step 3: Preview the Video CD Step 4: Output Reference Windows Getting Started Before Use 1. Click [Start], go to [Programs]-[Pixela]-[ImageMixer VCD], and select [ImageMixer with Important Notices VCD] to launch ImageMixer.
Exiting IMxVCD To quit IMxVCD, follow the steps below. Windows On the Navigation Bar, click the [Quit] button. Or, click the [Close] button to quit IMxVCD. in the IMxVCD application window, Macintosh On the Navigation Bar, click the [Quit] button. Or, on the menu bar, click the [File] and select [Quit]. You can also quit IMxVCD by holding the [Command] key while pressing [Q] key.
Copyright © 2002, PIXELA Corp. All rights reserved.
Tutorial Step 1: Add Your Movies Start Screen/Elements Step 2: Customize the Menu Step 3: Preview the Video CD After IMxVCD is launched, the first screen displayed is the "Start Screen". The elements of the "Start Screen" are described below.
Tutorial Step 1: Add Your Movies Navigation Bar Step 2: Customize the Menu Step 3: Preview the Video CD The Navigation Bar remains displayed in the IMxVCD application window. Use it to switch between operating modes. Step 4: Output Reference Getting Started Before Use Important Notices IMxVCD Functions User Environment [Start] button Click this button to display the Start Screen. The Start Screen is the first screen displayed after you launch IMxVCD.
Tutorial Step 1: Add Your Movies Layout environments/Elements Step 2: Customize the Menu Step 3: Preview the Video CD Use the menu layout functions to design the menu screen displayed when you play a Video CD. The elements of the "Layout environment screen" are described below. Step 4: Output Reference Getting Started Reference Refer to the Tutorial (Step1) .
[Add Movie] button Click this button to display a dialog box for selection of movie files to be added as movie buttons. Important You can continue adding movies until the capacity indicator bar is full. However, when the number of movies reaches 97 for a single project, no more can be added. Note You can also drag and drop movies to add them to the Layout environment. Settings panel The Settings panel displays the settings for the Style, the movie buttons, and the Title.
Tutorial Step 1: Add Your Movies Style Settings Panel Step 2: Customize the Menu Click the [Style:] tab to display the [Style:] settings panel for selection of a style template. Step 3: Preview the Video CD Step 4: Output Reference Reference Refer to the Tutorial (Step 2) .
overwrite them. [Apply background image] button For applying a background image to the menu screen. Click this button to display a dialog box for selection of still image files to apply. If image files are already applied when you click this button, a dialog box will be displayed allowing you to remove them. By removing the still image files, you can add different ones. You can also apply still image files by dragging the icons directly from your desktop and dropping them on the button.
Tutorial Step 1: Add Your Movies Movie Button Settings Panel Step 2: Customize the Menu Step 3: Preview the Video CD Step 4: Output "Movie buttons"s are the buttons displayed on the menu screen when you play a Video CD. The Selection Numbers of the movie buttons correspond to the buttons on the remote control of the playback device. Reference Getting Started Before Use Reference Refer to the Tutorial (Step 2) .
Copyright © 2002, PIXELA Corp. All rights reserved.
Tutorial Step 1: Add Your Movies Title Settings Panel Step 2: Customize the Menu Step 3: Preview the Video CD Click the [Title] tab to display the [Title] settings panel, where you can specify the title and customize the text settings for the menu screen title. Step 4: Output Reference Getting Started Reference Refer to the Tutorial (Step 2) .
Tutorial Step 1: Add Your Movies Preview and Output/Elements Step 2: Customize the Menu Step 3: Preview the Video CD This section explains how to preview the results of your authoring to check how it will play when recorded on your Video CD. The Video CD recording process is also described below.
Copyright © 2002, PIXELA Corp. All rights reserved.
Tutorial Step 1: Add Your Movies Preview Panel Step 2: Customize the Menu Step 3: Preview the Video CD Step 4: Output The movie buttons of the Video CD you have prepared have Selection Numbers that will be accessible from the remote control of the playback device. The preview is displayed by simulating the remote control operation. Reference Getting Started Before Use Reference Refer to the Tutorial (Step 3) .
[Stop] button Click this button to stop play. Important These control buttons may not necessarily match the operations of the remote control for the playback device. For example, in some cases the playback device requires you to press [1] and then [Play] for playback. Consult the manual for the playback device remote control. Copyright © 2002, PIXELA Corp. All rights reserved.
Tutorial Step 1: Add Your Movies Video CD Output (Windows) Step 2: Customize the Menu Step 3: Preview the Video CD On the Writing environment screen, click the [Output] button in the [Preview] panel. This section describes the [Video CD Output] dialog box that is displayed in Windows. Step 4: Output Reference Getting Started Important Be sure to read the Precautions.
Copyright © 2002, PIXELA Corp. All rights reserved.
Tutorial Step 1: Add Your Movies Video CD Image Output (Macintosh) Step 2: Customize the Menu Step 3: Preview the Video CD On the Writing environment screen, click the [Output] button in the [Preview] panel. This section describes the [Video CD Output] dialog box that is displayed for Macintosh users. Step 4: Output Reference Getting Started Before Use Important Notices Important Be sure to read the Precautions. Macintosh users cannot directly record Video CDs using IMxVCD.
Tutorial Step 1: Add Your Movies Preferences Step 2: Customize the Menu Use it to specify your desired IMxVCD preferences.
IMxVCD displays dialog boxes such as the one depicted below. means [OK] or [Yes] means [Cancel] or [No] Supported File Formats IMxVCD supports the following file formats. ● ● ● AVI QuickTime Movie (Macintosh only) MPEG-1 (Windows only) Copyright © 2002, PIXELA Corp. All rights reserved.
Tutorial Step 1: Add Your Movies Glossary Step 2: Customize the Menu Step 3: Preview the Video CD Step 4: Output DVD Video High-quality digital recordings of video and audio on read-only media Images are generally encoded in MPEG-2 format for recording. For playback on commercial DVD players.
PAL Argentina, United Kingdom, Italy, India, Indonesia, Australia, Austria, Netherlands, Canary Islands, North Korea, Greece, Kenya, Saudi Arabia, Singapore, Switzerland, Sweden, Spain, Thailand, Czechoslovakia, China, Denmark, Turkey, Germany, Nigeria, New Zealand, Norway, Pakistan, Finland, Brazil, Belgium, Poland, Portugal, Hong Kong, Malaysia, South Africa, and the former Yugoslavia region project The work you have prepared during authoring is called a project.
Tutorial Step 1: Add Your Movies Compatible Recording Drives Step 2: Customize the Menu Step 3: Preview the Video CD Step 4: Output Reference Getting Started The CD-R and other disk drives listed below have been verified for use with IMxVCD. (As of Wednesday, June 5, 2002.) We do not guarantee the performance of drives not listed here in creating Video CDs. Furthermore, we do not guarantee all functions of these drives.
NEC NEC_VALUESTAR LG Caravelle CREATIVE CyQ've SAMSUNG GENERIC Sony Century WPI TDK NEC ODX658 NR-7500A NR-7700A NR-7800A NR-7900A NR-7800B NR-8400A NR-8500A CB-2100A VT900/1D VT950/1D VT970/1D VT100/1A CED-8041B CED-8042B RW-4416 series RW-6424DA/K RW-8424S series CD-RW121032 RW1210E CRW-DVD SW204 SW408B SM304B SM308B SM-408B CRD-RW1 CRD-RW2 CRD-BP2 CRD-BP3 CRD-BP4 CRD-BP5 CRD-BP900P CRD-BP1300P CRD-BP1400P CRD-BP1500P CRD-BP1600P CRD-BP1700P CDU928E CRX50A CRX55A CRX75A CRX75U CRX76A CRX76U CRX10U
Teac Toshiba TORiSAN NOVAC Pioneer Hagiwara Panasonic MC-R5220EK CD-R6240S series CD-R624SK series CD-R56S CD-R58S CD-W4432EKB CD-W24E CD-W28E CD-RW280PU CD-W216E CD-W54E CD-W58E CD-W512SB CD-W512E CD-RW512EKB CD-W512EB CD-W516EB CD-W524EB CD-W540E CD-RW540EKB DW-28E SD-R1002 SD-R1102 SD-R1202 SD-R2002 SD-R2102 SD-R2212 SR-C8002 SR-C8102 CDW-U4424 NV-CR330P NV-DW340 DVR-103 DVR-A03-J DVR-A04-J DCR-111 HBC-CRW8432A HBC-CRW4XU HBC-CRW8XUG HBC-CRW448UG HBC-RWD4424A CW-7503 CW-7582 CW-7585 CW-7586B CW-8121
PHILIPS Pixela Hitachi LG Data Storage Plextor BENQ Mitsubishi Mitsumi MIRAI_TECHNOLOGY Melco CDD4201 CDD4401 CCD4801 428CDRW 4424CDRW 8432CDRW 241240CDRW 321240CDRW PH162180AEP PH1621809EP PIX-DVRR/FW1 PIX-DVRR/AT1 GCE-8160B GCC-4120B GCC-4080N PX-W4220T series PX-W124TS PX-W412C PX-W8220T PX-W8432T PX-W1210TA/BS PX-W1210TS PX-W1610TA/BS PX-S88T PX-S88TU PX-W2410TA/BS PX-W2410TU/BS PX-W4012TA/BS PX-320A/BS CRW3210P CRW4012P MK4416Y MK426Y MKRW124S MKRWT4BP CR-4804TE CR-48x5TE CR-4808TE CR-48x9TE CR-4
Yamaha LITE-ON RADIUS Ricoh Logitec DVRAM-FB CRW-16FB CRW-24FB CRW-24IU CRW-24SU CRW-24U2 CRW-32FB CRW-32IU CRW-32U2 CRW-S32FB CRW-40FB CRWD-20U2 CRWD-16FB CDR200 series CDR400 series CDR401 CRW2216E CRW4260 CRW4416S series CRW4416E CRW6416S series CRW8424S series CRW8424E CRW8824E CRW8824S series CRW2100E-VK CRW2100IX-VK CRW2200E CRW2200UX-VK CRW3200E-VK CRW3200UX-VK CRW3200SX LTR-12101B LTR-16102B FWS05020 Slim Line CDRW 4x4x24 MP7040A series MP7060A series MP7060S series MP7063A MP7080A MP7083A MP7120
LCW-T1210BU LCW-T1210BAK LCW-E1210BU LCW-E1210BSU LCW-E1210BAK LCW-E24U2 LCW-E24SU2 LCW-E24FU2 LCW-Y1610AK LCW-Y1610F LCW-PN8424SU LCW-T1610BSU LCW-T1610BAK LCW-T1610BFU LCW-PT8824BU LCW-R2010BAK LCW-Y2010BSU LCW-Y2010BFU LCW-G2410BAK LCW-G2410BFU LCW-G2410BSU LCW-R2010DVAK LCW-R2010DVSU LCW-R2010DVFU LCW-WINU LCW-PTU2 LCW-PEDVU2 LCW-S24U2 LCW-S24SU2 LCW-S24FU2 LCW-S24AK LCW-R20U2 LCW-R20FU2 LCW-R32AK LCW-R32U2 LCW-R32SU2 LCW-R32FU2 LCW-T40AK LCW-T40U2 LCW-T40FU2 LDR-214AK LDR-214F LDR-216AK LDR-216FU2 LDR-