8424S_e.
FCC_DOC8424.qx 9/8/99 3:56 PM Page 2 COMPLIANCE INFORMATION STATEMENT (DECLARATION OF CONFORMITY PROCEDURE) Responsible Party: Address: Telephone: FAX: Type of Equipment: Model Name: Yamaha Systems Technology, Inc. 100 Century Center Court San Jose, California 95112 (408) 467-2330 (408) 437-8791 CD Recordable/Rewritable Drive CRW8424S CRW8424S-NB This device complies with Part 15 of the FCC Rules.
FCC_DOC8424.qx 9/8/99 3:56 PM Page 3 Laser Diode Properties Material: GaAlAs Wavelength: 782-789 nm Emission Duration: Continuous Laser Output Power: Less than 44.6 µW* * This output is value measured at a distance 200mm from the objective lens surface on the optical pick-up block. ANSI Class : Class 1 CLASS 1 LASER PRODUCT LASER KLASSE 1 PRODUKT LUOKAN 1 LASERLAITE PRODUIT LASER DE CLASSE 1 This device is classified as a CLASS 1 LASER product.
10/18/99 12:07 PM Page 3 CD-R/RW Drive CRW8424S SERIES OWNER’S MANUAL i English pdf8424S_e.
pdf8424S_e.qx 10/18/99 12:07 PM Page 4 SAFETY PRECAUTIONS PLEASE READ CAREFULLY BEFORE PROCEEDING These precautions explain how to use the device correctly and safely, thereby preventing injury to yourself or to others. This section has been sub-divided into a WARNING section and a CAUTION section, according to the likelihood and nature of any potential injuries or damage inflicted. They relate to your personal safety, and also help you minimize the risk of damaging the device.
pdf8424S_e.qx 10/18/99 12:07 PM Page 5 CAUTION Always follow the basic precautions listed below to avoid the possibility of physical injury to you or others, or damage to the instrument or other property. These precautions include, but are not limited to, the following: ● Always unplug the computer from the electrical outlet if it will not be used for a prolonged period of time or if there is a risk of lightning. Otherwise, there is an increased risk of electrical shock, short-circuiting or fire.
pdf8424S_e.qx 10/18/99 12:07 PM Page 6 ■ About CD-R/RW discs Please read the following regarding the handling of CD-R/RW discs. 1. Do not expose discs to excessive heat or vibrations or extreme cold or heat (such as in direct sunlight or near a heater). 2. Do not touch disc surfaces. When handling a disc, hold it by its edges. 3. Remove dust and dirt from disc surfaces. Use air-based dust removers. The surfaces may be scratched if wiped with a dry cloth. 4.
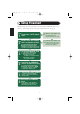
pdf8424S_e.qx 10/18/99 12:07 PM Page 7 Table of Contents Setup Flowchart ..................................................................1 Introduction ........................................................................2 Features of the CRW8424S Drive ....................................................2 System Configuration ............................................................3 Computer ........................................................................................3 Software ....
pdf8424S_e.qx 10/18/99 12:07 PM Page 8 Setup Flowchart This flowchart shows the procedure for setting up the CRW8424S drive. For easy cross-referencing, the relevant pages in this manual are also given. STEP 1 Do you have a SCSI adapter card? STEP NO 1-1 Obtain a SCSI adapter card Recommended models: Adaptec AHA-2940-series (PCI) YES STEP Check that the SCSI adapter 2 card is recognized correctly Go to Control Panel | System | Device Manager tab.
pdf8424S_e.qx 10/18/99 12:07 PM Page 9 Introduction Features of the CRW8424S Drive 8X Speed Writing to CD-R, 4X Speed Writing to CD-RW and 24X Speed Reading The CRW8424S drive can write to CD-R at 8X, 6X, 4X or 1X speed and write/overwrite to CD-RW at 4X or 2X speed. It can also read from CD-R, CDRW and CD-ROM discs at up to 24X speed. Supports a Wide Range of CD Formats The CRW8424S drive can read from and write to CD-ROM in standard ISO9660 format and to audio CD in CD-DA format.
8424S_e.qx 10/18/99 9:22 PM Page 10 System Configuration In order to use the CRW8424S drive, your computer system will need to meet the following set of requirements. Computer The minimum system requirements for using the CRW8424S drive are as follows: ● Any fully PC/AT-compatible computer. ● A Pentium-class or higher CPU running at 200MHz or faster. ● OS: Windows 95, Windows 98, Windows 98 SE (Second Edition) or Windows NT4.0 with Service Pack 3/4/5. ● A vacant 5.
8424S_e.qx 10/27/99 9:55 PM Page 11 System Configuration Discs The CRW8424S drive is compatible with discs which meet the following specifications: ● CD-R discs: Use discs that conform to the Orange Book Part 2 standards. When writing to CD-R at 6X or faster speed, you should use discs that have been designed for high-speed recording. ● CD-RW discs: Use discs that conform to the Orange Book Part 3 standards.
8424S_e.qx 10/27/99 9:55 PM Page 12 System Configuration Tools You will need the following tools at hand when installing the CRW8424S drive. Phillips Screwdriver You will need to use this when removing the cover of your computer and when mounting the drive. You may also need to temporarily remove the sound card to gain access to the CD audio connectors. In which case a small screw retaining the sound card’s face plate has to be removed.
8424S_e.qx 10/27/99 9:55 PM Page 13 Front and Rear of Unit Front Panel The CRW8424S drive’s front panel features the following: Manual Eject hole Only use this if no other method is available for unloading a disc. Disc tray The tray is used to hold the disc. It slides out from the drive unit when a disc needs to be loaded or unloaded. Headphone jack You can connect stereo headphones to this stereo mini jack and listen to audio CDs loaded in the drive.
8424S_e.qx 10/27/99 9:55 PM Page 14 Front and Rear of Unit Rear Panel The CRW8424S drive’s rear panel features the following: SCSI connector Insert the connector of the SCSI ribbon cable here. Make sure you align the red line of the ribbon cable with pin 1 of the drive’s connector, marked “SCSI INTERFACE CONNECTOR 1.
8424S_e.qx 10/27/99 9:55 PM Page 15 Installation This section gives a step-by-step guide to installing the CRW8424S drive. Make sure you have all the necessary tools. First Steps Once you have taken the CRW8424S drive out of its packaging, you should immediately note down the serial number shown on the top of the drive together with a barcode. You may need to refer to this number when requesting User Support services.
8424S_e.qx 10/27/99 9:55 PM Page 16 Installation To set each jumper switch, you have to bridge the two pins in the respective column of the grid with a plastic shunt. Shunts are already attached to the jumper switches in their default configurations.
8424S_e.qx 10/27/99 9:55 PM Page 17 Installation 1 SCSI ID number Each of the SCSI devices connected to the computer is identified by its SCSI ID number. You need to assign a number from “0” to “7” for each SCSI device. Commonly, ID number “7” is reserved for the computer’s SCSI adapter card itself. Therefore, the CRW8424S can actually be assigned an ID number from “0” to “6.” The ID number is set by attaching/detaching the shunts on the ID Select jumper switches according to the diagram shown below.
8424S_e.qx 10/27/99 9:55 PM Page 18 Installation 2 Parity Check The parity check is used for error correction during data transmissions. If parity-checking has to be disabled, the shunt on the Parity jumper switch should be removed. Parity ON (Default) Parity OFF Normally leave this setting alone. 1 24 ID SELECT PARITY TERMINATOR BLOCK SIZE 1 24 ID SELECT PARITY TERMINATOR BLOCK SIZE n By factory default, the Parity switch is set to “ON” and should normally be left in this state.
8424S_e.qx 10/27/99 9:55 PM Page 19 Installation Termination ON (Default) 1 24 Termination OFF ID SELECT PARITY TERMINATOR BLOCK SIZE 1 24 ID SELECT PARITY TERMINATOR BLOCK SIZE Set to “ON” if CRW8424S drive is last device on SCSI chain 4 Block Size The data block size of the CRW8424S can be set to 512 bytes per sector by setting the Block Size jumper switch to “ON.” This is necessary when installing the CRW8424S on a UNIX-based workstation. It is not necessary for Windows 95/98/NT4.0 computers.
8424S_e.qx 10/27/99 9:55 PM Page 20 Installation Installing the CRW8424S Drive You can install the CRW8424S drive in one of two possible ways: ● As an additional drive If the casing of your computer has a spare 5.25-inch drive bay available, such as with many tower-type designs, you can fit the CRW8424S drive in addition to the computer’s existing CD-ROM drive. CRW8424S ● As a replacement drive If the casing of your computer does not have a spare 5.
8424S_e.qx 10/27/99 9:55 PM Page 21 Installation Fitting the CRW8424S as an Additional Drive 1 Power down your computer and unplug it from the AC outlet. If you proceed without doing this, you run the risk of receiving an electric shock and/or short-circuiting and damaging components including the CRW8424S drive. 2 Remove the outer casing of the computer. If you need to remove screws in the process, make sure you don’t lose them.
8424S_e.qx 10/27/99 9:55 PM Page 22 Installation 3 Touch a metal part of the computer’s chassis or power supply unit to drain any static charge that may have built up inside your body. Drain any static charge You can permanently damage equipment if you touch it while there is any static charge in your body. 4 Remove the front cover of a vacant 5.25-inch drive bay slot in the computer and slide the drive backwards into the slot.
8424S_e.qx 10/27/99 9:55 PM Page 23 Installation 5 Leave enough room behind the drive for connecting the power, SCSI and audio cables. Then tighten the four fastening screws on the sides of the unit by hand to hold the drive in place. About SCSI adapter card termination To connect internally-mounted SCSI devices, the SCSI adapter card’s onboard internal SCSI termination must be switched ON. With most cards, this is done automatically.
8424S_e.qx 10/27/99 9:55 PM Page 24 Installation 6 Connect one end of the 50-pin SCSI flat cable to the computer’s SCSI adapter card. Align the red line of the cable with Pin 1 of the card’s SCSI connector. Next, connect a free 50-pin connector on the SCSI flat cable to the back of the CRW8424S drive such that the red line on the cable is aligned with pin 1, marked “SCSI INTERFACE CONNECTOR 1.
8424S_e.qx 10/27/99 9:55 PM Page 25 Installation 7 Connect the audio cable between the CRW8424S drive and the computer’s sound card, or the motherboard’s audio connector if it has built-in audio. One end of the audio cable has two connectors: a vertically-mounted type (PH) and a horizontally-mounted type (MPC). Choose one that matches your sound card’s connector. The connector at other end of the cable is connected to “AUDIO OUT” of the CRW8424S drive. Make sure connector’s lug is at the top.
8424S_e.qx 10/27/99 9:55 PM Page 26 Installation 8 Connect a 4-pin power cable to the power supply connector of the CRW8424S marked “DC INPUT.” AUDI O OU T R G L 1 24 ID SE PARI LECT TY TERM BLOCIN ATOR K SIZ E 1 SCSI INTE RFAC CONN E ECTO R DC IN PU T +5V G + 12V Top 4-pin power cable Bottom n There may be more than one 4-pin power cable available. Any may be used. n These connectors are D-shaped so it is only possible to connect the power cables the correct way round.
8424S_e.qx 10/27/99 9:55 PM Page 27 Installation ) Attach the outer casing of the computer and any screws that were removed. ! Reconnect the computer to the AC outlet and power it up. n When you power up the computer, make sure both LEDs on the panel of the CRW8424S light up together for brief moment.
8424S_e.qx 10/27/99 9:55 PM Page 28 Installation @ After the computer’s operating system (Windows 95/98) has loaded, open the Control Panel and double-click on the System icon. Select the Device Manager tab and double-click on “CDROM.” If the drive has been correctly installed, it should be listed as shown below. Similarly, double-click on “SCSI controllers” and the SCSI adapter card should be listed as shown below if it has been properly installed.
8424S_e.qx 10/27/99 9:55 PM Page 29 Installation Replacing an Existing CD-ROM Drive with the CRW8424S n The existing CD-ROM drive in the computer is assumed to be an IDE-type. 1 Power down your computer and unplug it from the AC outlet. If you proceed without doing this, you run the risk of receiving an electric shock and/or short-circuiting and damaging components including the CRW8424S drive. 2 Remove the outer casing of the computer.
8424S_e.qx 10/27/99 9:55 PM Page 30 Installation 3 Touch a metal part of the computer’s chassis or power supply unit to drain any static charge that may have built up inside your body. Drain any static charge You can permanently damage equipment if you touch it while there is any static charge in your body. 4 Disconnect all the cables connected to the rear of the existing CD-ROM drive, and also disconnect the audio cable from the sound card or motherboard’s audio connector.
8424S_e.qx 10/27/99 9:55 PM Page 31 Installation 5 Remove the four screws holding the CD-ROM drive in place, then slide the drive forward and out from the drive bay. Slide the CRW8424S drive backwards into the now-vacant bay without applying excessive force. CD-ROM drive CRW8424S 6 Leave enough room behind the drive for connecting the power, SCSI and audio cables. Then tighten the four fastening screws on the sides of the unit by hand to hold the drive in place.
8424S_e.qx 10/27/99 9:55 PM Page 32 Installation About SCSI adapter card termination To connect internally-mounted SCSI devices, the SCSI adapter card’s onboard internal SCSI termination must be switched ON. With most cards, this is done automatically. If your SCSI adapter card requires that you manually disable internal termination, refer to the documentation that came with it. 7 Connect one end of the 50-pin SCSI flat cable to the computer’s SCSI adapter card.
8424S_e.qx 10/27/99 9:55 PM Page 33 Installation 8 Connect the audio cable between the CRW8424S drive and the computer’s sound card, or the motherboard’s audio connector if it has built-in audio. One end of the audio cable has two connectors: a vertically-mounted type (PH) and a horizontally-mounted type (MPC). Choose one that matches your sound card’s connector. The connector at other end of the cable is connected to “AUDIO OUT” of the CRW8424S drive. Make sure connector’s lug is at the top.
8424S_e.qx 10/27/99 9:55 PM Page 34 Installation 9 Connect the 4-pin power cable to the power supply connector of the CRW8424S marked “DC INPUT.” AUDI O OU T R G L 1 24 ID SE PARI LECT TY TERM BLOCIN ATOR K SIZ E 1 SCSI INTE RFAC CONN E ECTO R DC IN PU T +5V G + 12V Top 4-pin power cable Bottom n There may be more than one 4-pin power cable available. Any may be used. n These connectors are D-shaped so it is only possible to connect the power cables the correct way round.
8424S_e.qx 10/27/99 9:55 PM Page 35 Installation ! Attach the outer casing of the computer and any screws that were removed. @ Reconnect the computer to the AC outlet and power it up. n When you power up the computer, make sure both LEDs on the panel of the CRW8424S light up together for brief moment.
8424S_e.qx 10/27/99 9:55 PM Page 36 Installation # After the computer’s operating system (Windows 95/98) has loaded, open the Control Panel and double-click on the System icon. Select the Device Manager tab and double-click on “CDROM.” If the drive has been correctly installed, it should be listed as shown below. Similarly, double-click on “SCSI controllers” and the SCSI adapter card should be listed as shown below if it has been properly installed.
8424S_e.qx 10/27/99 9:55 PM Page 37 Operation This section explains how to operate the CRW8424S drive after you have installed it. Make sure the computer is powered up. Loading a Disc 1 2 1 Press the Eject button on the CRW8424S drive’s front panel. 2 Place the disc onto the tray with its label or printing facing upward. 3 Press the Eject button to close the tray. n When a disc is loaded, the ON/DISC LED is lit up in orange first, then changes to green. For more details, refer to page 38.
8424S_e.qx 10/27/99 9:55 PM Page 38 Operation n It may not be possible to eject the disc tray while a disc is being read or in other situations, depending on the SCSI command. n Only remove the disc after the disc tray has opened fully. Otherwise, you risk damaging the drive or the disc. Manually Ejecting a Disc in an Emergency If the disc tray fails to open for some reason, such as a power outage, it can be opened manually.
8424S_e.qx 10/27/99 9:55 PM Page 39 Troubleshooting Please also refer to the YAMAHA CD-R/RW Drives web site for more information. YAMAHA CD-R/RW Drives web site URL: http://www.yamaha.co.jp/english/product/computer/ The drive does not power up. ● Is the 4-pin power cable from the computer’s power supply attached correctly? The computer does not start up. ● Is the SCSI card installed correctly? Please read the instructions that came with your SCSI card for details.
8424S_e.qx 10/27/99 9:55 PM Page 40 Troubleshooting ● Is the terminator on the CRW8424S drive set correctly? It should be set to ON only if it is the last device on the SCSI chain. Otherwise, it should be set to OFF. (→P. 11) ● Is the termination on the SCSI card set such that internal SCSI devices can be connected? Please read the instructions that came with your SCSI card for details. ● To write to CD-R/RW discs, your CD writing software must support the CRW8424S drive.
8424S_e.qx 10/27/99 9:55 PM Page 41 Troubleshooting The drive ejects or fails to read the disc, or the ON/DISC LED remains lit in orange after the disc has been loaded (meaning that the disc has not been recognized). (→P. 38) ● Disconnect the SCSI cable from the drive but leave the power cable connected, then load a disc. ● There may be problems with the disc itself.
8424S_e.qx 10/25/99 1:18 PM Page 42 Appendix Writing Modes Disc-at-Once (DAO) This mode is used when writing a complete disc in a single pass without pausing. Data cannot be added later, even if the full capacity of the blank disc has not been used.
8424S_e.qx 10/25/99 1:18 PM Page 43 Appendix Session-at-Once (SAO) This mode is used when writing each session in a single pass without pausing. More sessions can be added later if there is enough space left on the disc. Example: CD-Extra Audio Audio Audio Data Track 1 Track 2 Track 3 Track 4 Session 1 Session 2 n With CD-Extra, the audio is written in the first session and the data is written in the second. A maximum of 99 tracks can be written.
8424S_e.qx 10/25/99 1:18 PM Page 44 Appendix About the firmware The “firmware” is a small piece of software built into the CRW8424S drive, and is used to control its basic operation. Since it resides in flash memory, it can be overwritten and updated. To ensure the correct operation of the CRW8424S drive, updates to the firmware will be made available. You can find information about the most recent firmware for the drive on YAMAHA CD-R/RW Drive web site.
pdf8424S_e.
pdf8424S_e.
pdf8424S_e.
pdf8424S_e.qx 10/18/99 12:07 PM Page 48 Appendix Index 4-pin power cable ..................................19, 27 O ON/DISC LED................................................6 A Active Desktop ............................................34 additional drive ............................................13 audio cable ............................................18, 26 AUDIO OUT ..................................................7 B BIOS ............................................................
Address.qx 9/16/99 3:35 PM Page 2 Distributors and Head Offices / Bertrieb und Hauptgeschäftsstelle Distributeurs et sièges sociaux / Distribuidores y Casas matrices If you have any questions, please contact your dealer or one of the following companies. Pour plus de détails sur les produits, veuillez vous adresser à Yamaha ou au distributeur le plus proche figurant dans la liste suivante : Bei weiteren Fragen wenden Sie sich Sitte an Ihren Händler oder eine der folgenden Firmen.
YAMAHA CORPORATION Electronic Systems Division This document is printed on chlorine free (ECF) paper.