U CD RECEIVER AMPLI-TUNER CD OWNER’S MANUAL MODE D’EMPLOI
IMPORTANT SAFETY INSTRUCTIONS CAUTION RISK OF ELECTRIC SHOCK DO NOT OPEN CAUTION: TO REDUCE THE RISK OF ELECTRIC SHOCK, DO NOT REMOVE COVER (OR BACK). NO USER-SERVICEABLE PARTS INSIDE. REFER SERVICING TO QUALIFIED SERVICE PERSONNEL.
FCC INFORMATION (for US customers) 1 IMPORTANT NOTICE: DO NOT MODIFY THIS UNIT! This product, when installed as indicated in the instructions contained in this manual, meets FCC requirements. Modifications not expressly approved by Yamaha may void your authority, granted by the FCC, to use the product. 2 IMPORTANT: When connecting this product to accessories and/or another product use only high quality shielded cables. Cable/s supplied with this product MUST be used. Follow all installation instructions.
CAUTION: READ THIS BEFORE OPERATING YOUR UNIT. 1 2 3 4 5 6 7 8 9 10 11 12 13 14 15 16 To assure the finest performance, please read this manual carefully. Keep it in a safe place for future reference. Install this sound system in a well ventilated, cool, dry, clean place - away from direct sunlight, heat sources, vibration, dust, moisture, and/or cold. For proper ventilation, allow the following minimum clearances around CRX-332.
CONTENTS SUPPLIED ACCESSORIES ................................. 2 PLAYABLE DISCS AND FILE FORMAT......... 3 CONNECTION....................................................... 4 Connecting speakers/antennas/subwoofer ................. 4 Connecting the power cable....................................... 5 Other connection........................................................ 5 REMOTE CONTROL ........................................... 6 FRONT PANEL DISPLAY ...................................
PREPARATION SUPPLIED ACCESSORIES Make sure you have all of the following items. Remote control FM antenna Dock cover AM antenna USB cap SLEEP CD iPod AUX USB TUNER FOLDER MENU ENTER OPTION DISPLAY VOLUME MUTE TUNING MEMORY PRESET CAUTION (With CR2032 battery) Keep the USB cap out of the reach of children, so that it is not mistakenly swallowed. ■ Using the remote control Use the remote control within 6 m (20’) of this unit and point it toward the remote control sensor.
PLAYABLE DISCS AND FILE FORMAT ■ Playable MP3 and WMA files Use compact discs bearing the marks below. MP3 .... Compact discs (digital audio) Bitrate (kbps) Sampling frequency (kHz) MPEG 1 Audio Layer-3 32-320*1 32/44.1/48 MPEG 2 Audio Layer-3, 2 8-160*1 16/22.05/24 Format .... CD-R,CD-RW digital audio discs • CD-R or CD-RW discs bearing one of the following phrases. FOR CONSUMER FOR CONSUMER USE FOR MUSIC USE ONLY • Finalized CD-R or CD-RW discs Note *1 Variable bitrate is supported.
CONNECTION Connecting speakers/antennas/subwoofer Follow the procedure below to connect the speakers and FM/AM antennas to this unit. For information on your speakers, refer to the owner’s manual supplied for the speakers. If a subwoofer is connected, low-frequency audio signals are output through SUBWOOFER OUT. CAUTION Do not connect the power cable of this unit until all cable connections are completed. AM antenna FM antenna Notes Notes • Place the antenna in a location with good signal reception.
CONNECTION Connecting the power cable ■ Connecting iPad Connect or remove your iPad whenever you want. PREPARATION After you made all connections, connect the power cables of this unit To the wall outlet USB IPod y When the unit is turned on and the input source is set to USB, the connected iPad is charged. Other connection Note ■ Stationing iPod Station or remove your iPod whenever you want. y An iPod is charged when set in the iPod dock.
REMOTE CONTROL 1 Infrared signal transmitter 1 2 SLEEP: Sleep setting (☞ P. 12) 2 0 SLEEP 3 Source buttons: Change sources. When listening to the radio, press TUNER to switch between the FM and AM bands. 4 FOLDER (during data CD/USB playback): Change folder. CD iPod 5 AUX 3 7 4 5 : Scrolls through items on the iPod’s screen. 6 OPTION: Displays the option menu. (☞ P. 12) USB TUNER , (Shuffle), (Repeat) (☞ P. 10) FOLDER 8 TUNING (during receiving radio): Tuning radio (☞ P.
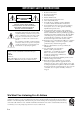
FRONT PANEL DISPLAY 2 3 4 SLEEP PRESET STEREO AUTO TUNED MEMORY 5 6 7 SHUFFLE REPEAT ARTISTS ALBUMS SONGS MUTE VOLUME B INPUT PHONES PRESET 8 9 0 1 SLEEP indicator: Lights up when the sleep timer is on (☞ P. 12). 2 PRESET indicator: Lights up when you preset radio stations (☞ P. 11). 3 STEREO indicator: Lights up when this unit is receiving a strong signal from an FM stereo broadcast. 4 AUTO indicator: Lights up when this unit is in the Automatic Tuning mode (☞ P. 11).
OPERATION FRONT PANEL AND BASIC OPERATION y • Press to set the unit to standby mode. All the information on the front panel display is not displayed in standby mode. This can reduce power consumption. To turn on the unit, press , , or on the front panel. If you press , the input source is set to CD, iPod or USB depending on which input source is used last. Playback begins if the input source is set to CD or USB. USB port: ☞ P.
LISTENING TO MUSIC Playback operation Follow the procedures below to play back music. 1 Set the source 2 Switch the input 3 Select music and start playback OPERATION Dock Adapter iPod iPod*1 Scroll the list USB IPod ☞ P. 5 MENU ENTER Control menu iPad*1 USB USB IPod ☞ P. 5 Skip to the first file in the previous/next folder for MP3 or WMA*3 USB*2 USB IPod FOLDER ☞ P.
LISTENING TO MUSIC Other operation ■ Control playback 1 ■ Switching the display 2 MENU ENTER You can switch the playback information shown on the front panel display. Some special characters may not be shown properly. 1 2 During playback DISPLAY OPTION : Skip forward/Press and hold to Fast forward : Skip backward/Press and hold to Rewind : Play/Pause : Stop During playback Press repeatedly.
LISTENING TO RADIO STATIONS Tuning to radio stations 1 Selecting preset radio stations (Preset tuning) 2 TUNING TUNER Press repeatedly to select FM/AM mode. Press and hold. Automatic tuning starts. y Select the preset radio station in FM/AM mode. PRESET OPERATION If the signal received from the station you want to select is weak, you can also tune into radio stations manually by pressing TUNING repeatedly. Note If you tune to a station manually, the sound is monaural.
USING USEFUL FUNCTIONS Using option menu The option menu appears on the front panel display by pressing OPTION. You can set various useful functions with option menu. Option menu Parameter or control range Reference page PRESET DELETE (Displays only when the input source is set to FM/AM.
ADDITIONAL INFORMATION TROUBLESHOOTING Refer to the table below when this unit does not function properly. If the problem you are experiencing is not listed below or if the instruction below does not help, turn off this unit, disconnect the power cable, and contact the nearest authorized Yamaha dealer or service center. General Problem This unit fails to turn on or enters the standby mode soon after the power is turned on. Cause Remedy Page Connect the power cable firmly.
TROUBLESHOOTING iPod/iPad Note In case of a transmission error without a status message appearing in the front panel of this unit, check the connection to your iPod/iPad (see page 5). Status message Cause Remedy Page iPod Connecting iPod Charging This unit is in the middle of recognizing the connection with your iPod. If the message continues to appear in the front panel display, disconnect and connect the iPod again.
TROUBLESHOOTING USB/iPad Note In case of a transmission error without a status message appearing in the front panel of this unit, check the connection to the USB device (see page 5). Status message Cause Remedy Page The USB device is not connected firmly. Connect the USB device again. 5 Unknown USB The connected USB device is not playable on this unit. Connect playable USB device. 5 The file name is too long. The file name should be no more than 250 characters.
TROUBLESHOOTING Disc playback Problem Cause Remedy Page No sound or distorted sound The sampling rate of an MP3 or WMA file may not be compatible with this unit. Check the sampling rate and bit rate of an MP3 or WMA file are compatible with this unit. 3 Disc playback does not start. You may be using a CD-R/RW that is not finalized. Finalize the CD-R/RW. — The disc label may be upside down. Check that the disc label is facing up. — The disc may be defective. Try playing back another disc.
HANDLING COMPACT DISCS • Always handle with care so that the playing surface is not scratched. Do not bend discs. • Do not wipe with a circular motion; wipe straight outward from the center. • To keep the playing surface clean, wipe with a clean, dry cloth. Do not use any type of disc cleaner, spray, or any other chemical-based liquid. • Do not expose discs to direct sunlight, high temperature or high humidity for a long time. • Use a soft-tipped pen when writing on the label side of a disc.
PRÉCAUTIONS CONCERNANT LA SÉCURITÉ CAUTION RISK OF ELECTRIC SHOCK DO NOT OPEN ATTENTION : POUR RÉDUIRE LES RISQUES D’INCENDIE ET DE DÉCHARGE ELECTRIQUE, NE PAS RETIRER LE COUVERCLE (OU LE PANNEAU ARRIÈRE). AUCUNE PIÈCE INTERNE NE PEUT ÊTRE CHANGÉE PAR L’UTILISATEUR. POUR L’ENTRETIEN, S’ADRESSER À UN PERSONNEL QUALIFIÉ.
Informations de la FCC (Pour les clients résidents aux États-Unis) 1 AVIS IMPORTANT : NE PAS APPORTER DE MOFIDICATIONS À CET APPAREIL ! Ce produit est conforme aux exigences de la FCC s’il est installé selon les instructions du mode d’emploi. Toute modification non approuvée expressément par Yamaha peut invalider l’autorisation, accordée par la FCC, d’utiliser ce produit.
ATTENTION : VEUILLEZ LIRE CE QUI SUIT AVANT D’UTILISER L’APPAREIL. 1 2 3 4 5 6 7 8 9 10 11 12 13 14 15 16 Pour utiliser l’appareil au mieux de ses possibilités, lisez attentivement ce mode d’emploi. Conservez-le soigneusement pour référence. Installez cet ensemble audio dans un endroit bien aéré, frais, sec et propre - veillez à ce qu’il soit à l’abri de la lumière directe du soleil, des sources de chaleur, des vibrations, des poussières, de l’humidité et/ou du froid.
TABLE DES MATIÈRES ACCESSOIRES FOURNIS ................................... 2 DISQUES ET FORMATS DE FICHIER PRIS EN CHARGE ...................................................... 3 RACCORDEMENT ............................................... 4 TÉLÉCOMMANDE............................................... 6 AFFICHEUR DE LA FACE AVANT .................. 7 GUIDE DE DÉPANNAGE...................................13 Généralités ............................................................... 13 iPod/iPad..............
PRÉPARATION ACCESSOIRES FOURNIS Assurez-vous que vous disposez de tous les éléments suivants. Télécommande Antenne FM Cache de la station d’accueil Antenne AM Cache USB SLEEP CD iPod AUX USB TUNER FOLDER MENU ENTER OPTION DISPLAY VOLUME MUTE TUNING MEMORY PRESET ATTENTION (avec pile CR2032) Tenez le cache USB hors de portée des enfants afin d’éviter qu’ils ne l’avalent par inadvertance.
DISQUES ET FORMATS DE FICHIER PRIS EN CHARGE ■ Fichiers MP3 et WMA pris en charge Utilisez des CD qui portent les mentions ci-après. MP3 .... .... Disques compacts (audio numérique) Disques audio numériques CD-R, CD-RW • Disques CD-R ou CD-RW portant l’une des mentions suivantes.
RACCORDEMENT Raccordement des enceintes/des antennes/du caisson de graves Respectez la procédure suivante pour raccorder les enceintes et les antennes FM/AM à l’appareil. Pour de plus amples informations sur les enceintes, reportez-vous au mode d’emploi qui les accompagne. Si un caisson de graves est raccordé, des signaux audio basse fréquence sont émis via SUBWOOFER OUT. ATTENTION Ne raccordez pas le câble d’alimentation de l’appareil avant d’avoir terminé tous les raccordements.
RACCORDEMENT Raccordement du câble d’alimentation ■ Raccordement de l’iPad Raccordez ou retirez l’iPad quand vous le souhaitez. PRÉPARATION Après avoir effectué tous les raccordements, branchez les câbles d’alimentation de l’appareil. À la prise secteur USB IPod y Lorsque l’appareil est sous tension et que la source d’entrée est réglée sur USB, l’iPad raccordé est chargé. Autres raccordements Remarque ■ Raccordement de l’ iPod Raccordez ou retirez l’iPod quand vous le souhaitez.
TÉLÉCOMMANDE 1 Émetteur de signaux infrarouges 1 2 SLEEP : paramètre de mise en veille (☞ P. 12) 2 0 SLEEP 3 Touches de sélection de source : permettent de changer de source. Lorsque vous écoutez la radio, appuyez sur TUNER pour basculer entre FM et AM. 4 FOLDER (pendant la lecture d’un CD de données/ périphérique USB) : permet de changer de dossier. CD iPod AUX 5 3 USB TUNER 4 5 6 OPTION : permet d’afficher le menu d’options. (☞ P.
AFFICHEUR DE LA FACE AVANT 2 3 4 SLEEP PRESET STEREO AUTO TUNED MEMORY 5 6 7 SHUFFLE REPEAT ARTISTS ALBUMS SONGS VOLUME MUTE B INPUT PHONES PRESET 8 9 0 1 Témoin SLEEP : s’allume lorsque la minuterie de mise en veille est active (☞ P. 12). 2 Témoin PRESET : s’allume lorsque vous mémorisez des stations radio (☞ P. 11). 3 Témoin STEREO : s’allume lorsque l’appareil reçoit un signal puissant d’une émission FM stéréo.
FONCTIONNEMENT FONCTIONNEMENT DE L’AFFICHEUR DE LA FACE AVANT ET FONCTIONNEMENT DE BASE y • Appuyez sur pour mettre l’appareil en veille. Toutes les informations de l’afficheur de la face avant ne s’affichent pas en mode veille. Cela peut réduire la consommation d’électricité. Pour mettre l’appareil sous tension, appuyez sur , ou sur la face avant. Si vous appuyez sur , la source d’entrée est réglée sur CD, iPod ou USB en fonction de la dernière source d’entrée utilisée.
ÉCOUTE DE MUSIQUE Lecture Respectez les procédures suivantes pour écouter de la musique. 1 Choisissez la source l’entrée 3 Sélectionnez de la musique et lancez la lecture FONCTIONNEMENT Adaptateur de la station iPod*1 2 Changez iPod Faites défiler la liste USB IPod ☞ P. 5 MENU ENTER Menu de commande iPad*1 USB USB IPod ☞ P. 5 Accédez au premier fichier du dossier précédent/suivant pour MP3 ou WMA*3 USB*2 USB IPod FOLDER ☞ P.
ÉCOUTE DE MUSIQUE Autres opérations ■ Commande de la lecture 1 ■ Commutation de l’afficheur 2 MENU ENTER Pendant la lecture Vous pouvez modifier les informations de lecture qui apparaissent sur l’afficheur de la face avant. Il est possible que certains caractères spéciaux ne s’affichent pas correctement.
ÉCOUTE DE STATIONS RADIO y Réglage de stations radio 1 2 TUNING TUNER Appuyez plusieurs fois de suite pour sélectionner le mode FM/AM. Maintenez cette touche enfoncée. La syntonisation automatique démarre. • Vous pouvez mémoriser jusqu’à 30 stations FM et 30 stations AM. • Pour annuler la mémorisation manuelle lorsque vous choisissez un numéro de mémorisation, appuyez de nouveau sur MEMORY.
UTILISATION DES FONCTIONS UTILES Utilisation du menu d’options Le menu d’options apparaît sur l’afficheur de la face avant si vous appuyez sur OPTION. Le menu d’options vous permet de définir diverses fonctions utiles. Menu d’options Paramètre ou plage de réglage Page de référence PRESET DELETE (S’affiche uniquement si la source d’entrée est réglée sur FM/AM.
INFORMATIONS COMPLÉMENTAIRES GUIDE DE DÉPANNAGE Reportez-vous au tableau suivant si l’appareil ne fonctionne pas convenablement. Si l’anomalie constatée n’est pas mentionnée ou si les actions correctives suggérées sont sans effet, mettez l’appareil hors tension, débranchez le câble d’alimentation et contactez votre revendeur ou service après-vente Yamaha agréé le plus proche.
GUIDE DE DÉPANNAGE iPod/iPad Remarque En cas d’erreur de transmission sans message d’état sur l’afficheur de la face avant de l’appareil, vérifiez les raccordements à votre iPod/iPad (voir page 5). Message d’état Causes possibles Solution Page iPod Connecting iPod Charging L’appareil procède à la reconnaissance de la connexion à votre iPod. Si le message reste affiché sur la face avant, débranchez et rebranchez l’iPod.
GUIDE DE DÉPANNAGE USB/iPad Remarque En cas d’erreur de transmission sans message sur l’afficheur de la face avant de l’appareil, vérifiez les connexions au périphérique USB (voir page 5). Message d’état Causes possibles Solution Page Le périphérique USB n’est pas raccordé correctement. Raccordez de nouveau le périphérique USB. 5 Unknown USB L’appareil ne prend pas en charge le périphérique USB raccordé. Raccordez un périphérique USB pris en charge. 5 Le nom du fichier est trop long.
GUIDE DE DÉPANNAGE Lecture d’un disque Anomalies Causes possibles Solution Page Aucun son ou son déformé La fréquence d’échantillonnage du fichier MP3 ou WMA n’est peut-être pas compatible avec l’appareil. Vérifiez que la fréquence d’échantillonnage et le débit binaire du fichier MP3 ou WMA sont compatibles avec l’appareil. 3 La lecture du disque ne démarre pas. Vous utilisez peut-être un CD-R/RW qui n’est pas finalisé. Finalisez le CD-R/RW.
MANIPULATION DES DISQUES COMPACTS • Veillez à toujours manipuler le disque avec soin afin d’éviter de rayer sa surface de lecture. Ne pliez pas les disques. • Pour nettoyer la surface de lecture, essuyez-la avec un chiffon sec et propre. N’utilisez pas de produit de nettoyage pour disque, de spray ou tout autre liquide à base de produits chimiques. • N’exposez pas les disques aux rayons directs du soleil, à des températures extrêmes ou à un taux d’humidité élevé pendant une période prolongée.
CAUTION Use of controls or adjustments or performance of procedures other than those specified herein may result in hazardous radiation exposure. The laser component in this product is capable of emitting radiation exceeding the limit for Class 1. Le laser de cet appareil peut émettre un rayonnement dépassant les limites de la classe 1.
© 2011 Yamaha Corporation Printed in Malaysia ZK72850