CV P - 701 Owner’s Manual Mode d’emploi Manual de instrucciones Thank you for purchasing this Yamaha Clavinova! We recommend that you read this manual carefully so that you can fully take advantage of the advanced and convenient functions of the instrument. We also recommend that you keep this manual in a safe and handy place for future reference. Before using the instrument, be sure to read “PRECAUTIONS” on pages 5- 6. For information on assembling the instrument, refer to the instructions on page 113.
SPECIAL MESSAGE SECTION PRODUCT SAFETY MARKINGS: Yamaha electronic products may have either labels similar to the graphics shown below or molded/stamped facsimiles of these graphics on the enclosure. The explanation of these graphics appears on this page. Please observe all cautions indicated on this page and those indicated in the safety instruction section. CAUTION RISK OF ELECTRIC SHOCK DO NOT OPEN CAUTION: TO REDUCE THE RISK OF ELECTRIC SHOCK. DO NOT REMOVE COVER (OR BACK).
FCC INFORMATION (U.S.A.) 1. IMPORTANT NOTICE: DO NOT MODIFY THIS UNIT! This product, when installed as indicated in the instructions contained in this manual, meets FCC requirements. Modifications not expressly approved by Yamaha may void your authority, granted by the FCC, to use the product. 2. IMPORTANT: When connecting this product to accessories and/or another product use only high quality shielded cables. Cable/s supplied with this product MUST be used. Follow all installation instructions.
Explanation of Graphical Symbols The lightning flash with arrowhead symbol within an equilateral triangle is intended to alert the user to the presence of uninsulated “dangerous voltage” within the product’s enclosure that may be of sufficient magnitude to constitute a risk of electric shock to persons. CA U TION RISK OF ELECTRIC SHOCK DO NOT OPEN CAUTION: TO REDUCE THE RISK OF ELECTRIC SHOCK, DO NOT REMOVE COVER (OR BACK). NO USER-SERVICEABLE PARTS INSIDE. REFER SERVICING TO QUALIFIED SERVICE PERSONNEL.
PRECAUTIONS PLEASE READ CAREFULLY BEFORE PROCEEDING Please keep this manual in a safe and handy place for future reference. WARNING Always follow the basic precautions listed below to avoid the possibility of serious injury or even death from electrical shock, short-circuiting, damages, fire or other hazards. These precautions include, but are not limited to, the following: Power supply/Power cord Fire warning • Do not place the power cord near heat sources such as heaters or radiators.
CAUTION Always follow the basic precautions listed below to avoid the possibility of physical injury to you or others, or damage to the instrument or other property. These precautions include, but are not limited to, the following: Power supply/Power cord Handling caution • Do not connect the instrument to an electrical outlet using a multiple-connector. Doing so can result in lower sound quality, or possibly cause overheating in the outlet.
NOTICE To avoid the possibility of malfunction/ damage to the product, damage to data, or damage to other property, follow the notices below. Handling • Do not use the instrument in the vicinity of a TV, radio, stereo equipment, mobile phone, or other electric devices. Otherwise, the instrument, TV, or radio may generate noise.
About functions/data bundled with the instrument • Some of the preset songs have been edited for length or arrangement, and may not be exactly the same as the original. • This device is capable of using various types/formats of music data by optimizing them to the proper format music data for use with the device in advance. As a result, this device may not play them back precisely as their producers or composers originally intended.
About the Manuals This instrument has the following documents and instructional materials. Included Documents Owner’s Manual (this book) Provides overall explanations of the Clavinova basic functions. Data List Contains various important preset content lists such as Voices, Styles and Effects. Online Materials (downloadable from the web) Reference Manual (only in English, French, German and Spanish) Explains advanced features of the instrument, not explained in the Owner’s Manual.
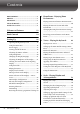
Contents PRECAUTIONS .................................................5 NOTICE..............................................................7 Information ........................................................7 About the Manuals .............................................9 1 Piano Room – Enjoying Piano Performance – 40 Playing a Piano Performance in Piano Room .. ............................................................................. 40 Included Accessories .....................................
Adjusting the Volume Balance Between Style and Keyboard ................................................... 68 Changing the Split Points ............................... 69 4 Song Playback – Playing and Practice Songs – 71 9 Registration Memory – Saving and Recalling Custom Panel Setups – 97 Registering Your Panel Setups ....................... 97 Saving the Registration Memory as a Bank File .............................................................................
Welcome to Clavinova True Acoustic Piano Feel Welcome to Clavinova This instrument features gorgeous piano Voices, created with samples of the Yamaha CFX flagship concert grand piano and the famous Bösendorfer* concert grand piano, as well as a special keyboard to fully reproduce the natural touch response and expressive nuances of an actual concert grand piano, including rapid repetitive capability.
Even if you’re playing alone, the CVP can put an entire backing band behind you! Simply playing chords automatically triggers and controls the auto accompaniment backing (Style function).
Panel Controls ) 3 5 1 6 # 8 2 Panel Controls 4 9 7 ! @ A-1 B-1 C0 D0 E0 F0 G0 A0 B0 C1 D1 E1 F1 G1 A1 B1 C2 D2 E2 F2 G2 A2 B2 C3 D3 E3 Panel Setup (Panel Settings) By using the controls on the panel, you can make various settings such as selecting a Voice or Style, tuning the pitch, and so on. These settings of the instrument are together referred to as “panel setup” or “panel settings” in this manual. 1 [USB TO DEVICE] terminal .......................
$ ^ * B % & ( A C D Panel Controls # F3 G3 A3 B3 C4 D4 E4 F4 G4 A4 B4 C5 D5 E5 F5 G5 A5 B5 C6 D6 E6 F6 G6 A6 B6 C7 Music rest page 16 Guide lamps page 76 Key cover page 16 [ ] (Standby/On) switch page 18 I/O connectors pages 20 and 103 Pedals page 23 [AC IN] jack: For connecting a power cord.
Starting Up Opening/Closing the Key Cover When opening the key cover, lift the cover slightly, then push and slide it open. When closing the key cover, slide the cover toward you and gently lower the cover over the keys. Starting Up CAUTION Be careful to avoid catching your fingers when opening/closing the cover. CAUTION • Hold the cover with both hands when opening or closing it. Do not release it until it is fully opened or closed.
To lower the music rest: Pull the music rest toward yourself as far as it will go. 2 Raise the two metal supports (at the rear of the music rest). 3 Gently lower the music rest backward until it is all the way down. Starting Up 1 Power Supply Connect the plugs of the power cord in the order shown in the illustration. In some areas a plug adaptor may be provided to match the pin configuration of the AC wall outlets in your area.
Turning On/Off the Power Starting Up 1 Turn down the [MASTER VOLUME] dial to “MIN.” 2 Press the [P] (Standby/On) switch to turn the power on. The display and the power indicator located below the left end of the keyboard lights up. Adjust the volume as desired while playing the keyboard. The power indicator lights up. 3 Press and hold the [P] (Standby/On) switch for about a second to turn the power off.
Disabling Auto Power Off (simple method) Turn the power on while holding down the lowest key on the keyboard. A message appears briefly, then the instrument starts up with the Auto Power Off is disabled. A-1 For details on how to set the desired Auto Power Off time, refer to the Reference Manual on the website (page 9), Chapter 12. Starting Up + Adjusting the Master Volume To adjust the volume of the entire keyboard sound, use the [MASTER VOLUME] dial while playing the keyboard.
Using Headphones Starting Up Standard stereo phone plug Since this instrument is equipped with two [PHONES] jacks, you can connect two sets of standard stereo headphones. If you are using only one set of headphones, insert a plug into either of these jacks. CAUTION Do not use the headphones for a long period of time at a high or uncomfortable volume level, since this can cause permanent hearing loss.
Throughout this manual, arrows are used in the instructions, indicating in shorthand the process of calling up certain displays and functions. Changing the Display Language This determines the language used in the display for messages, file names, and character input. 1 Call up the operation display. 2 4 Starting Up 1 [FUNCTION] → 2 TAB [L][R] MENU2 → 3 [G] (SYSTEM) → 4 TAB [L][R] OWNER 3 1 2 2 Use the [4]/[5] buttons to select the desired language. The language is now set.
Showing the Owner Name in the Opening Display You can have your name appear in the opening display (the display that appears when the power is turned on). 1 Call up the operation display. 1 [FUNCTION] → 2 TAB [L][R] MENU2 → 3 [G] (SYSTEM) → 4 TAB [L][R] OWNER Starting Up 2 4 3 2 1 2 Press the [I] (OWNER NAME) button to call up the Owner Name display. Refer to page 36 for character-entry details.
Using the Pedals The instrument features three pedals. Soft pedal Damper pedal Starting Up Sostenuto pedal Damper pedal (Right) Pressing this pedal lets you sustain notes even after releasing the keys. When you select a Piano Voice compatible with VRM (page 49), pressing this pedal activates the VRM to accurately recreate the unique resonance of an acoustic grand piano’s soundboard and strings. This pedal can be used to control the half-pedal function.
Playing the Demos The Demos provide helpful, easy-to-understand introductions to the features and functions as well as sound demonstrations. Press the [DEMO] button to call up the Demo display. 2 Press one of the [A] – [D] buttons to show a specific Demo. Starting Up 1 Pressing one of the [F] – [I] buttons plays back the overview Demo continuously, calling up the various displays in sequence. The sub menus are shown on the display. Press one of the [A] – [J] buttons corresponding to the sub menu.
Display-based Controls The LCD provides comprehensive at-a-glance information on all current settings. The displayed menu can be selected or changed by the controls around the LCD.
TAB [L][R] buttons These buttons are used mainly to change the pages of displays that have “tabs” at the top. Starting Up [1] – [8] buttons The [1] – [8] buttons are used to make selections or adjust settings (up or down correspondingly) for functions shown directly above them. If a menu appears in this section of the display, use the [1] – [8] (upper) buttons to select the desired items.
[DATA ENTRY] dial and [ENTER] button Depending on the selected LCD display, the [DATA ENTRY] dial can be used in the following two ways. Selecting files (Voice, Style, Song, and so on) Starting Up When one of the File Selection displays (page 30) is shown, you can use the [DATA ENTRY] dial to move the cursor, then press the [ENTER] button to actually select a file. Press the [ENTER] button to actually select the file. The selected file is highlighted. Move the cursor (bold frame).
Messages Shown in the Display A message (information or confirmation dialog) sometimes appears on the screen to facilitate operation. When the message appears, simply press the appropriate button. Starting Up Instant Selection of the Displays — Direct Access With the convenient Direct Access function, you can instantly call up the desired display — with just a single additional button press. 1 Press the [DIRECT ACCESS] button.
Main Display Configuration The display that appears when the power is turned on is the Main display. The Main display shows the current basic settings such as the currently selected Voice and Style, allowing you to see them at a single glance. The Main display is the one you’ll usually see when you play the keyboard. 9 7 ) 8 Starting Up 1 6 3 2 1 5 4 Voice name Displays the Voice names currently selected for RIGHT 1, RIGHT 2 and LEFT parts (page 44).
9 Audio information Displays information for the selected audio file (file name, time, etc.) When the recording of USB Audio Player/Recorder is in standby, a “REC WAIT” indication appears. While recording, “REC” appears. ) Registration Sequence Indicates the sequence order of the Registration Memory (if set to on; page 99) numbers, which can be called up via the TAB [L][R] buttons or the pedal. The selected Registration Memory number is enclosed in a frame.
Closing the current folder and calling up the next highest level folder In the PRESET display, several data (files) are contained together in a folder. You can also organize your original data in the USER/USB display by creating several new folders (page 32). To close the current folder and call up the next highest level folder, press the [8] (UP) button. Starting Up Example of the PRESET Voice Selection display The PRESET Voice files are categorized and contained in appropriate folders.
File/Folder Management If you’ve saved a lot of files to a USB flash drive or USER drive, it may be difficult to find the desired file quickly. To make it easier to find the files you want, you can organize your files in folders, rename the files, delete unnecessary files, etc. These operations are done in the File Selection display. Creating a New Folder Starting Up This operation lets you create new folders.
Renaming a File/Folder This operation lets you rename files/folders. NOTE 1 Call up the display containing the file/folder you want to rename. 2 Call up MENU2 at the right bottom of the display by pressing the [8] button as necessary. 3 Press the [1] (NAME) button. Starting Up • Files in the PRESET tab cannot be renamed. • The “PianoRoom” folder cannot be renamed. The pop-up window for the Rename operation appears at the bottom of the display.
Copying or Moving Files This operation lets you copy or cut a file and paste it to another location (folder). You can also copy a folder (but not move it) by using the same procedure. Please note that some files have copy/move restrictions. See “Restrictions for protected Songs” on page 73. NOTE Files in the PRESET tab and the “PianoRoom” folder cannot be moved. 1 Call up the display containing the file/folder you want to copy.
Deleting Files/Folders This operation lets you delete a file/folder. NOTE 1 Call up the display containing the file/folder you want to delete. 2 Call up MENU2 at the right bottom of the display by pressing the [8] button as necessary. 3 Press the [5] (DELETE) button. Starting Up • Files in the PRESET tab cannot be deleted. • The “PianoRoom” folder cannot be deleted. The pop-up window for the Delete operation appears at the bottom of the display.
Entering Characters The instructions that follow show you how to enter characters for naming your files/folders, inputting keywords, etc. Entering characters is done in the display shown below. 2 1 4 3 Starting Up 1 Change the type of character by pressing the [1] button. If you select a language other than Japanese as the Language (page 21), the following different types of characters are available: • CASE ..........................Capital letters, numbers, marks • case ............................
Other character-entry operations Deleting characters Move the cursor to the character you wish to delete by using the [DATA ENTRY] dial, and press the [7] (DELETE) button. To delete all characters on the line at once, press and hold the [7] (DELETE) button.
Data Backup This procedure backs up all data stored in USER drive (except Protected Songs) and settings to the USB flash drive as a backup file (extension: bup.). The backup file can be restored to the instrument again, allowing you to recall the panel settings and performance data you created previously. NOTE Before using a USB flash drive, be sure to read “Connecting a USB Device” on page 106. Starting Up 1 Connect a USB flash drive for the backup destination. 2 Call up the operation display.
Restoring the Factory-programmed Settings Restores the System Setup parameters to the original factory settings. Refer to the separate Data List booklet for details on the System Setup parameters, marked with “” in the “System Setup” row in the Parameter Chart list. Turning the power on while holding the right-most key on the keyboard displays a message indicating that initialization is in progress. The message disappears when initialization is complete.
Piano Room – Enjoying Piano Performance – The Piano Room function is for those who want to simply, conveniently, and fully enjoy playing the instrument as a piano. No matter what settings you’ve made from the panel, you can instantly call up the optimum settings for piano performance with a single button press. You can also change the piano settings as you like, or you can enjoy playing the piano as if you are in a small ensemble.
Playing the Piano in Session with Other Instruments 1 Press the 2 Press the [F] button to call up the Session players in the display. [PIANO ROOM] button to call up the Piano Room display. Session players can be shown or hidden by pressing the [F] button. Session players 2 3,5 3 Press the [J] button to start. The intro starts playing back. 4 Play the keyboard following a few measures of the intro. The Session players provide accompaniment for your performance. Jazz or Pop is recommended.
Changing/Resetting the Piano Room Settings You can change the settings of Piano room, such as touch sensitivity, as you like. You can also restore all Piano Room settings to the default. 1 Press the [Piano Room] button to call up the Piano room display. To change the accompaniment settings, press the [F] button to display the session players. 1 2 Use the [8] buttons to call up the setting display, and then change the settings.
Recording your Performance in the Piano Room You can record your performance in the Piano Room to the instrument or a USB flash drive. NOTE When you record to the instrument, the method of recording is MIDI. When you record to a USB flash drive, the method of recording is Audio. Refer to page 79 for details on the difference between MIDI and Audio recordings.
Voices – Playing the keyboard – The instrument features a wide variety of exceptionally realistic instrumental Voices, including piano, guitar, strings, brass, wind instruments and more. 2 Playing Preset Voices Voices – Playing the keyboard – Selecting a Voice (RIGHT1) and Playing the Keyboard You can play a single Voice over the entire keyboard range. This is used for normal performance—for example, with the piano Voice.
To Select XG Voices Refer to the Reference Manual on the website (page 9). 3 Press one of the [A] – [J] buttons to select the desired Voice. To call up the other display pages (P1, P2, etc.), press one of the [1] – [7] buttons or press the same VOICE button again. NOTE The Voice type and its defining characteristics are indicated above the Preset Voice name. For details on the characteristics, see page 47 and the Reference Manual (page 9).
4 Press one of the [A] – [J] buttons to select the desired Voice. 5 Play the keyboard. The Voice selected for RIGHT1 (page 44) and the Voice selected here are sounded simultaneously in a layer. Quickly selecting Voices for the Right 1 and 2 parts 2 You can quickly select the Right 1 and 2 part Voices, just from the Voice category selection buttons. Press and hold one Voice button, then press another.
Keyboard parts Voices can be assigned independently to each of the three keyboard parts: Right 1, Right 2 and Left. You can combine these parts by using the PART ON/OFF buttons to create a rich, ensemble sound. Upper section of the keyboard 2 Split Point (F 2) When the LEFT part is off, the RIGHT1 and 2 Voices can be played over the entire keyboard.
Calling Up the Piano Default Settings (Piano Reset) When you turn the power on, the Voice is set to “CFX Grand,” allowing you to play the instrument as a piano across the entire keyboard. No matter what settings you’ve made from the panel, you can instantly call up these default settings. NOTE This function cannot be used while the Piano Room display (page 40) or the Piano Lock display (page below) is shown. 1 Press and hold down the [PIANO ROOM] button for two seconds or longer.
Playing the Realistic Resonance-enhanced VRM Voices 1 Select the VRM Voice. Press the VOICE category [PIANO] button to call up the Voice Selection display, then select a Voice having a “VRM” icon above its name.
Playing Super Articulation Voices 2 1 Select a Voice having the indication “S.Art!” in the Voice Selection display. 2 Call up MENU1 at the right bottom of the display by pressing the [8] button as necessary. 3 Press the [6] (INFO) button to call up helpful information on how to play the selected S. Art! Voice. Play in the way described on the information display.
Applying Voice Effects The instrument features a sophisticated multi-processor effect system which can add extraordinary depth and expression to your sound. 1 From the Main display, select the desired part for which you want to add effects. 2 Press the [VOICE EFFECT] button to call up the VOICE EFFECT display. Voices – Playing the keyboard – 2 4 1 3 2 3 Use the [1], [3] – [5] and [I] buttons to apply effects to the Voices.
3 [4UD] DSP [5UD] DSP VARIATION With the digital effects built into the instrument, you can add ambience and depth to your music in a variety of ways. Various effect types, such as chorus and delay are included. • The DSP switch is used to turn the DSP (Digital Signal Processor) effect on or off for the currently selected keyboard part. • The DSP Variation switch is used to determine whether variations of the DSP effect are effective or not.
Creating Original Organ Flutes Voices The instrument uses advanced digital technology to recreate the legendary sound of vintage organs. Just as on a traditional organ, you can create your own sound by increasing and decreasing the levels of the flute footages. 1 Press the [ORGAN FLUTES] button. The FOOTAGE Page of the Organ Flutes Voice is called up. 2 Use the [1] – [8] buttons to adjust the footage settings. The [1] buttons control two footages: 16' and 5 1/3'.
3 [] [F] VIBRATO OFF [G] VIBRATO ON 4 [H] VIBRATO DEPTH Sets the Vibrato depth to one of three levels: 1 (low), 2 (mid), or 3 (high). 5 [I] PRESETS Opens the File Selection display of the Organ Flute Voices for selecting a preset Organ Flutes Voice. Alternately turns the vibrato effect for the Organ Flutes Voice ON or OFF. NOTE About the VOLUME/ATTACK Page and EFFECT/EQ Page, see the Reference Manual on the website (page 9).
Setting the Touch Response of the Keyboard You can adjust the touch sensitivity of the instrument (how the sound responds to the way you play the keys). This setting does not change the weight of the keyboard. The touch sensitivity type is commonly applied to all Voices. 1 Call up the operation display.
Using the Metronome The metronome provides a click sound, giving you an accurate tempo guide when you practice, or letting you hear and check how a specific tempo sounds. Press the [METRONOME ON/OFF] button to start/stop the metronome. 2 Voices – Playing the keyboard – Adjusting the Metronome Tempo 1 Press one of the TEMPO [-]/[+] buttons to call up the pop-up tempo setting display. 2 Use the TEMPO [-]/[+] buttons to set the tempo.
Advanced Features Refer to the Reference Manual on the website, Chapter 2.
Styles – Playing Rhythm and Accompaniment – The instrument features a variety of accompaniment and rhythmic backing patterns (called “Styles”) in a variety of different musical genres including pop, jazz, and many others. Each Style features Auto Accompaniment, letting you produce automatic accompaniment playback simply by playing “chords” with your left hand. This lets you automatically recreate the sound of a full band or orchestra — even if you’re playing by yourself.
4 Press the [SYNC START] button to enable synchronized start. 5 As soon as you play a chord (page 60) with your left hand, all parts of the selected Style start. Try playing chords with your left hand and play a melody with your right along with the rhythm.
For users who are unfamiliar with chords, this handy chart features common chords for your quick reference. Since there are many useful chords and many different ways to use them musically, refer to commercially available chord books for further details. Chords Indicates the root note.
Lets you easily play chords in the accompaniment range of the keyboard using only one, two or three fingers. This type is available only for Style playback. C Major chord Press the root key only. Cm Minor chord Simultaneously press the root key and a black key to its left. C7 Seventh chord Simultaneously press the root key and a white key to its left. Cm 7 Minor seventh chord Simultaneously press the root key and both a white and black key to its left.
Operating Style Playback To Start/Stop Playing [START/STOP] button Rhythm Parts of the Style starts playing back as soon as the [START/ STOP] button is pressed. To stop playback, press the button again. [SYNC START] button 3 Styles – Playing Rhythm and Accompaniment – This puts the Style playback in standby. The Style starts playing back when you press any note on the keyboard (when [ACMP ON/OFF] is off) or you play a chord with your left hand (when [ACMP ON/OFF] is on).
About the lamp status of the section buttons (INTRO/MAIN VARIATION/BREAK/ ENDING) • Red: The section is currently selected. • Red (flashing): The section will be played next, following the currently selected section. * The Main [A] – [D] buttons also flash red during fill-in playback. • Green: The section contains data but not currently selected. • Off: The section contains no data and cannot be played.
Adjusting the Tempo TEMPO [-]/[+] buttons By pressing the TEMPO [-] or [+] button, you can decrease/increase the tempo over a range of 5 – 500. While the TEMPO pop-up is shown on the display, you can also use the [DATA ENTRY] dial to adjust the value. Pressing the TEMPO [-]/[+] buttons simultaneously resets the tempo to the default value. [TAP TEMPO] button 3 During Style playback, you can change the tempo by tapping the [TAP TEMPO] button twice at the desired tempo.
Automatically changing One Touch Settings with the Main sections The convenient OTS (One Touch Setting) Link function lets you automatically have One Touch Settings change when you select a different Main section (A – D). The Main sections A, B, C and D correspond to One Touch Settings 1, 2, 3 and 4 respectively. To use the OTS Link function, turn the [OTS LINK] button on. NOTE You can change the timing in which the One Touch Settings change with the MAIN VARIATION [A] – [D] change.
Example 1: Play the following piece on the Piano section. The Styles that suit your performance with similar tempo are listed. Example 2: Play the following rhythm on the Drum section. Snare 3 Styles – Playing Rhythm and Accompaniment – 66 Kick The Styles that contain the similar drum patterns are listed. 4 Select the desired Style from the list by using the [1] – [6] buttons. Try playing keyboard along with the Style if it matches the song you want to play.
Turning Style Parts On/Off and Changing Voices A Style contains eight parts: RHY1 (Rhythm 1) – PHR2 (Phrase 2) below. The performance data of each part is played back in the corresponding channel. You can add variations and change the feeling of a Style by selectively turning channels on/off as the Style plays. Style channels • RHY1/2 (Rhythm 1/2) These are the basic parts of the Style, containing the drum and percussion rhythm patterns.
Adjusting the Volume Balance Between Style and Keyboard If you feel the sound that you play on the keyboard doesn’t seem to be loud enough (or is too loud) in comparison to the Style or Song playback (page 71) volume, you can adjust the volume of each independently. You can also independently adjust the audio volume, the sound input from the microphone or [AUX IN] jack, and the audio sound received from a smart device connected by wireless LAN (page 108).
Changing the Split Points These are the settings (two Split Points) that separate the different sections of the keyboard: the Chord section, the LEFT part section and the RIGHT1 and 2 section. The two Split Point settings (below) are specified as note names. Chord section 1 Split Point (LEFT) Voice LEFT Voice RIGHT1 – 2 3 Call up the operation display. [FUNCTION] → TAB [L][R] MENU1 → [A] SPLIT POINT/CHORD FINGERING → TAB [L][R] SPLIT POINT 2 Set the Split Point.
Style file compatibility This instrument uses the SFF GE file format (page 8) and can play back existing SFF files; however, they will be saved in the SFF GE format when the file is saved (or loaded) in this instrument. Please keep in mind that the saved file can only be played back on instruments that are compatible with the SFF GE format. 3 Styles – Playing Rhythm and Accompaniment – 70 Advanced Features Refer to the Reference Manual on the website, Chapter 3.
Song Playback – Playing and Practice Songs – For the Clavinova, “Song” refers to MIDI songs, which include preset songs, commercially available MIDI files, and so on. Not only can you play back a Song and listen to it, but you can also play the keyboard along with Song playback. Playback of Songs You can play back the following types of Songs.
3 If you’ve selected the “PRESET” tab in step 2, first select a browsing method by using the [A] – [C] buttons, then select a Song category by using the [A] – [J] buttons. The preset Songs are categorized and contained in appropriate folders. 4 Select the desired Song by using the [A] – [J] buttons. You can also select a Song by using the [DATA ENTRY] dial, then press the [ENTER] button to execute. NOTE You can instantly jump back to the Main display by “double-clicking” on one of the [A] – [J] buttons.
Rewind/Fast Forward Press the [REW] or [FF] button once to move back/forward one measure. Hold the [REW] or [FF] button to scroll backward/forward continuously. Pressing the [REW] or [FF] button calls up a pop-up window showing the current measure number (or Phrase Mark number) in the display. While the Song Position pop-up is shown on the display, you can also use the [DATA ENTRY] dial to adjust the value.
Displaying Music Notation (Score) You can view the music notation (score) of the selected Song. We suggest that you read through the music notation before starting to practice. You can also convert your recorded Songs to notation with this operation. NOTE The instrument can display the music notation of commercially-available music data or your recorded Songs. 1 Select a Song (steps 1 – 4 on page 71). 2 Press the [SCORE] button to call up the Score display.
Displaying Lyrics (Text) When the selected Song contains lyric data, you can view it on the instrument’s display during playback. 1 Select a Song (steps 1 – 4 on page 71). 2 Press the [LYRICS] button to call up the Lyrics display. When the Song data contains lyrics data, the lyrics are shown on the display. You can look through the entire lyrics by using the TAB [L][R] buttons when the Song playback is stopped. As Song playback starts, the color of the lyrics changes, indicating the current position.
One-handed Practice with the Guide Lamps The key guide lamps indicate the notes you should play, when you should play them, and how long you should hold them down. You can also practice at your own pace — since the accompaniment waits for you to play the notes correctly. Here, mute the right-hand part and try practicing the part using the guide lamps. NOTE The guide lamps light in red for the white keys and green for the black keys. 1 Select a Song and call up the Score display (page 74).
Repeat Playback The Song Repeat functions can be used to repeatedly play back a Song or a specific range of measures in a Song. This is useful for repeated practicing of difficult-to-play phrases. To repeat a Song, turn the [REPEAT] button on and playback the desired Song. Turning the [REPEAT] button off cancels Repeat playback. NOTE You can play multiple Songs repeatedly. (page 78) Specifying a Range of Measures and Playing them Back Repeatedly (A-B Repeat) Select a Song (steps 1 – 4 on page 71).
Playing Multiple Songs Repeatedly 1 Select a Song in a folder containing multiple Songs (steps 1 – 4 on page 71). For example, select a Song from a folder of the preset Songs. NOTE The preset Songs in the “Follow Lights” folder contain the Guide settings. These Songs are inappropriate for use with ALL or RANDOM repeat. 2 Call up the operation display.
Song Recording via MIDI – Recording Your Performance via MIDI – This instrument allows you to record your performance with the following two methods. • MIDI recording (described in this chapter) With this method, recorded performances are saved as SMF (format 0) MIDI files. If you want to re-record specific sections or edit parameters such as those of Voice, use this method. Also, if you want to record your performance to each channel one by one, execute Multi Channel Recording (page 82).
5 Press the SONG CONTROL [STOP] button to stop recording. A message prompting you to save the recorded performance appears. To close the message, press the [EXIT] button. 5 Song Recording via MIDI – Recording Your Performance via MIDI – 80 6 Press the SONG CONTROL [PLAY/PAUSE] button to play back the recorded performance. 7 Save the recorded performance as a file. Press the [SONG SELECT] button to call up the Song Selection display, in which you can save the recorded performance as a file.
Saving Files This operation lets you save your original data (such as Songs you’ve recorded and Voices you’ve edited) to a file. The explanations here apply when you save your recorded performance as a Song file. 1 In the relevant File Selection display, press the TAB [L][R] buttons to select “USER” or “USB” as save destination. 1 3 2 2 Call up MENU2 at the right bottom of the display by pressing the [8] button as necessary. There are some displays for which MENU2 does not appear.
Complete a Piano Piece by Recording the Right- and Left-hand Parts Separately (Multi Channel Recording) The Multi Channel Recording method let you record data to each channel independently, one by one, up to 16. Here, you will learn how to create a complete, two-handed piano piece by recording the right-hand part to channel 1, and then recording the left-hand part to channel 2 while listening to the already recorded data.
6 Record the left-hand performance to channel 2. 6-1 While holding down the SONG CONTROL [REC] button, press the [2] button to set channel 2 to “REC.” NOTICE If you record to a channel which has already recorded data, the existing data will be erased and overwritten with the new data. 6-2 6-3 Select “RIGHT1” (which will be recorded to channel 2) by using the [C]/[D] buttons. Play the keyboard with your left-hand. Recording begins automatically as soon as you play a note on the keyboard.
USB Audio Player/Recorder – Playback and Recording Audio Files – The convenient USB Audio Player/Recorder allows you to play back audio files (.WAV) saved to a USB flash drive — directly from the instrument. Moreover, since you can record your performances and recordings as audio data (.WAV) to a USB flash drive, it is possible to play back the files on computer, share them with your friends, and record your own CDs to enjoy as well.
4 Press one of the [A] – [J] buttons corresponding to the file you want to listen to. 6 5 5 Call up MENU1 at the right bottom of the display by pressing the [8] button as necessary. NOTE 6 Press the [7] (AUDIO PLAY) button to start playback. This operation returns to the USB AUDIO PLAYER display. 7 Press the [2] (STOP) button to stop playback. NOTICE Never attempt to disconnect the USB flash drive or turn the power off during playback. Doing so may corrupt the USB flash drive data.
Playback-related Operations Stop Select next file (Hold this to move forward continuously through the current file) Play/Pause Select previous file (Hold this to move backward continuously through the current file) 6 Adjusting the volume of audio playback [6] (AUDIO VOLUME) buttons USB Audio Player/Recorder – Playback and Recording Audio Files – These let you adjust the playback volume of an Audio file.
Canceling the Vocal Part and Playing the Part with Backing (Vocal Cancel) This lets you cancel or attenuate the center position of the stereo sound. This lets you sing “karaoke” style with just instrumental backing, since the vocal sound is usually at the center of the stereo image in most recordings. This function cannot be applied to the sound input from the microphone or [AUX IN] jack or the audio sound received from a smart device connected by wireless LAN.
Recording Your Performance as Audio Try recording your performance as audio data to a USB flash drive. NOTE To record your performance with the USB Audio Player/Recorder, make sure to use a compatible USB flash drive. Before using a USB flash drive, be sure to read “Connecting a USB Device” on page 106. NOTE In addition to the Audio Recording functions explained here, MIDI Recording (page 79) is also available on this instrument. • File format that can be recorded .wav...... 44.
5 Start recording by pressing the [3] (PLAY/PAUSE) button, then start your performance. When recording begins, the elapsed recording time is shown on the right side of the Recording display. Recordable time 6 5 Never attempt to disconnect the USB flash drive or turn the power off during playback. Doing so may corrupt the USB flash drive data or the recording data. 6 Stop recording by pressing the [2] (STOP) button.
Microphone – Connecting a Microphone and Singing Along with Your Performance – By connecting a microphone to the [MIC/LINE IN] jack (standard 1/4" phone jack), you can enjoy singing along with your keyboard performance or with Song playback. The instrument outputs your vocals through the built-in speakers.
Useful Functions for Karaoke Singing When using the preset Songs: • Lyrics on the display ...... page 75 • Transpose, Pitch Shift .... page 50 When using the Audio Songs: • Vocal Cancel ................... page 87 • Pitch Shift........................ page 86 Disconnecting the microphone 1 Set the [INPUT VOLUME] knob to the minimum position. 2 Disconnect the microphone from the [MIC/LINE IN] jack. NOTE Before turning the power off, make sure to set the [INPUT VOLUME] knob to the minimum position.
Music Finder – Calling Up Ideal Setups (Voice, Style, etc.) for Each Song – Music Finder – Calling Up Ideal Setups (Voice, Style, etc.) for Each Song – If you want to play in a certain genre of music but don’t know which Style and Voice settings would be appropriate, the convenient Music Finder function can help you out.
3 Play the Style by playing chords with your left hand and the melody with your right (page 59). You can download the Records (panel settings) from the Yamaha website, and then load them to this instrument (page 93). Don’t turn off the [OTS LINK] button. When turned off, you cannot call up the appropriate panel settings even when you select the record.
Music Finder – Calling Up Ideal Setups (Voice, Style, etc.) for Each Song – 8 5 Use the TAB [L][R] buttons to call up the USB display containing the panel settings file downloaded from the website. 6 Select the desired file by pressing the appropriate [A] – [J] button. 7 Press [H] (APPEND) if you want to add Records of the selected Music Finder file, or press [G](REPLACE) if you want to replace all Records with the new ones. Press the [G] (YES) button at the confirmation prompt.
Searching for the Panel Settings 1 From the ALL page of the MUSIC FINDER display, press the [6] (SEARCH 1) button to call up the Search 1 display. (The [6] button corresponds to SEARCH 2.) 2 Enter the search criteria. [A] MUSIC Searches by song name. Pressing the [A] button calls up the pop-up window to enter the song name. To clear the entered Music, press the [F] (CLEAR) button. [B] KEYWORD Searches by keyword. Pressing the [B] button calls up the pop-up window to enter the keyword.
Music Finder – Calling Up Ideal Setups (Voice, Style, etc.) for Each Song – 8 [3UD] TEMPO FROM Sets a tempo range to which the search will be limited. [4UD] TEMPO TO [5UD]/ [6UD] GENRE Selects the desired music genre. To cancel searching, press the [8] (CANCEL) button. 3 Press the [8] (START SEARCH) button to start the search. The Search 1 display appears, showing the results of the search.
Registration Memory – Saving and Recalling Custom Panel Setups – Registering Your Panel Setups 1 Set up the panel controls (such as Voice, Style, effects, and so on) as desired. Refer to the separate Data List for a list of parameters that can be registered with the Registration Memory function. 2 Press the [MEMORY] button in the REGISTRATION MEMORY section. The display for selecting the items to be registered appears.
About the lamp status • Red: Data registered and currently selected • Green: Data registered but not currently selected • Off: 5 No data registered Register various panel setups to other buttons by repeating steps 1 – 4. The registered panel setups can be recalled by simply pressing the desired number button. NOTE Registration Memory – Saving and Recalling Custom Panel Setups – 9 The panel setups registered in the numbered buttons are preserved even when you turn off the power.
3 Press the [6] (SAVE) button to save the Bank file. For instructions on saving, refer to the operation steps (starting from Step 4) on page 81. Recalling a Registered Panel Setup NOTE You can instantly call up the information display of the currently selected Registration Memory Bank by pressing the [DIRECT ACCESS] button and one of the REGISTRATION MEMORY [1] – [8] buttons in sequence.
Mixing Console – Editing the Volume and Tonal Balance – The Mixing Console gives you intuitive control over various sonic aspects of the keyboard parts and Song/Style channels, including volume balance and the timbre of the sounds. It lets you adjust the levels and stereo position (pan) of each Voice to set the optimum balance and stereo image, and lets you set how the effects are applied.
• PANEL PART Use this display when you want to adjust the balance between the entire Song part, entire Style part, Mic part, Right 1 part, Right 2 part and Left part. • STYLE PART Use this display when you want to adjust the balance between all parts of the Style. • SONG CH 1 – 8 or SONG CH 9 – 16 Use this display when you want to adjust the balance between all parts of the Song. Pressing the [A] (PART) button will alternates the display between SONG CH 1 – 8 and SONG CH 9 – 16.
• EQ Boosts or attenuates the high and low frequencies bands for each part to correct the tone or timbre of the sound. • MEQ Selects the Master EQ type that is applied to the overall sound, and lets you edit the parameters for tone control. • CMP This is the Master Compressor setting which determines the dynamics of the overall sound. 4 Save your MIXING CONSOLE settings. To save the PANEL PART display settings: Register them to Registration Memory (page 97).
Connections – Using Your Instrument with Other Devices – CAUTION Before connecting the instrument to other electronic components, turn off the power of all the components. Also, before turning any components on or off, make sure to set all volume levels to minimum (0). Otherwise, electrical shock or damage to the components may occur.
Playing External Audio Devices with the Built-in Speakers You can connect the output jacks of an external device such as portable audio player to the instrument’s AUX IN jack, letting you hear the sound of that device through the built-in speakers of the instrument. NOTICE To avoid damaging the device, first turn on the power to the external device, then to the instrument. When turning off the power, first turn off the power to the instrument, then to the external device.
Connecting a Footswitch/Foot Controller The FC4A, FC4 or FC5 footswitches and the FC7 foot controller (sold separately) can be connected to the [AUX PEDAL] jack. A footswitch can be used for switching functions on and off, while a foot controller controls continuous parameters such as volume. Footswitch FC4A/FC4 Footswitch FC5 Foot Controller FC7 Example 1: Controlling the volume of the performance data played on the keyboard by a foot controller.
Connecting a USB Device You can connect a USB flash drive or a USB wireless LAN adaptor to the [USB TO DEVICE] terminal. You can save data you’ve created on the instrument to the USB flash drive (pages 38, 81), or you can connect the instrument to a smart device such as iPad via wireless LAN (page 108). Precautions when using the [USB TO DEVICE] terminal • When connecting then disconnecting the USB device (and vice versa), make sure to wait a few seconds between the two operations.
Formatting a USB flash drive When a USB flash drive is connected, a message may appear prompting you to format. If so, execute the format operation. NOTICE The format operation deletes any previously existing data. Make sure that the USB flash drive you are formatting does not contain important data. Proceed with caution, especially when connecting multiple USB flash drives. 1 Insert a USB flash drive for formatting into the [USB TO DEVICE]. 2 Call up the operation display.
Connecting to a Computer By connecting a computer to the [USB TO HOST] terminal, you can transfer data between the instrument and the computer via MIDI. For details on using a computer with this instrument, refer to “Computer-related Operations” on the website. NOTICE Use an AB type USB cable of less than 3 meters. USB 3.0 cables cannot be used. Connections – Using Your Instrument with Other Devices – 11 NOTE • • • • The instrument will begin transmission a short time after the USB connection is made.
Attaching an iPad to the Music Rest Set the holder set (included accessories) on the bottom of the music rest, then set your iPad on the holders. NOTICE To prevent the iPad from falling, note the following points: 1 First, pull the music rest up from the lowest position and toward you, so that there is a gap at the bottom of the music rest, then fit the holders in as shown.
Connecting External MIDI Devices For details about MIDI, refer to “MIDI Basics” downloadable from the Yamaha website (page 9). Use the [MIDI] terminals and standard MIDI cables to connect external MIDI devices (keyboard, sequencer, etc.). • MIDI IN............. Receives MIDI messages from another MIDI device. • MIDI OUT ........ Transmits MIDI messages generated by the instrument to another MIDI device. • MIDI THRU ..... Simply relays the MIDI messages received at MIDI IN.
Utility/System – Making Global Settings – The Utility and System sections in the Function menu provide a variety of convenient tools and settings for the instrument. These include general settings that affect the entire instrument, as well as detailed settings for specific functions. Also included are data reset functions and storage media control, such as media formatting. UTILITY display There are four pages.
BACKUP/RESTORE For backing up or restoring the settings and data saved in the USER drive of the instrument (page 38) to or from a USB flash drive. SETUP FILES For saving and recalling the specified settings of the instrument. RESET For resetting all or specified settings of the instrument to the factory default, or deleting all the files you saved in the USER drive while leaving the settings of the instrument.
Assembly Preparation Before Assembling Assembly parts Headphone hanger F K CAUTION • Assemble the unit on a hard and flat floor with ample space. • Be careful not to confuse or misplace the parts, and be sure to install all parts in the correct orientation. Please assemble the unit in accordance with the sequence described here. • Assembly should be carried out by at least two persons. • Be sure to use only the included screws of the specified sizes. Do not use any other screws.
2 Attach B. 1 1 Align the holes on the upper side of B with the A bracket holes on D and E, then attach the upper corners of B to D and E by finger-tightening two screws G. 2 Secure the bottom end of B using four screws H. 3 Securely tighten the screws G on the top of B that were attached in Step 2- 1. A E E 13 G D B 2J D 5 Connect the pedal cord and power cord. 1 Insert the pedal cord plug into the pedal connector.
6 Rotate the adjuster until it comes in firm contact with the floor surface. When moving the instrument after assembly, always hold the bottom of the main unit. CAUTION When moving the instrument, always hold the bottom of the main unit. Do not hold the key cover or top portion. Improper handling can result in damage to the instrument or personal injury. Do not hold here. 7 Attach the headphone hanger. Attach the headphone hanger using two screws K as shown in the illustration. K Hold here.
Troubleshooting Overall A click or pop is heard when the power is turned on or off. Electrical current is being applied to the instrument. This is normal. The power is automatically turned off. This is normal and due to the Auto Power Off function. If necessary, turn the function off (page 18). Noise is heard from the instrument’s speakers. Noise may be heard if a mobile phone is used near the instrument or if the phone is ringing. Turn off the mobile phone, or use it further away from the instrument.
Overall An existing file is not shown on the display. The file extension (.MID, etc.) may have been changed or deleted. Manually rename the file, adding the appropriate extension, on a computer. Data files with names of more than 50 characters cannot be handled by the instrument. Rename the file, reducing the number of characters to 50 or less. Voice The Voice selected from the Voice Selection display does not sound. Check whether or not the selected part is turned on (page 47).
Song When playing back a Song, some channels do not play. Playback of these channels may be set to “OFF.” Turn playback ON for those channels that are set to “OFF” (page 75). The Guide lamps do not light during Song playback, even after pressing the [GUIDE] button. Any notes outside of the 88-key range cannot be indicated by the Guide lamps. The Guide lamps light an octave or two lower/higher than the actual pitch.
Panel Button Chart No.................................. Corresponds to the number in the “Panel Controls” on page 14. Button/Control ............. Indicates the button/controller that you should use at first for entering the corresponding function. Display.......................... Indicates the display title (and tab title) called up by operating the button/controller. Reference Manual........ “YES” indicates that the detailed information is described in the Reference Manual on the website (page 9). No.
No.
No.
Specifications Product name Size/Weight Control Interface Digital Piano Width [For models with polished finish] 1352 mm (53-1/4") [1355 mm (53-3/8")] Height [For models with polished finish] With Music Rest closed 918 mm (36-1/8") [921 mm (36-1/4")] With Music Rest 1065 mm (41-15/16") [1066 mm (42")] Depth [For models with polished finish] With Music Rest 595 mm (23-7/16") [596 mm (23-7/16")] Weight [For models with polished finish] 59.0kg (130 lbs., 1 oz) [61.5kg (135 lbs.
Effects Types Functions Styles Recording/ Playback (MIDI) Preset Functions 58 Preset + 3 User Chorus 106 Preset + 3 User DSP 295 Preset + 3 User Master EQ 5 Preset +2 User Part EQ 27 Parts Master Compressor 5 Preset + 5 User Intelligent Acoustic Control (IAC) Yes Stereophonic Optimizer Yes Dual (Layer) Yes Split Yes Number of Styles 310 Featured Styles 253 Pro Styles, 21 Session Styles, 36 Pianist Styles File Format Style File Format GE (Guitar Edition) Fingering Single Fing
Functions Storage and Connectivity Overall Controls Metronome Yes Tempo 5 – 500, Tap Tempo Transpose -12 – 0 – +12 Tuning 414.8 – 440.0 – 466.8 Hz Scale Type 9 Types Miscellaneous Piano Room Yes Storage Internal Memory approx. 2.
Index A A-B Repeat ...................................................................... 77 Accessories ........................................................................ 9 Accompaniment ........................................................... 58 ACMP ON/OFF ............................................................ 58 ADD TO MF .................................................................. 96 Assembly ....................................................................... 113 Audio ........
K Key Cover ........................................................................ 16 KEYBOARD HARMONY ......................................... 52 Keyboard parts .............................................................. 47 L Language .......................................................................... 21 LCD ............................................................................. 21, 25 LEFT ................................................................................. 46 Lyrics .....
Split Points ...................................................................... 69 START/STOP .......................................................... 59, 62 Step Recording ............................................................... 83 Stereophonic Optimizer ............................................. 20 Style ................................................................................... 58 Style channels .................................................................
Information for Users on Collection and Disposal of Old Equipment This symbol on the products, packaging, and/or accompanying documents means that used electrical and electronic products should not be mixed with general household waste. For proper treatment, recovery and recycling of old products, please take them to applicable collection points, in accordance with your national legislation and the Directives 2002/96/EC.
For details of products, please contact your nearest Yamaha representative or the authorized distributor listed below. Pour plus de détails sur les produits, veuillez-vous adresser à Yamaha ou au distributeur le plus proche de vous figurant dans la liste suivante. Para detalles sobre productos, contacte su tienda Yamaha más cercana o el distribuidor autorizado que se lista debajo. MALTA NORTH AMERICA CANADA Yamaha Canada Music Ltd.
Yamaha Global Site http://www.yamaha.com/ Yamaha Downloads http://download.yamaha.com/ Manual Development Department © 2015 Yamaha Corporation Published 03/2016 MWGR*.