CV P- 909 CVP - 905 Owner’s Manual Mode d’emploi Manual de instrucciones Thank you for purchasing this Yamaha Digital Piano! This instrument provides a comprehensive array of authentic voices and a superb grand piano touch with versatile functions. We recommend that you read this manual carefully so that you can fully take advantage of the advanced and convenient functions of the instrument. We also recommend that you keep this manual in a safe and handy place for future reference.
ATTENTION RISQUE DE CHOC ELECTRIQUE-NE PAS OUVRIR CAUTION: TO REDUCE THE RISK OF ELECTRIC SHOCK, DO NOT REMOVE COVER (OR BACK). NO USER-SERVICEABLE PARTS INSIDE. REFER SERVICING TO QUALIFIED SERVICE PERSONNEL. The above warning is located on the bottom of the unit. ATTENTION : POUR RÉDUIRE LES RISQUES D'ÉLECTROCUTION, NE PAS RETIRER LE CAPOT (OU LE DOS). NE CONTIENT PAS DE PIÈCES NÉCESSITANT L'INTERVENTION DE L'UTILISATEUR. POUR TOUTE INTERVENTION, FAIRE APPEL À DES PROFESSIONNELS QUALIFIÉS.
FCC INFORMATION (U.S.A.) 1. IMPORTANT NOTICE: DO NOT MODIFY THIS UNIT! This product, when installed as indicated in the instructions contained in this manual, meets FCC requirements. Modifications not expressly approved by Yamaha may void your authority, granted by the FCC, to use the product. 2. IMPORTANT: When connecting this product to accessories and/or another product use only high quality shielded cables. Cable/s supplied with this product MUST be used. Follow all installation instructions.
Information for users on collection and disposal of old equipment: This symbol on the products, packaging, and/or accompanying documents means that used electrical and electronic products should not be mixed with general household waste. For proper treatment, recovery and recycling of old products, please take them to applicable collection points, in accordance with your national legislation.
PRECAUTIONS PLEASE READ CAREFULLY BEFORE PROCEEDING Especially in the case of children, a guardian should provide guidance on how to properly use and handle the product before actual use. Please keep this manual in a safe and handy place for future reference. WARNING Always follow the basic precautions listed below to avoid the possibility of serious injury or even death from electrical shock, short-circuiting, damages, fire or other hazards.
If you notice any abnormality Connections • If any of the following problems occur, immediately turn off the power switch and disconnect the power plug from the outlet. Finally have the device inspected by Yamaha service personnel. - The power cord or plug becomes frayed or damaged. - Unusual smells or smoke are emitted. - Some object, or water has been dropped into the product. - There is a sudden loss of sound during use of the product. - Cracks or other visible damage appear on the product.
NOTICE To avoid the possibility of malfunction/damage to the product, damage to data, or damage to other property, follow the notices below. Handling • Do not connect this product to a public Wi-Fi and/or Internet service directly. Only connect this product to the Internet through a router with strong password protections. Consult your router manufacturer for information on optimum security practices.
• The Bluetooth® word mark and logos are registered trademarks owned by Bluetooth SIG, Inc. and any use of such marks by Yamaha Corporation is under license. Compatible formats for this instrument • The company names and product names in this manual are the trademarks or registered trademarks of their respective companies. Tuning • Unlike an acoustic piano, this instrument does not need to be tuned by an expert (although the pitch can be user-adjusted to match other instruments).
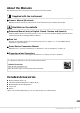
About the Manuals This instrument has the following documents and instructional materials. Supplied with the instrument Owner’s Manual (this book) Explains the basic operations and functions of this instrument. Please read this manual first. Available on the website Reference Manual (only in English, French, German and Spanish) Explains advanced functions and operations for each icon shown in the Menu display (page 28). Please read this manual after reading the Owner’s Manual.
Contents PRECAUTIONS..................................................................................................................................5 NOTICE........................................................................................................................................................ 7 Information ...................................................................................................................................................
4 Styles – Playing Rhythm and Accompaniment – 58 Playing with a Style .................................................................................................................................... 58 Style Control Operations ............................................................................................................................ 60 Calling up Panel Settings Appropriate for the Current Style (One Touch Setting).....................................
Welcome to the World of CVP! This new CVP model is equipped with a convenient touch screen, enabling visual and intuitive control over virtually all instrument functions. Simply by touching this large and easy-to-see display, you can select desired items, enable and control various features, or edit parameter values—with greater ease and speed than ever before! The instrument also has many advanced features that enhance your musical enjoyment and expand your creative and performance possibilities.
Enjoyable Song Lesson Features—with Score Display and Guide Lamps Welcome to the World of CVP! The Lesson features are a fun way to learn and master Songs, with notation shown on the display. Moreover, each key of the keyboard has a guide lamp, which lights to indicate the notes to be played, letting you practice melodies and phrases smoothly—even if you are a beginner or have trouble reading notation.
Panel Controls 2 3 45 6 7 9 ) @ 1 8 A-1 B-1 C0 D0 E0 F0 G0 A0 B0 C1 D1 E1 ! F1 G1 A1 B1 C2 D2 E2 F2 G2 A2 B2 C3 D3 E3 Panel Setup (Panel Settings) These settings of the instrument made by using the controls on the panel are together referred to as “panel setup” or “panel settings” in this manual. 1 [USB TO DEVICE] terminal .........page 103 For connecting a USB flash drive, USB wireless LAN adaptor or USB display adaptor. This terminal is also located at the bottom of the instrument.
^ % # & * ( Panel Controls $ F3 G3 A3 B3 C4 D4 E4 F4 G4 A4 B4 C5 D5 E5 CVP-909 F5 G5 A5 B5 C6 D6 E6 Key cover (page 16) Music rest (page 17) Sheet music braces (page 17) F6 G6 A6 B6 C7 CVP-905 Key cover (page 16) Music rest (page 17) Sheet music braces (page 17) Guide lamps (page 72) I/O connectors (page 101) Pedals (page 38) I/O connectors (page 101) Guide lamps (page 72) Pedals (page 38) [AC IN] jack (page 18) For connecting the power cord.
Starting Up For information on assembling the instrument, refer to the instructions on pages 116, 120 or 124. Opening/Closing the Key Cover To open the key cover, hold the hand grip with both hands, and then lift the key cover slightly, and push it up and back. To close the key cover, lower the key cover back in place gently with both hands. CAUTION Be careful to avoid catching your fingers when opening/closing the cover. CAUTION • Hold the cover with both hands when opening or closing it.
To lower the music rest: Close the Music braces if they are open, and then lower the music rest by following the instructions below. 1 Pull the music rest toward yourself as far as it Music braces will go. 2 Raise the two metal supports (at the rear of the music rest). 3 Gently lower the music rest backward until it is all the way down. Pull the music rest toward yourself as far as it will go. When raised, the music rest locks in place at a certain angle and cannot be adjusted.
For the longer stay, use the inner recess, and for the shorter stay, use the outer recess to support the lid. CAUTION • Do not use the outer recess for the longer stay. Doing so makes the lid unstable and may cause it to fall, resulting in damage or injury. • Make sure that the end of the stay fits securely in the lid recess. If the stay is not properly seated in the recess, the lid may fall, causing damage or injury. • Be careful that you or others do not bump the stay while the lid is raised.
Turning the Power On/Off 1 Turn down the [MASTER VOLUME] control to “MIN.” 2 Press the [P] (Standby/On) switch to turn the power on. Starting Up The [MIC] lamp located at right of the [MASTER VOLUME] control and the display light up. After a while, the Home display (page 26) is shown and the instrument starts up. Adjust the volume as desired while playing the keyboard. NOTE Before the Home display is shown, no sound is emitted when the keys are pressed.
Adjusting the Master Volume To adjust the volume of the entire keyboard sound, use the [MASTER VOLUME] control while playing the keyboard. CAUTION Do not use the instrument for a long period of time at a high or uncomfortable volume level, since this can cause permanent hearing loss. Intelligent Acoustic Control (IAC) IAC is a function which automatically adjusts and controls the sound quality according to the overall volume of the instrument.
Reproducing a Natural Sound Distance Sensation (even when using Headphones)—Binaural Sampling and Stereophonic Optimizer This instrument features two advanced technologies that allow you to enjoy exceptionally realistic, natural sound, even though listening on headphones. Binaural Sampling Sampling A technology which records the sounds of an acoustic instrument then stores them to the tone generator to be played based on information received from the keyboard.
Making Basic Settings As necessary, make basic settings for the instrument, such as the language shown on the display. 1 Call up the operation display (Utility). 2 Touch [System] on the display. 3 Make the necessary settings by touching the display. First, touch [Menu] at the bottom right corner of the Home display which is shown when the power is turned on. Then touch [] to move to page 2 (if necessary), and touch [Utility]. Version Indicates the firmware version of this instrument.
Changing the Brightness of Display Here you can change certain display settings as desired, including brightness. Call up the operation display (Utility) (step 1 on page 22). 2 Touch [Touch Screen/Display] on the display. 3 Change the settings by touching the display. Starting Up 1 Touch Screen Brightness Sound Determines whether or not touching the display will trigger the click sound.
1 Basic Operations Display Structure Turning on this instrument calls up the Home display, from which you can call up the File Selection display and Menu display, providing you convenient access to various functions and allowing you to make various settings. For detailed instructions on the display, refer to page 26.
Song Selection display Basic Operations 1 Touch here to expand. By expanding the Song area, you can call up the playback-related controls on the display.
Display Configuration This section covers the most often used displays: Home, File Selection and Menu. The Home display appears when the power is turned on. The File Selection display and Menu display can be called up from the Home display. Home Display Appears when the power is turned on, and can be called up when the [HOME] button is pressed. This display shows the current basic settings such as the current Voice and Style, allowing you to see them at a single glance.
File Selection Display The File Selection display is for selecting a Voice, Style, Song, and other data. You can call up this display by touching the name of the Voice, Style or Song on the Home display, or by pressing one of the VOICE or STYLE buttons, etc. 1 2 3 1 Category A wide variety of data such as Voices and Styles are divided into several categories (tabs) according to the data type. Except for the following two, all tabs are referred to as “preset” tabs, since they contain preset data.
Menu Display This is the portal display for using various functions and can be called up by touching the [Menu] icon at the bottom right corner of the Home display. 1 2 1 Function list Various convenient functions are shown via icons. Touching each of them calls up the corresponding function. This list consists of two pages, which you can select by pressing [] or []. For information on each function, refer to the “Menu Display Function List” (page 113) or the Reference Manual on the website (page 9).
Display-based Controls The display of this instrument is a special touch screen that allows you to select or change the desired parameter by simply touching the corresponding setting on the display. The Data dial and the [HOME] button can also be used. Data dial Display [HOME] button Using the Display (Touch Screen) Basic Operations 1 NOTICE Do not use any sharp or hard tools to operate the touch screen. Doing so may damage the display.
Rotate Touch and hold the display knob, and rotate your finger around the knob to change the parameter value. Touch and hold This instruction means to touch the object in the display and hold it for a while. When setting values by using []/[], a slider or a knob, you can restore the default value by touching and holding the value on the display. Rotating the Data Dial Depending on the display, the Data dial can be used in the following two ways.
Using the ASSIGNABLE Buttons You can assign the functions which you use frequently to these four panel buttons at the left side of the display. Also, any of the functions listed on the Menu display (page 28) can be assigned here as a shortcut. Call up the operation display via [Menu] [Assignable] [Assignable]. 1 Basic Operations 1 2 3 2 Touch the desired button number to call up the list.
File Management Data you have created such as recorded Song and edited Voice can be saved as files to the instrument (referred to as “User memory”) and a USB flash drive. If you’ve saved a lot of files, you may have trouble finding the desired file quickly. To make operation easier, you can organize your files in folders, or you can use the search function. These operations are done in the File Selection display. NOTE Before using a USB flash drive, be sure to read “Connecting USB Devices” on page 103.
Creating a New Folder Folders can be created, named and organized as desired, making it easier to find and select your original data. NOTE • The maximum total number of files/folders which can be saved to the User memory differs depending on the file size and the length of the file/folder names. • The maximum number of files/folders which can be stored in a folder is 2,500. 1 In the File Selection display, touch the User tab (page 27) then select the location to which you want to create a new folder.
Copying or Moving Files You can copy or cut a file and paste it to another location (folder). You can also copy a folder (but not move it) by using the same procedure. NOTE • Files in the Preset tabs cannot be moved. • Copying of commercially available musical data including but not limited to MIDI data and/or audio data is strictly prohibited except for your personal use. Commercially available Song data may be copy protected to prevent illegal copying or accidental erasure.
Registering Files to the Favorite Tab You can call up your favorite or often used Voices or Styles quickly by registering them to the Favorite tab. Touch the star mark ( ) at the right side of each file to register the corresponding file to the Favorite tab. To remove the registered file from the Favorite tab, touch the colored star mark ( ) in the Favorite tab or in the tab which actually contains the corresponding file.
Searching for Files 1 In the File Selection display, touch 2 Touch the Search box to call up the Character Entry window. (Search) to call up the Search display. Search box 3 Enter the file name or the folder name (or just a part of it) to start searching (page 37). If you want to enter multiple words, insert a space between each word. After the search is complete, the resulting list appears. If no files are listed, try this step again with another word.
1 Touch the character type. When the Language (page 22) is set to other than Japanese: Touching [Symbol] (or [abc]) switches between entering symbols or Roman letters (and numbers). To switch between entering capital letters or small letters, touch (Shift).
Using the Pedals NOTE • The pedals are protected with vinyl covers when shipped from the factory. Remove the covers from the pedals before using to ensure optimum use of the pedal effects. • If the pedal box rattles or gives way when you step on the pedals, turn the adjuster so that it is set firmly against the floor (pages 119, 122, 125). Soft Pedal Sostenuto Pedal Damper Pedal Damper Pedal (Right) Pressing this pedal sustains notes. Releasing this pedal immediately stops (damps) any sustained notes.
Using the Metronome The [METRONOME ON/OFF] button lets you start or stop the metronome. The metronome provides a click sound, giving you an accurate tempo guide when you practice, or letting you hear and check how a specific tempo sounds. NOTE You can also change the time signature, volume and sound of the metronome on the display called up via [Menu] [Metronome] [Metronome].
Setting the Touch Sensitivity of the Keyboard Touch Sensitivity determines how the sound responds to your playing strength. This setting does not change the weight of the keyboard. 1 Call up the display via [Menu] [Keyboard]. 2 Make the settings by touching the display. Touch Curve Enter checkmarks to the boxes of the desired keyboard parts, then touch here to call up the setting window and select the Touch Sensitivity type.
Transposing the Pitch in Semitones The TRANSPOSE [−]/[+] buttons transpose the overall pitch of the instrument (the keyboard sound, Style playback, MIDI Song playback, and so on) in semitone steps (from −12 to 12). Pressing the [−] and [+] buttons simultaneously resets the value to 0. NOTE • If you want to transpose the pitch of the Audio Song, use the Pitch Shift parameter on page 74. • The Transpose functions do not affect the Drum Kit or SFX Kit Voices.
Adjusting the Volume Balance From the Balance display called up via [Menu] [Balance], you can adjust the volume balance among the keyboard parts (Main, Layer, Left), the Style, the Song, the microphone sound, and the Audio Input Sound from the external device (page 107). Slide your finger vertically for each part to adjust the volume.
Data Backup You can back up all data in the User memory of this instrument (except for Protected Songs) and all settings to the USB flash drive as a single file (file extension: .bup). This procedure is recommended for data security and backup in case of damage. NOTE • For information on the settings that can be backed up, refer to the “Backup/Restore” column of the “Parameter Chart” in the Data List on the website (page 9).
2 Piano Room – Enjoying the Piano Performance – The Piano Room function is for those who want to simply, conveniently, and fully enjoy playing the instrument as a piano. No matter what settings you’ve made from the panel, you can instantly call up the optimum settings for piano performance with a single button press. You can also change the piano settings as you like, or you can enjoy playing the piano as if you are in a small ensemble.
Playing the Piano in Session with Other Instruments 1 Press the [PIANO ROOM] button to call up the Piano Room display. 2 Touch (Accompaniment) at the upper right of the display. Session players appear in the display. Session players can be shown or hidden by touching (Accompaniment) or (Piano). 2 3 Session players 3 Select the type of accompaniment. Touch the picture of the session players to call up the list for selecting the desired accompaniment.
Changing the Accompaniment Settings Touch (Settings) at the bottom of the accompaniment type list of step 3 on page 45, to call up the setting display. 1 2 3 4 46 5 1 Turns all parts, except those of rhythm and bass, on or off. 2 Turns the rhythm parts and bass parts on or off. 3 Turns the bass part on or off. 4 Move the slider to adjust the volume of the accompaniment. 5 Touch here to go back to the accompaniment type list.
Changing/Resetting the Piano Room Settings You can change various Piano Room settings as you like. You can also restore all Piano Room settings to the default. 1 Press the [PIANO ROOM] button to call up the Piano Room display. 1 To change the settings of the accompaniment, touch (Accompaniment) to call up the session players. Touch (Settings) to change the settings. 2 Shaded items in the list below are available only when session players are displayed.
Recording your Performance in the Piano Room You can record your performance in Piano Room as a MIDI Song (page 67) to the User memory of the instrument. 1 Press the [PIANO ROOM] button to call up the Piano Room display. 2 Touch [I] (Rec) to start recording, and then play the keyboard. Make any necessary settings, such as the type of piano, calling up the session players, and so on. If you want to record from the Intro section of the accompaniment, start the accompaniment.
3 Voices – Playing the Keyboard – The instrument features a wide variety of exceptionally realistic instrumental Voices, including piano, guitar, strings, brass, wind instruments and more. Playing Preset Voices The Voices can be played via three keyboard parts: Main, Layer and Left. These playing modes allow you to play just one single Voice (Main), play two different Voices in layer (Main and Layer), or play different Voices in the right- and left-hand areas of the keyboard (Main/Layer and Left).
Using the panel buttons 1-1 To select the keyboard part, press the VOICE [MAIN/LAYER/LEFT] button repeatedly if necessary until the desired part’s lamp lights. 1-1 1-2 1-2 Press one of the desired VOICE category buttons to call up the Voice Selection display. NOTE • You can select Voices for the Main and Layer parts simply by using the Voice category selection buttons. While holding down one of the Voice category selection buttons, press another Voice category selection button.
Voice Characteristics At the left side of each Voice name on the Voice Selection display, the icon which represents its defining characteristic is indicated. There are various Voice characteristics; however, only the following ones are covered here. For detailed explanations, refer to the “VoiceSetting” section in the Reference Manual on the website (page 9). • : VRM Voices (page 53) These recreate the characteristic string resonance of a real acoustic piano. • / : Super Articulation (S.Art, S.
Maintaining the Left Voice even when releasing the keys (Left Hold) When the Left Hold function is set to “On” via [Menu] [Keyboard], the Voice for the Left part is held even when the keys are released. Non-decaying Voices such as strings are held continuously, while decay-type Voices such as piano decay more slowly (as if the sustain pedal has been pressed). When the Left Hold is “On,” an “H” indication appears at the left side of the keyboard illustration in the center of the Home display.
Playing Realistic Resonance-enhanced Piano Sounds (VRM Voices) Simply by selecting a VRM Voice, you can enjoy the VRM effect (see below). An icon [VRM] is shown at the left side of the Voice name of a VRM Voice on the Voice Selection display. The default setting of the VRM effect is on. You can turn it on or off, and adjust the depth via [Menu] [Voice Setting] [Piano] 1/2 page. For details, refer to the Reference Manual on the website (page 9).
Setting the Split Point The key which divides the keyboard into two or three areas is referred to as “Split Point.” There are two types of Split Point: “Left Split Point” and “Style Split Point.” The “Left Split Point” divides the keyboard into the Left part area and Main part area while the “Style Split Point” divides the keyboard into the Chord section for Style playback (page 59) and the Main or Left part area.
Playing Super Articulation Voices The Super Articulation Voices (S.Art Voices and S.Art2 Voices) enable you to create subtle, very realistic musical expressions, simply by how you play. The [S.Art]/[S.Art2] icons are shown beside the Voice name of Super Articulation Voices (S.Art, S.Art2) on the Voice Selection display or the Home display. For specific performance instructions on certain Voices, you can call up the Information window of the selected S.Art Voice or S.
Creating Original Organ Flutes Voices The instrument uses advanced digital technology to recreate the legendary sound of vintage organs. Just as on a traditional organ, you can create your own sound by increasing and decreasing the levels of the flute footages. The created Voice can be saved for future recall. NOTE The term “footage” is a reference to the sound generation of traditional pipe organs, in which the sound is produced by pipes of different lengths (in feet).
1 Volume Determines the volume of the entire Organ Flutes sound. 2 Rotary/ Tremolo* Alternately switches the Rotary Speaker speed between “Slow” and “Fast.” This parameter is available only when an effect type which contains “Rotary” in its name is applied. 3 Vibrato* Turns the vibrato on or off, and allows you to adjust the vibrato depth and vibrato speed. 4 Response Adjusts the response speed of both the Attack and Release portions of the sound.
4 Styles – Playing Rhythm and Accompaniment – The instrument features a variety of accompaniment and rhythmic backing patterns (called “Styles”) in a variety of different musical genres including pop, jazz, and many others. Each Style features Auto Accompaniment, letting you produce automatic accompaniment playback simply by playing “chords” with your left hand. This lets you automatically recreate the sound of a full band or orchestra — even if you’re playing by yourself.
2 Touch the desired Style. For the example score above, touch [Country & Blues] category and touch [Modern Country], and then touch [Country 8Beat 2]. The Style category can be selected also by pressing one of the STYLE buttons. NOTE You can change the sub category by pressing the same Style category button twice or more. 3 Make sure that the STYLE CONTROL [ACMP ON/OFF] button is turned on.
Style Characteristics The Style type and its defining characteristics are indicated on the Preset Style icon (such as Pro and Session). For details about these icons, refer to the “StyleSetting” section in the Reference Manual on the website (page 9). A Style generally consists of eight parts (channels): rhythm, bass, etc. You can add variations and change the feeling of a Style by selectively turning channels on/off or by changing the Voices (page 100).
To Start/Stop Playing [R/J] (START/STOP) Starts playback of the rhythm part of the current Style. To stop playback, press this button again. Playing back both rhythm and auto accompaniment ([ACMP ON/OFF] button) If you turn on the [ACMP ON/OFF] button, both the rhythm part and auto accompaniment can be played back when playing chords in the chord section during Style playback. NOTE • The rhythm does not sound for some Styles.
Changing Variation (Sections) During Style Playback Each Style features four different Main sections, four Fill-in sections and a Break section. By using these sections effectively, you can easily make your performance sound more dynamic and professional. The section can be freely changed while the Style is playing back. MAIN VARIATION [A] − [D] Press (or touch) one of the MAIN VARIATION [A] – [D] to select the desired Main section (the button lights in red).
Calling up Panel Settings Appropriate for the Current Style (One Touch Setting) One Touch Setting is a powerful and convenient feature that automatically calls up the most appropriate panel settings (Voices or effects, etc.) for the currently selected Style, with the touch of a single button. If you’ve already decided which Style you wish to use, you can have One Touch Setting automatically select the appropriate Voice for you. 1 Select the desired Style (steps 1– 2 on page 58).
Memorizing original settings to One Touch Setting You can memorize your original panel settings to the One Touch Setting. The newly created One Touch Setting will be saved in the User tab as a User Style, and you can call up the One Touch Setting as a part of the Style file. 1 Select the desired Style to memorize your One Touch Setting. 2 Make the desired panel settings, such as those for Voices and Effects. 3 Press the [MEMORY] button of REGISTRATION MEMORY.
Changing the Chord Fingering Type You can change the Chord Fingering type depending on your playing style. 1 Call up the Split Point/Fingering window: [Menu] [Split&Fingering]. NOTE The Split Point/Fingering window can be called up also by holding the keyboard illustration on the Home display. 2 Touch []/[] to select the desired Fingering Type. Single Finger Lets you easily play chords in the accompaniment range of the keyboard using only one, two or three fingers.
AI Fingered Basically the same as Fingered, with the exception that less than three notes can be played to indicate the chords (based on the previously played chord, etc.). NOTE Only in the Piano Room, your performance in the Chord section produces the sound of the selected Voice as well as that of the accompaniment.
5 Song Playback – Playing and Practice Songs – For the Clavinova, “Song” refers to MIDI or audio data which include preset songs, commercially available music files, etc. Not only can you play back a Song and listen to it, but you can also play the keyboard along with Song playback. There are two kinds of Songs that can be recorded and played back on this instrument: MIDI Songs and Audio Songs.
1 On the Home display, touch the Song name to call up the Song Selection display. 2 Touch the desired Song on the display to select it.
Queuing the next Song for playback (MIDI Song only) While a MIDI Song is playing back, you can queue up the next MIDI Song for playback. This is convenient for chaining it to the next Song smoothly during stage performance. Select the Song you want to play next in the Song Selection display, while a Song is playing back. The [Next] icon appears at the right side of the corresponding Song name. To cancel this setting, touch the [Next] icon. 4 Touch [J] (Stop) to stop playback.
NOTE • The pop-up window mentioned here does not appear when you rewind or fast forward a MIDI Song not having Phrase Marks or an Audio Song by touching on the display. • Phrase Mark is a pre-programmed marker in certain MIDI Song data, which specifies a specific location in the Song. Moving the Song Playback Position In the Song area (when expanded) of the Home display, the current position of the Song playback is shown. This can be moved forward or backward by moving the slider on the display.
Changing the Size of the Score/Displaying Lyrics in a Score By touching (View Settings) shown on the lower right of the display, you can change the settings of the Score display, such as changing the size of the score, or displaying note names or lyrics within the score, and so on. For details on the Score display, refer to the Reference Manual on the website (page 9). NOTE Lyrics can be shown only when the MIDI Song contains lyric data.
One-handed Practice with the Guide Function MIDI Audio You can mute the right-hand part to try practicing that part on your own. The explanations here apply when you practice the right-hand part with “Follow Lights” of the Guide functions. The guide lamps indicate the notes you should play and when you should play them. You can also practice at your own pace — since the accompaniment waits for you to play the notes correctly.
Other guide functions In addition to the “Follow Lights” function explained above, there are more functions in the Guide features, for practicing the timing of playing the keys (Any Key mode), for Karaoke or for practicing a song at your own pace (Your Tempo). You can select the functions via [Menu] [SongSetting] [Guide] [Type]. For more information, refer to the Reference Manual on the website (page 9).
Top of the Song A B End of the Song NOTE • When you want to repeat from the top of the song to somewhere in the middle of the song: 1. Turn on the A-B Repeat icon, and then start Song playback. 2. Touch the A-B Repeat icon again at the desired ending point (B). • Specifying only Point A results in repeat playback between Point A and the end of the Song. 4 Touch [J] (Stop) to stop playback. The Song position will return to Point A. After your practice, turn off (A-B Repeat).
3 In the Song area (when expanded) of the Home display, touch to call up the Setup window. (Pitch Shift) NOTE Pitch Shift cannot be applied to MP3 files of 48.0 kHz sample rate. 4 Set the value by touching [L]/[R]. Adjusting the Playback Speed (Time Stretch) Audio Like Tempo adjustment of a MIDI Song (page 39), you can adjust the playback speed of an Audio Song in USB flash drive by stretching or compressing it.
6 Song Recording – Recording Your Performance – This instrument allows you to record your performance in the following two methods. • MIDI Recording With this method, recorded performances are saved to the User memory of the instrument or a USB flash drive as an SMF (format 0) MIDI file. If you want to re-record a specific section or change Voices and edit other parameters, use this method.
1 Make the necessary settings such as Voice and Style selection. 2 On the Home display, touch [] at the upper right to expand the Song area, and then touch [I] (Rec) to call up the Song Recording window. 2 NOTE • The Song Recording window can be called up also by pressing the SONG CONTROL [I] (Rec) button. Here and in the later steps, the operation in the Song area of the Home display can be controlled by the SONG CONTROL buttons (page 69).
6 After you finish your performance, touch [J] (Stop) on the Home display to stop recording. 8 (MIDI Recording only) 6 7 7 To hear the recorded performance, touch [R/K] (Play/Pause). 8 Save the recorded performance. In MIDI Recording After recording, (Save) appears in the Song area of the Home display. This icon indicates that recorded data exists but has not yet been saved.
Independently Recording the Right- and Left-hand Parts (MIDI Recording) With MIDI Recording, you can create a MIDI Song which consists of 16 channels (parts) by recording each channel independently, allowing you create a complete piece which may be difficult to play live.
5 After you finish your performance, touch [J] (Stop) on the Home display to stop recording. 5 6 7 6 To hear the recorded performance, touch [R/K] (Play/Pause). If you want to record the right-hand performance from scratch, return to step 1. Since recording of the right-hand part is completed, go on to the next step to record the lefthand part. 7 Touch [I] (Rec) to call up the Song Recording window, and then confirm that [Overwrite MIDI] is selected.
When the Left part is turned on from the Home display Touching [Left Hand] sets only “Left” to [Rec], and other parts to [Off]. The target channel for recording Left part is automatically set to channel 2. NOTICE Previously recorded data will be overwritten if you set channels which already have recorded data to [Rec]. To check whether each channel has recorded data or not, first cancel recording, and then play back the Song while viewing the [Song Ch1-8] tab and [Song Ch9-16] tab on the Mixer display.
Recording to Specific Channels (MIDI Recording) With MIDI Recording, you can create a MIDI Song which consists of 16 channels (parts) by recording each channel independently, allowing you create a complete piece. By default, keyboard parts are assigned to channels 1 − 3, and Style parts such as rhythm and bass are assigned to channels 9 − 16. Here, you will learn how to specify the channel and part for recording as you like, and overdub the channels one by one.
Specifying recording parts quickly Touching the buttons at the bottom left ([Keyboard All], [Style All], [Left Hand] or [Right Hand]) can set [Rec]/[Off] for multiple parts at once. This is convenient when you to separately record the Style parts and the keyboard parts, or the right-hand parts and the left-hand part. • [Keyboard All]: You can turn all of the Keyboard parts (Main, Left and Layer) [Rec] or [Off] together. • [Style All]: You can turn all of the Style parts [Rec] or [Off] together.
7 Touch [I] (Rec) to call up the Song Recording window, and then confirm that [Overwrite MIDI] is selected. 7 8 8 Specify the next target channel and part for recording, and record your performance (steps 3 – 6). As soon as you start recording, the previously recorded channel also starts playback. You can set whether to play back the previously recorded channel(s) in the Mixer display (page 100).
Converting a MIDI Song to an Audio Song You can convert a recorded MIDI Song in the User memory or USB flash drive to an Audio Song. Conversion is executed by playing back the MIDI Song and re-recording it as an Audio Song. By default, the converted data is saved in WAV format, in the same way as Audio recording (page 76). NOTE Before using a USB flash drive, be sure to read “Connecting USB Devices” on page 103. 1 Call up the Song Selection display which contains the MIDI Song to be converted.
7 Microphone – Adding Vocal Harmony Effects to Your Singing – By connecting a microphone to the [MIC/LINE IN] jack (standard mono phone jack), you can enjoy singing along with your keyboard performance or with Song playback. The instrument outputs your vocals through the built-in speakers. Moreover, you can automatically apply various Vocal Harmony effects to your voice as you sing.
Applying Vocal Harmony Effects to Your Voice 1 Connect the microphone to the instrument (page 86). 2 Call up the Vocal Harmony display via [Menu] [VocalHarmony]. 4 Vocal Harmony name Mode 3 6-1 (When the Mode is set to “Vocoder” or “Vocoder Mono”) NOTE The display shown at left is called up when the Harmony Mode is set to “Vocoder.” A different display appears when the Harmony Mode is set to “Chordal.” 3 Make sure that Harmony is set to “On.
6 Follow the steps below, depending on which Type (and mode) you selected. If you selected the Chordal type: 6-1 Make sure that the [ACMP ON/OFF] button is turned on. 6-2 Play back a Style, or play back a Song which contains chords. Vocal harmonies based on the chords are applied to your singing. If you selected the Vocoder or Vocoder-Mono type: 6-1 As necessary, change the “Keyboard” setting to “Off,” “Upper,” or “Lower.
8 Registration Memory/Playlist – Saving and Recalling Custom Panel Setups – Registration Memory (page 90) You can register your custom panel settings to each of the Registration Memory [1] – [8] buttons. You can also save all eight registered panel setups as a single Registration Memory Bank file. If you select a Registration Memory Bank file beforehand, you can easily call up the registered settings simply by pressing a button during your performance.
Saving and Recalling Custom Panel Setups with Registration Memory Registering Your Panel Setups 1 2 Set up the panel controls (such as Voice, Style and so on) as desired. Refer to “Parameter Chart” in the Data List on the website (page 9) for a list of parameters that can be registered with the Registration Memory function. Press the [MEMORY] button in the REGISTRATION MEMORY section to call up the Registration Memory window.
Saving the Registration Memory as a Bank File All of the panel settings are registered to the eight Registration Memory buttons as a single Bank file. On the Home display, touch [] at the upper right corner to show the Registration area, and then touch the area to call up the Registration Bank Selection display. 1 2 NOTE In general, Registration Memory data (Bank files) is compatible between the CVP-909/CVP-905 and CVP-809/CVP-805.
Confirming the Registration Memory Information You can call up the information window to confirm which Voices and Style are memorized to the [1] – [8] buttons of a Registration Memory Bank. 1 Call up the Registration Bank Selection display, and then select the desired Bank. 2 Touch (Information) to call up the Registration Bank Information window. This display consists of two pages: Voice-related and Style-related. You can alternate between the two via []/[]. For switching the pages.
2 Enter the search options in the box. • Tag: Enter tags (see below) to the box, or select tags from the list by touching [Existing Tag List]. If you want to enter multiple tags to the box, insert a space between each tag. • Song: Enter the Song name. • Style: Enter the Style name. • Style Tempo: Enter the Style tempo range. To clear each search query, touch [Clear]. To clear all, touch [All Clear]. 3 Touch (Filter) to show the search result.
Using Playlists to Manage a Large Repertoire of Panel Setups The Playlist is useful for managing multiple set lists for your performances. You can select only the desired files from a large repertoire (the huge number of the Registration Memory Bank files) and create a new set list for each performance. Adding a Record (Link to a Bank file) to a Playlist By adding Records to a Playlist, you can directly recall desired Registration Memory Bank files from the Playlist for each performance.
4 If necessary, edit the Record. The newly added Playlist Record simply recalls the selected registration Bank file. If you want to set more detailed settings (such as directly recalling a specified Registration Memory number), you can edit the Record. Record name File path of the Registration Bank file linked to the Record. This file will be recalled by selecting the Record. 4-2 Touch to edit the Record. (Record name) Determines the name of the Record.
Recalling Custom Panel Setups via the Playlist 1 Call up the Playlist display via [Menu] [Playlist]. 2 4 Registration Memory number called up when the Record is loaded. Display called up after loading the Record. 2 Touch the Playlist name to call up the Playlist Selection display. 3 Select the desired Playlist file. 4 Select the Record name on the Playlist display, and then touch [Load].
Deleting the Record from the Playlist 1 On the Playlist display, touch the desired Record to delete. 2 Touch [Delete]. 3 Touch [Yes] to delete the Record. 4 Touch (Save) to save the edited Playlist file. Copying the Playlist Records from Another Playlist (Append Playlist) “Append Playlist” allows you to copy the existing Playlist file and add it to the current Playlist file. 1 Touch [Append Playlist] to call up the Playlist File Selection display. 2 Touch the desired Playlist file to append.
9 Mixer – Editing the Volume and Tonal Balance – The Mixer gives you intuitive control over aspects of the keyboard parts and Song/Style channels, including volume balance and the timbre of the sounds. It lets you adjust the levels and stereo position (pan) of each Voice to set the optimum balance and stereo image, and lets you set how the effects are applied. This chapter covers the basic procedures for the Mixer. For details, refer to the Reference Manual on the website (page 9).
3 Audio Use this display when you want to adjust the balance among audio sounds input via the USB Audio Interface function and Bluetooth Audio function, etc. (page 107). Master Unlike the other displays, use this display when you want to adjust the tonal characteristics of the entire sound (except for Audio Songs) of this instrument. Touch a tab for editing the desired parameters. Filter For adjusting the Harmonic Content (resonance) and sound brightness.
4. Touch (Save) to call up the Song Selection display, and then save as a Song file (page 32). To save the “Audio” Mixer settings: Saving operation is not necessary. Audio Mixer settings are retained even when the power is turned off. To store the “Master” Mixer settings: Your original edits can be stored as a Master Compressor type and Master EQ type. If you want to recall the settings for future use, select the corresponding type at the upper right of each display. 1.
10 Connections – Using Your Instrument with Other Devices – CAUTION Before connecting the instrument to other electronic devices, turn off the power of all the devices. Also, before turning any devices on or off, make sure to set all volume levels to minimum (0). Otherwise, damage to the devices, electrical shock, or even permanent hearing loss may occur. NOTICE Do not place any devices in an unstable position. Doing so may cause the device to fall and result in damage.
1 [AUX PEDAL] jack For connecting a separately sold foot controller or footswitch (page 112). 2 MIDI terminals For connecting to a computer or external MIDI device, such as a synthesizer or a sequencer (page 111). 3 [USB TO HOST] terminal For connecting to a computer or smart device such as smartphone or tablet (page 105). 4 AUX OUT [L/L+R]/[R] jacks For connecting to external powered speaker systems (page 110).
Connecting USB Devices ([USB TO DEVICE] terminal) You can connect a USB flash drive, USB display adaptor or a USB wireless LAN adaptor to the [USB TO DEVICE] terminal. You can save data you’ve created on the instrument to the USB flash drive (page 32), as well as connect to an external monitor by using a USB display adaptor to show the instrument’s display (page 111) or connect the instrument to a smart device via USB wireless LAN adaptor (page 106).
Formatting a USB Flash Drive When a USB flash drive is connected, a message may appear indicating that the connected USB flash drive is not formatted. If so, execute the format operation. NOTICE The Format operation deletes any previously existing data. Make sure that the USB flash drive you are formatting does not contain important data. Proceed with caution, especially when connecting multiple USB flash drives. 1 Connect a USB flash drive for formatting to the [USB TO DEVICE] terminal.
Connecting to a Computer ([USB TO HOST] terminal) By connecting a computer to the [USB TO HOST] terminal, you can transmit/receive MIDI data or Audio data between the instrument and the computer. For details on using a computer with this instrument, refer to the “Computer-related Operations” on the website (page 9). CAUTION If you are using a DAW (digital audio workstation) application with this instrument, set the Audio Loopback function (page 105) to off.
Connecting to a Smart Device ([AUX IN] jack/Bluetooth/[USB TO HOST] terminal/Wireless LAN) Connecting a smart device such as a smartphone or tablet provides the following advantages: • By connecting via the [AUX IN] jack (page 107) or Bluetooth (page 108), you can hear the sound of the smart device through the built-in speakers of the instrument. • By connecting via the [USB TO HOST] terminal, you can transmit/receive audio data (USB Audio Interface function; page 105).
Listening to Audio Playback by the External Device through the Instrument’s Speaker ([AUX IN] jack/Bluetooth/[USB TO HOST] terminal) Audio playback by the connected device can be output from the instrument’s speaker. To input audio, connect an external device by one of the following methods.
Listening to Audio data from a Bluetooth-equipped device through this instrument (Bluetooth Audio Function) Before using the Bluetooth function, be sure to read “About Bluetooth” on page 109. You can play the sound of audio data saved in a Bluetooth-equipped device, such as a smartphone or portable audio player, on this instrument and listen to it through the built-in speaker of the instrument.
3 Touch [Pairing] to pair with a Bluetooth-equipped device. If you wish to connect your Bluetooth-equipped device to the instrument, the device needs to be paired with the instrument first. Once the device has been paired with this instrument, there is no need to perform pairing again. NOTE • “Pairing” means to register Bluetooth-equipped devices on this instrument, and establish the mutual recognition for wireless communication between the two.
Using an External Speaker System for Playback (AUX OUT [L/L+R]/[R] jacks) You can connect a stereo system to amplify the instrument’s sound by using the AUX OUT [L/L+R]/[R] jacks. The microphone or guitar sound connected to the instrument’s [MIC/LINE IN] jack is output at the same time. NOTICE • To avoid possible damage, first turn on the power to the instrument, and then to the external device. When turning off the power, first turn off the power to the external device, and then to the instrument.
Connecting External MIDI Devices (MIDI terminals) By using MIDI cables and connecting to an external MIDI device (keyboard, sequencer, etc.) or a computer, you can control the MIDI device from the instrument or control the instrument from the MIDI device. • MIDI [IN]: Receives MIDI messages from another MIDI device. • MIDI [OUT]: Transmits MIDI messages generated by the instrument to another MIDI device. • MIDI [THRU]: Simply relays the MIDI messages received at MIDI IN.
Connecting a Microphone or Guitar ([MIC/LINE IN] jack) To the [MIC/LINE IN] jack (standard 1/4" phone jack), you can connect a microphone, guitar, or other various equipment. For instructions on connecting a microphone, refer to page 86. Note that you need to select “MIC” or “LINE IN” depending on the connected equipment. When the output level of the connected equipment (such as a microphone, guitar, bass) is low, set the [MIC/LINE] switch to “MIC.
Menu Display Function List This section explains simply and very briefly explains what you can do in the displays which are called up by touching each icon on the Menu display. Some functions are described in this Owner’s Manual on the pages indicated below. For details about each function, refer to the Reference Manual on the website (page 9). Description Pages Tempo For adjusting the tempo of MIDI Song, Style or Metronome.
Menu Description By recording chord progressions you play, the Style can be played back automatically in response to the chord progression data—without the need for you to play chords in the chord section of the keyboard. Chord Looper – Pedal Determines the functions assigned to the pedals. – Assignable Determines the functions assigned to the ASSIGNABLE [1] – [4] buttons. 31 Voice Edit Lets you edit the preset Voices to create your own Voices.
Menu Description For making the settings for the instrument’s speakers and the external monitor. 111 Touch Screen/ Display For editing the parameters for the display settings, such as the theme of the home display, brightness, and touch panel calibration. 23 Parameter Lock Determines which parameters (effect, Split Point, etc.) will not be changed when the panel setups are changed via Registration Memory.
CVP-909 (Grand piano type) Assembly CAUTION • Assemble the unit on a hard and flat floor with ample space. • Be careful not to confuse or misplace the parts, and be sure to install all parts in the correct orientation. Please assemble the unit in accordance with the sequence described here. • Assembly should be carried out by at least four persons. • Be sure to use only the included screws of the specified sizes. Do not use any other screws.
2 Attach the three legs and three leg beams. 3 Attach the lyre braces. Refer to the diagram below to verify the orientation of the legs. Rear leg 1 Front leg Front leg 1 Install and tighten four screws on each leg, starting with one of the front legs. 4 × 16 mm thin screws 6 × 40 mm fixing screws 1 Attach the lyre braces using the four thin screws (4 × 16 mm). 4 Raise the unit to the standing position. CVP-909 (Grand piano type) Assembly Use the front legs as support to raise the unit.
5 Install the pedal box. 1 Remove the twist tie and tape that affix the pedal cord to the upper portion of the pedal box. . 6 × 20 mm fixing screws Tape Twist tie 2 Attach the front side of the pedal box to the bottom of the unit by finger-tightening the two fixing screws (6 × 20 mm). 5 Loosen the four screws that were attached in step 3, and then securely tighten the four screws again while pushing the lyre braces in the direction of arrows as illustrated.
6 Rotate the adjuster until it comes in firm contact with the floor surface. After completing the assembly, please check the following. • Are there any parts left over? Review the assembly procedure and correct any errors. • Is the instrument clear of doors and other movable fixtures? Move the instrument to an appropriate location. • Does the instrument make a rattling noise when you shake it? Tighten all screws.
CVP-909 Assembly CAUTION • Assemble the unit on a hard and flat floor with ample space. • Be careful not to confuse or misplace the parts, and be sure to install all parts in the correct orientation. Please assemble the unit in accordance with the sequence described here. • Assembly should be carried out by at least two persons. • Be sure to use only the included screws of the specified sizes. Do not use any other screws. Use of incorrect screws can cause damage or malfunction of the product.
2 Attach units B and C to unit A. 1 Align units B and A so that the protrusion fits into the hole. 4 Attach unit D to unit A. 1 Fix unit D to the bottom surface of unit A using two screws J. 2J 1J D 2 Fix unit B to the bottom surface of unit A using two screws H. H Attach the parts, pressing unit B onto unit A so that the two fit tightly together. 2 Fix unit D to the speaker box of unit A using two screws J. If the screw holes do not align, loosen the other screws and adjust the position of unit D.
3 Pass the pedal cord from under unit D to the backside of the main unit. 8 Insert the AC power cord plug into the [AC IN] jack. 9 Rotate the adjuster until it comes in firm contact with the floor surface. 4 3 4 Place unit F on the bracket of unit D. 5 Attach unit F to unit D using three screws M. M 7 Connect the pedal cord. 10 Attach the headphone hanger. 1 Insert the pedal cord plug into the pedal connector.
Transporting CAUTION When moving the instrument, always hold the bottom of the main unit. Do not hold the key cover or top portion. Improper handling can result in damage to the instrument or personal injury. Hold here. Do not hold here. If you move to another location, you can transport the instrument along with other belongings. You can move the unit as it is (assembled) or you can disassemble the unit down to the condition it was in when you first took it out of the box.
CVP-905 Assembly CAUTION • Assemble the unit on a hard and flat floor with ample space. • Be careful not to confuse or misplace the parts, and be sure to install all parts in the correct orientation. Please assemble the unit in accordance with the sequence described here. • Assembly should be carried out by at least two persons. • Be sure to use only the included screws of the specified sizes. Do not use any other screws. Use of incorrect screws can cause damage or malfunction of the product.
4 7 Secure A. 1 Adjust the position of A so that the inner lines of the side boards of A and D/E are aligned as shown in the illustration. 2 Attach A using six screws F. 3 Securely tighten the screws G on the top of B that were attached in step 2-1. Attach the headphone hanger. Attach the headphone hanger using two screws J as shown in the illustration. A D J E F After completing the assembly, please check the following.
Troubleshooting Overall A click or pop is heard when the power is turned on or off. Electrical current is being applied to the instrument. This is normal. The power is automatically turned off. This is normal and due to the Auto Power Off function. If necessary, set the parameter of the Auto Power Off function (page 19). Noise is heard from the instrument’s speakers. Noise may be heard if a mobile phone is used near the instrument or if the phone is ringing.
Overall An existing file is not shown on the display. The file extension (.MID, etc.) may have been changed or deleted. Manually rename the file on a computer, adding the appropriate extension. Data files with names of more than 50 characters cannot be handled by the instrument. Rename the file, reducing the number of characters to 50 or less. Metronome, MIDI Song or Style goes out of tempo slightly when you play the keyboard. This occurs infrequently when Grand Expression Modeling is set to “Dynamic.
Song (MIDI) The measure number is different from that of the score in the Song Position display, shown by pressing the [LL] (Rewind)/[RR] (Fast forward) buttons. This happens when playing back music data for which a specific, fixed tempo is set. (MIDI) When playing back a Song, some channels do not play. Playback of these channels may be set to off. Turn playback on for those channels that are set to off (page 100).
Mixer The sound seems strange or different than expected when changing a rhythm Voice (drum kit, etc.) of the Style or Song from the Mixer. When changing the rhythm/percussion Voices (drum kits, etc.) of the Style and Song from the VOICE parameter, the detailed settings related to the drum voice are reset, and in some cases you may be unable to restore the original sound. You can restore the original sound by selecting the same Song or Style again.
Specifications CVP-909GP (Grand Piano type) CVP-909 Width [For models with polished finish] [1,430 mm (56-5/16")] 1,426 mm (56-1/8") [1,429 mm (56-1/4")] 1,420 mm (55-15/16") [1,423 mm (56-0")] Height [For models with polished finish] With music rest closed [913 mm (35-15/16")] 868 mm (34-3/16") [872 mm (34-5/16")] 868 mm (34-3/16") [871 mm (34-5/16")] With music rest raised [1,076 mm (42-3/8")] 1,027 mm (40-7/16") [1,028 mm (40-1/2")] 1,026 mm (40-3/8") [1,027 mm (40-7/16")] Product Name Siz
CVP-909GP (Grand Piano type) Types Reverb 65 Preset + 30 User Chorus 107 Preset + 30 User 106 Preset + 30 User Insertion Effect 358 Preset + 30 User 322 Preset + 30 User Variation Effect 358 Preset + 30 User 322 Preset + 30 User Master Compressor 5 Preset + 30 User Master EQ 5 Preset + 30 User Part EQ 27 Parts Vocal Harmony Functions 54 Preset + 60 User Intelligent Acoustic Control (IAC) Yes Stereophonic Optimizer Yes Dual (Layer) Yes Split Styles Preset Number of Styles Fingeri
CVP-909GP (Grand Piano type) Functions Bluetooth (May not have this functionality depending on the country in which you purchased the product.) Bluetooth version 4.2 Supported profile A2DP Compatible codec Wireless output Maximum communication distance Radio Frequency Miscellaneous Yes Yes (by using a commercially available USB display adaptor*) * For a list of compatible devices, access the “Yamaha Downloads” website. Yes (display/button lamps) 44.1 kHz, 24 bit, stereo Internal Memory approx.
Index A F A-B Repeat ................................................................ 73 Accessories ................................................................. 9 ACMP ON/OFF button .................................................. 61 AI Fingered ................................................................ 66 AI Full Keyboard ......................................................... 66 Assembly ................................................116, 120, 124 ASSIGNABLE buttons ....................
Metronome ................................................................ 39 Microphone ................................................................ 86 MIDI connection ........................................................111 MIDI Recording ........................................................... 76 MIDI Song ................................................................. 67 Mixer ........................................................................ 98 Monitor ................................
MEMO CVP-909/CVP-905 Owner’s Manual 135
GNU GENERAL PUBLIC LICENSE Version 2, June 1991 Copyright © 1989, 1991 Free Software Foundation, Inc., 51 Franklin Street, Fifth Floor, Boston, MA 02110-1301 USA Everyone is permitted to copy and distribute verbatim copies of this license document, but changing it is not allowed.
6. 7. Each time you redistribute the Program (or any work based on the Program), the recipient automatically receives a license from the original licensor to copy, distribute or modify the Program subject to these terms and conditions. You may not impose any further restrictions on the recipients’ exercise of the rights granted herein. You are not responsible for enforcing compliance by third parties to this License.
GNU LESSER GENERAL PUBLIC LICENSE Version 2.1, February 1999 Copyright © 1991, 1999 Free Software Foundation, Inc., 51 Franklin Street, Fifth Floor, Boston, MA 02110-1301 USA Everyone is permitted to copy and distribute verbatim copies of this license document, but changing it is not allowed. [This is the first released version of the Lesser GPL. It also counts as the successor of the GNU Library Public License, version 2, hence the version number 2.1.
b) Use a suitable shared library mechanism for linking with the Library. A sections as part of a whole which is a work based on the Library, the distribution of the whole must be on the terms of this License, whose permissions for other licensees extend to the entire whole, and thus to each and every part regardless of who wrote it.
This section is intended to make thoroughly clear what is believed to be a consequence of the rest of this License. 12. If the distribution and/or use of the Library is restricted in certain countries either by patents or by copyrighted interfaces, the original copyright holder who places the Library under this License may add an explicit geographical distribution limitation excluding those countries, so that distribution is permitted only in or among countries not thus excluded.
libpng This copy of the libpng notices is provided for your convenience. In case of any discrepancy between this copy and the notices in the file png.h that is included in the libpng distribution, the latter shall prevail. COPYRIGHT NOTICE, DISCLAIMER, and LICENSE: If you modify libpng you may insert additional notices immediately following this sentence. This code is released under the libpng license. libpng versions 1.0.7, July 1, 2000 through 1.6.
Files or Software are furnished to do so, provided that either (a) this copyright and permission notice appear with all copies of the Data Files or Software, or (b) this copyright and permission notice appear in associated Documentation. Except as contained in this notice, the name of the X Consortium shall not be used in advertising or otherwise to promote the sale, use or other dealings in this Software without prior written authorization from the X Consortium.
This Font Software is licensed under the SIL Open Font License, Version 1.1. This license is copied below, and is also available with a FAQ at: http://scripts.sil.org/OFL Apache License2.0 Copyright (c) 2009-2018 Arm Limited. All rights reserved. SPDX-License-Identifier: Apache-2.0 SIL OPEN FONT LICENSE Version 1.
Credits and Copyrights for the pre-installed Songs All I Want For Christmas Is You Words and Music by Mariah Carey and Walter Afanasieff Copyright © 1994 UNIVERSAL TUNES, BEYONDIDOLIZATION, SONY MUSIC PUBLISHING (US) LLC, TAMAL VISTA MUSIC and KOBALT MUSIC COPYRIGHTS SARL All Rights for BEYONDIDOLIZATION Administered by UNIVERSAL TUNES All Rights for SONY MUSIC PUBLISHING (US) LLC and TAMAL VISTA MUSIC Administered by SONY MUSIC PUBLISHING (US) LLC, 424 Church Street, Suite 1200, Nashville, TN 37219 All Ri
Hey Jude Words and Music by John Lennon and Paul McCartney Copyright © 1968 Sony Music Publishing (US) LLC Copyright Renewed All Rights Administered by Sony Music Publishing (US) LLC, 424 Church Street, Suite 1200, Nashville, TN 37219 International Copyright Secured All Rights Reserved Higher Love Words and Music by Will Jennings and Steve Winwood Copyright © 1986 BLUE SKY RIDER SONGS and F.S. MUSIC LTD. All Rights for BLUE SKY RIDER SONGS Administered by IRVING MUSIC, INC. All Rights for F.S. MUSIC LTD.
All Rights on behalf of Please Don’t Forget To Pay Me Music Administered by Universal Music Works All Rights on behalf of Reservoir 416 Administered Worldwide by Reservoir Media Management, Inc.
For U.S.A. This transmitter must not be co-located or operated in conjunction with any other antenna or transmitter. (554-M01 FCC transmitter 01) This equipment complies with FCC radiation exposure limits set forth for an uncontrolled environment and meets the FCC radio frequency (RF) Exposure Guidelines. This equipment has very low levels of RF energy that is deemed to comply without testing of specific absorption rate (SAR). (554-M04 FCC portable 01) Important Notice: U.S.
For European Union and United Kingdom EN SIMPLIFIED EU DECLARATION OF CONFORMITY / SIMPLIFIED UK DECLARATION OF CONFORMITY Hereby, Yamaha Music Europe GmbH declares that the radio equipment type [CVP-909GP, CVP-909, CVP-905] is in compliance with Directive 2014/53/EU and the radio equipment regulations of UK. The full texts of the EU declaration of conformity and the UK declaration of conformity are available at the following internet address: https://europe.yamaha.com/en/support/compliance/doc.
ET LIHTSUSTATUD ELI VASTAVUSDEKLARATSIOON Käesolevaga deklareerib Yamaha Music Europe GmbH, et käesolev raadioseadme tüüp [CVP-909GP, CVP-909, CVP-905] vastab direktiivi 2014/53/EL nõuetele. ELi vastavusdeklaratsiooni täielik tekst on kättesaadav järgmisel internetiaadressil: https://europe.yamaha.com/en/support/compliance/doc.html EL ΑΠΛΟΥΣΤΕΥΜΕΝΗ ΔΗΛΩΣΗ ΣΥΜΜΟΡΦΩΣΗΣ ΕΕ Με την παρούσα ο/η Yamaha Music Europe GmbH, δηλώνει ότι ο ραδιοεξοπλισμός [CVP-909GP, CVP-909, CVP-905] πληροί την οδηγία 2014/53/ΕΕ.
For details of products, please contact your nearest Yamaha representative or the authorized distributor listed below. Pour plus de détails sur les produits, veuillez-vous adresser à Yamaha ou au distributeur le plus proche de vous figurant dans la liste suivante. NORTH AMERICA CANADA Yamaha Canada Music Ltd. 135 Milner Avenue, Toronto, Ontario M1S 3R1, Canada Tel: +1-416-298-1311 U.S.A. Yamaha Corporation of America 6600 Orangethorpe Avenue, Buena Park, CA 90620, U.S.A.
Yamaha Global Site https://www.yamaha.com/ Yamaha Downloads https://download.yamaha.