DIGITAL SOUND PROJECTOR YSP-500/HTY-750 SERVICE MANUAL IMPORTANT NOTICE This manual has been provided for the use of authorized YAMAHA Retailers and their service personnel. It has been assumed that basic service procedures inherent to the industry, and more specifically YAMAHA Products, are already known and understood by the users, and have therefore not been restated.
YSP-500/HTY-750 ■ TO SERVICE PERSONNEL WALL OUTLET 1. Critical Components Information Components having special characteristics are marked s and must be replaced with parts having specifications equal to those originally installed. 2. Leakage Current Measurement (For 120V Models Only) When service has been completed, it is imperative to verify that all exposed conductive surfaces are properly insulated from supply circuits. ● Meter impedance should be equivalent to 1500 ohms shunted by 0.15µF.
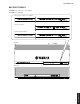
YSP-500/HTY-750Y ■ FRONT PANELS YSP-500 (T, K, A, B, G, E, L, V, J models) HTY-750 (B, G, E models) YSP-500 (T, K, A, B, G, E, L, V models) YSP-500 (J model) HTY-750 (B, G, E models) Top view Front view YSP-500/HTY-750 3
YSP-500/HTY-750 ■ REAR PANELS YSP-500 (T, K, A, B, G, E, L, V models) HTY-750 (B, G, E models) YSP-500/HTY-750 YSP-500 (J model) 4 YSP-500 (T model) (K model) (A model) (B, G, E models) (L model) (V model)
YSP-500/HTY-750Y YSP-500 (J model) HTY-750 (B, G, E models) ■ REMOTE CONTROL PANELS YSP-500 (T, K, A, B, G, E, L, V models) HTY-750 (B, G, E models) STANDBY/ON POWER POWER AV 電 源 電 源 電 源 AV TV TV VCR DVD AUX INPUT1 TV INPUT2 MACRO STB YSP-500 (J model) チューナー ビデオ DVD テレビ 入力1 入力2 マクロ AUX BS 音量モード CS 自動設定 地デジ 入力モード 地アナ スリープ テレビ TV AUTO VOL MODE SETUP INPUTMODE SLEEP 5BEAM ST+3BEAM 3BEAM 5ビーム ST+3ビーム 1 2 3 1 2 MY SUR. ステレオ 6 4 9 7 STEREO 4 5 7 8 SUR.
YSP-500/HTY-750 ■ SPECIFICATIONS / 参考仕様 ■ Amplifier Section / アンプ部 ■ Function Section / 機能部 Maximum Power / 実用最大出力 (EIAJ) [4 ohms, 10% THD] Woofer [100 Hz] ................................................................. 15 W/ch Tweeter [1 kHz] .................................................................... 2 W/ch Total Maximum Output Power / 総合最大出力 ................................................................................................ 62 W Decode Format / デコードフォーマット .....................
YSP-500/HTY-750 ■ INTERNAL VIEW T .......... K .......... A .......... B .......... G .......... The “ tion. Chinese model Korean model Australian model British model European model E .......... L .......... V .......... J ........... South European model Singapore model Taiwan model Japanese model 1 2 ” logo and “IntelliBeam” are trademarks of YAMAHA CorporaTruBass, SRS and the “ ” symbol are registered trademarks of SRS Labs, Inc.
4 LANGUAGE SETUP 3 MANUAL SETUP 2 AUTO SETUP CATEGORY 1 1 MEMORY 4) DISPLAY MENU 3) INPUT MENU STANDARD DIMMER AUTO DIMMER OSD SHIFT VCR AUX DVD IMAGE LOCATION LEFT L |---- C RIGHT C ----| R > AUTO, LAST TV/STB d) TREBLE GAIN ANALOG DIGITAL ANALOG DIGITAL DIGITAL Surround L Surround R Front L Front R Center Surround L Surround R Front L Front R Center Surround L Surround R b) BEAM TRAVEL LENGTH Front L Front R Center Surround L Surround R c) FOCAL LENGTH Front L Front R Center a) HORIZONTL AN
YSP-500/HTY-750 ■ SERVICE PRECAUTIONS / サービス時の注意事項 Safety measures 安全対策 • Some internal parts in this product contain high voltages and are dangerous. Be sure to take safety measures during servicing, such as wearing insulating gloves. ・ この製品の内部には高電圧部分があり危険です。修理の 際は、絶縁性の手袋を使用するなどの安全対策を行って ください。 • Note that positions indicated below are dangerous even after the power is turned off because an electric charge remains and a high voltage continues to exist there.
YSP-500/HTY-750 3. Removal of Grille Front 3. グリルフロントの外し方 a. b. c. d. a. b. c. d. Remove 5 screws (0) and 4 screws (A). (Fig. 3) Remove the front panel forward. (Fig. 3) Remove 12 screws (B) and 2 screws (C). (Fig. 3) Remove the grille front forward. (Fig. 3) 0のネジ5本、Aのネジ4本を外します。(Fig. 3) フロントパネルを前方へ取り外します。(Fig. 3) Bのネジ12本、Cのネジ2本を取り外します。(Fig. 3) グリルフロントを前方へ取り外します。(Fig. 3) 4. Removal of Grille Net ass’y (YSP-500) 4. グリルネットASSYの外し方 a. Remove 5 screws (D) and then remove the grille net ass’y. (Fig.
YSP-500/HTY-750 6. Removal of INPUT (1) and (2) P.C.B.s 6. INPUT (1)、(2)P.C.B.の外し方 * ※ INPUT(1)およびINPUT(2)P.C.B.を交換する場合、必 ず同時に行ってください。どちらか片方にバージョン の異なるP.C.B.を取り付けると、動作しないことがあ ります。 When replacing INPUT (1) and INPUT (2) P.C.B.s, be sure to replace them at the same time. Installing either P.C.B. of different version from the other may cause failure of operation. Hのネジ3本を外します。(Fig. 4) Iのネジ3本を外し、束線止めを外します。(Fig. 4) Jのネジ3本を外します。(Fig.5) サポートP.C.B.を取り外します。(Fig. 4) K のネジ10本を外し、リアパネルを取り外します。 (Fig. 5) f.
YSP-500/HTY-750 When checking the P.C.B.s: P.C.B.をチェックする場合には: * Put the rubber sheet and cloth over this unit. Then place the P.C.B.s upside down on the cloth and check it. (Fig. 7) * Reconnect all cables (connectors) that have been disconnected. * When connecting the flexible flat cable, be careful with polarity. * In this unit, the ground of P.C.B.s is connected to the chassis. When these P.C.B.s are removed from the chassis, connect the ground point to the chassis, using a ground lead wire or such.
YSP-500/HTY-750 Disassembly Procedures as far as Driver Woofer/ Tweeter スピーカーユニットまでの分解手順 1. Removal of Bottom Cover 1. ボトムカバーの外し方 a. Remove 3 screws (1) and then remove the side panel L. (Fig. 8) b. Remove 3 screws (2) and then remove the side panel R. (Fig. 8) c. Remove 30 screws (3), 4 screws (4), 4 screws (5) and 5 screws (6). (Fig. 8) d. Remove the bottom cover rearward. a. 1のネジ3本を外し、パネルサイドLを取り外します。 (Fig. 8) b. 2のネジ3本を外し、パネルサイドRを取り外します。 (Fig. 8) c. 3のネジ30本、4のネジ4本、5のネジ4本、6のネジ 5本を外します。(Fig. 8) d.
YSP-500/HTY-750 2. Removal of Top Cover 2. トップカバーの外し方 a. Remove 6 screws (7), 4 screws (8) and 9 screws (9). (Fig. 9) b. Remove the top cover rearward. a. 7 のネジ6本、 8 のネジ4本、 9 のネジ9本を外しま す。(Fig. 9) b. トップカバーを後方に取り外します。 Bottom view 7 7 8 9 Rear view Top cover トップカバー 9 9 YSP-500/HTY-750 Fig.
YSP-500/HTY-750 3. Removal of Grille Front 3. グリルフロントの外し方 a. b. c. d. a. 0のネジ5本、Aのネジ4本を外します。(Fig. 10) b. フロントパネルを前方へ取り外します。(Fig. 10) c. B のネジ12本、 C のネジ2本を取り外します。(Fig. 10) d. グリルフロントを前方へ取り外します。(Fig. 10) Remove 5 screws (0) and 4 screws (A). (Fig. 10) Remove the front panel forward. (Fig. 10) Remove 12 screws (B) and 2 screws (C). (Fig. 10) Remove the grille front. (Fig. 10) 4. グリルネットASSYの外し方 4. Removal of Grille Net ass’y (YSP-500) a. Dのネジ5本を外し、グリルネットASSYを取り外しま す。(Fig. 10) a.
YSP-500/HTY-750 5. Removal of Frame Front 5. フレームフロントの外し方 a. Remove 4 screws (E) and screw (F). (Fig. 11) b. Remove CB801 and CB903. (Fig. 11) c. Remove the frame front together with P.C.B.s. (Fig. 11) a. Eのネジ4本、Fのネジ1本を外します。(Fig. 11) b. CB801、CB903を外します。(Fig. 11) c. フレームフロントをP.C.B.と一緒に取り外します。 (Fig. 11) E Front view Frame front フレームフロント F INPUT (5) P.C.B. CB801 Bottom view YSP-500/HTY-750 Fig. 11 16 CB903 INPUT (4) P.C.B.
YSP-500/HTY-750 6. Removal of Frame Main 6. フレームメインの外し方 a. Remove 12 screws (G) and 3 screws (H). (Fig. 12) b. Remove the frame top. (Fig. 12) c. Remove 6 screws (I), 4 screws (J) and 2 screws (K). (Fig. 12) d. Remove CB601-604 and CB901-902. (Fig. 12) e. Remove the frame main together with cabinet tweeter. (Fig. 12) a. Gのネジ12本、Hのネジ3本を外します。(Fig. 12) b. フレームトップを取り外します。(Fig. 12) c. I のネジ6 本、 J のネジ4本、 K のネジ2 本を外しま す。(Fig. 12) d. CB601-604、CB901-902を外します。(Fig. 12) e. フレームメインをキャビネットツィーターと一緒の取 り外します。(Fig.
YSP-500/HTY-750 ■ UPDATING FIRMWARE / ファームウェアの書き込み After replacing the following parts with the replacement parts, update the latest firmware according to the following procedure. DSP P.C.B. Microprocessor (IC211) of DSP P.C.B. DSP (TI Flash ROM, IC212) of DSP P.C.B. ● Required tools 下記の部品をサービス部品に交換した場合、下記の手順 により最新のファームウェアの書き込みを行ってくださ い。 DSP P.C.B. DSP P.C.B.のマイコン(IC211) DSP P.C.B.のDSP(TI Flash ROM、IC212) ● 必要なツール • Program downloader programs For microprocessor .............................. FlashSta.
YSP-500/HTY-750 6.[Refer...]をクリックし、書き込むファームウェアを選 択します。(Fig. 3) ※ ID、およびMCU Typeは書き込みファイル 選択時、自動的に取り込まれます。 (Fig. 3) [OK]をクリックします。(Fig. 3) 6. Click [Refer...], and select the firmware name. (Fig. 3) * The ID code and MCU type are loaded when the file is selected. (Fig. 3) Click [OK]. (Fig. 3) When [Refer...] is clicked, the open file screen is displayed. [R e f e r . . . ]をクリックすると “ファイルを開く” が表示されま す。 Fig. 3 7.[Setting]をクリックし、通信速度の設定を行います。 (Fig. 4) 7. Click [Setting] and set the baud rate. (Fig.
YSP-500/HTY-750 9. プログラムの送信が終了すると、下記の画面が表示さ れ、 [OK] をクリックして “FlashSta.exe” を終了します。 (Fig. 6) 9. When the program transmission is completed, the screen appears as shown below. (Fig. 6) Click [OK] to end “FlashSta.exe”. Fig. 6 10. Disconnect the power cable of main unit from the AC outlet. 11. Disconnect the RS232C cross cable, RS232C conversion jig and flexible flat cable. 10. 本機の電源コードをACコンセントから抜きます。 11.
YSP-500/HTY-750 4. Select the self-diagnostic function menu “19-2. checksum”. Check that the displayed checksum is the same as the written firmware checksum. 4. ダイアグ“19-2. checksum”を選択します。 表示されたチェックサムが書き込んだファームウェアの チェックサムと同じであることを確認します。 CHECK SUM:8382 * When the displayed firmware version and checksum are different from written firmware version and checksum, repeat the steps from 1 to 11 of “Writing to the microprocessor” again.
YSP-500/HTY-750 3. 送信データ、ポートを選択します。 3. Select the data and port. · DSP HEX FILE Select “YSP500_data1_Verx_xr.hex”. ・ DSP HEX FILE “YSP500_data1_Verx_xr.hex”を選択します。 · RS232C Select the port of RS-232C. ・ RS232C 接続しているRS-232Cポートを選択します。 When [Refer...] is clicked, the open file screen is displayed. [Refer...] をクリックすると“ファイルを開く” が表示されます。 Select the firmware ファームウェアを選択します Select the port of RS-232C 接続しているRS-232Cポートを選択します * The port selection varies depending on OS of the PC. Windows 98/2000/Me .........
YSP-500/HTY-750 5. Connect the power cable of main unit to the AC outlet. While pressing the “VOL+” key and “VOL-” key of the main unit, press the “STANDBY/ON” key of the remote control to activate the self-diagnostic function. 5. 本機の電源コードをACコンセントに接続し、本機の “VOL+” キーと “VOL-” キーを押しながら、リモコンの “電 源”キーを押し、ダイアグを起動します。 a. Using the “UP” or “DOWN” key of the remote control, select the self-diagnostic function menu in the figure below. a. リモコンの “UP” キーまたは “DOWN” キーを使い、下 図のダイアグメニューを選択します。 TxTestCh [---] b.
YSP-500/HTY-750 7. Check the SUM. After downloading successfully, the value of “SUM from SET” is appeared. The procedure is completed when the value of “SUM from FILE” and “SUM from SET” matches. * When the displayed firmware version and checksum are different from written firmware version and checksum, repeat the steps from 1 to 8 of “Writing to the DSP” again. 7.
YSP-500/HTY-750 ■ SELF-DIAGNOSTIC FUNCTION / ダイアグ (自己診断機能) This unit has self-diagnostic functions that are intended for inspection, measurement and location of faulty point. There are 21 main menu items, each of which has submenu items. Listed in the table below are main menu items and submenu items. Note that not all menu items listed will apply to the models covered in this service manual. No.
YSP-500/HTY-750 No. 11 12 YSP-500/HTY-750 DOCK CHECK (Not applied to these models. / このモデル には適用されません) XM CHECK (Not applied to these models. / このモデル には適用されません) 13 DAB CHECK (Not applied to these models. / このモデル には適用されません) 14 HDMI AUDIO (Not applied to these models. / このモデル には適用されません) HDMI INFORMATION (Not applied to these models. / このモデル には適用されません) 15 26 Main menu 16 HDMI SELECT (Not applied to these models. / このモデル には適用されません) 17 VIDEO CONVERSION (Not applied to these models.
YSP-500/HTY-750 • Starting Self-Diagnostic Function ● ダイアグの起動 To activate the self-diagnostic function, press the “STANDBY/ON” key of the remote control while pressing 2 keys of the main unit as shown below at the same time. 本体の下図に示すキーを同時に押しながらリモコンの“電 源”キーを押すと、ダイアグが起動します。 Key of main unit / 本体キー Key of remote control / リモコンキー Press the “STANDBY/ON” key of the remote control while pressing these keys of the main unit.
YSP-500/HTY-750 • Display provided when Self-Diagnostic Function started When the monitor is connected, the list of main menu items is displayed on the monitor screen as shown below. (This list remains on display until the self diagnostic function is cancelled.) ● ダイアグ起動時の表示 モニターを接続してある場合は、モニターの画面に下図の ようにメインメニューの一覧が表示されます。(ダイアグ を解除するまで、この表示が保持されます) DIAGNOSTIC MENU 1.DSP THR 2.RAM THR 3.PRO LOGIC 4.MIC CHECK 5.VFD CHECK 6.MAN’ LTEST 7.RS232C 8.PRESET 9.AD CHECK 10.IF STATUS 11.DOCK TEST 12.XM TEST 13.
YSP-500/HTY-750 Version (1 alphabet) バージョン(英1文字) D-I_PROTECT C Cause: Amplifier IC is abnormal. 原因: アンプICが異常。 Turning on the power without correcting the cause will trigger the protection function to work 2 second later to shut off the power supply. 異常状態のまま電源オンすると、2秒後にプロテクション がかかり、電源が切れます。 DIG MUTE PRT Cause: Control section is abnormal. 原因: 制御部が異常。 If there is an abnormality between the microprocessor and DSP, the protection function works 25 seconds later and the power is turned off.
YSP-500/HTY-750 • Display during Self-Diagnostic Function operation During the self-diagnostic function operation, the menu list described in the section of the startup screen appears on the TV screen and the function at work is indicated on the FL display. The contents displayed during the function operation are described later in the section on details of functions. • Operation procedure of Main menu and Sub-menu There are 21 main menu items, each of which has some sub-menu items.
YSP-500/HTY-750 • Details of Self-Diagnostic Function menu ● ダイアグメニュー詳細 1. DSP THROUGH 1. DSP THROUGH The signal is not changed into beam and output from the channel specified by the sub-menu. When 2CH signals are input, they are distributed as follows at DSP (IC206 DSP P.C.B.). ビーム化は行わず、サブメニューの指定CHから出力し ます。 2CH信号入力時はDSP(IC206 DSP P.C.B.) にて以下の ように信号を振り分けます。 L CH ..... FRONT L, SURROUND L, CENTER, LFE R CH .... FRONT R, SURROUND R L CH ..... FRONT L、SURROUND L、CENTER、LFE R CH ....
YSP-500/HTY-750 [Digital] L/R L/R YDA141-SZ 1 Tweeter x8 YDA141-SZ 2 Tweeter x8 L/L Digital input DSP DIR L/R L/R L/L DAC ADC Analog input D-AMP LFE (SUBWOOFER OUT) Woofer L/R [Analog] L/R L/R YDA141-SZ 1 Tweeter x8 YDA141-SZ 2 Tweeter x8 L/L Digital input DSP DIR L/R L/R L/L Analog input ADC DAC YSP-500/HTY-750 LFE (SUBWOOFER OUT) 32 D-AMP Woofer L/R
YSP-500/HTY-750 2. RAM THROUGH 2. RAM THROUGH ビーム化は行わず、サブメニューの指定CHから出力し ます。 2CH信号入力時はDSP1(IC5 DSP P.C.B.)にて以下の ように信号を振り分けます。 The signal is not changed into beam and output from the channel specified by the sub-menu. When 2CH signals are input, they are distributed as follows at DSP (IC206 DSP P.C.B.). L CH ..... FRONT L、SURROUND L、CENTER、LFE R CH .... FRONT R、SURROUND R L CH ..... FRONT L, SURROUND L, CENTER, LFE R CH .... FRONT R, SURROUND R DSP(IC206 DSP P.C.B.
YSP-500/HTY-750 3. PRO LOGIC / Neo:6 3. PRO LOGIC / Neo:6 サブメニューでPRO LOGIC I、II、Neo:6を選択可能で す。 PRO LOGIC I, II, Neo:6 can be selected from the submenu items. PRO LOGIC I (PRO LOGIC EMULATION) PRO LOGIC (PRO I LOGIC EMULATION) 3.PRO LOGIC I PRO LOGIC II PRO LOGIC II 3.PRO LOGIC II Neo:6 Neo:6 3. Neo:6 4. MIC CHECK 4. MIC CHECK マイク入力された信号をAD-DA経由でサブウーファー出 力端子へ出力します。 The signal inputted through the microphone is output via AD-DA at the output terminal of the subwoofer. 4.MIC CHK 5.
YSP-500/HTY-750 Checking FL display section / FL表示部のチェック Check of the Video control section.
YSP-500/HTY-750 6. MANUAL TEST 6. MANUAL TEST The noise generator with a built-in DSP outputs the test noise through the channels specified by the submenu. The noise frequency is 30 to 80Hz for LFE but 500 to 2kHz for others. TEST ALL TEST FRONT L 6.TEST ALL 6.TEST CENTER Noise is output from the FRONT L channel. FRONT Lチャンネルからノイズを出力 Noise is output from the CENTER channel. CENTERチャンネルからノイズを出力 TEST FRONT R TEST SURROUND R TEST SURROUND L Noise is output from the FRONT R channel.
YSP-500/HTY-750 7. RS-232C 7. RS-232C データ送受信チェック、ハードウェアフローポート チェックを行うメニューです。 パワーオフ状態にしてから、RS232C端子の2ピン (RxD)と3ピン(TxD)、7ピン(RTS)と8ピン(CTS)を ショートさせます。(ショートさせるときは必ず電源 を切ってください。) ダイアグを起動してメニューを選択します。 サブメニューは2つあります。 This menu is used to check transmission of the data and the flow port of the hardware. With the power turned off, short between pins No. 2 (RxD) and No. 3 (TxD), and between pins No. 7 (RTS) and No. 8 (CTS) of the RS232C terminal. (Be sure to turn off the power when shorting the pins.
YSP-500/HTY-750 9. AD DATA CHECK 9. AD DATA CHECK This menu is used to display the A/D conversion value of the main microprocessor which detects panel keys of the main unit and protection functions in % using the sub-menu. During signal processing, the condition before execution is maintained.
YSP-500/HTY-750 10.IF STATUS 10.IF STATUS (Input function status) Using the sub-menu, the status data is displayed one after another in the hexadecimal notation. During signal processing, the status before execution of this menu is maintained. * The details of the following status information can not be disclosed because of the development purpose. * The figures in the diagram are given as reference only.
YSP-500/HTY-750 11.DOCK CHECK Not applied to these models. 11.DOCK:NG NNN 12.XM CHECK 13.DAB CHECK Not applied to these models. Not applied to these models. DAB SCL 1k - 1dB/44 1 kHz, -1 dB / 44.1 kHz 1k -61dB/44 1 kHz, -61 dB / 44.1 kHz SCL: DLS (Dynamic Label Segment) DLS: Mute /44 Mute / 44.1 kHz SIGNAL QUALITY Tone/44 XM tone / 44.1 kHz ISO Tone/44 ISO tone / 44.1 kHz 1k - 1dB/32 1 kHz, -1 dB / 32.0 kHz XM Signal Q.
YSP-500/HTY-750 14.HDMI AUDIO 14.HDMI AUDIO このモデルには適用されません。 Not applied to these models. SPDIF 15.HDMI INFORMATION 15.HDMI INFORMATION このモデルには適用されません。 Not applied to these models. HMN:NG HPI:NG HDMI model name HDMI product ID HVN:NG HDMI vendor name CEC: CEC (Consumer Electronics Control) receive data 16.HDMI SELECT 16.HDMI SELECT このモデルには適用されません。 Not applied to these models.
YSP-500/HTY-750 17.VIDEO CONVERSION 17.VIDEO CONVERSION このモデルには適用されません。 Not applied to these models.
YSP-500/HTY-750 18.MODEL 18.MODEL モデル、仕向、ビデオフォーマットの情報を表示しま す。 The information on the model, destination and video format is displayed. MODEL NAME YSP-500を表示します。 MODEL NAME YSP-500 or HTY-750 is displayed. MODEL:YSP-500 DESTINATION Jを表示します。 DESTINATION T, K, A, B, G, E, L or V is displayed. DEST : GE VIDEO FORMAT NTSC (K, V models) PAL (T, A, B, G, E, L models) VIDEO FORTMAT NTSC VIDEO: PAL 19.バージョン/チェックサム情報 19.VERSION/CHECK SUM The firmware version and checksum are displayed.
YSP-500/HTY-750 20.DATE 20.DATE プログラムの更新日付、プロテクション履歴のクリ ア、リモコン受信コードを表示します。 Remo Codeのメニューにすると、リモコンの全キーの 値を検出するためキー操作はできなくなりますが、本 機の“I N P U T ”キーを押すことにより、次のサブメ ニューに進めることができます。 The updated date of the program, clearance of the protection history and the remote control reception code are displayed. When Remo Code menu is selected, keys become nonoperable due to detection of the values of all keys. However, it is possible to advance to the next submenu by pushing the “INPUT” key of the main unit.
YSP-500/HTY-750 21. DSP CHECK 21. DSP CHECK Tx Test Ch Have the sound produced from each driver to check its condition and installation position. Use the “ENTER” and “RETURN” keys of the remote control for selection.
YSP-500/HTY-750 RS232C Use the “ENTER” and “RETURN” keys of the remote control for selection. RS232C リモコンの“決定”、“戻る”キーを使って選択します。 RS232C: YAMAHA Cert Mode 試験用の特殊モードを選択します。 Cert Mode Select the special mode for testing. Cert.Mode[OFF] * Be sure to set to “OFF” ※ 必ず“OFF”にしてください T1V T1V (DSP)のバージョンを表示します。 T1V The version of T1V (DSP) is displayed. T1V:0302t T1D このモデルには適用されません。 T1D Not applied to these models. T1D:---------APP このモデルには適用されません。 APP Not applied to these models.
YSP-500/HTY-750 ■ DISPLAY DATA ● V901 : 15-BT-115GNKF (INPUT P.C.B.) t 1 PATTERN AREA ● PIN CONNECTION Pin No. 60 59 58 57 56 55 54 53 52 51 50 49 48 47 46 45 44 43 42 41 40 39 38 37 36 35 34 33 32 31 Connection F2 NX NP NP P1 P2 P3 P4 P5 P6 P7 P8 P9 P10 P11 P12 P13 P14 P15 P16 P17 P18 P19 P20 P21 P22 P23 P24 P25 P26 30 29 28 27 26 25 24 23 22 21 20 19 18 17 16 15 14 13 12 11 10 9 8 7 6 5 4 3 2 1 Pin No.
YSP-500/HTY-750 ■ IC DATA IC206: D70YE101BRFP266 (DSP P.C.B.) Decoder/Post processor No replacement part available.
YSP-500/HTY-750 Pin No.
YSP-500/HTY-750 YSP-500/HTY-750 Pin No.
YSP-500/HTY-750 Pin Function Name No. 128 CVDD 132 10 31 42 50 60 68 73 DVDD 81 92 103 112 125 136 1 6 13 15 18 26 30 36 40 47 54 62 69 72 VSS 78 82 87 95 99 106 109 114 118 124 129 133 140 I/O TYPE(1) PULL(2) GPIO(3) Detail of Function Core supply I/O supply Ground 1) TYPE column refers to pin direction in functional mode. If a pin has more than one function with different directions, the functions are separated with a slash (/).
YSP-500/HTY-750 IC211: M3087BFKBGP (DSP P.C.B.
YSP-500/HTY-750 No.
YSP-500/HTY-750 No. Control Port Interrupt Timer UART Analog terminal name terminal terminal terminal terminal TA2OUT/ W/RTP20 O DIR RESET 34 P73 35 P72 36 P71 TB5IN/ TA0IN/ RTP03 I/O *37 P70 TA0OUT/ RTP02 I/O 38 VCC1 P67 CTS2/ TA1IN/V RTS2/ SS2 TA1OUT/ V TxD1/ SDA1/ SRxD1 Tx Usually RS-232C asynchronous communication data output Data transmission terminal for AF220 Power supply +3.
YSP-500/HTY-750 No.
YSP-500/HTY-750 No.
YSP-500/HTY-750 Key detection for A/D port Pull-up resistance 10 k-ohms R [ohm] 0 V [V] 0~0.165 KEY 0 VOLUME+ (138 Pin) KEY 1 VOLUME(139 Pin) +1.2 k ~0.495 INPUT NO KEY Destination for AD port Pull-up resistance 10 k-ohms R [ohm] 15 k V [V] ~2.145 Destination B, G, E (133 Pin) (HTY-750) 24 k 39 k 91 k ~2.475 ~2.805 V, K (U, C) ~3.135 T, A, B, G, L, E (YSP-500) ∞ (Pull-up) ~3.3 J PS_PROTECT Vref=3.3 V VOL_DET1 (134 Pin) +3.
A B C D E F G H I J YSP-500/HTY-750 ■ BLOCK DIAGRAMS (Writing port for factory) From/To Microprocessor (IC211) (CB201) SCKB SDMB SDD /CS_SPJ1 /IC_SPJ /DISABLE_SPJ /IRQO_SPJ1 /ICTIA LC89057W (IC203) +3.3V SCKA SDMA SDD /CSDIR /ICDIR /INTDIR VCC 96 97 98 37 38 67 39 70 71 AXR0[3] AXR0[1] AXR0[2] AXR0[0] 117 115 116 113 TISDO_F TISDO_S TISDO_C TISDO_W +5VA2(+5A) +3.
A B C D E F G H I J YSP-500/HTY-750 1 POWER SUPPLY SECTION BLOCK DIAGRAM 2 D522 T502 D510 3 C533 D+5 S1 C523 TH501 + MGND SWITCHING POWER SUPPLY D528 IC510 +12V S4 Q505 IC504, 505, 511 D+12 S2 C534 4 C552 L503 D523 IC509 +5A AGND L501 5 L502 C535 S3 RY501 -24V D524 AC IN T501 POW_RY D501 F501 Q506 S3.3 D507 IC506 C502 D503 S3.
A B C D E F G H I J YSP-500/HTY-750 1 • ■ PRINTED CIRCUIT BOARDS Semiconductor Location Ref no. Location Ref no. Location Ref no. Location Ref no. Location D201 F4 D202 D203 E5 B5 D204 D205 B6 B5 D206 B6 D210 D211 C3 C3 IC201 IC202 F3 E6 IC203 IC204 D5 D4 IC206 E4 IC213 B3 IC208 IC209 E5 B5 IC601 IC602 G5 I5 IC210 IC211 E3 C4 IC603 IC751 G3 I3 IC212 D3 DSP P.C.B. (Side A) – 2 サービス部品供給なし DRIVER (WOOFER_R) + WF_MR WF_PR No replacement part available.
A B C D E F G H I J YSP-500/HTY-750 1 • Semiconductor Location Ref no. Location Ref no. Location Ref no. Location Ref no. Location D207 B5 D208 D212 B5 C3 D213 D214 B3 D6 D601 D602 F5 F5 D603 D604 G5 G5 D605 H5 D606 H5 Q602 H4 D607 D608 I5 I5 Q603 Q604 H5 H5 D609 Q601 G5 H4 DSP P.C.B.
A B C D E F G H I J YSP-500/HTY-750 1 INPUT (1) P.C.B. (Side A) Notes) 注意) Safety measures • Some internal parts in this product contain high voltages and are dangerous. Be sure to take safety measures during servicing, such as wearing insulating gloves. • Note that positions indicated below are dangerous even after the power is turned off because an electric charge remains and a high voltage continues to exist there.
A B C D E F G H I J YSP-500/HTY-750 1 • Semiconductor Location Ref no. Location Ref no. Location Ref no. Location Ref no. Location D502 H2 D504 D508 E3 F3 D512 D513 D3 D3 D514 D517 D3 F4 D519 D520 C3 C3 D521 C3 D526 C6 D536 E5 D527 D529 D4 D4 IC505 IC507 F5 E6 D530 D533 E6 D2 Q504 D3 INPUT (1) P.C.B.
A B C D E F G H I J YSP-500/HTY-750 1 Note) 注意) Caution for P.C.B. replacement When replacing INPUT (1) and INPUT (2) P.C.B.s, be sure to replace them at the same time. Installing either P.C.B. of different version from the other may cause failure of operation. P.C.B.交換時の注意 INPUT(1)およびINPUT(2)P.C.B.を交換する場合、必ず同時に行ってください。どちらか片方にバージョンの異なるP.C.B.を 取り付けると、動作しないことがあります。 AUDIO INPUT OUT DIGITAL INPUT OPTICAL INPUT (2) P.C.B.
A B C D E F G H I J YSP-500/HTY-750 1 INPUT (2) P.C.B. (Side B) 2 16 16 IC6 IC1 1 3 9 • 9 8 1 37 36 4 1 8 5 IC 8 48 1 25 24 IC7 1 8 8 14 IC5 1 9 1 IC2 IC4 4 16 5 8 7 12 13 4 8 Semiconductor Location Ref no. Location Ref no.
A B C D E F G H I J YSP-500/HTY-750 1 INPUT (3) P.C.B. (Side A) 2 3 CB901 CB902 4 -24V GND +12V +3.3V KEY0 KEY1 S3.3 STBY_SW GND KEY1 KEY0 STBY_SW S3.3 REMOTE GND FL_PWM FL_TXD FL_CLK FL_CE FL_ON GND CB903 INPUT (1) DSP (CB204) INPUT (5) P.C.B. (Side A) 5 (W506) INTELLIBEAM MIC GND STBY_SW S3.3 KEY1 KEY0 INPUT (4) P.C.B. (Side A) JK801 W991 6 STANDBY/ON + VOLUME – INPUT CB801 • 7 66 Semiconductor Location Ref no.
A B C D E F G H I J YSP-500/HTY-750 1 INPUT (3) P.C.B. (Side B) 2 3 48 49 32 IC 90 1 33 64 17 16 1 4 INPUT (5) P.C.B. (Side B) 5 INPUT (4) P.C.B. (Side B) 6 4 1 IC801 5 • 7 8 Semiconductor Location Ref no. Location Ref no. Location Ref no. Location Ref no.
YSP-500/HTY-750 ■ PIN CONNECTION DIAGRAMS • ICs • Diodes AN77L04 BR25L320F-W EEPROM D70YE101BRFP266 M3087BFKBGP 1SS355 1SS380 MA8036 3.6V MA8051-M 5.1V MA8062-M 6.2V MA8068-M 6.8V MA8091-M 9.1V FA3641-H1-TE1 108 73 72 109 MA8100-H 10.3V MA8100-M 10.0V MA8110-M 11.0V MA8220-L 21.3V MA8240-H 25.0V UDZ5.
A B C D E F G H I J L K M N YSP-500/HTY-750 SCHEMATIC DIAGRAMS DSP 1/2 1 (Reset switch) IC203: LC89057W-VF4AD-E Digital audio interface transceiver IC201,202: PQ1CZ41H2Z Chopper regulators EMPHA/UO AUDIO/VO 32 33 VIN VOUT RXOUT 1 ON/OFF circuit 5 Soft start Q R S Oscillator F/F RX4 8 4 Oadj 16 RMCK 17 RBCK Clock Selector Modulation & Parallel Port TBCK/PIO1 45 COM 0.
A B C D E F G H I J L K M N YSP-500/HTY-750 DSP 2/2 1 CB601 2 0 3.3 CB602 3.4 0 2.5 5.0 0.2 0 0 5.0 0.2 0 0 0.2 5.0 0 5.0 5.0 5.0 0 5.0 5.0 5.1 0.2 5.1 0 5.1 2.5 5.1 0 3.3 5.0 0 2.5 5.0 0.2 0 5.0 0 0.2 0 0 0.2 5.0 0 5.0 5.2 5.2 0 5.2 5.0 5.1 0.2 5.1 0 5.2 2.4 5.2 DRIVER TWEETER x 8 3.3 3.3 0 0 0 0.2 0 0 5.0 0 0 5.0 0 IC601 0 0 0.2 0 5.0 5.0 0 0 0 0 5.2 0.2 0.2 0.2 5.0 0 0 CB603 0 IC602 0.2 0 0 5.
A B C D E F G H I J L K M N YSP-500/HTY-750 INPUT 1/2 1 IC8: MB90050PF-G-119-E1 OSD controller IC8: MB90050PF-G-118-E1 OSD controller INPUT SELECTOR SIN 0 5.8 5.1 IC5 IC4 VIN VIN 0 CB7 3.3 IC4 YIN YOUT CIN 0 0 5.8 HSYNCO 8.3 DCOL5 to DCOL0 HSYNCO 5.8 VSYNCO CSYNCO TV/STB (T, K, A, B, G, E, L, V models) TV/TUNER (J model) FLDO CB6 Palette (4 bits→6 bits) VBLKO AMP VSYNCO DB CSYNCO DH FLDO 11.1 5.6 0 XS 5.1 5.1 0 3.3 3.
A B C D E F G H I J L K M N YSP-500/HTY-750 INPUT 2/2 1 CB508 5 k-ohms 10 W 0 (111.6) CB504 AC5.5 AC1.1 (333.7) 5.2 (332.5) 2 Page 70 0 (113.9) (476.4) K4 to DSP_CB607 (33.2) (33.2) 4.0 (1.0) IC507 AC1.0 AC3.0 (0.1) 0 10.4 0 0 CB505 (1.0) 13.8 15.3 (1.3) IC511 (15.2) 11.9 IC510 13.8 5.0 11.9 Page 71 0 3 G4 4.0 to INPUT (2)_CB4 0 (4.0) 4.0 0 (4.0) (0.7) (0) 5.0 (5.1) (4.0) (15.2) (15.2) (1.3) (0) 4.0 5.0 IC509 10.4 (-0.1) (15.
YSP-500/HTY-750 ■ REPLACEMENT PARTS LIST • ELECTRICAL COMPONENT PARTS WARNING ● Components having special characteristics are marked s and must be replaced with parts having specifications equal to those originally installed. ● The chip resistor is not supplied as a replacement part. * When a chip resistor is necessary, use the following part.
YSP-500/HTY-750 P.C.B. DSP Ref No. Part No.
YSP-500/HTY-750 P.C.B. DSP Part No.
YSP-500/HTY-750 P.C.B. DSP and P.C.B. INPUT * YSP-500/HTY-750 * * * * * Ref No. Part No.
YSP-500/HTY-750 P.C.B. INPUT Part No.
YSP-500/HTY-750 P.C.B. INPUT YSP-500/HTY-750 Ref No. C502 s C503 s C504 C505 C505 s C506-507 C510 C513 C515 C515 s C516 C517 C518 C519 C520-521 C522 C523 C523 C524 C525-526 C527 s C528 C529 s C530 C531 C533 C534 C535 C538 C539 C542 C543 C544-545 C547 C548 C549 C550 C551 C552-553 C554-555 C556 C558 C559 C801 C805 C807 C809 C811 C813 C815 C817-818 C819 C901-903 C904 C905 Part No.
YSP-500/HTY-750 P.C.B. INPUT s s s s s Part No.
YSP-500/HTY-750 P.C.B. INPUT s s s s s YSP-500/HTY-750 s * Ref No. Part No.
YSP-500/HTY-750 P.C.B. INPUT s s s s s s s s Ref No. Part No. R540 R543 R551 R917-918 R919 RY501 SW991-994 T501 T501 T501 T502 T502 TH501 TH501 U1-2 U901 V901 XL1 XL1 VC756500 HV755120 VP940300 HV755470 HV754100 WE513800 WD483100 XW605A00 XW606A00 XW608A00 X6646A00 X6961A00 WF544600 WF129000 WH169900 WK721700 WK515200 VV949800 WC044100 WE983600 WE774400 WC986900 WB552400 Description R.MTL.OXD R.CAR.FP R.MTL.OXD R.CAR.FP R.CAR.FP RELAY SW.TACT TRANS.PWR TRANS.PWR TRANS.PWR TRANS.PWR TRANS.
A B C D E YSP-500/HTY-750 1 • OVERALL ASS’Y 94 F G H I J Caution for P.C.B. replacement P.C.B.交換時の注意 When replacing INPUT (1) and INPUT (2) P.C.B.s, be sure to replace them at the same time. Installing either P.C.B. of different version from the other may cause failure of operation. INPUT(1) およびINPUT(2) P.C.B.を交換する場合、必ず同時に行ってください。どちらか片 方にバージョンの異なるP.C.B.
YSP-500/HTY-750 * * * * * * * * * * * s s s s s s s * * * * * * * * * * * * * * * * * * * * * * * Ref No. Part No.
A B C D E F G H I J YSP-500/HTY-750 1 • ACCESSORIES 200 205 x1 T, K, A, B, G, E, L, V models Ref No. Part No.
A B C D E YSP-500/HTY-750 1 • SERVICE TOOLS 2 303 301 3 302 4 300 5 Ref No. 300 301 302 303 Part No. AAX74420 V6509500 VQ044400 MF109140 Description P.C.B. RS-232C SOCKET CONNECTOR 9P SE 3170 CONNECTOR BASE PIN 9P FLEXIBLE FLAT CABLE 9P 140mm P=1.
YSP-500/HTY-750 ■ REMOTE CONTROL • SCHEMATIC DIAGRAM +3V IC4 Q4 DTA113ZKA Q5 DTC144EKA R28 6.8ohms R29 22k-ohms µPD17245MC-119-5A4-E1-A IC2 1pin IC3 3pin D4 MIE-544A2 1 R25 2ohms (1/4W) C SW1 2 R26 Q3 27ohms 2SD1781K C22 C24 4 3 1 2 IC5 8 16 24 32 40 48 56 7 15 23 31 39 47 55 6 14 22 30 38 46 54 5 13 21 29 37 45 53 C20 C21 1000µF 6.3V 2.2mF 5.
YSP-500/HTY-750 • PANELS • YSP-500 (T, K, A, B, G, E, L, V models) HTY-750 (B, G, E models) D4 STANDBY/ON M1 TV Label T, K, A, B, G, E, L, V models STB VCR DVD AUX TV J model チューナー ビデオ DVD AUX テレビ YSP 78-DF 78-49 78-4A 78-DE 78-DF Operation at SW1=ON (TV/AV mode) 78-DF is transmitted. 78-49 is transmitted. 78-4A is transmitted. 78-DE is transmitted. 78-DF is transmitted. Indicator LED POWER POWER AV KEY CODE Key no.
YSP-500/HTY-750 88
YSP-500/HTY-750 YSP-500/HTY-750 89
YSP-500/HTY-750 YSP-500/HTY-750 90
YSP-500/HTY-750Y 91
YSP-500/HTY-750