
User Manual
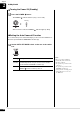
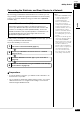


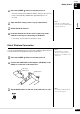
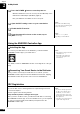
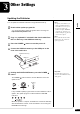
Table Of Contents
- 01_YH773B0_dkven_st_pro_om_en_fr_de_es_it_c1
- 02_1_YH773B0_dkven_st_pro_om_pre
- 02_2_YH773B0_dkven_st_pro_om_frontmatter
- 03_YH773B0_dkven_st_pro_om_en_body
- 04_YH773B0_dkven_st_pro_om_appendix
- dkven_st_pro_om_en_YH773A0 39
- dkven_st_pro_om_en_YH773A0 40
- dkven_st_pro_om_en_YH773A0 41
- dkven_st_pro_om_en_YH773A0 42
- dkven_st_pro_om_en_YH773A0 43
- dkven_st_pro_om_en_YH773A0 44
- dkven_st_pro_om_en_YH773A0 45
- dkven_st_pro_om_en_YH773A0 46
- dkven_st_pro_om_en_YH773A0 47
- dkven_st_pro_om_en_YH773A0 48
- dkven_st_pro_om_en_YH773A0 49
- dkven_st_pro_om_en_YH773A0 50
- dkven_st_pro_om_en_YH773A0 51
- dkven_st_pro_om_en_YH773A0 52
- dkven_st_pro_om_en_YH773A0 53
- dkven_st_pro_om_en_YH773A0 54
- dkven_st_pro_om_en_YH773A0 55
- 05_YH773B0_dkven_st_pro_om_en_fr_de_es_it_c4

Getting Started
English
2
Chapter
16
Note:
For details on the WPS setting, refer
to the owner’s manual supplied with
your wireless router (access point).
Press the WPS button on your wireless router (access
point) within two minutes after step 5.
When the Disklavier is successfully connected to the wireless
router (access point), the LED lamp on the USB wireless LAN
adaptor (UD-WL01) lights up.
Connection between the Disklavier and the wireless router (access
point) is now established. Once the Disklavier is connected to your
wireless router (access point) by WPS, the setting will be
remembered by the Disklavier, and you will not need to repeat this
process the next time.
Note:
For details on the Wi-Fi setting,
refer to the owner’s manual supplied
with your smart device.
Open the Wi-Fi setting screen on your smart device.
Enable the Wi-Fi function.
From the network list shown on the screen, tap on the
network to which you connected your Disklavier.
If necessary, enter a password, and then connect.
6
7
8
9