
Installation guide


Studio Manager V2 Installation Guide (for DM2000/02R96/DM1000/01V96)
10
Mac OS X
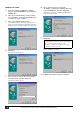
1 Start your computer, then log in as Administrator.
To confirm that the Administrator account is available,
select [System Preferences], then [Users (Account)].
2 Double-click the “Mac OS X” folder on the CD-
ROM.
3 Double-click the “USBdrv_” folder.
4 Double-click “USB-MIDI Driver v1. *****.mpkg”
(***** represents the version number).
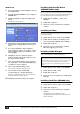
An “Authenticate” window opens, prompting the
password.
If the window does not prompt you to enter the password,
click the lock icon.
5 Enter the password for the Administrator’s
account. If you have not set the password, click
[OK].
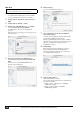
The “Welcome to the YAMAHA USBMIDI Driver
Installer” window is displayed.
6 Click [Continue].
The “Select a Destination” is displayed.
7 Select a destination for the driver installation,
then click [Continue].
A window opens, displaying the message “Click install to
perform a basic installation of this software.”
The message “Installing this software requires 100MB of
disk space” may appear. However, the actual required free
disk space is specified in the “Macintosh System
Requirements” on page 6.
8 Click [Install].
If the driver has already been installed, the [Upgrade]
button is displayed instead of the [Install] button.
The driver is installed, and message “The software was
successfully installed” is displayed.
9 Click the [Close] button.
The driver installation is complete.
You can check the following locations to confirm that the
driver has been installed:
• Library -> Audio -> MIDI Drivers -> YAMAHA-
USBMIDIDriver.plugin
• Library -> PreferencePanes -> YAMAHA-
USBMIDIPatch.prefPane
NOTE: Before installing the driver, disconnect any USB devices
(other than the keyboard and mouse) from the computer.