取扱説明書 JA 取扱説明書 1
安全上のご注意 ご使用の前に、必ずこの「安全上のご注意」をよくお読みください。 ここに示した注意事項は、製 品を安全に正しくご使用いただき、お客様や他の方々 への危害や財産への損害 を未然に防止するためのものです。必ずお守りください。 お子様がご使用になる場 合は、保護者の方が以下の内容をお子様にご徹底ください ますようお願いいたしま す。 お読みになったあとは、使用される方がいつでも見られる所に必ず保管してください。 ■ 記号表示について この製品や取扱説明書に表示されている記号には、次のような意味があります。 「ご注意ください」という注意喚起を示します。 〜しないでくださいという「禁止」を示します。 「必ず実行」してくださいという強制を示します。 ■ 「警告」と「注意」について 以下、誤った取り扱いをする と生じることが想定される内容を、危害や損害の大き さと切迫の程度を明示す るために、「警告」と「注意」に区分して掲載しています。 警告 この表示の欄は、 「死亡す る可能性または重傷を負 う可能性が想定される」 内容です。 注意 この表示の欄は、 「傷害を 負う可能性または物的損 害が発生す
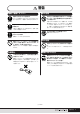
警告 電源 / 電源アダプター 水に注意 電源は必ず交流 100V を使用する。 エアコンの電源など交流 200V のものがあります。 誤って接続すると、感電や火災のおそれがあります。 必ず実行 禁止 電源アダプターは、必ず指定のもの (110 ページ ) を使用する。 (異なった電源アダプターを使用すると)故障、発熱、 必ず実行 火災などの原因になります。 本体の上に 花瓶や薬品など 液体の入ったも のを置か ない。また、浴室 や雨天時の屋 外など湿気の 多いと ころで使用しない。 内部に水などの液体が入ると、感電や火災、または故 障の原因 になりま す。入っ た場合は、すぐに 電源ス イッチを切り、電源プラグをコンセントから抜いた上 で、お買い上げの楽器店または巻末のヤマハ修理ご相 談センターに点検をご依頼ください。 ぬれた手で電源プラグを抜き差ししない。 感電のおそれがあります。 電源プラグにほ こりが付着し ている場合は、ほこ り をきれいに拭き取る。 感電やショートのおそれがあります。 禁止 必ず実行 禁止 電源アダプター コードをストー ブなどの熱器具 に近 づけたり、無理 に
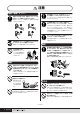
注意 電源 / 電源アダプター 必ず実行 電源プラグを抜 くときは、電源ア ダプターコード を 持たずに、必ず電源プラグを持って引き抜く。 電源アダプターコードが破損して、感電や火災の原因 になることがあります。 必ず実行 必ず実行 必ず実行 長期 間使 用し ない とき や落 雷の おそ れ があ ると き は、必ずコンセントから電源プラグを抜く。 感電や火災、故障の原因になることがあります。 本体を移動 するときは、必ず 電源アダプター コード などの接続ケーブルをすべて外した上で行なう。 コードをいためたり、お客様や他の方々が転倒したり するおそれがあります。 この機器を電源コンセントの近くに設置する。 電源プラグに容易に手の届く位置に設置し、異常を感 じた場合にはすぐに電源スイッチを切り、電源プラグ をコンセントから抜いてください。また、電源スイッ チを切った状態でも微電流が流れています。この製品 を長時間使用しないときは、必ず電源プラグをコンセ ントから抜いてください。 スタンドに取り付ける場合は、必ず指定のアタッチメ ントモジュール (MAT1) を使用する。 本体が転倒し破損したり
禁止 データの保存 本体 の上 にの った り重 い ものをのせたりしない。ま た、ボタンやスイッチ、入 出力 端子 など に無 理な 力 を加えない。 本体が破損したり、お客様 や他 の方 々が けが を した りする原因になります。 作成したデータの保存とバックアップ 保存したデ ータは故障や誤 操作などのため に失われ ることがあります。大切なデータは USB 記憶装置に 保存してください。 必ず実行 外部 USB 記憶装置のバックアップ 禁止 保存した USB 記憶装置の万一の事故に備えて、大切 なデータは予備のUSB記憶装置にバックアップとし て保存されることをおすすめします。 大きな 音量で 長時間 ヘッ ドフォンを使用しない。 聴覚障 害の原 因にな りま す。 必ず実行 ● データが破損したり失われたりした場合の補償はいたしかねますので、ご了承ください。 ● 不適切な使用や改造により故障した場合の保証はいたしかねます。 使用後は、必ず電源スイッチを切りましょう。 電源スイッチを切った状態(電源スイッチがスタンバイの状態)でも微電流が流れています。スタンバイ時の消費電力は、最
はじめに このたびは、ヤマハ電子パーカッションパッド DTX-MULTI 12をお買い上げいただき、 まことにありがとうございました。DTX-MULTI 12の優れた機能を十分にご活用いただ くために、この取扱説明書をよくお読みくださいますようにご案内申し上げます。また、 ご一読いただいたあとも、不明な点が生じた場合に備えて、保証書とともに大切に保管い ただきますようお願いいたします。 付属品(お確かめください) □ □ □ □ □ 電源アダプター 取扱説明書( 本書) データリスト 保証書 DVD-ROM× 1枚( 付属DAWソフトウェア ) DTX-MULTI 12 の特長 ●12個の内蔵パッドと豊富な入力端子 ●USB端子による拡張性 叩きやすく配置された 12個のパッドにより、幅広い演奏に対 応します。加えて背面には、ヤマハ電子ドラム用のパッドや ドラムトリガーを接続する入力端子を5つ備えています。別 売のパッドやドラムトリガーを接続するとDTX-MULTI 12 を核とした、コンパクトなドラムキットを作ったり、アコー スティックドラムと連携することができます。また、フット スイッチやハイハ
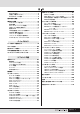
目 安全上のご注意 ..................................................................... 2 付属品 ( お確かめください ) ............................................... 6 DTX-MULTI 12 の特長...................................................... 6 各部の名称と機能 ...................................................... 8 演奏までの準備 ...................................................... 10 ドラムセットと一緒に使う ............................................... 10 電源の準備 ..........................................................................
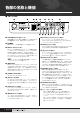
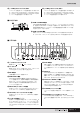
各部の名称と機能 ■ フロントパネル q w e r t !1 !2 !3 !5 ≤≤≤≤≤YAMAHA <> y q VOLUME(マスターボリューム ) 全体の音量(OUTPUT 端子) を調整します。時計方向に回 すと音量が大きくなり、反対方向で小さくなります。 w LCD画面 操作していく上で必要な情報やデータが表示されます。 e LEDパッドインジケーター 叩いたパッドの番号が点灯します。1〜12の番号は本体 パッドのパッド1〜12と対応しています。リアパネルの PAD端子に接続した別売のパッドを叩いた場合や、 FOOT SW端子やHH CTRL 端子に接続した別売のフット スイッチやハイハットコントローラーを踏んだ場合、[1317/FOOT SW/HH CTRL]が点灯します。 NOTE ・ インジケーター部には、工場出荷時に透明の保護フィルムが貼られ ていますので、はがしてからご使用ください。 r [MIDI]ボタン MIDIモードに入ります( 61ページ)。また、[SHIFT]ボタ ンを押しながら[MIDI]ボタンを押すと、Cubaseの
各部の名称と機能 !6 [ −/DEC](マイナス /デック)ボタン !7 [+/INC](プラス /インク) ボタン パラメーター設定時にカーソル位置の値を 1ずつ減らしま す。[SHIFT] ボタンを押しながら[−/DEC]ボタンを押す か、または[ −/DEC]を押しながら[ +/INC]ボタンを押す と、カーソル位置の値を10 ずつ減らします。 パラメーター設定時にカーソル位置の値を1ずつ増やしま す。[SHIFT]ボタンを押しながら[ +/INC]ボタンを押す か、または[+/INC] を押しながら[ −/DEC]ボタンを押す と、カーソル位置の値を10ずつ増やします。 ■ サイドパネル !8 USB TO DEVICE 端子 !8 USB対応の外部記憶装置( フラッシュメモリー、ハードディスクドライブなど) を、直接もしくは USBケーブルを使って接続します。本体で制作したデータを 外部記憶装置に保存( セーブ)したり、また外部記憶装置から本体へデータを読 み込むこと( ロード)ができます。 !9 !9 USB TO HOST端子 本体とコンピューターのUSB端子とを USBケー
演奏までの準備 ドラムセットと一緒に使う お手持ちのドラムセットと一緒にお使いになる場合は、モ ジュールアタッチメントMAT1(別売 )を本体の底面に取り 付け、タムホルダーやスタンド類と組み合わせてお使いい ただくと便利です。詳しい取り付け方法につきましては MAT1に付属の取扱説明書をご覧ください。 スピーカーやヘッドフォンの接続 本体にはスピーカーが内蔵されていません。音を出すため には、外部アンプとスピーカー、ヘッドフォンなどを接続 してください (下図参照)。 注意 ・ 接続には、それぞれの機器の端子形状に適合したプラグを持つケーブル をお使いください。 電源の準備 1 本体のF(スタンバイ/オン)スイッチが切れていること を確認します。 ● OUTPUT L/MONO、R端子 (標準モノラルフォーンジャック) 外部アンプ+スピーカーを接続して、本体の出力音を鳴ら します。モノラル入力の機器を接続する場合は、 OUTPUT L/MONO 端子の方に接続してください。 ● PHONES端子 (標準ステレオフォーンジャック) ヘッドフォンを接続します。ヘッドフォンの音量はリアパ ネルの VO
演奏までの準備 ■ USB TO DEVICE端子ご使用上の注意 電源を入れる 1 2 スピーカーやオーディオ機器の接続が完了したら、本 体と外部オーディオ機器の音量がゼロになっているこ とを確認します。 本体リアパネルにある F(スタンバイ/オン)スイッチを 押すと電源が入ります。 LCD画面にオープニング画面が表示され、その後キットモー ドの画面になります。 本体には USB TO DEVICE端子があります。USB TO DEVICE 端子にUSB機器を接続する場合は、以下のこと をお守りください。 NOTE ・ USB機器の取り扱いについては、お使いのUSB機器の取扱説明書もご覧 ください。 ● 使用できる USB機器 USB 対応の記憶装置(フラッシュメモリー、ハードディス クドライブなど ) 動作確認済み USB機器については、ご購入の前にイン ターネット上の下記 URLでご確認ください。 http://www.yamaha.co.
演奏までの準備 ● 誤消去防止 ■ 外部MIDI機器で本体をコントロールする場合 USB記憶装置には誤ってデータを消してしまわないよう にするため、ライトプロテクトができるものがあります。 大切なデータが入っている場合は、ライトプロテクトで書 き込みができないようにしてください。逆にデータを保存 する場合などは、ご使用の前にお使いのUSB 記憶装置の ライトプロテクトが解除されていることをご確認くださ い。 本体の MIDI IN 端子と外部MIDI機器の MIDI OUT端子を MIDIケーブルで接続します。 MIDIケーブル MIDI IN端子 MIDI OUT端子 注意 ・ USB記憶装置の頻繁な電源のオン/ オフ (接続したUSB記憶装置がセル フパワー機器の場合)や USBケーブルの抜き差しをしないでください。 楽器本体の機能が停止するおそれがあります。 外部 MIDI機器 ・ ユーティリティーモードで保存(セーブ )/読み込み (ロード)/ 削除(デ リート)/ フォーマットなどデータのアクセス中に、USB TO DEVICE 端 子からUSB記憶装置をはずしたり、双方の電源を切
演奏までの準備 ■ USB TO HOST端子ご使用時の注意 コンピューターと接続する 本体とコンピューターを USBケーブルで接続することで MIDIデータを送受信でき、音楽制作の幅が大きく広がり ます。ここでは、本体とコンピューターの接続方法につい て説明します。 NOTE ・ 音を鳴らすには、本体にスピーカーやヘッドフォンを接続する必要があり ます。詳しくは、10ページをご覧ください。 ・ USBケーブルは付属しておりません。本体をコンピューターと接続する ときは、3メートル以下の、ABタイプのUSBケーブルをお買い求めくだ さい。 1 以下の URLから、最新のUSB-MIDIドライバーをダウ ンロードします。ダウンロードボタンを押したあと、 ファイルの実行および解凍をします。 http://www.yamaha.co.
演奏までの準備 コンピューター上のソフトウェアにもよりますが、次の図 のように本体側のローカルコントロールをオフにして、 DAWソフトウェア側のMIDIスルーをオンに設定すると、 音が二重になって聞こえたりせず、適切なサウンドが得ら れます。 IN OUT OUT 音源部 パッド ローカルコントロール LocalCtrl = off IN DAWソフトウェア のMIDIスルーを オンにする。 NOTE ・ DAWとは、デジタルオーディオワークステーション(Digital Audio Workstation)の略で、オーディオの録音や編集、ミキシングなど一連の作 業ができるCubaseのようなアプリケーションソフトのことを指します。 では本体側とソフトウェア側の設定のしかたについて、そ れぞれ以下で説明します。 ● 本体側の設定手順 本体のローカルコントロールを 1 off に設定します。 [UTILITY]ボタンを押してユーティリティーモードに 入り、[B]/[ C]ボタンを何度か押して、UTIL6 MIDI の設定ページを表示させ、[ENTER]ボタンを押しま す。 UTIL
演奏までの準備 Cubaseをリモートコントロールする 3 LCD画面に Cubase Remote のメッセージが表示され、 リモート機能が有効になります。 本体には Cubaseのリモート機能が搭載されています。こ の機能を使えば、Cubaseのクリックのオン/オフやトラ ンスポートコントロールなどを本体パネル上から行なえる ので、効率よく音楽制作ができます。 <<≥≥≥Cubase≥≥≥>> <<≥≥≥Remote≥≥≥>> ■ コンピューター側の設定手順 NOTE はじめてリモート機能を利用するときは、以下の手順でコ ンピューター側の設定をしてください。 1 以下の URLから、最新のDTX-MULTI 12 Extension をダウンロードします。 ダウンロードが完了したら、適当な場所でファイルを解凍し ます。 http://www.yamaha.co.
パッドを叩いて音を鳴らす ここではまず、スティック (別売 )を使ったパッドの基本的な叩き方を覚えたあと、いろいろなキット (パッドに割り当てられた音色のセット )を選んで、本体のサウンドを楽しんでみましょう。 パッドの名称 パッドの叩き方 本体のパッドには下図のように 1〜12の番号が割 り当てられています。これらの番号はパッドインジ ケーターの番号に対応しており、叩いたパッドの番 号が点灯します。 パッド (4〜9)を叩くときは、ドラムスティックの 先端 (チップ ) がパッドの中央に当たるように叩きま す。 ● パッド(4 〜9) の叩き方 1 2 3 4 5 6 7 8 9 10 11 12 パッドインジケーター ドラムスティックの部位 チップ 注意 ・ パッド1〜3と本体プラスチック部分のすき間に指を入れないでくだ さい。はさまれてけがをするおそれがあります。 パッド (1〜3、10〜12)を叩くときは、ドラムス ティックのショルダーがパッドの中央に当たるよう に叩きます。 ● パッド(1 〜3、10 〜 12)の叩き方 ドラムスティックの部位 ショルダ
パッドを叩いて音を鳴らす 手で叩く感度に設定すれば、手で叩いて鳴らすこと もできます (19ページ)。 プリセットキットを選ぶ ク イ ッ ク ガ イ ド 各パッドを叩いたときに鳴る音 ( ボイスやパターン) を1つのセットにしたものを、キットと呼びます。 本体にあらかじめ準備されているプリセットキット を切り替えて、豊富な音色をお楽しみください。 NOTE ・ この説明書に掲載されている画面は、すべて操作説明のためのものです。 したがって、キットやボイスの名称などの表示が、実際の仕様と異なる 場合があります。 NOTE ・ パッドには個別の打楽器を含むプリセットボイス(=ボイス )、またはフ レーズ(=パターン )が割り当てられています。パターンが割り当てられ ているパッドを叩くと、パターンがワンショット(1 回だけ再生し、繰り 返さない)またはループ (繰り返し)で再生され、パッドインジケーターの 該当番号が点灯します。ループ再生のときはもう一度同じパッドを叩く とパターンが停止し、ランプの点灯も消えます。 1 [KIT] ボタンを押し、キット選択画面を表 示します。 [KIT] ボタン
パッドを叩いて音を鳴らす 気に入ったプリセットボイスを パッドに割り当てる 4 お好みのプリセットキットの中で、一部のパッドに 割り当てられている音色だけを入れ替えたい場合、 下記操作でユーザーキットを作るとよいでしょう。 ここでは選んだキットのパッド 4にお好みのボイス を割り当て、割り当てたキットを空のユーザーキッ ト001に保存してみます。 1 パッド 4を叩いて、画面上のパッド番号を -º¢- にします。 画面上のカーソルを -º¡- の位置まで移動さ せ、[− /DEC]/[+ /INC]ボタンを押して、 -º¢- を選ぶことも可能です。 [KIT]ボタンを押して、キット選択画面を 表示します。 パッド番号 KIT1 P001:PercsMaster 2 [−/DEC]/[+/INC]ボタンを押して、お 好みのボイスを割り当てたいキットを選び ます。 KIT1 P009:Oak≥Custom 3 VCE01≥≥-º¢-≥≥≥ Tm001:OakCtm≥H 5 パッド 4に割り当てたいボイスを選択しま す。 カーソルを画面左下に移動させ、[− /DEC]/ [+ /INC]
パッドを叩いて音を鳴らす 6 [STORE]ボタンを押し、ユーザーキット としてストア (保存 )します。 以下の画面が表示されるので、[− /DEC]/[+ / INC]ボタンを押して、空のユーザーキット 001を選び [ENTER]ボタンを押します。 VCE≥Store≥to U001:User≥Kit ユーザーキット番号 ク イ ッ ク ガ イ ド 1 つのパッド /コントローラーに複数のボイスを重ねられ る機能をレイヤーと呼びます。本体では最大 4 つ(A〜 D) までレイヤーを設定することができるので、「パッドを叩 いた際に最大 4 ボイスを鳴らす」ことができます。この4 レイヤーの鳴らし方も、同時に発音させるだけでなく、 違う音を交互に鳴らしたり、発音 /消音を繰り返すことも できます。レイヤーの詳しいしくみについては、32 ペー ジをご覧ください。 ユーザーキット名 ■ 手で叩く場合( ハンドパーカッション) NOTE ・ エディットした設定内容が本体の内部メモリーに保存され ていないとき、[STORE]ボタンが点灯します。ストア (保存) を実行すると、[STORE] ボタン
パターンを聞く 本体には、さまざまなリズムがプリセットパターンとしてあらかじめ準備されています。 プリセットパターンのうち、最初の 3つ(eP001〜 eP003)は本体の多彩な音色をお楽しみいただくためのデ モパターンです。 またパターン番号が eP004以降のプリセットパターンは、パッドに割り当てるための素材として活用するこ とができます。 デモパターンを聞く 1 [PTN]ボタンを押し、パターン選択画面を 表示します。 [PTN]ボタンが点灯します。eP001〜 eP003 がデモパターンです。 PTN1≥≥≥ƒ=120≥4/4 ©P001:Demo≥01 2 プリセットパターンを聞く 1 2 [PTN]ボタンを押し、パターン選択画面を 表示します。 [−/DEC]/[+/INC]ボタンを押して、好 みのパターンを選びます。 eP004以降のプリセットパターンを選びま しょう。 PTN1≥≥≥ƒ=120≥4/4 ©P004:80s≥Electo もう一度[PTN]ボタンを押すと、デモパ ターンが再生されます。 再生中は[PTN] ボタンが点滅し、<< >>に囲 まれたデモパターン名
自分でパターンを作る ク イ ッ ク ガ イ ド 自分の演奏をユーザーパターンとして録音できます。 録音したユーザーパターンはプリセットパターンと同じように再生したり、パッドに割り当てる素材として 使えます。 演奏をパターンに録音する 演奏をパターンに録音し、録音したユーザーパター ンをパッド 6に割り当ててみましょう。 1 3 [SHIFT]ボタンを押しながら [PTN]ボタ ンを押して録音モードに入ります。 [PTN] ボタンが赤く光ります。 [PTN]ボタンを押してパターンモードに入 り、[− /DEC]/[+/INC]ボタンを押して 空のユーザーパターンを選びます。 REC≥≥≥≥ƒ=120≥4/4 Meas=004≥Q=©≥≥-“ 空のユーザーパターンを選ぶと、パターン名に Empty Ptn と表示されます。 NOTE PTN1≥≥≥ƒ=120≥4/4 ©U003:Empty≥Ptn パターン名 注意 ・ 録音済みのユーザーパターンは上書き保存されてしまい ます。上書きしたくないときは必ず、空のユーザーパ ターンを選んでください。 4 録音条件を設定します。 この画面では
自分でパターンを作る 5 [PTN]ボタンを押して録音を始めます。 2小節のカウントのあとで録音が始まります。 クリック音を聴きながら演奏しましょう。 8 [KIT]ボタンを押してキットモードに入り ます。 KIT1 P001:PercsMaster 現在録音中の小節数 REC≥Meas=≥001 Now≥Recording... 注意 9 ・ 録音中は絶対に電源を切らないでください。すべての ユーザーパターンのデータが失われるおそれがありま す。 6 [STORE]ボタンを押し、パターンを割り 当てたキットをユーザーキットとしてスト ア(保存 )します。 以下の画面が表示されるので、[− /DEC]/[+ / INC]ボタンを押して、空のユーザーキットを選 び、[ENTER]ボタンを押します。 手順4で設定した小節数で録音が終わりま す。 VCE≥Store≥to U001:User≥Kit 録音が終わると画面に Please keep power on... とデータ保存中のメッセージがしばらく 表示されます。 ≥Please≥keep≥≥≥ ≥power≥on...
USB記憶装置に保存 (セーブ)する ク イ ッ ク ガ イ ド ここでは、作成したユーザーキットやユーザーパターンなどのデータをすべて 1つのファイルにまとめ、 外部 USB記憶装置に保存する方法を説明します。 1 USB 記憶装置を本体のUSB TO DEVICE端子に接続します。 4 NOTE [−/DEC]/[+/INC]ボタンを押して値を All にします。 設定が済んだら [ENTER]ボタンを押します。 ・ USB記憶装置については、11 ページの『USB記憶装置(デ バイス )を接続する』をご覧ください。 UTIL7-1-1 Type=All 2 [UTILITY]ボタンを押してユーティリ ティーモードに入り、[B ]/[C]ボタンを 押して UTIL7 FILE を選び、 [ENTER]ボタンを押します。 UTIL7 ≥≥≥≥≥≥FILE 3 NOTE ・ All 以外にもセーブするファイルのタイプを選択できます (93ページ )。 5 ファイルにつける名前を入力します。 文字の入力方法や使用できる文字の種類につい ては、47ページをご覧ください。 UTI
USB記憶装置に保存 (セーブ )する 7 もう一度[ENTER] ボタンを押してセーブ を実行します。 すでに同じ名前のファイルがUSB 記憶装置に保 存されている場合は、 Overwrite? とメッ セージが表示されます。このメッセージは上書 き保存のことですので、上書き保存してもよい 場合は、[ENTER]ボタンを押してセーブを実行 します。上書き保存をしたくない場合は、 [EXIT]ボタンを押すと手順5 の画面に戻ります ので、もう一度ファイル名を入力できます。 セーブ中は Now saving... [EXIT] to cancel とメッセージが表示されます。セーブ が完了すると Completed.
オーディオファイルをインポートする ク イ ッ ク ガ イ ド コンピューター上などのオーディオファイル (WAV、AIFFファイル )を、USB記憶装置から「ウェーブ」 として本体に取り込むことができます。 ウェーブはパッドに割り当てることにより、叩いて鳴らせます。 NOTE ・ 本体は 16ビットのオーディオファイルのみ取り扱うことができます。16 ビット以外のオーディオファイルをインポートした い場合、付属の DAWソフトウェアなどでビット数の変換を行なってください。変換方法についてはソフトウェア付属の取扱 説明書をご覧ください。 ・ 取り扱いできる 1ファイルの最大の長さは約 23秒 (44.1kHz / 16ビットの場合 )です。 ・ 上記条件をすべて満たしたオーディオファイルでも、読み込みができない場合があります。 1 2 3 コンピューターに接続された USB記憶装 置のルートディレクトリーに、お気に入り のオーディオファイル (WAVまたはAIFF ファイル )を保存します。 Now≥Importing...
オーディオファイルをインポートする 8 9 [KIT]ボタンを押して、キットモードに戻 ります。 [STORE]ボタンを押し、読み込んだボイ スを割り当てたキットをユーザーキットと してストア( 保存) します。 以下の画面が表示されるので、[−/DEC]/[+ / INC]ボタンを押して、空のユーザーキットを選 び、[ENTER]ボタンを押します。 VCE≥Store≥to U001:User≥Kit ユーザーキット番号 10 ユーザーキット名 確認画面が表示されるので、[ENTER]ボ タンを押してストアを実行します。 ≥≥≥KIT≥Store ≥Are≥you≥sure?≥≥ 注意 ・ Please keep power on... とデータ保存中のメッ セージがしばらく表示されますので、表示中は絶対に電 源を切らないでください。すべてのユーザーキットの データが失われるおそれがあります。 ≥≥Please≥keep ≥≥power≥on...
リファレンス 内部のしくみ ここでは、パッドを叩いてから実際にスピーカーから音が出るまでの信号の流れや内部的なしくみを解説します。それらを 理解することで、本体の豊富な機能を存分にお使いいただけます。 機能構成 外部パッド、コントローラー、フットスイッチ 本体パッド リ フ ァ レ ン ス キ ッ ト 本体トリガー入力端子 ボ イ ス トリガー信号 トリガー信号 M I D I トリガーセットアップ (プリセット /ユーザー ) キット( プリセット /ユーザー ) ウ ェ ー ブ 1 キットの構成 本体全パッド + 外部パッド/ コントローラーに プリセットボイス /パターン / ウェーブを割り当 てる 1 パッドにつき4 レイヤー (A〜 D)まで ボイスを設定可能 プリセット ボイス プリセット パターン USB TO DEVICE パ タ ー ン インポート ユーザーパターン パターン 録音 インポート USB TO HOST MIDI メッセージ MIDIメッセージ MIDIメッセージ 音源 ユ ー テ ィ リ テ ィ ー WAVファイル AIFF フ
内部のしくみ パッドとトリガー信号 本体にある12面のパッドとトリガー入力端子 (PADM〜 Q)、HH CTRL端子、FOOT SW 端子に接続したパッドを 叩いたり、フットスイッチなどのコントローラーを操作す ることで演奏をします。これらパッドやコントローラーを 操作すると、叩いた強さなどの演奏情報を持つ「トリガー 信号」が発生し、このトリガー信号を音源に伝えることで 発音します。 トリガー入力端子 N/Oとトリガー入力端子P/Qはそれぞ れ端子は 1つですが、1つの端子にモノラル出力のパッド を 2つ接続でき、2つのトリガー出力を扱うことができま す。LCD 画面上にはそれぞれ個別のパッド ¡¢ 、¡∞ 、 ¡§ 、¡¶ として表示されます。 例 : PAD N/ OにモノラルパッドTP65と PCY65を接続 TP65を叩くとトリガー信号が出力され、 パッド ¡¢ に割り当てられたボイスが 発音されます。 ■ 本体パッド 1〜12 TP65 本体の12個のパッドには、以下のように 1から 12までの 番号が付いています。設定画面には本体パッド1 〜12は º¡ 〜 ¡™ と表示されます。 パッ
内部のしくみ ■ FOOT SW端子 別売のフットスイッチ (FC4やFC5)、ハイハットコント ローラー (HH65)、フットコントローラー (FC7)を接続 して使います。LCD画面上には √¤‘’ として表示されま す。 接続するフットスイッチ /コントローラーの種類や、そこ に割り当てる機能を設定することで、様々な使い方ができ ます。ここではいくつか代表的な使用例を紹介します。 NOTE ● フットスイッチ(FC4、FC5)でキットやパターンを切 り替える [ 機能] フットスイッチ (FC4、FC5)を踏むごとに、さまざまな設 定を切り替えることができます。たとえば、キット番号や パターン番号を 1ずつ切り替える、テンポ値を 1ずつ増減 する、タップテンポを設定する、クリック音のオン /オフ など。また、コントロールチェンジの値を 2つ設定してお いて、その 2つを切り替えることもできます。 ・ 必ず本体の電源を切った状態で、フットスイッチやハイハットコントロー ラーを接続してください。正常に動作しないことがあります。 ● ハイハットコントローラー (HH65)をキックペダルと して使う [
内部のしくみ ● ハイハットコントローラー (HH65)で音量など (コン トロールチェンジ )を調整する ■ 別売パッド /ドラムトリガーとトリガー入力端子 の対応 [機能 ] フットコントローラー (FC7) と同様に、ハイハットコント ローラー (HH65) の踏み込み加減で、さまざまな値をコン トロールすることができます。 別売のパッド /ドラムトリガーを接続して使用する場合、 差し込む端子によっては、全種類のトリガー信号に対応で きない場合があります。下表にパッド各製品とリアパネル のトリガー入力端子との対応を掲載してありますので、 パッドを接続するときの参考にしてください。 HH65 PAD M: 2ゾーン/3ゾーン対応。パッドコントローラー対応なし PAD N/ O、PAD P/Q: 2ゾーン /3ゾーン対応なし。パッドコントローラー対応なし INPUT ( トリガー入力端子) [設定 ] ・ 本体の電源を切った状態で、FOOT SW端子にハイハッ トコントローラー (HH65)を接続します。 ・ 本体の電源を入れます。 ・ UTIL4-2 FootSwInSel を HH65 に
内部のしくみ パッドを叩いたときに鳴らす音 パッドを叩いたり、コントローラー /フットスイッチを操 作することで出力された「トリガー信号」を受け、本体の 音源部はそれぞれのパッドやコントローラー /フットス イッチに割り当てられているプリセットボイスを鳴らした りパターンを再生したりします。本体でパッドやコント ローラー /フットスイッチを叩いたり操作した際に発音さ せることができる音には、以下の 3タイプがあります。 ・ プリセットボイス スネア、バスドラム、シンバルなどのドラム音やパー カッション音や、ピアノ、木琴、ギターなどの音階を 持った楽器音など ・ パターン さまざまな楽器の演奏フレーズ(ワンショット、ループ) ・ ウェーブ インポート操作により取り込んだウェーブ パッドやコントローラー /フットスイッチへのボイス /パ ターン /ウェーブの割り当ては、[VOICE]ボタンを押して 表示されるボイスモードの「ボイスの選択画面」において 行ないます。割り当てるボイスは、楽器の種類やパター ン、ウェーブなどのカテゴリー (分類 )に分けられていま す。このように、「プリセットボイス」 、「パターン」
内部のしくみ キットの構造 ボイスのレイヤー構造 パッド01を叩くとレイヤー A〜 D が同時に発音します 本体パッド1 〜12、外部トリガー入力端子 M〜Q, FOOT SW 端子、HI-HAT CONTROL端子 (クローズ、 オープン)に対してボイス /パターン/ウェーブを割り当て たものをキットと呼びます。本体内にはあらかじめ50種 類のプリセットキットが準備されています。キットは自分 の好みで作り変えることも可能で、ユーザーキットとして 200種類を本体に保存できます。 レイヤー A VCE1 -º¡ç GM001:GrandPiano GM001:GrandPiano レイヤー B VCE1 -º¡¬ GM025:NylonGtr GM025:NylonGtr レイヤー C ■ キットとボイスの関係 ボイスデータはすべてキット単位でまとめられ、保存され ています。つまり、ひとつのキットは、そのキットで全 パッド/全コントローラーに割り当てられているボイス情 VCE1 -º¡GM041:Violin œ GM041:Violin レイヤー D VCE1 -º¡˚ GM
内部のしくみ ● パッドごとにボイスを直接割り当てる方法 パッドを指定し、そこに割り当てるボイス /パターン/ ウェーブを選んで割り当てます。 1 [KIT]ボタンを押してキットモードに入り、キットを選 例: パッドごとにボイスを直接割り当てる キットモード KIT1 P009:Oak≥Custom びます。次に[VOICE]ボタンを押してボイスモードに 入り、VCE1画面(ボイスの選択 )を表示させます。 キット名 キットモードでの設定 ・ ・ ・ ・ ・ 対象のパッド/ コントローラー キット全体の音量 キットテンポ キット全体にかかるエフェクトの設定 ミュートの設定 ハイハットの設定 など VCE1≥≥-º¡Cy013:Thin16Eg ボイスモード パッドに割り当てられているボイス 2 本体パッド 1〜 12にボイス を割り当てる VCE1≥≥-º¡Cy013:Thin16Eg 画面上段にカーソルを移動し、[−/DEC]/[+/INC]ボ キ ッ ト タンで対象のパッド/コントローラーを選びます。対象 のパッドを叩くことでも選択できます。 VCE1≥≥-¡™-≥≥≥
内部のしくみ ● パッドごとに送信する MIDIメッセージを指定し、 ボイスを割り当てる方法 4 これは、パッドに対しては『パッドを叩いたときに送信 するMIDIノートメッセージの番号』を設定し、音源に [C]ボタンを押してMIDI1-2 画面を表示させます。 MIDI1-2≥-º¡-≥≥≥ç Note=≥≥≥D≥1/≥38 対しては『MIDIノートメッセージの番号ごとにボイス を割り当てる』という方法です。この方法の利点は、 画面下段で、パッド パッドを叩いたときに複数のMIDIノートメッセージを 送信させることで、前述のレイヤー機能を使って複数の ド -º¡- のレイヤー Aを示します。これでレイ ヤー Aに MIDIノートナンバーが設定されました。 子からMIDIメッセージを出力して、外部 MIDI機器をコ ントロールすることもできます。 5 [VOICE]ボタンを押してボイスモードに入り、VCE1 画面を表示させます。 ここでは、本体パッド01を叩いたときに 2つのボイスを MIDI ノートナンバー 同時に鳴らす設定を例に解説します。 [KIT]ボタンを押してキットモード
内部のしくみ 7 [VOICE]ボタンを押してVCE1画面を表示させ、MIDI ノートナンバー E1/40 に割り当てるボイス(ここ これで、本体パッド 01を叩くとD1/38と E1/40の2つ の MIDIノートナンバーが音源に送られ、 では Sn001:OakCustomと Cy013:Thin16Egのボイスが同 時に発音する設定ができました。 Cy013:Thin16Eg )を設定します。 VCE1≥≥≥≥E≥1/≥40 Cy013:Thin16Eg 前ページで設定した 2音同時に発音する設定では、パッド を叩いてから音が鳴るまでの間に、本体の内部で下図のよ うな処理が行なわれます。 リ フ ァ レ ン ス 本体パッド 01を叩く キ ッ ト 2つの MIDIノートメッセージ (D1/38と E1/40)が同時に 音源へ送られる 鍵盤上に並べられた MIDIノートナンバーのイメージ ボ イ ス 0 それぞれのMIDI ノート ナンバーに割り当てられた ボイスが発音する C0 D1 E1 C7 24 38 40 108 M I D I 127 Sn
内部のしくみ ● コーラス エフェクト 音源部から出力された音声に、残響、広がり、厚みなど、 さまざまな効果をかけ音を加工する装置です。音作りの最 終段階でエフェクトを活用することによって、さらに表現 力を加えます。 コーラス系などのタイプを持つエフェクトです。キットご とにエフェクトタイプを選択しますが (KIT5)、各レイヤー へのかかり具合を設定することができます (VCE4-2)。 ● リバーブ コンサートホールやライブハウスで演奏しているような残 響 (リバーブ)効果をかけるエフェクトです。キットごとに エフェクトタイプを選択しますが (KIT6)、各レイヤーへの かかり具合を設定することができます (VCE4-3)。 ■ エフェクト構成 以下の4 種類のエフェクトが用意されています。 ● バリエーション NOTE その名の通りさまざまな効果を付加するエフェクト群で す。キットごとにエフェクトタイプを選択しますが、各レ イヤーへのかかり具合を設定することができます(KIT41)。 ・ ユーザーパターンに対しては、バリエーション、コーラス、リバーブエ フェクトのかかり具合を設定し、ユーザ
内部のしくみ ■ エフェクトプログラムのカテゴリーとタイプに ついて ここでは、各エフェクトタイプのしくみや効果について説 明します。また、そのカテゴリーに含まれるエフェクトタ イプを紹介します。エフェクトを設定する際の参考にして ください。カテゴリーごとに掲載しているエフェクトタイ プリストには、リバーブ (REV)、コーラス(CHO)、バリ エーション (VAR)それぞれに含まれているかどうかを丸印 またはー (ハイフン )で表示しています。丸印が割り当てら れているエフェクトタイプは、画面上で選択できます。 ● COMPRESSOR&EQ ( コンプレッサー&イコライザー ) フランジャーは、ジェット機の上昇下降音のような響きを 作り出すエフェクトです。基本原理はコーラスと同じです が、コーラスよりもディレイタイムを短くし、さらに フィードバック回路を持つことで激しいうねりと音程が移 行する効果を与えます。曲中で常時かけるのではなく、ポ イントを決めて部分的にかけるように使います。フェー ザーは、位相をずらして原音とミックスするフェーズシフ ト回路とその出力をフィードバックする回路を持つエフェ ク
内部のしくみ ● WAH (ワウ ) ● CHORUS ( コーラス) フィルターの周波数特性を変化させることで、独特のサウ ンドを作り出すエフェクトです。周波数特性がLFOによっ て周期的に変化するのがオートワウ、入力する楽器音の音 量によって変化するのがタッチワウです。 複数の音源が同時に鳴っているような、音に奥行きと厚み を付加するエフェクトです。複数の音源を同時に鳴らした 場合、それぞれの音源のピッチや位相が微妙に違っている ため、聴いている人に拡がり感や人数感を感じさせます。 ディレイを使って、これと同じ効果を出すエフェクトが コーラスです。実際には、遅延時間を LFOによって1 秒程 度の周期で規則的に変化させて、音をビブラートがかかっ たような状態にしてから原音と混ぜることで、複数の音源 を同時に鳴らした場合と同じ効果を得ています。 エフェクトタイプ Var 説明 AutoWah O ビンテージ系のオートワウです。 TouchWah O ビンテージ系のタッチワウです。 TouchWahDist O TOUCH WAH の出力を DISTORTION によ り、歪ま
内部のしくみ ● DELAY ( ディレイ) ■ エフェクトパラメーターについて 入力音を時間的に遅らせて発音させ、やまびこのような効 果を作り出すエフェクトです。空間の奥行きや拡がりを 作ったり、音を太くしたりなど、さまざまな使い方があり ます。 エフェクトパラメーターは、エフェクトの効果のかかり方 を調整するための設定です。エフェクトをかける音色や楽 曲に合わせてエフェクトパラメーターを操作することに よってはじめて、エフェクトの効果が活きてきます。エ フェクトパラメーターの働きについては、以下のエフェク トパラメーター解説で確認し、音を聴きながら最適な状態 に設定しましょう。 エフェクトタイプ Var 説明 CrossDelay O 2本のディレイのフィードックをクロスさせ たエフェクトです。ディレイ音が左右に飛び 交うタイプのディレイです。 TempoCrosDly O ディレイタイムが曲のテンポとシンクするタ イプのクロスディレイです。 TempoDlyMono O ディレイタイムが曲のテンポとシンクするタ イプのモノラルディレイです。 TempoDlySt O
内部のしくみ パラメーター名 パラメーターの意味 パラメーター名 センターチャンネルのディレイ音量を設定する HiLvl 高域のレベルを設定する DlyMix ディレイ音のミキシング量を設定する HiMute 高域のミュートスイッチ DlyOfst 変調のためのディレイタイムのオフセット値を設定す る Drive 効果をかける度合を設定する DriveHorn ホーン (高音側)の回転による変調の深さを設定する DriveRotor ローター (低域側)の回転による変調の深さを設定する HiTh 高域側においての効果が効き始める入力レベルを設定 する DstL.Gain 歪ませた音の低域を EQで増減させるゲイン量を設定 する HornF ファスト回転時のホーン(高域側)の回転するスピード を設定する DstM.
内部のしくみ パラメーター名 M.Gain パラメーターの意味 パラメーター名 中域を EQで増減させるゲインを設定する M.
内部のしくみ 本体の内部メモリー 制作/編集したユーザーキットやユーザーパターン、 ウェーブなどは、内部メモリーに保存することで電源を 切ってもデータを保持することができます。また、ユー ザートリガーセットアップやユーティリティーなど、シス テムの設定も保存できます。 ■ ユーザーキットの編集と保存 キットを選ぶと、キットデータは「エディットバッ ファー」と呼ばれる、本体の一時的な保管場所にコピーが 作られます。キットの編集は、エディットバッファーに一 時的に保存されたキットにすべて反映されます。編集前の キットデータではなくコピーしたキットデータを編集する ことにより、編集前のキットデータが誤って書き替えられ ないようにするためのしくみです。 ■ 本体に保存されるデータ 以下のデータを、本体に保存できます。 ● ユーザーキット パッド/コントローラーに自分の好みのボイスを割り当て てセットアップしたオリジナルキットをストア操作により ユーザーキット用メモリーに保存し、プリセットキットと 同様に呼び出して使うことができます。ユーザーキットは 最大で200個まで本体に保存でき、電源を切っても保持 されます
内部のしくみ ■ メモリー構成 本体の各機能と、内部メモリー /USB外部記憶装置との関係は以下のとおりです。 内部メモリー 外部USB 記憶装置 プリセットデータ(ROM) ・ キット ・ ボイス ・ パターン ・ トリガーセットアップ ユーザーメモリー データ製作機能 フラッシュ ROM ・ キット設定 UTIL7 FILE ファイル拡張子:.MTK (ファイルタイプ=AllKit) ・ ユーザーキット ・ ボイス設定 ・ MIDI設定 ・ パターン設定 ファイル拡張子:.MTT (ファイルタイプ=AllTrigger) ・ ユーザートリガー セットアップ ・ ユーティリティー 設定 セーブ /ロード ストア ・ ウェーブ設定 キ ッ ト ひとまとめにしたもの ・ トリガー設定 ・ ユーティリティー設定 リ フ ァ レ ン ス ボ イ ス ファイル拡張子:.MTU (ファイルタイプ=Utility) ファイル拡張子:.MTA (ファイルタイプ=All) ファイル拡張子:.
基本操作 設定の変更やジョブの実行、データの保存(ストア )といっ た操作の基本手順を説明します。 ■ モードの切り替え 本体では、機能ごとに設定項目を以下の7 つのグループに 分け、それらをモードと呼んでいます。 各モードへは、以下のボタンを押すことで移動します。 ・キットモード:[KIT]ボタン キットの選択/編集を行ないます。 ・ボイスモード:[VOICE]ボタン キットモードの一部です。ボイスの選択/編集を行 ないます。 ・MIDIモード:[MIDI]ボタン キットモードの一部です。MIDI関連の設定を行な います。 ・パターンモード:[PTN]ボタン パターンの選択/編集を行ないます。 ・ウェーブモード:[WAVE]ボタン ウェーブファイルの取り込み/編集を行ないます。 ・ユーティリティーモード:[UTIL]ボタン システム全体の設定/ファイル操作を行ないます。 ・トリガーモード:[SHIFT]ボタン+[UTILITY] ボタン トリガーセットアップデータの編集を行ないます。 ■ メニュー画面の切り替え 各モードはメニューと呼ばれる項目ごとの画面に分かれて います。メニュー画面の左上には、モード
基本操作 ■ 設定ページの切り替え ■ 設定値の変更 メニュー画面はさらに数ページの設定画面 (設定ページと 呼びます )で構成されています。メニュー画面を選んだあ と、[ENTER]ボタンを押すことで設定ページの階層(下の 階層 )へ移動します(下の階層へ移動できる場合は、 [ENTER]ボタンが点灯します)。画面左上のメニュー番号 にはハイフン (−)に続いて設定ページを表す数字が表示さ れます。設定ページの切り替えは、[B]/[C]ボタンで行 ないます。 [− /DEC]/[+ /INC]ボタンを押すことで、カーソル位置 の項目の設定値を増減 (または切り替え)します。 ・ [SHIFT] ボタンを押しながら[+ /INC]ボタンを押す、または[+ /INC]ボタ ンを押しながら[ −/DEC]ボタンを押すことで、10ずつ値が増えます。 ■ 設定内容の保存(ストア操作 ) 例: ボイスモード VCE3 TONE の場合 VCE3 ≥≥≥≥≥≥TONE NOTE ・ [SHIFT] ボタンを押しながら[− /DEC]ボタンを押す、または[− /DEC]ボタ ンを押しながら[ +/INC
キットモード (KIT) この章では、[KIT]ボタンで呼び出せるドラムキットモードについて説明します。ドラムキットは、すぐに使える 50種類 のプリセットキット(P001〜 P050)に加え、自分で作成 /保存した200種類のユーザーキット (U001〜U200) が使用 できます。キットモードでは、これらのキットの選択や編集を行ないます。 注意 ・ 設定が終わったら、電源を切る前、またはキットを切り替える前に、必ずストア操作(45 ページ)を行なってください。 キットモードの構成 キットモードには、以下の8 つのメニューがあります。メニューの切り替えは[B]/[C]ボタンで行ないます。メニューの 下に設定ページがある場合は、[ENTER]ボタンを押すことで設定ページへ移動します。ページの下の階層にさらに設定 ページがある場合は、同様に[ENTER]ボタンを押すことで次の設定ページへ移動します。また、[EXIT]ボタンを押すこと で、ひとつ上の階層へ移動します。 メニュー画面 46 取扱説明書 設定ページ KIT1 P001:PercsMaster キットの選択 ................
キットモード (KIT) KIT1 キット全体の音量 KIT2-1 キットの選択 使用するキットをプリセットキット /ユーザーキットから 選択します。[KIT]ボタンを押して、キットの選択ページ (KIT1)を表示させます。ボイスモードや MIDIモードで パッドやボイスを編集する場合も、このページでキットを 選んでからそれぞれのモードで作業を行ないます。 KIT2-1≥≥ ≥≥≥Volume=118 1 Volume ( ボリューム) キット全体の音量を設定します。 設定値 B ・ MIDI3-2 Volumeで MIDI 10チャンネルのボリュームを変更すると、こ の KIT2-1 Volumeも同じ値に設定されます。ただしKIT2-1 Volumeを 変更しても MIDI3-2 Volume の設定は変更されません。 キットカテゴリー キットカテゴリー ( プリセットキット U )を選択します。 P 、ユーザーキット キット選択時のテンポ KIT2-2 キ ッ ト P、U KIT2-2≥≥ ≥≥≥Tempo=off キット番号 : キット名
キットモード (KIT) KIT3 EFFECT SEND KIT4 VARIATION エフェクトセンド バリエーション KIT3 ≥≥EFFECT≥SEND KIT4 ≥≥≥VARIATION キット全体にかかるコーラスエフェクトおよび、リバーブ エフェクトのかかり具合を設定します。2つの設定ページ (KIT3-1、KIT3-2)があり、KIT3 EFFECT SEND のメ ニュー画面から[ENTER]ボタンで設定ページに移動し、 [B]/[C]ボタンで目的の設定ページを表示させます。 バリエーションエフェクトのタイプやエフェクトのかかり 具合を設定します。バリエーションエフェクトは全ボイス (全MIDIチャンネル )にかかります。5つの設定ページ (KIT4-1〜KIT4-5)があり、KIT4 VARIATIONのメ ニュー画面から [ENTER]ボタンで設定ページに移動し、 [B]/[C]ボタンで目的の設定ページを表示させます。 コーラスセンド KIT3-1 キット全体(ドラムボイスのみ )にかかるコーラスエフェク トのかかり具合を設定します。ドラムボイスごとに設定し た割合(
キットモード (KIT) KIT4-2≥≥≥≥≥ ≥VarReturn=≥64 1 コーラス 0〜127 バリエーションパン(定位) KIT4-3 KIT4-3≥≥≥≥≥ ≥≥≥VarPan=≥C KIT5 ≥≥≥≥≥CHORUS 1 VarReturn (バリエーションリターン ) バリエーションエフェクトからのリターンレベルを設定しま す。 設定値 1 KIT5 CHORUS バリエーションリターン KIT4-2 1 コーラスエフェクトのタイプやエフェクトのかかり具合を 設定します。コーラスエフェクトは全ボイス (全MIDIチャ ンネル )にかかります。4つの設定ページ(KIT5-1〜KIT54)があり、KIT5 CHORUSのメニュー画面から [ENTER] ボタンで設定ページに移動し、[ B]/[C]ボタンで目的の 設定ページを表示させます。 設定値 L63〜 C〜R63 KIT5-1≥≥ChoType= G≥Chorus 1 ボ イ ス 別冊データリストをご覧ください。 バリエーション トゥ リバーブ KIT4-4 KIT4-4≥≥≥
キットモード (KIT) コーラスパン(定位) KIT5-3 KIT5-3≥≥≥≥≥ ≥≥≥ChoPan=≥C 1 KIT5-4≥≥≥≥≥ ≥≥ChoToRev=≥≥0 1 1 L63〜C〜R63 別冊データリストをご覧ください。 上記画面 (KIT6-1)で[ENTER]ボタンを押すと、選択した リバーブエフェクトのパラメーター設定ページが表示され ます。パラメーターの数だけ設定ページがあります。 [B]/[C]ボタンで目的のパラメーター設定ページを表示 させます。 1 KIT6-1-1 パラメーター設定ページ ChoToRev (コーラス トゥ リバーブ ) コーラスエフェクトからリバーブエフェクトへのセンドレベ ルを設定します。 設定値 1 リバーブタイプ リバーブエフェクトのタイプを選択します。 設定値 コーラス トゥ リバーブ KIT5-4 KIT6-1≥≥RevType= R3≥Hall 1 ChoPan (コーラスパン ) コーラスエフェクトからの信号のパン (定位) を設定します。 設定値 リバーブタイプ KIT6-1 KIT6-1-
キットモード (KIT) KIT7 OTHER ミュートスイッチでは、ミュートによって音を変えたり、 音を消す機能を演奏で使用するかどうかを選択できます。 KIT7 ≥≥≥≥≥OTHER KIT7-2≥-º¡≥≥≥MuteSw=off ミュート *やハイハットに関する設定および、キット選択 時に使うトリガーセットアップの指定をします。6つの設 定ページ (KIT7-1〜KIT7-6)があり、KIT7 OTHER のメ ニュー画面から [ENTER]ボタンで設定ページに移動し、 [B]/[C]ボタンで目的の設定ページを表示させます。 *ミュートとは? パッドを手で押さえることによって、叩いて鳴らす音を変化させ たり、鳴らした音を消したりする演奏表現の一つです。音の微妙 なニュアンスを変えることができます。 本体では、実際にミュートしたときに音を変化させたり、音を消 す機能をあらかじめ設定することができます。 レイヤースイッチ KIT7-1 レイヤースイッチとは、各パッドに最大 4つまで用意され ているレイヤーを、演奏時に切り替える機能です。 KIT7-1≥-º¡LayerSwitch=off
キットモード (KIT) ハイハットファンクション KIT7-3 KIT7-3≥≥≥ ≥HH≥Func=hi-hat 1 設定値 ハイハットMIDIチャンネル KIT7-4≥≥≥ ≥HH≥MIDI≥ch=10 1 HH MIDI ch (ハイハット MIDI チャンネル) KIT7-3 HH Funcを MIDI に設定した場合に、ハイハット コントローラーから出力する MIDIメッセージの出力先 MIDI チャンネルを設定します。 設定値 1〜16 NOTE ・ KIT7-3 HH Funcを -- 表示)。 hi-hat に設定している場合は設定できません( ハイハットMIDIタイプ KIT7-5 KIT7-5≥≥≥ HHMIDIType=CC01 1 HHMIDIType (ハイハット MIDI タイプ) KIT7-3 HH Funcを MIDI に設定した場合に、ハイハット コントローラーから出力する MIDIメッセージの種類を設定し ます。 設定値 CC01〜 CC95(コントロールチェンジ)、AT(ア フタータッチ)、P
キットモード (KIT) KIT8-1-1 コピーパッド設定ページ KIT8 JOB キットジョブ KIT8-1-1≥≥ ≥≥º¡≥≥≥-ß≥≥º™ KIT8 ≥≥≥≥≥≥JOB キットやパッドの編集 (コピー、入れ替え、初期化)をしま す。5つの設定ページ (KIT8-1〜 KIT8-5)があり、KIT8 JOBのメニュー画面から [ENTER]ボタンで設定ページに 移動し、[B]/[C]ボタンで目的の設定ページを表示させ ます。 1 B ジョブの設定が終わったら [ENTER]ボタンを押します。 Are you sure? と実行の確認画面が表示されます。 01〜 12、13、13R1、13R2、14〜 17、 FTSW (FOOT SW)、HHCL (HI-HAT Close)、 HHSP (HI-HAT Splash) リ フ ァ レ ン ス コピー先パッド番号 コピー先パッドのパッド番号を選択します。 01-12 に設定した場合は、すべての本体パッド(パッド 01〜 12)に対してコピー元パッドの情報がコピーされます。 all に設定した場合は、すべての外部パッド(1
キットモード (KIT) エクスチェンジキット KIT8-3 ユーザーキット間でキットデータを入れ替えます。 [ENTER]ボタンを押して、設定ページを表示させます。 KIT8-3≥≥≥≥≥ ≥≥Exchange≥Kit KIT8-3-1 エクスチェンジキット設定ページ 2 エクスチェンジキット 1 B エクスチェンジキット 2 入れ替えを行なう 2つのユーザーキット番号を選択します。 U001〜U200 NOTE ・ 未ストアの編集データは入れ替えされません。ストア操作により保 存済のユーザーキットデータが、入れ替えされます。 イニシャライズパッド KIT8-4 現在選択中のキットをパッド別に初期化します。 [ENTER]ボタンを押して、設定ページを表示させます。 KIT8-4≥≥≥≥≥ ≥Initialize≥Pad KIT8-4-1 イニシャライズパッド設定ページ KIT8-4-1≥ ≥≥InitPad=¡£Ω¡ 1 1 パッド番号 初期化の対象となるパッドのパッド番号を選択します。 設定値 01〜12、13、13R1、13R2、14〜17、 FT
ボイスモード (VCE) この章では、[VOICE]ボタンを押して呼び出せるボイスモードについて説明します。ボイスモードでは、パッドに割り当 てるボイス (プリセットボイスやパターン) の選択や編集を行ないます。ボイスについての説明やしくみは31ページをご覧 ください。 注意 ・ 設定が終わったら、電源を切る前、またはキットを切り替える前に、必ずストア操作(45ページ )を行なってください。 リ フ ァ レ ン ス ボイスモードの構成 ボイスモードには、以下の 5つのメニューがあります。メニューの切り替えは[B]/[C]ボタンで行ないます。メニューの 下に設定ページがある場合は、[ENTER]ボタンを押すことで設定ページへ移動します。[EXIT]ボタンを押すと、ひとつ上 の階層へ移動します。 ボイスモードでの編集の対象となるボイスは、現在選択しているキットの各パッドに割り当てられているボイスです。ボイ スモードに入る前に、キットモードで編集対象のキットを選んでおきます。ボイスモードの先頭画面 (VCE1画面)で、パッ ドに割り当てるボイス (プリセットボイス/パターン/ウェーブ )を設定します。ボイスモード
ボイスモード (VCE) 1 VCE1 ボイスの選択 設定値 VCE1≥-¡£Ω¡-≥≥≥≥ç Sn001:OakCustom このメニューではパッド番号を指定し、指定したパッドを 叩いたときに鳴らすボイス(プリセットボイス /パターン/ ウェーブ)を選択します。また、パッド番号の代わりに MIDIノートナンバーを指定し、指定したノートナンバー に対して鳴らすボイスを選択することもできます(34ペー ジ参照)。設定の対象がパッド番号もしくはMIDIノートナ ンバーかによって、画面表示や設定項目が異なります。ま た、ボイスモードで設定できる内容も異なります。 パッド番号 設定の対象となるパッドのパッド番号または MIDIノートナン バーを設定します。 パッド番号の指定はパッドを叩くことで もできます。 01〜12、13、13R1、13R2、14〜 17、 FTSW (FOOT SW)、HHCL (HI-HAT Close)、 HHSP (HI-HAT Splash)、C#-1、D-1〜 A#5 NOTE ・ パッド13 は3ゾーン対応なので 3つのパッド番号(13: ヘッド、13R1: リム1,
ボイスモード (VCE) C VCE2 TUNE/OUTPUT ボイスのチューニング/音量/パン (定位) Tune (チューニング ) ボイスのピッチ(音程 )を 1セント単位で設定します。 設定値 -24.00 〜+0.0〜+24.
ボイスモード (VCE) 【VCE3-1 アタックタイム】 C Attack (アタックタイム) パッドを叩いてから、 ボイスが発音時の最大レベルに達する までの時間を設定します。 VCE3 TONE ボイスのトーン 設定値 VCE3 ≥≥≥≥≥≥TONE ボイス(ボイス /パターン/ウェーブ)のトーン (音質)を設定 します。4つの設定ページ (VCE3-1〜VCE3-4)があり、 VCE3 TONEのメニュー画面から[ENTER]ボタンで設定 ページに移動し、[B]/[C]ボタンで目的の設定ページを 表示させます。 -64〜 +0〜+63 【VCE3-2 ディケイタイム】 C Decay (ディケイタイム ) ボイスが発音時の最大レベルから減衰するのに要する時間を 設定します。 設定値 -64〜 +0〜+63 【VCE3-3 リリースタイム】 C Release (リリースタイム) ノートオフを受信してから音が消えるまでの時間を設定しま す。 設定値 VCE3-1 アタックタイム -64〜 +0〜+63 NOTE ・ MIDIモードの MIDI1-5 RcvKeyOffが off
ボイスモード (VCE) D Q (フィルターレゾナンス ) フィルターのカットオフ周波数付近の信号を持ち上げること により、音にクセをつけます。 設定値 VCE4-2 コーラスセンド 1 -64〜+0〜+63 VCE4-2≥-º¡-≥≥≥≥ç ≥≥ChoSend=127 レベル レゾナンス (Q) 1 B 01〜 12、13、13R1、13R2、14〜 17、 FTSW、HHCL、HHSP、C#-1、D-1〜 A#5 C リ フ ァ レ ン ス レイヤー番号 設定値 周波数 3 パッド番号 設定値 カットオフ周波数 2 A、B、C、D ChoSend (コーラスセンド ) コーラスエフェクトに送る量(センドレベル )を、レイヤーご とに設定します。 設定値 キ ッ ト 0〜127 NOTE ・ キット全体のコーラスセンドレベルは、KIT3-1 ChorusSendで設定し ます。 VCE4 EFFECT SEND エフェクトセンド ボ イ ス VCE4-3 リバーブセンド VCE4 ≥≥EFFECT≥SEND 1 ボイスにかかるエフェクト (バ
ボイスモード (VCE) VCE5 OTHER VCE5-2 その他の設定 オルタネートグループ 1 VCE5 ≥≥≥≥≥OTHER VCE5-2≥-º¡-≥≥≥≥ç AltGroup=≥≥≥≥off 2つの設定ページ (VCE5-1、VCE5-2)があり、VCE5 OTHERのメニュー画面から [ENTER]ボタンで設定ページ に移動し、[B]/[C]ボタンで目的の設定ページを表示さ せます。 1 設定値 B C 音源の設定(モノ/ポリ) 1 2 VCE5-1≥-º¡-≥≥≥≥ç ≥Mono/Poly=poly 3 パッド番号 01〜12、13、13R1、13R2、14〜 17、 FTSW、HHCL、HHSP、C#-1、D-1〜A#5 レイヤー番号 設定値 VCE5-1 2 A、B、C、D AltGroup (オルタネートグループ ) オルタネートグループを設定します。 オルタネートグループとは、 同時に鳴らしたくない音をまと めたグループをいいます。 あらかじめ同時に鳴ることがあり 得ないボイスを同じオルタネートグループに登録しておくと、 同グループの中で後から叩い
MIDIモード (MIDI) この章では、[MIDI]ボタンで呼び出せるMIDIモードについて説明します。MIDIモードでは、キットごとに持っている MIDI関連の設定を行ないます。各パッドのレイヤー設定( レイヤーの数や鳴らし方の変更) は、このMIDIモードで行ないま す。MIDIモードで扱える機能の詳しいしくみについては、34ページをご覧ください。 注意 ・ 設定が終わったら、電源を切る前、またはキットを切り替える前に、必ずストア操作(45ページ )を行なってください。 リ フ ァ レ ン ス MIDIモードの構成 MIDIモードには、以下の3 つのメニューがあります。メニューの切り替えは[B]/[C]ボタンで行ないます。メニューの下 に設定ページがある場合は、[ENTER]ボタンを押すことで設定ページへ移動します。また、[EXIT]ボタンを押すことで、 ひとつ上の階層へ移動します。MIDIモードでの設定はキット単位で保存(ストア )されるので、キットモードで編集対象の キットを選んでから MIDIモードに入ります。MIDI1の設定メニューでは設定対象のパッドを選びパッド単位で設定します。 MIDI2
MIDIモード (MIDI) MIDI1 MIDIメッセージタイプの選択 MIDI1≥-º¡MessageType=note 1 パッド番号 設定の対象となるパッドのパッド番号を設定します。パッド 番号の指定はパッドを叩くことでもできます。 設定値 B 01〜12、13、13R1、13R2、14〜17、 FTSW (FOOT SW)、HHCL (HI-HAT Close)、 HHSP (HI-HAT Splash) MessageType (メッセージタイプ ) 1で選択したパッドを叩いたときに出力される MIDIメッセー ジのタイプを設定します。 ・ note....MIDIノートを出力します。パッドを叩いて発音さ せる場合はこれに設定します。 ・ CC .......コントロールチェンジを出力します。 ・ PC .......プログラムチェンジを出力します。 ・ strt......ソングスタート (FA)を出力します。 ・ cont....コンティニュー (FB) を出力します。 ・ stop....
MIDI モード (MIDI) スタック/オルタネート/ホールドモード の使用例 MIDI1-2 1 MIDI1-1の Mode (発音の設定 )では、4つのレイヤー の鳴らし方を選ぶことができます。和音を鳴らしたり、 違う音を交互に鳴らすなど、設定することができます。 ここでいくつか使用例を紹介します。 ● パッドを叩くごとに、1 音だけ鳴らす場合 MIDI1-1 ページで Mode=stack に設定し、MIDI1-2 ページでレイヤー A にMIDIノートを割り当てます。 レイヤー ノートナンバー A D1 B off C off D off ノートナンバー A D1 B E2 C off D off 1 B ノートナンバー A D1 B E2 C off D off リ フ ァ レ ン ス レイヤー番号 設定対象のレイヤーを選択します。 A、B、C、D Note (ノート ) 設定対象レイヤーが発音時に出力されるMIDIノートを設定し ます。 ・ off ........
MIDIモード (MIDI) MIDI1-4 ゲートタイム 1 MIDI1-6 2 MIDI1-4≥-º¡-≥≥≥ç ≥GateTime=0.0s 1 3 3 1 B A、B、C、D C D 0.0s〜9.
MIDI モード (MIDI) MIDI1-8 トリガーモノ/ポリ MIDI1-8≥-º¡TrgMonoPoly=poly 1 1 TrgMonoPoly (トリガーモノポリ) 1で選択したパッドについて、パッドを連続して叩いた際の 動作を設定します。 mono に設定すると、すでに発音され ている音を止め、常に新しい音のみが発音します。 poly に 設定した場合はその制限はありません。 1 ・ MIDI1-5 RcvKeyOffが off に設定されている場合はキーオフ(ノー トオフ)を受信しないので、トリガーモノ/ ポリを設定する場合は on に設定してください。これにより、キーオフ受信時に消音しま す。 B トリガー オルタネート グループ MIDI1-9≥-º¡-≥≥ TrgAltGrp=off CCNo (コントロールチェンジ番号 ) 1で選択したパッドを叩いたときに出力される MIDIコント ロールチェンジ番号を設定します。 キ ッ ト 1〜95 Val (コントロールチェンジ値 ) 1で選択したパッドを叩いたときに出力される MIDIコント ロールチェンジの値を設定
MIDIモード (MIDI) MIDI2 TG/MIDI SWITCH MessageType=PC の場合の設定ページ MIDI1-1 バンクセレクトMSB/LSB、PC MIDI1-1≥-º¡M000/L000/PC001 2 1 バンクセレクト MSB 1で選択したパッドを叩いたときに出力されるバンクセレク トMSB の値を設定します。 001〜128 MIDI2-1≥≥≥≥≥Ch≥1 ≥TG≥Switch=off 1 B 1 MIDI2-2 MIDI Ch (MIDI チャンネル) 1で選択したパッドを叩いたときに出力されるプログラム チェンジの MIDIチャンネルを設定します。 取扱説明書 off、on MIDIスイッチ MIDI2-2≥≥≥≥≥Ch≥1 MIDI≥Switch=off 01〜12、13、13R1、13R2、14〜17、 FTSW、HHCL、HHSP 1〜16 1〜16 2 1 設定値 B 1 2 Ch (MIDIチャンネル ) 設定の対象となる MIDIチャンネル(1〜 16)を選択します。 1〜16 MIDI Switch (M
MIDI モード (MIDI) MIDI3 OTHER MIDI3-3 その他の設定 パン(定位) MIDI3-3≥≥≥≥≥Ch≥1 ≥≥≥≥Pan=≥C MIDI3 ≥≥≥≥≥OTHER 1 キット選択時に出力される各種 MIDIメッセージを設定し ます。8つのページ (MIDI3-1〜MIDI3-8)があり、MIDI3 OTHERのメニュー画面から [ENTER]ボタンで設定ページ に移動し、[B]/[C]ボタンで目的の設定ページを表示さ せます。 2 Ch (MIDIチャンネル ) 設定値 B 1 1〜16 Pan (パン ) キット選択時に出力されるパン( 定位)を設定します。 設定値 リ フ ァ レ ン ス L63 〜C〜R63 NOTE ・ MIDI3-1 Transmit が off または PC に設定されている場合、設 定値は --- と表示され設定できません。 MIDI3-1 トランスミット MIDI3-4 MIDI3-1≥≥≥≥≥Ch≥1 ≥≥Transmit=all 1 MIDI3-4≥≥≥≥≥Ch≥1 M000/L000/PC001 2 1〜
MIDIモード (MIDI) バリエーションセンド MIDI3-6 コーラスセンド MIDI3-7 リバーブセンド MIDI3-5 MIDI3-8 MIDI3-8≥≥≥≥≥Ch≥1 CCNo=off/Val=≥≥0 キット選択時に出力される各エフェクトへのセンド(送出 ) レベルを設定します。 NOTE ・ MIDI3-1 Transmit が off または PC は --- と表示され設定できません。 2 に設定されている場合、設定値 1 各画面の 2でそれぞれのパラメーターを設定します。1は 3画面とも同じ設定項目です。 B 1 1 C Ch (MIDIチャンネル ) 設定値 1〜16 off、1〜95 Val (コントロールチェンジ値 ) キット選択時に出力される MIDIコントロールチェンジの値を 設定します。 設定値 1〜16 3 CCNo (コントロールチェンジ番号 ) キット選択時に出力される MIDIコントロールチェンジ番号を 設定します。 off に設定した場合はコントロールチェンジ を出力しません。 設定値 2 1 Ch (MIDIチャンネル
ウェーブモード (WAVE) この章では、[WAVE]ボタンを押して呼び出せるウェーブモードについて説明します。本体では、WAV形式またはAIFF 形式のオーディオデータ (ウェーブファイル) を取り込んで、プリセットボイスやパターンと同様に使うことができます。 ウェーブモードでは、ウェーブファイルの本体への取り込みや編集を行ないます。 注意 ・ ウェーブのインポートや設定が終わったら、電源を切る前、またはウェーブを切り替える前に、必ずストア操作(45ページ )を行なってください。 リ フ ァ レ ン ス ウェーブモードの構成 ウェーブモードには、以下の 4つのメニューがあります。メニューの切り替えは[B]/[C]ボタンで行ないます。メニュー の下に設定ページがある場合は、[ENTER]ボタンを押すことで設定ページへ移動します。ページの下の階層にさらに設定 ページがある場合は、同様に [ENTER]ボタンを押すことで次の設定ページへ移動します。また、[EXIT]ボタンを押すこと で、ひとつ上の階層へ移動します。 メニュー画面 設定ページ WAVE1 WV001:EmptyWave ウェーブの選択と再
ウェーブモード (WAVE) WAVE1 ウェーブの選択と再生 ウェーブを選択し再生します。ここで表示されるウェーブ は、インポート操作(72ページ)によって本体に保存され たウェーブです。USB記憶装置を本体に挿入 (接続)して いるだけでは、USB記憶装置に保存されたウェーブファ イルを選ぶことはできません。 この画面で[WAVE]ボタンを押している間、選択中の ウェーブが鳴ります。[WAVE]ボタンから指を離すと再生 が停止します。 WAVE1 WV001:My≥Wave 1 A ウェーブ番号 : ウェーブ名 設定値 WV001〜 WV500 WAVE2-1 ウェーブの再生方法 WAVE2-1≥ PlayMode=oneshot 1 1 PlayMode (再生方法) ウェーブの再生のしかたを設定します。 この設定は、選択したウェーブをパッドに割り当てたときに も有効です。スタートポイント、 エンドポイント、ループポ イントは、次の WAVE2-2 Trimmingで設定します。 ・ oneshot(ワンショット ) スタートポイントからエンドポイントまでを 1 度
ウェーブモード (WAVE) WAVE2-2 ウェーブのトリミング ウェーブのトリミング (ポイント編集)を行ないます。以下 の画面で [ENTER]ボタンを押して、設定ページを表示さ せます。 WAVE2-3 ウェーブ名 ウェーブ名を設定します。以下の画面で [ENTER]ボタン を押して、ウェーブ名の設定ページを表示させます。 WAVE2-3≥ ≥≥≥≥≥≥Name WAVE2-2≥ ≥≥≥≥Trimming WAVE2-3-1 ウェーブ名の設定ページ WAVE2-2-1 トリミング設定ページ WAVE2-2-1≥≥start ≥≥Point=05000 1 リ フ ァ レ ン ス WAVE2-3-1 ≥≥[MyWave≥1≥] 2 ウェーブ名 1 トリミングポイント トリミング対象のポイントを設定します。start ( スタートポ イント )、loop ( ループポイント)、end (エンドポイント )の それぞれの位置は、下図の通りです。 ・ Start( スタートポイント) 再生を開始する位置を設定します。この位置よりも 前 (小さい数
ウェーブモード (WAVE) WAVE3-1 オーディオファイルの一括 インポート USB記憶装置の中にある WAVファイルとAIFFファイル のすべてを、本体の内部メモリーにインポート(取り込み ) します。 オーディオファイルを1ファイルずつ インポートする USB 記憶装置の中にあるウェーブファイル(WAV また は AIFF形式)を1 ファイルずつ選んで、内部メモリーに インポート (取り込み)します。 NOTE NOTE ・ 1ファイルずつ選んでインポートすることもできます。右コラムをご覧く ださい。 ・ WAV、AIFF以外の形式のファイルはインポートできません。 ・ WAV、AIFF以外の形式のファイルはインポートできません。 1 コンピューターを使って、インポートしたいウェーブファイ ル(WAVまたはAIFF 形式)を USB記憶装置のルートディレク トリーに保存します。 コンピューターを使って、 インポートしたいウェーブファ イル (WAVまたは AIFF形式 )をUSB記憶装置のルート ディレクトリーに保存します。 2 USB 記憶装置を、本体のUSB TO DE
ウェーブモード (WAVE) WAVE3-2 ノーマライズ WAVE3-5 現在選択中のウェーブに対して、適度な音量になるよう増 幅します。WAVE3-2-1 Ratioの設定ページで、増幅の量 を設定します。以下の画面で [ENTER]ボタンを押して、 設定ページを表示させます。 メモリーの最適化(オプティマイズ) 本体のウェーブ用メモリーを最適化します。最適化とは、 メモリー領域を整理し直すことで、メモリーの有効活用領 域を拡大する作業のことです。メモリーを最適化すること で、メモリーの空き容量が増える場合があります。 WAVE3-2≥≥≥≥ ≥≥≥Normalize WAVE3-5≥≥≥≥ Optimize≥Memory リ フ ァ レ ン ス WAVE3-2-1 レシオ設定ページ WAVE4 MEMORY INFO WAVE3-2-1 ≥≥≥Ratio=100% 1 1 Ratio (レシオ ) ウェーブの増幅の割合を設定します。100%に設定すると、 最大レベルがクリップ寸前のレベルになるように増幅します。 100% 以上に設定すると、音が歪むおそれがあ
パターンモード (PTN) この章では、[PTN]ボタンを押して呼び出せるパターンモードについて説明します。本体には、内蔵で再生専用のプリ セットパターン(P001〜 P128)と、録音 /編集ができるユーザーパターン(U001〜 050)が用意されています。パター ンモードでは、これらのパターンの録音や編集を行ないます。 NOTE ・ プリセットパターンが選択されている場合、PTN2-1以降の設定ページを呼び出すことができません。プリセットパターンを編集したい場合は、PTN4-5 Copyでプリセットパターンを空のユーザーパターンへコピーし、コピーしたユーザーパターンを編集しましょう。 注意 ・ パターンの録音や設定が終わったら、電源を切る前、またはパターンを切り替える前に、必ずストア操作(45 ページ)を行なってください。 パターンモードの構成 パターンモードには、以下の6 つのメニューがあります。メニューの切り替えは[B]/[C]ボタンで行ないます。メニュー の下に設定ページがある場合は、[ENTER]ボタンを押すことで設定ページへ移動します。ページの下の階層にさらに設定 ページがある場合は、同様
パターンモード (PTN) PTN1 PTN2 COMMON パターンの選択と再生 パターンのループ再生/テンポ/ パターン名 パターンを選択し、テンポおよび拍子を設定して再生しま す。[PTN] ボタンを押して、パターンの選択ページ (PTN1)を表示させます。PTN1ページで[PTN]ボタンを 押すと選択したパターンが再生され、もう一度 PTN1ペー ジで[PTN]ボタンを押すと停止します。 パターンの編集や録音作業をする場合は、対象のパターン をあらかじめこのページで選んでおきます。 1 2 PTN1≥≥≥ƒ=120≥4/4 ©P001:Demo≥01 3 1 ユーザーパターンのループ再生、テンポ、パターン名を設 定します。3 つの設定ページ(PTN2-1〜PTN2-3)があ り、PTN2 COMMONのメニュー画面から[ENTER]ボタ ンで設定ページに移動し、[ B]/[C]ボタンで目的の設定 ページを表示させます。 NOTE PTN2-1 30〜300 NOTE 拍子 パターンの拍子を設定します。 PTN2-1≥≥ ≥≥≥≥Loop=off 1 1/4
パターンモード (PTN) PTN2-3 パターン名 パターン名を設定します。以下の画面で[ENTER]ボタン を押して、パターン名の設定ページを表示させます。 PTN3 MIDI パターンのMIDI設定 PTN3 ≥≥≥≥≥≥MIDI PTN2-3≥≥ ≥≥≥≥≥≥Name PTN2-3-1 パターン名の設定ページ PTN2-3-1 ≥≥[Pattern≥1≥]≥≥ ユーザーパターンに対するチャンネルごとの MIDI情報を 設定します。7 つの設定ページ(PTN3-1〜PTN3-7)があ ります。ここでの設定は内蔵音源へ送信されると同時に、 外部にも MIDI出力されます。PTN3 MIDIのメニュー画面 から [ENTER]ボタンで設定ページに移動し、[B]/[C]ボ タンで目的の設定ページを表示させます。 NOTE ・ プリセットパターンが選ばれている場合は、[ENTER]ボタンを押しても設 定ページに移動することはできません。 パターン名 最大10 文字までの長さでパターン名を設定できます。[B]/ [C]ボタンで変更したい文字を点滅表示させ、[− /DEC]/
パターンモード (PTN) PTN3-2 MIDIボリューム PTN3-2≥≥≥≥≥≥Ch≥1 ≥≥≥Volume=100 1 1 2 1〜16 1 NOTE PC に設定している場合は設定 C D MIDIパン(定位) 000 〜127 001〜128 1 B に設定している場合は設定できません( -- キットを選択する場合は、MIDIチャンネル 10を以下のよう に設定します。 2 M I D I ・ プリセットキットの場合 MSB=125、LSB=000、PC=プリセットキット番号 ・ ユーザーキット (1〜 100) の場合 MSB=125、LSB=001、PC=001(U001) 〜100(U100) ・ ユーザーキット (101 〜200 )の場合 MSB=125、LSB=002、PC=001(U101)〜100(U200) 1〜16 Pan ( パン) コントロールチェンジ 10番のパン (定位 )を設定します。内蔵 音源に対しては、この値が各 MIDIチャンネルの定位となりま す。 設定値 off 1 Ch (MIDIチャンネル ) 設定値
パターンモード (PTN) PTN3-6 PTN4 JOB コーラスセンド パターンジョブ PTN3-6≥≥≥≥≥≥Ch≥1 ≥≥ChoSend=≥≥0 1 PTN4 ≥≥≥≥≥≥JOB 2 Ch (MIDIチャンネル ) 設定値 B 1 1〜16 ChoSend (コーラスセンド ) コーラスエフェクトへのセンドレベルを設定します。 設定値 0〜127 NOTE ・ PTN3-1 Transmitを off または できません( --- 表示 )。 PC に設定している場合は設定 ・ MIDI 10 チャンネルのコーラスセンドを変更すると、現在選択されて いるキット全体のコーラスセンド(KIT3-1 ChorusSend) も同値に設定 されます。 現在選択中のユーザーパターンのクォンタイズやマージ、 SMF ファイルのインポートなどを行ないます。7つの設定 ページ (PTN4-1〜 PTN4-7)があり、PTN4 JOB のメ ニュー画面から [ENTER]ボタンで設定ページに移動し、 [B ]/[C]ボタンで目的の設定ページを表示させます。 NOTE ・ プリセッ
パターンモード (PTN) ● クオンタイズの動作例 PTN4-3 ・タイミングがずれて入力されたデータ クリアパターン 現在選択中のユーザーパターンのデータを消去します。以 下の画面で [ENTER]ボタンを押して表示される確認画面 Are you sure? で、[ENTER]ボタンを押すと消去が実 行されます。 ・クオンタイズによりタイミングがそろえられたデータ 注意 ・ クリアパターンを実行するとデータは完全に消去されますので、大切な データは必ず USB記憶装置へセーブ(保存 )してください。 ジャストなタイミング PTN4-2 リ フ ァ レ ン ス PTN4-3≥≥≥≥≥ ≥≥≥≥≥Clear マージパターン 2つのパターンを選び、それらをマージ (重ね合わせ)した ものをユーザーパターンとして保存します。あらかじめ PTN1ページで保存先のユーザーパターンを選んでおき、 以下の画面で [ENTER]ボタンを押して設定ページを表示 させます。 PTN4-2≥≥≥≥≥ ≥≥≥≥≥Merge PTN4-4 キ ッ ト クリアオールパターン 全ユ
パターンモード (PTN) PTN4-5-1 コピーパターン設定ページ 以下の画面で[ENTER]ボタンを押し、表示される確認画 面 Are you sure? で[ENTER]ボタンを押すと、コ ピーが実行されます。 PTN4-5-1≥≥ ≥©P004≥-ßCurrent PTN4-7 USB 記憶装置に保存したSMF(フォーマット0)を本体に インポート (取り込み)します。SMFとはスタンダード MIDIファイルの略で、拡張子 midのMIDIシーケンスデー タです。本体に SMFをインポートすると、SMF をユー ザーパターンとして使えます。 PTN4-7≥≥≥≥≥ ≥≥≥Import≥SMF 1 1 コピー元パターン 1 コピー元のパターンを選択します。 設定値 eP004〜 eP128、 eU001〜 eU050 インポートSMF PTN4-7-1 インポート SMF設定ページ 注意 ・ 現在選択中のユーザーパターンに上書きされますので、大切なデータは コピーパターンを実行する前に、USB記憶装置へセーブ(保存 )してくだ さい。 PTN4-7-1<
パターンモード (PTN) PTN5 MEMORY INFO メモリーインフォメーション PTN5 ≥≥MEMORY≥INFO 本体のユーザーパターン用メモリーの使用状況を表示しま す。PTN5 MEMORY INFOの画面で [ENTER]ボタンを 押すと、メモリーの使用状況画面が表示されます。 PTN5-1 メモリーインフォメーション PTN5-1≥≥≥≥≥≥0.0% ≥≥≥0.4KB/896.
ユーティリティーモード (UTIL) この章では、[UTILITY]ボタンを押して呼び出せるユーティリティーモードについて説明します。ユーティリティーモー ドでは、システム全体に関する設定やファイル操作を行ないます。 注意 ・ 設定が終わったら、電源を切る前に、必ずストア操作(45 ページ)を行なってください。 ユーティリティーモードの構成 ユーティリティーモードには、8つのメニューがあります。メニューの切り替えは [B ]/[C ]ボタンで行ないます。 メニューの下に設定ページがある場合は、[ENTER]ボタンを押すことで設定ページへ移動します。ページの下の階層にさ らに設定ページがある場合は、同様に[ENTER]ボタンを押すことで次の設定ページへ移動します。また、[EXIT]ボタンを 押すことで、ひとつ上の階層へ移動します。 メニュー画面 UTIL1 ≥≥≥≥GENERAL UTIL1-1 UTIL1-2 UTIL1-3 UTIL1-4 UTIL1-5 UTIL1-6 UTIL1-7 UTIL1-8 マスターボリューム .......................................
ユーティリティーモード (UTIL) UTIL1 GENERAL UTIL1-4 システム全体に関する設定 UTIL1-4 StartupPtn=©P001 UTIL1 ≥≥≥≥GENERAL 1 システム全体に関する設定を行ないます。8つの設定ペー ジ (UTIL1-1〜UTIL1-8)があり、UTIL1 GENERALのメ ニュー画面から [ENTER]ボタンで設定ページに移動し、 [B]/[C]ボタンで目的の設定ページを表示させます。 UTIL1-1 1 MasterVolume ( マスターボリューム) 本体音源のマスターボリュームを設定します。この値が小さ いと、本体パネルの VOLUMEを上げても音量が上がりませ ん。 設定値 スタートアップトリガー番号 UTIL1-5 ≥StartupTrg=P01 1 0〜127 キ ッ ト 1 StartupTrg ( スタートアップトリガー番号) 電源を入れたときに選択されるトリガーセットアップ番号を 設定します。カテゴリー (P: プリセットセットアップ、 U: ユーザーセットアップ)と番号
ユーティリティーモード (UTIL) UTIL1-7 パンデプス UTIL1-7 ≥≥PanDepth=≥64 1 UTIL2-2 設定値 UTIL2-2≥≥ ≥≥≥Volume=127 1 PanDepth (パンデプス ) 個別のドラム音や楽器音のパン (定位) バランスを保ったまま、 全体のパンを設定します。 1 1 Volume (クリック マスター ボリューム) クリック音のマスターボリュームを設定します。 設定値 0〜127 1〜127 UTIL2-3 UTIL1-8 クリック マスター ボリューム AUX アウトプットセレクト クリック エレメント ボリューム 1 UTIL1-8 AuxOutSel=L&R+ph 1 1 AuxOutSel (AUXアウトプットセレクト ) AUX IN端子から入力されるオーディオ信号の出力先を設定し ます。 ・ L&R+ph ...... OUTPUT (L/MONO、R) 端子と PHONES 端子の両方に出力します。 ・ phones .......
ユーティリティーモード (UTIL) UTIL2-5 UTIL2-5-3 クリック アクセント ノートナンバー クリックMIDI UTIL2-5-3 NoteA…=C#-1/≥13 UTIL2-5 ≥≥≥Click≥MIDI 1 クリックの MIDI設定を行ないます。UTIL2-5 Click MIDI には 4つの設定ページ(UTIL2-5-1 〜UTIL2-5-4) があり、 UTIL2-5 Click MIDIの設定ページで [ENTER]ボタンを押 すと、UTIL2-5-1 MIDI INの設定ページが表示されます。 UTIL2-5-2〜 UTIL2-5-4画面へは[B]/[C]ボタンで移動 します。 1 NoteAcc (アクセントノートナンバー ) クリックのアクセント音のMIDIノートナンバーを設定しま す。 設定値 off、C#-2〜F#8 ・ UTIL2-5-1 MIDI INが on の場合、ここで設定したナン バーの MIDIノートを受信するとクリックのアクセント音を 発音します。 リ フ ァ レ ン ス NOTE ・ この設定を off にした場合
ユーティリティーモード (UTIL) タップテンポ機能 タップテンポ機能とは、パッドを叩くタイミングでパ ターンやクリックのテンポを設定する機能です。 あなたの感覚でカウントを出して、パターンやクリッ クのテンポを決めることができます。 1 [SHIFT]ボタンを押しながら、[ E](クリック)ボタンを 押します。 タップテンポの設定画面が表示されます。表示されている テンポ値は現在の設定です。 TAP≥TEMPO ≥≥≥≥≥ƒ=120 UTIL3 MASTER EQ マスター EQの設定 UTIL3 ≥≥≥MASTER≥EQ ボイスやパターンなどの出力音の音質を補正するマスター イコライザーに関する設定を行ないます。3 つの設定ペー ジ (UTIL3-1〜UTIL3-3)があり、UTIL3 MASTER EQの メニュー画面から [ENTER]ボタンで設定ページに移動し、 [B]/[C]ボタンで目的の設定ページを表示させます。 G (ゲイン) 2 演奏したいテンポでパッドを数回叩きます。 どのパッドを叩いてもかまいません。叩いたタイミングか らテンポが自動的に検出され、LCD画面に表示され
ユーティリティーモード (UTIL) UTIL3-1 EQゲイン、フリケンシー、Q UTIL3-1≥≥≥≥≥≥mid G+12/F2.0k/Q≥0.1 2 1 3 1 EQシェイプ 周波数帯域 lowとhighに対して、イコライザーのタイプを 選ぶことができます。 UTIL3-2≥≥≥≥≥≥low ≥Shape=shelving 4 周波数帯域 設定の対象となるマスター EQ のバンド( 周波数帯域)を選択し ます。 設定値 UTIL3-2 1 low、lowMid、mid、highMid、high G (ゲイン ) 1で選択したバンドの信号レベルをどの程度ブースト/ カット ( 増減)するかを設定します。 設定値 C F ( フリケンシー ) 1で選択したバンドの中でブースト/ カットする中心周波数を 設定します。バンド lowでは、UTIL3-2 2Shapeで設定して いるイコライザーのタイプにより設定範囲が異なります。 low: shelvingの場合 32〜 2.0k peaking の場合 63〜2.
ユーティリティーモード (UTIL) Func にCC01〜 CC95 ( コントロールチェンジ) を設定した 場合は、以下のようにコントロールチェンジ値および送信 チャンネルを設定します。 UTIL4 PAD パッドに関する設定 ●設定対象が UTIL4 ≥≥≥≥≥≥PAD FTSW 以外の場合 UTIL4-1≥-º¡-≥≥†” Func=CC01/127 パッドやフットスイッチに機能を割り当てたり、FOOT SW端子に接続するコントローラータイプの設定、内蔵 パッド10〜 12の設定を行ないます。3つの設定ページ (UTIL4-1〜UTIL4-3)があり、UTIL4 PAD のメニュー画 面から[ENTER]ボタンで設定ページに移動し、[B]/[C] ボタンで目的の設定ページを表示させます。 2 ●設定対象が FTSW 3 で、UTIL4-2 FootSwInSel=ftswの場合 UTIL4-1≥-√¤‘’-†” Func=CC01/≥0-127 2 UTIL4-1 パッドファンクション 4 3-a 4 3-b ●設定対象が FTSW で、UTIL4-2 Foo
ユーティリティーモード (UTIL) UTIL4-2 FOOT SW端子の機能 UTIL4-2≥≥≥≥ FootSwInSel=ftSw 1 UTIL5-1 設定値 UTIL5-1≥ ≥ClosePosi=+10 1 FootSwInsel (FOOT SW入力選択 ) FOOT SW 端子に接続するコントローラーを、フットスイッ チ (ftSw)、ハイハットコントローラー (HH65)、フットコン トローラー (FC7) のいずれかに設定します。 クローズポジション 1 ftSw、HH65、FC7 1 ClosePosi (クローズポジション ) ハイハットコントローラーを踏んだときに、オープン音から クローズ音に切り替わる位置を調節します。値が小さいほど トップとボトムの開きが狭い感じになります。 設定値 -32〜 +0〜+32 リ フ ァ レ ン ス NOTE ・ ハイハットコントローラーおよびフットコントローラー接続時に送 信されるベロシティーは、MIDI1-7 TrgVelの設定に従います。 ・ フットスイッチ接続時に送信されるベロシティー
ユーティリティーモード (UTIL) UTIL6 MIDI UTIL6-3 システム全体のMIDI設定 UTIL6-3≥≥≥ ≥RcvPC10ch=on UTIL6 ≥≥≥≥≥≥MIDI 1 システム全体に関わるMIDIの設定を行ないます。12の設 定ページ(UTIL6-1〜 UTIL6-12)があります。UTIL6 MIDIの画面から[ENTER]ボタンで設定ページに移動し、 [B]/[C]ボタンで目的の設定ページを表示させます。 UTIL6-2 1 off、on UTIL6-5 取扱説明書 ローカルコントロール 1 LocalCtrl (ローカルコントロール ) パッドやパターンによる演奏に対して内蔵音源が発音する (on) かしない(off) かを設定します。通常は on に設定しま す。 off にすると、本体のパッド /コントローラー部と音源 部が内部的に切り離され、 パッドを叩いても音が出なくなり ます。 NOTE ・ LocalCtrl=off に設定していても、MIDI IN端子やUSB端子で受信し たMIDI メッセージには対応(発音)し、本体の演奏
ユーティリティーモード (UTIL) UTIL6-6 MIDIシンク UTIL6-6≥≥≥ ≥MIDI≥Sync=int 1 UTIL6-8 設定値 UTIL6-8≥≥≥ ≥SeqCtrl=in/out 1 MIDI Sync (MIDIシンク) パターンやクリックの再生を、本体で設定されたテンポで行 なうか、本体に接続した外部 MIDI機器からのクロック (タイ ミングクロック F8)で行なうかを設定します。 ・ int ....... 本体で設定されたテンポで動作します。本体を単独 で使用したり、本体を同期演奏のマスターとして使 用する場合は、この設定にします。 ・ ext ...... MIDI入力された外部クロックで動作します。外部 MIDI機器を同期演奏のマスターとして使用する場 合は、この設定にします。 ・ auto ...
ユーティリティーモード (UTIL) UTIL6-11 UTIL7 FILE MIDIマージ ファイルの操作 UTIL6-11≥≥ ≥≥≥Merge=off 1 1 Merge (マージ ) MIDI IN端子に接続した外部MIDI機器から送られた演奏デー タを、本体内部で生成される演奏データとミックスして MIDI OUT端子から出力する機能です。 on に設定すると、ミッ クス機能が有効になります。 設定値 off、on UTIL7 ≥≥≥≥≥≥FILE UTIL7 FILEではファイルの操作を行ないます。6つの設 定ページ (UTIL7-1〜UTIL7-6)があり、UTIL7 FILEのメ ニュー画面から [ENTER]ボタンで設定ページに移動し、 [B]/[C]ボタンで目的の設定ページを表示させます。 NOTE ・ UTIL6-9 MIDI IN/OUTを ん( --- 表示 )。 UTIL6-12 USB に設定している場合は設定できませ ファイルモードの機能や操作を理解するためには、用語に 対する理解が必要です。ここでは、ファイルモードで出て くる用語につ
ユーティリティーモード (UTIL) ディレクトリー (Dir) メモリーやハードディスクの中で、ファイルを整理するための保 管場所をディレクトリーと呼びます。コンピューターでは一般的 にディレクトリーのことをフォルダーと呼びますが、両者はまっ たく同じものです。ディレクトリーには、ファイルネームと同じ ようにディレクトリーネームが設定されます。 本体では、専用ディレクトリーを対象にファイル操作が行 なわれます。専用ディレクトリーは本体のフォーマット (UTIL7-5 Format)時に以下の構成で自動作成されます。 ただし、ディレクトリーは本体ディスプレイ上には表示さ れません。 ¥YAMAHA UTIL7-1 UTIL7-1≥≥≥ ≥≥≥Save≥File ファイルを USB記憶装置などにセーブ (保存)します。 1 2 DTXMULTI ALL オール ALLKIT オールキット ALLWAV オールウェーブ ALLPTN ALLTRG オールパターン オールトリガー UTL ユーティリティー ファイルのセーブ(保存) 本体でフォーマット(UTIL7-5 F
ユーティリティーモード (UTIL) 4 ファイル名を設定したら、[ENTER]ボタンを押します。 ファイルをセーブする確認画面が表示されます。セーブする 場合は[ENTER] ボタンを押します。セーブしない場合は [EXIT]ボタンを押すと、 手順3の画面に戻ります。 UTIL7-2 UTIL7-2≥≥≥ ≥≥≥Load≥File ≥≥≥Save≥File ≥Are≥you≥sure? 同じファイル名のファイルが存在する場合は、以下のように 上書き保存の確認画面が表示されます。別のファイル名にす る場合は、[EXIT] ボタンを押してUTIL7-1-2 Name 画面に 戻ります。 ≥≥≥Save≥File ≥≥≥Overwrite? 5 ファイルのロード(読み込み) USB 記憶装置などにセーブしておいたファイルを、本体 の記憶域にロード (読み込み)します。 1 本体でセーブしたファイル が保存されているUSB記憶装置 を、本体側面の USB TO DEVICE端子に差し込みます。 2 UTIL7- 2 Load File画面で[ENTER]ボタンを押します。 UT
ユーティリティーモード (UTIL) 4 ファイルを選択したら、[ENTER]ボタンを押します。 ● Kitの場合 【All、AllKit、AllWave、AllPattern、AllTrigger、Utility のファイルを選択した場合】 →手順 8の画面が表示されます。 【Kit、Wave、Pattern、Trigger のファイルを選択した場合】 →手順 5の画面が表示されます。 5 UTIL7-2-4≥≥ U001:User≥Kit ● Waveの場合 選択したファイルの中から 1ファイルを選択します。 UTIL7-2-4≥≥ WV001:Empty≥Wave [ −/DEC]/[+ /INC]ボタンを押して、ロードする1 ファイル を選択します。 ●Kit の場合 UTIL7-2-3≥≥ U001:MyKit ●Wave の場合 UTIL7-2-4≥≥ ©U001:Empty≥Ptn ● Triggerの場合 UTIL7-2-3≥≥ WV001:MyWave 設定値 UTIL7-2-3≥≥ ©U001:MyPt
ユーティリティーモード (UTIL) UTIL7-3 ファイル名の変更(リネーム) 4 [ENTER]ボタンを押してUTIL7-3-3 Name 画面を表示させ ます。 UTIL7-3-3≥≥≥ Name=[MYDATA] UTIL7-3≥≥≥ ≥≥Rename≥File [ B]/[C] ボタンでカーソルを移動し、[− /DEC]/[+/INC] USB記憶装置に保存されたファイルのファイル名を変更 (リネーム)します。 ボタンを押してファイル名を変更します。 最大8 文字までの 長さでファイル名を設定できます。 NOTE 1 USB記憶装置を、本体側面の USB TO DEVICE端子に差し 込みます。 2 UTIL7-3 Rename File画面で [ENTER]ボタンを押して UTIL7-3-1 Type画面を表示させます。 ・ ファイル名中に空白(スペース)を含む場合は、自動的に 換えれられます。 5 リネームするファイルのタイプを選択します。 ・ All .................
ユーティリティーモード (UTIL) UTIL7-4 ファイルのデリート(削除) 5 [ENTER]ボタンを押して、デリートを実行します。 デリート実行中は以下のような画面が表示されます。 Executing... UTIL7-4≥≥≥ ≥≥Delete≥File 注意 USB記憶装置の中にあるファイルをデリート (削除)しま す。 1 本体でデリートしたいファイルが保存されている USB記憶装 置を、本体側面の USB TO DEVICE端子に差し込みます。 2 UTIL7-4 Delete File画面で[ENTER]ボタンを押します。 UTIL7-4-1 Type 画面が表示されます。 ・ デリート実行中は、USB記憶装置を USB TO DEVICE端子から外し たり、USB記憶装置や本体の電源を切らないでください。楽器本 体の故障や USB記憶装置の故障の原因となります。 デリートが完了すると、 Completed.
ユーティリティーモード (UTIL) 3 [ENTER] ボタンを押して、フォーマットを実行します。 フォーマット実行中は以下のような画面が表示されます。 UTIL8 FACTORY SET ファクトリーセット Executing... UTIL8 ≥≥FACTORY≥SET 注意 ・ フォーマット実行中は、USB記憶装置をUSB TO DEVICE 端子から 外したり、USB記憶装置や本体の電源を切らないでください。楽 器本体の故障やUSB記憶装置の故障の原因となります。 フォーマットが完了すると、 Completed.
トリガーモード (TRG) この章では、[SHIFT]ボタンと [UTILITY]ボタンを同時に押して呼び出せるトリガーモードについて説明します。奏法の 違い (スティック、手など)、接続するパッドの種類などにより、演奏時にパッドから送られるトリガー信号の特性は異なり ます。トリガーモードでは、パッドごとにトリガー信号を本体で処理するのに適正な信号に調整し、トリガーセットアップ データとして保存します。 注意 ・ 設定が終わったら、電源を切る前、またはトリガーを切り替える前に、必ずストア操作(45ページ )を行なってください。 リ フ ァ レ ン ス トリガーモードの構成 トリガーモードには、以下の 4つのメニューがあります。メニューの切り替えは[B]/[C]ボタンで行ないます。メニュー の下に設定ページがある場合は、[ENTER]ボタンを押すことで設定ページへ移動します。ページの下の階層にさらに設定 ページがある場合は、同様に [ENTER]ボタンを押すことで次の画面へ移動します。また、[EXIT]ボタンを押すことで、ひ とつ上の階層へ移動します。 メニュー画面 TRG1≥≥≥≥≥≥≥≥≥≥˛¸ P
トリガーモード (TRG) TRG1 TRG2 PAD トリガーセットアップの選択 パッドに関する設定 使用(または編集 )するトリガーセットアップを選択しま す。 TRG1≥≥≥≥≥≥≥≥≥≥˛¸ P01:Stick≥Wide 1 A B 3 2 トリガー セットアップ カテゴリー トリガーセットアップのカテゴリー ( プリセットトリガー P 、ユーザートリガー U )を選択します。 設定値 P、 U トリガーセットアップ番号:トリガーセットアップ名 使用( または編集) するトリガーセットアップを選択します。 設定値 本体パッドおよびトリガー入力端子に接続したパッドに対 して、感度や出力などの設定を行ないます。パッドタイプ (TRG2-1 Type) とクロストーク(TRG2-2 Crosstalk)の 2 つの設定ページがあります。TRG2 PADのメニュー画 面から [ENTER]ボタンで設定ページに移動し、[B]/[C] ボタンで目的の設定ページを表示させます。 TRG2-1 P(プリセット トリガー セットアップ選択時: 01〜05 U(ユーザー トリガー セットア
トリガーモード (TRG) Type ( パッドタイプ) 1 で選んだパッドのタイプを設定します。下表を参照に、適 切なパッドタイプを選んでください。 1で本体パッド (UP、 MID、LOW、01 〜12)を選んだ場合は本体パッド用のパッ ドタイプが表示され、外部入力パッド番号 (13〜 17)を選ん だ場合は外部入力用パッドタイプが表示されます。 本体パッド用パッドタイプ StickDyna、StickNorm、StickNarrow、 HandDyna、HandNorm、Hand 設定値 C 外部入力用パッドタイプ KP125、KP65、TP120/100Sn、TP120/ 100Tm、TP65S Snare、TP65S Tom、 TP65S HiHat、TP65、PCY155、 PCY135、PCY150S、PCY130SC、 PCY130S/130、PCY65S/65、RHH135、 RHH130、DT Snare、DT HiTom、DT LoTom、DT Kick、TRG Snare 1、TRG Snare 2、TRG Snare 3、TRG HiTom 1、 TRG HiTom 2、TR
トリガーモード (TRG) TRG2-1-4 ベロシティーレンジの設定 TRG2-1-4≥-MID-˛¸ Velocity=≥≥0-127 1 TRG2-2 1 Velocity (ベロシティー ) TRG2-1-3のLevelで設定したトリガー入力信号レベルに対 応させるベロシティー値を最小〜最大で設定します。ここで 設定したベロシティーの範囲でボイスが発音します。 設定値 クロストークの防止 パッドを叩いた際、共振やパッド間の干渉により他のパッ ドからトリガー信号が発生してしまうことをクロストーク といいます。ここでは設定した値より低いトリガー信号を 発音しないことで、クロストークの発生を防止します。 TRG2-2 Crosstalkの画面で[ENTER]ボタンを押すと、 TRG2-2-1 Levelの設定画面が表示されます。TRG2-22 Level画面へは、[B]/[C]ボタンで移動します。 最小ベロシティー : 0 〜 126 最大ベロシティー : 1 〜 127 TRG2-2≥≥≥≥≥≥≥≥˛¸ ≥≥≥Crosstalk TRG2-1-5 ダブルトリガーの防止 スティックやビー
トリガーモード (TRG) TRG2-2-2 クロストークレベルの設定 (1パッド対象) クロストーク防止の設定例 (その2) 1 TRG2-2-2≥-¡¢-≥˛¸ Level=≥25%(¡£) 3 1 を叩くとパッド5 の音が鳴ってしまう場合 1 TRG2-2-2の設定ページを表示させ、以下のように設定 します。 1 :05(パッド 5)、2:04( パッド4) 2 [SHIFT]ボタンを押しながら[ D]ボタンを押して、イン プットロックを設定( -º∞- 表示が [º∞] 表示になる)しま す。 2 パッド クロストークの設定をしたいパッドを選択します。パッドを 叩いて選択することもできます。 設定値 ● 手で叩く感度に設定しているときに、本体のパッド 4 UP、MID、LOW、01〜17 ・ インプットロックを設定しないと、手順 3でパッド4を叩いた際 に、設定対象パッドが 4に切り替わってしまいます。 ・ パッドを叩いて選択できる設定値は、UP、MID、LOW、13 〜17にな ります。 B 発生源パッド 1 で設定したパッドに発生するクロストークの発生源パッド
トリガーモード (TRG) TRG3 NAME TRG4 COPY PAD トリガーセットアップ名を付ける トリガーセットアップのコピー TRG3 ≥≥≥≥≥≥NAME 最大12文字までの長さでトリガーセットアップ名を設定 できます。上記画面で[ENTER]ボタンを押して、トリ ガーセットアップ名の設定ページを表示させます。 TRG3-1 TRG4 ≥≥≥≥COPY≥PAD 現在編集中のトリガーセットアップのデータを、パッド単 位でコピーできます。上記画面で [ENTER]ボタンを押し て、トリガーセットアップのコピー設定ページを表示させ ます。 トリガーセットアップ名 TRG4-1 TRG3-1 ≥[HandPercus≥≥] トリガーセットアップのコピー TRG4-1≥≥≥≥ ≥≥º¡≥≥≥-ß≥≥º™ トリガーセットアップ名 1 最大12 文字までの長さでトリガーセットアップ名を設定でき ます。[B]/[C]ボタンで変更したい文字を点滅表示させ、 [− /DEC]/[+ /INC]ボタンで文字を選びます。 使用できる文字は以下のとおりです (表示順)。 スペース
困ったときは パッドの設定は適切ですか? パッドを叩いても音が鳴らない、 または音量が小さい ● [UTILITY] → UTIL4 PAD → UTIL4-1 Funcの値が off 以外になっていませんか? (88ページ) ● [UTILITY] → UTIL4 PAD → UTIL4-3 Pad10-12の値 が disable になっていませんか? (89ページ) 正しく接続されていますか? ● ヘッドフォンやアンプ /スピーカーなどの外部機器は正し く接続されていますか ? (10 ページ) ● 使用しているケーブルが不良ではありませんか ? 接続した外部音源が鳴らない場合 ● MIDI ケーブル( コネクター)は正しく接続されていますか? (12ページ) ボリュームやレベルが下がっていませんか? ● 本体に接続しているアンプ /スピーカー ● フロントパネルのマスターボリューム (8ページ) ● [KIT] → KIT2 COMMON → KIT2-1 Volume ( ボリュー ム) (47 ページ) ● [VOICE] → VCE2 TUNE/OUTPUT → VCE 2-2 Vol
困ったときは 音が歪む ● エフェクトの設定は適切ですか ?エフェクトタイプや設定 によっては、音が歪む場合があります。( 48〜50、59、 68、78ページ) ● [VOICE] → VCE3 TONE → VCE3-4のフィルターの設 定は適切ですか?フィルターをかける場合、Q(フィルター レゾナンス) によっては音が歪む場合があります。(58ペー ジ) ● マスターボリュームを上げすぎていませんか ? 音が鳴りやまない ● [MIDI] → MIDI1 → MIDI1-5 RcvKeyOffの値を off に設定すると、音色によっては音が止まらないことがあり ます。(64ページ) 音を消すには、[SHIFT]ボタンを押し ながら[EXIT]ボタンを押します。 連打をしたときに音が途切れてしまう [A]ボタンを押してもパターン再生がスタート しない ● 選んでいるパターンにデータは入っていますか? ● [UTILITY] → UTIL6 MIDI → UTIL6-6 MIDI Syncの設 定を確認してください。 ext に設定しているとき、また は auto に設定し外部からMIDIクロックを
困ったときは クロストーク (叩いたパッド以外のパッドが発音して しまう )を起こす ● 103ページの「クロストーク防止の設定例」を行なってく ださい。 ● [TRIGGER] →TRG2 PAD →TRG2-2-1 または、TRG22-2のLevelを適切な値に設定してください。(102、 103ページ) ● 別売のパッドを接続している場合、パッドにレベル調節つ まみがあるときは、適切なレベルに調節してください。 ● [TRIGGER] →TRG2 PAD → TRG2-1-3 Level の最小レ ベルを適切な値に設定してください。(101ページ) ● 手で叩く感度に設定されていませんか ? [TRIGGER] → TRG1 で適切なトリガーセットアップを選択してくださ い。( 100ページ) ● 手で叩く感度に設定されていませんか ? [TRIGGER] → TRG2 PAD →TRG2-1 Typeでパッドタイプを Hand系 以外に設定してください。 (100ページ) 2 つのパッドを同時に叩いたときに1 つしか鳴らない ● [TRIGGER] → TRG2 PAD → TRG2-1-1 で鳴
メッセージ一覧 メッセージ 108 説 明 Are you sure? [YES]/[NO]各操作を実行したときの、確認を求める表示です。 Choose user pattern. プリセットパターンを選択している状態で、パターンジョブをしようとしたときに表示されま す。ユーザーパターンを選択してから、パターンジョブを行なってください。 Completed. ロード、セーブ、フォーマット、ジョブなどの実行が完了したときに表示されます。 Connecting USB device... USB記憶装置を接続中です。 Copy protected. 著作権保護されているデジタルオーディオソースのため、ウェーブ編集などができません。 Executing... フォーマット中や、ジョブの実行中に表示されます。そのままお待ちください。 File already exists. 同じ名前のファイルがすでに存在しています。 File not found. 選択したタイプのファイルがありません。 Illegal file.
メッセージ一覧 メッセージ USB device full. 説 明 USB記憶装置の容量が一杯でファイルがセーブできないときに表示されます。新しい USB 記憶 装置を用意するか、不要なファイルを消去してから操作をやりなおしてください。 USB device not ready. USB記憶装置が本体に正しくセットされていない場合に表示されます。 USB device read/write error. USB記憶装置へのリード/ ライト中にエラーが発生しました。 USB device write protected. USB記憶装置が書込み禁止状態になっている、または、CD-ROMドライブなどへの書き込みを 行なおうとした場合に表示されます。 Excessive demand for USB power. USB記憶装置の消費電力が規定値を超えています。 USB transmission error. USB記憶装置との通信中にエラーが発生しました。 Wave memory full.
仕様 パッド部 音源部 パッド数 12 外部入力 5 (3ゾーン対応×1, モノラル× 4) 最大同時発音数 64音 波形メモリー ボイス数 100MB相当(16bitリニア換算) ドラム/パーカッション:1,061音色 キーボード:216音色 ドラムキット数 プリセット:50キット ユーザー:200キット エフェクター バリエーション×42タイプ、コーラス×6タイプ、リバーブ×6タイプ、マスター EQ(5バンド) トリガー部 パッドファンクション ドラムキットINC/DEC、パターンINC/DEC、テンポ INC/DEC、タップテンポ、クリックON/ OFF、コントロールチェンジ送信 ウェーブ 読み込み可能ウェーブ数 500 ウェーブデータビット 16bit シーケンサー クリック その他 波形メモリー 64MB 最大サンプルサイズ 1モノサンプル:2MB 1ステレオサンプル:4MB サンプルフォーマット オリジナルフォーマット、WAV、AIFF シーケンサー容量 約152,000音 音符分解能 4分音符/480 レコーディング方式 リア
索引(五十音順/アルファベット順 ) 4 分音符ノートナンバー (Note q) ...... 85 F スイッチ ........................... 9, 10 , 11 [E] ボタン ................................... 8, 86 [ − /DEC] ボタン ................................. 9 [ + /INC] ボタン .................................. 9 [B]、[D]、[C] ボ タン .............. 8, 44 [ENTER] ボタン ........................... 8, 45 [EXIT] ボタン ............................... 8, 45 [KIT] ボタン........................... 8, 44 , 46 [MIDI] ボタン ......................... 8, 44 , 61 [PTN] ボタン ........................
索引( 五十音順/ アルファベット順 ) ヘッドフォンボリューム ....................... 9 ベロシティー................................... 102 ベロシティーリミット下限 ................. 64 ベロシティーリミット上限 ................. 64 ベロシティカーブ ............................ 101 ボイス ........................................ 31, 55 ボイス [VOICE] ボタン .......... 8, 44, 55 ボイスカテゴリー ............................... 56 ボイス番号 ......................................... 56 ポイント ............................................ 71 ボタン ...................................................
索引( 五十音順/ アルファベット順 ) Q V Q ( フィルターレゾナンス )................ 59 Q ( 周波数特性 ) ................................. 87 Quantize ( クオンタイズ )................. 78 Val ( コントロールチェンジ値 ) .. 65, 68 var ( バリエーション ) ....................... 83 Var ( バリエーションセンド ) ........................................... 59, 68, 77 VarPan ( バリエーションパン ) . 36, 49 VarReturn ( バリエーションリターン ) ................................................... 36, 49 VarToCho (バリエーショントゥコーラス ) ...................................................
MEMO 114 取扱説明書
保証とアフターサービス サービスのご依頼、お問い合わせは、お買い上げ店、またはヤマハ修 理ご相談センターにご連絡ください。 ● 保証書 本機には保証書がついています。 保証書は販売店がお渡ししますので、必ず「販売店印・お買い上げ 日」などの記入をお確かめのうえ、大切に保管してください。 消耗部品の例 ボリュームコントロール、スイッチ、ランプ、リレー類、接続端 子、鍵盤機構部品、鍵盤接点など ● 補修用性能部品の最低保有期間 製品の機能を維持するために必要な部品の最低保有期間は、製造打 切後 8年です。 ● 保証期間 ● 持込み修理のお願い お買い上げ日から1年間です。 まず本書の「困ったときは」をよくお読みのうえ、もう一度お調べ ください。 それでも異常があるときは、お買い上げの販売店、または最寄りの 修理品お持ち込み窓口へ本機をご持参ください。 ● 保証期間中の修理 保証書記載内容に基づいて修理いたします。詳しくは保証書をご覧 ください。 ● 保証期間経過後の修理 修理すれば使用できる場合は、ご希望により有料にて修理させてい ただきます。 下記の部品については、使用時間や使用環境などにより
ヤマハ電子ドラム製品ウェブサイト: http://www.yamaha.co.jp/product/drum/ed ヤマハマニュアルライブラリー: http://www.yamaha.co.jp/manual/ U.R.G., Digital Musical Instruments Division © 2009-2010 Yamaha Corporation WR85350 009POAP*.