
User Manual
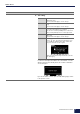
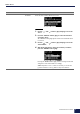
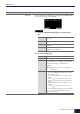
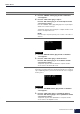
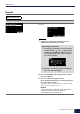
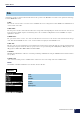
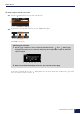
Table Of Contents
- Cover
- Contents
- Links from the Owner’s Manual
- How the Triggers Generate Sounds
- The Relationship Between Trigger Input Jacks, Trigger Inputs, and Trigger Input Sources
- Trigger Input Jack Input Mode
- Sounds that are played by trigger (Inst and Voice)
- Voices and Layers
- User Voices
- Importing to User Voices
- Changing the way a user voice is played (one-shot or Loop)
- Editing and auditioning user voices
- Selecting the Trigger Input or Trigger Input Source
- Effect Processor Design
- DTX-PRO Internal Memory
- MENU Button
- KIT Mode
- CLICK Mode
- RECORDER Mode
- TRAINING Mode
- Connecting a Computer
- Troubleshooting
- Reference

MENU Button
67
DTX-PRO Reference Manual
Recorder
MENU/Job/Recorder
Screen Parameter Description
Export Audio
MENU/Job/Recorder/Export Audio
Saves the audio data recorded in the internal recorder to a USB
flash drive.
1. If you want to add a name to the file, press the
“NAME” button ([F2]) and enter a name.
2. Press the “EXPORT” button ([F3]) and the confirma-
tion screen appears.
3. Press the “YES” button ([F1]) to export.
Press the “NO” button ([F3]) to cancel the export and
the screen returns to Step 1.
“Completed.” appears when the export is complete, and the
screen returns to the Export screen.
NOTICE
• Recorded data will be lost when the power is turned off or
when the factory reset operation is carried out.
• Audio data is not backed up in “All” files.
Procedure
Entering the File Name
1. Use the [–][+] controllers to select a character,
and then use the “ ” and “ ” buttons ([F1]
and [F3]) to move the cursor to the next char-
acter position. A file name of up to 16 charac-
ters can be assigned.
2. When you are finished entering all characters,
press the “OK” button ([F2]).