UB DVD RECEIVER DVR-S150 © 2004 YAMAHA ELECTRONICS CORPORATION, USA 6660 ORANGETHORPE AVE., BUENA PARK, CALIF. 90620, U.S.A. YAMAHA CANADA MUSIC LTD. 135 MILNER AVE., SCARBOROUGH, ONTARIO M1S 3R1, CANADA YAMAHA ELECTRONIK EUROPA G.m.b.H. SIEMENSSTR. 22-34, 25462 RELLINGEN BEI HAMBURG, F.R. OF GERMANY YAMAHA ELECTRONIQUE FRANCE S.A. RUE AMBROISE CROIZAT BP70 CROISSY-BEAUBOURG 77312 MARNE-LA-VALLEE CEDEX02, FRANCE YAMAHA ELECTRONICS (UK) LTD.
IMPORTANT SAFETY INSTRUCTIONS CAUTION RISK OF ELECTRIC SHOCK DO NOT OPEN CAUTION: TO REDUCE THE RISK OF ELECTRIC SHOCK, DO NOT REMOVE COVER (OR BACK). NO USER-SERVICEABLE PARTS INSIDE. REFER SERVICING TO QUALIFIED SERVICE PERSONNEL.
IMPORTANT SAFETY INSTRUCTIONS FCC INFORMATION (for US customers) 1. IMPORTANT NOTICE : DO NOT MODIFY THIS UNIT! This product, when installed as indicated in the instructions contained in this manual, meets FCC requirements. Modifications not expressly approved by Yamaha may void your authority, granted by the FCC, to use the product. Compliance with FCC regulations does not guarantee that interference will not occur in all installations.
CAUTION: READ THIS BEFORE OPERATING YOUR UNIT. 1 2 3 4 5 6 7 8 9 10 11 12 13 14 15 16 17 18 19 To assure the finest performance, please read this manual carefully. Keep it in a safe place for future reference. Install this sound system in a well ventilated, cool, dry, clean place with at least 10 cm on the top, 10 cm on the left and right, and 10 cm at the back of DVR-S150 — away from direct sunlight, heat sources, vibration, dust, moisture, and/or cold.
CAUTION: READ THIS BEFORE OPERATING YOUR UNIT. CAUTION Use of controls or adjustments or performance of procedures other than those specified herein may result in hazardous radiation exposure. ¶ The name plate is located on the bottom of the unit.
Contents Introduction ............................................................ 3 About this manual...................................................... 3 Supplied Accessories .............................................. 3 Controls and Functions .......................................... 4 Top and front panels .................................................. 4 Display....................................................................... 5 Remote control.............................................
Contents SOUND OPTIONS Enjoying Sound with Specific Speakers.............. 57 Enjoying 6.1/5.1ch sources with all speakers including a virtual speaker (Matrix 6.1).............. 57 Enjoying 2ch sources with all speakers (Dolby Pro Logic II)............................................ 58 Enjoying DSP programs with the front speakers only (Virtual CINEMA DSP).............................. 59 Enjoying DSP Programs in a Variety of Ways ...................................................................
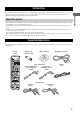
Introduction About this manual • This manual provides information relevant only to the YAMAHA CinemaStation “DVR-S150”. For information on speakers or other AV equipment, refer to the manual for that product. • In this manual, operations that can be performed using either the DVD receiver or its remote control are explained using the remote control. • Remote control descriptions and illustrations in this manual are based on the U.K. and Europe models unless otherwise specified.
CONTROLS AND FUNCTIONS Controls and Functions Top and front panels Buttons indicated with an asterisk (*) perform different functions depending on the selected mode of operation. 12 3 4 56 7 8 9 0 A 1 STANDBY/ON Turn this unit on. Press to set the unit in the standby mode. (page 19) 2 Opens and closes the disc tray. 3 PROGRESSIVE (MEMORY) [MEMORY (for U.K. and Europe models)] (DVD/CD mode) Switches DVD playback between progressive scan and interlace outputs.
Controls and Functions Display 1 3 DIGITAL PL DSP MATRIX PCM TITLE TRACK CHAP PROGRESSIVE DVD VCD CD B C D 4 5 VIRTUAL SILENT 6 7 8 9 PROG SLEEP REP A-B ALL AUTO ST MEMORY PS TUNED PTY RT CT PTY HOLD E INTRODUCTION 0 A 2 GH F I (U.K. and Europe models only) 1 Decoder indicator Displays the icon for the selected internal decoder. B Playback icon Lights up during disc playback. 2 DSP Lights up when a DSP program is selected. C Pause icon Lights up when disc playback is paused.
Controls and Functions Remote control AMP • DSP program selection • Input selection, etc. DVD/CD • Playback • Subtitle and audio language selection, etc. FM/AM • Radio station tuning • Radio station preset, etc. Amp mode DVD/CD mode Tuner mode CinemaStation has three main operation modes. Before operating functions in each mode, you need to select a mode to change the remote control button assignments. To switch the operation mode • Amp mode: Press AMP. (page 7) • DVD/CD mode: Press DVD/CD.
Controls and Functions ■ Amp mode Operations available only in amp mode STANDBY/ON POWER TV SURROUND ANGLE SUBTITLE SELECT MATRIX 6.1 REPEAT STEREO A-B SW CENTER SURR NIGHT SET MENU 7 8 9 SHIFT INTRODUCTION 1 2 3 AUDIO 1 SURROUND, SELECT Sets Dolby Digital or DTS. Press SURROUND and then SELECT to set Dolby Pro Logic II for 2ch sources. (page 58) 2 NIGHT Sets the CinemaStation to the Night Listening mode. (page 61) TV INPUT TV CH 3 SET MENU Enters the Set Menu.
Controls and Functions ■ DVD/CD mode Operations available only in DVD/CD mode STANDBY/ON 1 Number buttons (1 to 9, 0) Inputs numerals to specify parameters such as track or chapter numbers. POWER TV 1 SURROUND AUDIO ANGLE SUBTITLE SELECT MATRIX 6.1 REPEAT STEREO A-B SW CENTER SURR NIGHT SET MENU 6 3 w, f Fast forwards/fast reverses.
CONNECTING SPEAKERS Connecting Speakers Follow the procedure below to connect speakers to the CinemaStation. Here, the connection example uses the YAMAHA NX-P150 (consisting of four satellite speakers, a center speaker and a subwoofer) and its supplied cables. For information on your speakers, refer to the owner’s manual for the speakers. y PREPARATION You can also use commercially available speakers and cables (see page 11).
Connecting Speakers Connecting speakers (Front/Surround/Center) 1 Connecting a subwoofer Note Insert the cable plug of the speaker cable into the speaker jack of the same color until you hear it click into place. • FRONT R (Red), CENTER (Green), FRONT L (White): Insert the cable plug facing the tub upwards. • SURROUND R (Gray), SURROUND L (Blue): Insert the cable plug facing the tub downwards. Do not connect the power cable of the CinemaStation or subwoofer until all cable connections are completed.
Connecting Speakers Using commercially available speakers or cables 2 Peel away about 10 mm (10/32”) of covering from the tip of the new cable and twist the cable core firmly in a clockwise direction. When using speakers or cables other than those of the YAMAHA NX-P150 (consisting of four satellite speakers, a center speaker and a subwoofer) and its supplied cables, be careful of the following.
CONNECTING A TV Connecting a TV Follow the procedure below to connect your TV to CinemaStation using the supplied video pin cable. If you want to output sound from the speakers connected to CinemaStation, prepare a commercially available audio pin cable to connect them. Also, you can enjoy high-quality pictures with the component video, S-Video, or SCART (U.K. and Europe models only) connection. For information about your TV, refer to the supplied manual.
CONNECTING ANTENNAS Connecting Antennas To enjoy radio on the CinemaStation, you need to connect AM and FM antennas to the CinemaStation. This product includes an AM loop antenna and indoor FM antenna. If there is a problem of weak radio wave reception in your area or you want to improve radio reception, we recommend that you use optional outdoor antennas. For details, consult the nearest authorized YAMAHA dealer or service center.
CONNECTING EXTERNAL AV COMPONENTS Connecting External AV Components If you connect external AV equipment such as a VCR, video camera, or game console to the following AV jacks on the CinemaStation, you can enjoy those AV sources with the CinemaStation. Also, you can record AV sources played on the CinemaStation using the recording equipment. This section provides some examples of other AV equipment connections. For information on your AV equipment, refer to the manual for it.
Connecting External AV Components Connecting a VCR TV If you connect a VCR to the CinemaStation using commercially available audio/video cables, you can enjoy videos with the CinemaStation and record AV sources played on the CinemaStation on the VCR. For information on your VCR, refer to the owner’s manual for the VCR. VCR • Do not connect the power cable of the CinemaStation until all cable connections are completed. • Turn off the AV equipment before connecting it to the CinemaStation.
Connecting External AV Components ■ Digital connections Connecting a game console If you connect a game console to the CinemaStation using a commercially available audio/video cable (for analog connections) or a video cable and optical cable (for digital connections), you can enjoy games or videos with the CinemaStation. For information, refer to the manual supplied with your game console. Follow the procedure below to connect a game console using digital connections.
Connecting External AV Components Connecting a CD recorder or MD recorder 1 Anti-dust cap y • Use a commercially available optical cable (shown below) to connect your CD recorder or MD recorder to the CinemaStation. To make all connections, two optical cables are required. 2 Connect the OPTICAL OUT (DIGITAL AUDIO) jack on the CinemaStation to the optical digital input jack on your recorder using a commercially available optical cable.
INSTALLING BATTERIES IN THE REMOTE CONTROL Installing Batteries in the Remote Control 1 Press the mark on the battery cover and slide off the cover. 2 Insert the two supplied batteries (AA, R06, UM-3) into the battery compartment. Make sure you insert the batteries according to the polarity markings (+ and –). 3 Close the battery cover. Press % ■ To replace the batteries If the batteries grow old, the effective operation distance of the remote control decreases considerably.
Turning the Power to On/Standby Turning the Power to On/Standby STANDBY/ON POWER STANDBY/ON ( Press STANDBY/ON ( ) once to turn on the CinemaStation. Press STANDBY/ON ( ) once more to place the CinemaStation in standby mode. TV ) SURROUND NIGHT AUDIO ANGLE SUBTITLE SELECT MATRIX 6.1 REPEAT STEREO A-B SW CENTER SURR SHIFT TV INPUT TV CH Selecting an Input Source You can enjoy various AV sources with the CinemaStation.
Adjusting the Volume Level Adjusting the Volume Level Press VOLUME + to increase the volume level and VOLUME – to decrease. TEST ON/OFF VOLUME TV VOL MUTE VOLUME +/– AMP DVD/CD VIDEO VCR TUNER MOVIE MUSIC SPORTS GAME CINEMA Muting the Sound (Mute) TEST ON/OFF VOLUME TV VOL MUTE MUTE VOLUME +/– AMP DVD/CD VCR VIDEO TUNER MOVIE MUSIC CINEMA 20 SPORTS GAME Press MUTE to mute the sound. To restore audio output to the previous volume level, press MUTE again or press VOLUME +/–.
Auto Speaker Setup (YPAO) Auto Speaker Setup (YPAO) With the YAMAHA Parametric Room Acoustic Optimizer (YPAO) feature, you can avoid troublesome speaker setup and achieve highly accurate sound adjustments. The supplied optimizer microphone collects and analyzes the sound that the speakers produce in your actual listening environment. We recommend that you perform YPAO each time when you change the speaker layout or listening position.
Auto Speaker Setup (YPAO) 4 6 Press STANDBY/ON to turn on the CinemaStation. STANDBY/ON ( STANDBY/ON POWER TV ) SURROUND NIGHT AUDIO ANGLE SUBTITLE SELECT MATRIX 6.1 REPEAT STEREO A-B SW CENTER SURR SET MENU Press YPAO once more to continue the setup procedure. “AUTO SETUP” appears in the display, and measurement begins. Test tones are output from each speaker in turn, and the display changes as follows. TEST LEFT TEST CENTER SHIFT TEST RIGHT TV INPUT TV CH TEST R SUR.
Auto Speaker Setup (YPAO) ■ To turn the YPAO mode on/off You can switch between speaker settings configured by YPAO and manual setup by turning on/off the YPAO mode. ON SCREEN START MENU YPAO CH CH ENTER RETURN STATUS ON/OFF TEST ON/OFF VOLUME TV VOL MUTE BASIC OPERATION AMP AMP 1 Press AMP. 2 Press ON/OFF to display the currently selected mode, then press ON/OFF again to select “YPAO ON” or “YPAO OFF”. • YPAO ON: The CinemaStation uses speaker settings configured by YPAO.
Auto Speaker Setup (YPAO) ■ Error and warning messages If an error or warning message appears, check the cause and follow the remedy corresponding to the message, then carry out the setup procedure once more (page 21). Error messages before setup Error message Cause Remedy Connect MIC Optimizer microphone is not connected. • Connect the supplied optimizer microphone to the YPAO MIC jack on the front panel. Unplug HP Headphones are connected. • Unplug the headphones.
Auto Speaker Setup (YPAO) Message Cause Remedy The volume level of the front left speaker is outside the • Readjust the speaker installation so that all speakers are specified range. (No level correction is made.) set in locations with similar conditions. • Check the speaker connections. • Use speakers of similar quality and efficiency. W LEVEL R The volume level of the front right speaker is outside the specified range. (No level correction is made.
Enjoying Sound Field Programs (DSP Programs) Enjoying Sound Field Programs (DSP Programs) Digital Sound Field Processor (DSP) programs feature a variety of sound fields that allow you to enjoy movies and music. At the touch of a button, the DSP program automatically sets your speaker settings, such as reflected sound, reverberant sound and the delay time for each channel to match your audio source. y • You can change the delay time for each DSP program as necessary.
Enjoying Sound Field Programs (DSP Programs) Sports program Press the SPORTS button. SPORTS Live Sports In a live stereo sports broadcast, announcer voices are central, engulfed in the cheers and emotional whirl of the stadium. Game program Press the GAME button. GAME Game Gives TV games extra depth and surround. You can enjoy TV games with monaural or stereo sound.
Setting the Sleep Timer Setting the Sleep Timer If you set the Sleep Timer, the CinemaStation automatically turns to the Standby mode after the specified time. STANDBY/ON Press SLEEP to select the time setting. Each time you press the SLEEP button, the time setting changes as follows: POWER TV SURROUND AUDIO ANGLE SUBTITLE SELECT MATRIX 6.
Changing DVD Settings on the TV (On-Screen Menu) Changing DVD Settings on the TV (On-Screen Menu) You can change the various settings for DVD playback using the menu displayed on the TV screen (On-Screen Menu) connected to the CinemaStation. For details on the available menu items, refer to “On-Screen Menu guide” (page 30). Operating the On-Screen Menu STANDBY/ON Press DVD/CD, then press ON SCREEN to display the On-Screen Menu on your TV.
Changing DVD Settings on the TV (On-Screen Menu) On-Screen Menu guide Main Menu Preferences Toolbar Submenu Function Features Status window Sets the status information display to “On” or “Off”. On: You can display or hide status information using the STATUS button on the remote control. Status information includes disc type and total time or elapsed time of the current track/chapter. Off: Status information does not appear. Picture Video shift Adjusts the screen position (+1 to +7).
Changing DVD Settings on the TV (On-Screen Menu) Main Menu Setup Submenu Access Setting Item Function Sets Disc lock to “On” or “Off”. (page 44) Change PIN Changes the password. (page 45) Enter PIN Enters the password. (page 44) Parental level Sets the Parental Control level (0 to +8). (page 43) Country Selects the country in which you are using the CinemaStation. TV shape Sets the screen aspect of your TV to “4:3 panscan”, “4:3 letterbox”, or “Wide-screen (Widescreen)”.
Supported Disc Types Supported Disc Types You can enjoy movie or music discs with CinemaStation. Since some CinemaStation disc operations are limited to specific disc types, the supported disc types are indicated using the icons shown below. Each icon means that the operation is limited to the corresponding disc type. For information on supported disc standards and disc usage notes, refer to “Disc Information” (page 86) and “Handling a disc” (page 87).
Basic Playback Operations Basic Playback Operations Follow the procedures below to carry out basic disc playback operations. The CinemaStation also provides various useful functions for disc playback. For details, refer to “Useful Playback Operations” (page 34). ■ To advance frame-by-frame DVD-V STANDBY/ON POWER TV SURROUND AUDIO ANGLE SUBTITLE SELECT MATRIX 6.
Useful Playback Operations Useful Playback Operations You can enjoy movie or music discs with various useful features on the CinemaStation. For information on basic disc playback operations, refer to “Basic Playback Operations” (page 33). Specifying an elapsed time for playback (Time Search) 2 Press press or to select “Toolbar”, then . You can specify an elapsed time where you want playback to start. The Time Search feature is only available with the On-Screen Menu (page 29).
Useful Playback Operations Customizing playback order (Program Play) You can customize the playback order for chapters or tracks stored in the disc. Also, you can display the playback order, disable the Program Play feature, or clear all Program Play contents after customizing the playback order. The Program Play feature is available only with the On-Screen Menu (page 29). 3 Press press or to select “Program”, then .
Useful Playback Operations ■ To check Program Play contents STANDBY/ON You can check the chapters (tracks) you stored as Program Play contents. POWER TV SURROUND AUDIO ANGLE SUBTITLE SELECT MATRIX 6.1 REPEAT STEREO A-B SW CENTER NIGHT SET MENU 1 Carry out steps 1 to 3 in the “Customizing playback order (Program Play)” procedure (page 35). 2 Press or to select “Play list” (“Playlist”), then press . 3 Press (tracks).
Useful Playback Operations Repeating playback (Repeat Play) You can repeat single chapter (track), single title, or entire disc. Also, you can set two points (start and end points) to repeat the specified section of a title (track) with A-B Repeat (page 38). Notes • Repeat Play may not work depending on DVD disc types. • Repeat Play does not work while playing back a video CD using the Playback Control feature (page 39). 1 Play back the disc, title, or chapter (track) you want to repeat.
Useful Playback Operations ■ To repeat between two points (A-B Repeat) 1 Play back the title or track that includes the section you want to repeat. For details, refer to “Basic Playback Operations” (page 33). 2 At the position where you want to set as the start point of the repeat section, hold down SHIFT and press A-B. You can repeat the specified section of a title (track) by setting two points (start and end points). Notes • Repeat Play may not work depending on DVD disc types.
Useful Playback Operations Operating disc menus (DVD menu/ Video CD Playback Control) Many DVDs and video CDs include original navigational menus called “DVD menus” and “video CD Playback Control menus”. These menus provide a convenient way to operate the disc. Follow the procedure below to use a DVD menu or video CD Playback Control with the CinemaStation.
Selecting Audio and Subtitle Languages Selecting Audio and Subtitle Languages DVD-V You can select audio and subtitle languages for DVD playback. Also, you can set default languages for DVD playback with the On-Screen Menu. For details on setting default languages, refer to “On-Screen Menu guide” (page 30). Note This selection is available only with multi-language compatible discs. Also, languages available for each disc may vary.
Selecting a Viewing Angle Selecting a Viewing Angle DVD-V You can select a viewing angle for DVD playback. Note This selection is available only with multi-angle compatible discs. Also, viewing angles available for each disc may vary. For information on your disc, refer to the operating instructions in the DVD menu or on its jacket. 1 STANDBY/ON POWER TV ANGLE SUBTITLE SELECT MATRIX 6.
Zooming Images Zooming Images DVD-V You can zoom in a specified part of picture during DVD playback. The Zoom feature is available only with the On-Screen menu (page 29). STANDBY/ON POWER 4 TV SURROUND AUDIO ANGLE SUBTITLE SELECT MATRIX 6.1 REPEAT STEREO A-B SW CENTER NIGHT Press .
Restricting Playback (Parental Control) Restricting Playback (Parental Control) DVD-V You can set playback restrictions for certain discs using Parental Control. Only users who know the password can access the locked discs. Setting the Parental Control level 4 You can restrict playback according to a predetermined level (Parental Control level). For information on the Parental Control level of each disc, refer to the instruction on its jacket. Press press or to select “Enter PIN”, then .
Restricting Playback (Parental Control) Locking discs Playing locked discs You can use this function to lock all video discs to restrict playback. Only those discs you select to unlock in “Playing locked discs” are available for access. STANDBY/ON Follow the procedure below to access a locked disc by entering the password. 1 Load a disc into the disc tray. If the disc is locked, the password input screen appears on the TV screen. 2 Press or to select “Play once” or “Play always”, then press .
Restricting Playback (Parental Control) Changing the password Follow the procedure below to change the password to access locked disc. 1 Carry out steps 1 to 5 in the “Setting the Parental Control level” procedure (page 43). 2 Press or then press . 3 Use the number buttons to enter the current password (4 digits). to select “Change PIN”, ENJOYING MOVIE AND MUSIC DISCS Notes • The default password is “0000”. • If you forget your password, press s four times instead of entering the password.
Enjoying High-Quality Video (NTSC/Progressive Scan) Enjoying High-Quality Video (NTSC/Progressive Scan) DVD-V Progressive Scan is video that represent a frame with one pass of sequential scan lines whereas interlace output video, which is usually adopted for most TVs, represents a frame with two passes. Progressive Scan provides better video quality by reducing picture noises.
Enjoying JPEG Images Enjoying JPEG Images You can view JPEG pictures in a commercial JPEG CD or personally recorded on a CD-R or CD-RW disc on the TV screen. STANDBY/ON 1 Load a disc in the disc tray. Playback starts automatically and thumbnails appear on the TV screen. To move through the list of thumbnails, press b or a. 2 Press / / / to select the thumbnail, then press ENTER. To return to the thumbnail screen, press MENU. 3 Press p to start the slide show. To stop the slide show, press s.
Tuning Radio Stations Tuning Radio Stations The CinemaStation provides several methods for tuning AM/FM radio stations, such as Auto Tuning (FM only), Manual Tuning (AM/FM) and Preset Tuning (AM/FM). Follow the procedure below to tune your favorite radio stations. 1 Preset group Displays the preset group (page 51). About the display 2 1 4 2 Preset number Displays the preset number (page 51). 3 3 Mode indicator Preset mode: Displays a colon. Tuning mode: No colon is displayed.
Tuning Radio Stations Selecting preset radio stations (Preset Tuning) ■ To switch frequency and RDS modes While receiving an FM RDS station (an RDS indicator lights up), press FREQ/RDS. If you preset your favorite radio stations with Auto Preset (page 51) or Manual Preset (page 52) on the CinemaStation, you can tune the radio stations simply by selecting the preset group and number. STANDBY/ON TV SURROUND ANGLE SUBTITLE SELECT MATRIX 6.
Tuning Radio Stations ■ To select stations by program type (genre) You can tune FM RDS stations by selecting a program type (genre). Once you select a program type, the CinemaStation automatically searches for FM RDS stations currently broadcasting the corresponding programs. 1 Press PTY SEEK MODE. The program type you selected last time appears in the CinemaStation display. 2 Press PRESET u or d to select the program type you want to listen to.
Presetting Radio Stations You can preset your favorite radio stations automatically (FM stations only) or manually to tune the stations simply by selecting the preset group and number. The CinemaStation can store up to 40 stations (5 groups x 8 stations) in its memory. Presetting FM stations automatically (Auto Preset) If the FM radio wave reception is strong in your area, Auto Preset is a quick and useful way to preset FM radio stations.
Presetting Radio Stations Presetting radio stations manually (Manual Preset) Changing the order of preset radio stations If you want to preset AM stations or FM radio wave reception is weak in your area, follow the procedure below to preset radio stations manually. Follow the procedure below to change the order of preset radio stations. In this procedure, we switch the radio stations preset to E1 and A5 for example.
Playing Back External Sources If you connect an external AV component to CinemaStation, you can enjoy AV sources played back on that component with CinemaStation. For details on connection methods, refer to “Connecting External AV Components” (pages 14 to 17). Also, you can operate the component using the CinemaStation remote control by setting a remote control code (page 72). Note Make sure you read the owner’s manual for your external AV component before making any connections or operating it.
Playing Back External Sources Game console playback If you connect the VIDEO IN L/R (AUDIO/VIDEO) jacks on the CinemaStation to the audio/video output L/R jacks on your game console using an audio/video cable (page 16), you can enjoy game sounds with the CinemaStation. y You can also connect the CinemaStation and a game console with the digital connection (page 16).
Recording AV Sources With External AV Components If you connect an external recorder to the CinemaStation, you can record AV sources played back on the CinemaStation or external AV equipment. For details on the connection methods, refer to “Connecting External AV Components” (pages 14 to 17). Also, you can operate those equipment with the CinemaStation remote control by setting the remote control codes (page 72). Note Make sure you read the manuals for your equipment to operate them.
Recording AV Sources With External AV Components Copying video component sources to a video cassette If you use analog connections to connect a VCR and video component to the CinemaStation (pages 15 to 16), you can copy video component sources to a video cassette on the VCR. Note Copying video sources guarded by copy protection may result in picture distortion of the recording due to copy protection signals. STANDBY/ON POWER STANDBY/ON ( TV ) SURROUND NIGHT AUDIO ANGLE SUBTITLE SELECT MATRIX 6.
Enjoying Sound with Specific Speakers You can enjoy movies or music with various sound effects produced by the specified speakers. Enjoying 6.1/5.1ch sources with all speakers including a virtual speaker (Matrix 6.1) 1 Press AMP. 2 Press MATRIX 6.1 to select the mode. Each time you press the button, the mode changes as follows: You can use Matrix 6.
Enjoying Sound with Specific Speakers Enjoying 2ch sources with all speakers (Dolby Pro Logic II) Dolby Pro Logic II converts a 2ch source into virtual multi-channel source for enjoying 2ch sounds with all speakers. STANDBY/ON POWER 1 Play the 2ch source (e.g. music) you want to listen to. 2 Press AMP. 3 Press SURROUND. 4 Press SELECT to select “PL II”. 5 Press SURROUND to select “PL II” mode.
Enjoying Sound with Specific Speakers Enjoying DSP programs with the front speakers only (Virtual CINEMA DSP) 1 Play the source you want to listen to. 2 Press AMP. Since Virtual CINEMA DSP processes an audio input source to reproduce virtual surround speakers, you can enjoy DSP program only with the front speakers. 3 Press the DSP program button to select the DSP program you want to use. For details, refer to “Enjoying Sound Field Programs (DSP Programs)” (page 26).
Enjoying DSP Programs in a Variety of Ways Enjoying DSP Programs in a Variety of Ways You can enjoy the presence of sound effects with DSP programs even when you use headphones or reduce the volume level. Listening with headphones (“SILENT CINEMA”) 1 Connect the headphones to the SILENT CINEMA jack on the CinemaStation. “SILENT CINEMA” allows you to enjoy multi-speaker simulation sounds with headphones. 2 Play the source you want to listen to.
Enjoying DSP Programs in a Variety of Ways Listening at low volume (Night Listening) Since Night Listening tones down large sound effect and clears speech or vocal sounds, you can enjoy DSP programs even at low volume. STANDBY/ON 1 Play the source you want to listen to. 2 Press AMP. 3 Press a DSP program button to select the DSP program you want to use. For details, refer to “Enjoying Sound Field Programs (DSP Programs)” (page 26). 4 Press NIGHT.
Enjoying High-Quality Sound Enjoying High-Quality Sound You can play back Dolby, DTS, and 2ch sources true to the original sound. Enjoying original Dolby and DTS sounds You can play back original sounds processed with Dolby Digital, Dolby Pro Logic or DTS. STANDBY/ON POWER TV AUDIO ANGLE SUBTITLE SELECT MATRIX 6.
Enjoying High-Quality Sound Enjoying original 2ch sound (Stereo) You can play back original stereo sounds such as music CDs with the front speakers. STANDBY/ON AUDIO ANGLE SUBTITLE SELECT MATRIX 6.1 REPEAT STEREO A-B SW CENTER NIGHT SET MENU 2 Press AMP. 3 Press STEREO. The sound field effect turns off and Stereo playback starts. y STEREO ■ To turn off Stereo playback (turn on the sound field effect) TV INPUT A B C D E SLEEP PRESET Press STEREO again.
ADJUSTING THE SPEAKER BALANCE DURING PLAYBACK Adjusting the Speaker Balance During Playback The speaker settings configured by YPAO (page 21) are suitable for most conditions. However, depending on room conditions or listening position, you may need to adjust the speaker balance manually. This adjustment is important because it brings out the maximum effect of the DSP program, and faithfully reproduces the acoustic characteristics of Dolby Pro Logic, Dolby Pro Logic II, Dolby Digital and DTS.
Adjusting the Speaker Balance During Playback Adjusting the speaker balance during playback If you feel the speaker balance is not proper during audio playback, follow the procedure below. STANDBY/ON 1 Press AMP. 2 Adjust the volume level of each speaker. To adjust the center speaker volume, press CENTER +/–. To adjust the surround speaker volume, press SURR +/–. To adjust the subwoofer volume, press SW +/–. POWER TV SURROUND SW +/– AUDIO ANGLE SUBTITLE SELECT MATRIX 6.
Adjusting the Speaker Balance During Playback ■ To adjust the speaker balance for 5ch Stereo DSP programs 1 Play a source. You can adjust the speaker balance applied to “5ch Stereo” DSP programs. 2 Press AMP. 3 Press MUSIC to select “5ch Stereo”. For details, refer to “Enjoying Sound Field Programs (DSP Programs)” (page 26). 4 Press or to select the speaker of which you want to adjust the volume level.
Configuring Dolby Pro Logic II Music Settings You can configure the parameters for Dolby Pro Logic II Music to fine-tune the sound field effect. STANDBY/ON 1 Carry out the “Enjoying 2ch sources with all speakers (Dolby Pro Logic II)” procedure (page 58) and select “PL II Music”. 2 Press or to select “PANORAMA”, “DIM.” or “CT WIDTH”. For details on each parameter, refer to “About the Dolby Pro Logic II Music parameters” below. 3 Press 4 To configure other parameters, repeat steps 2 and 3.
DSP PROGRAM DELAY TIME SETTINGS DSP Program Delay Time Settings Each DSP program is designed to draw out the maximum effect from the source audio. The CinemaStation provides the DSP programs with optimum value of parameters including reflected sound, reverberant sound and delay time. Among these parameters, you can change the delay time to match to your speaker positions. Delay time is the time gap in playback between front speaker audio and surround speaker audio.
DSP Program Delay Time Settings ■ Program default settings Program Group MOVIE Program Name 1 Default Setting (ms) Action* 20 Action 6.1** 15 Drama* 20 Drama 6.1** 15 Sci-Fi* 20 Sci-Fi 6.1** 15 Spectacle* 23 Spectacle 6.1** 15 Theater* 20 Theater 6.1** 5 1 Music Video 21 2 Classic Hall 30 3 Jazz Club 30 4 Rock Concert 15 SPORTS 1 Live Sports 10 GAME 1 Game 36 2 3 4 5 MUSIC Program Name Default Setting (ms) PRO LOGIC* (Dolby Pro Logic) 10 SUR.
CONFIGURING THE AUDIO INPUT SIGNAL SETTING Configuring the Audio Input Signal Setting You can play back most audio sources without a problem with the factory audio input signal setting (AUTO). However, depending on your needs, you can configure the audio input mode to specify an input signal type that can be used on the CinemaStation. Also, you can check the type of the audio signal currently input into the CinemaStation (page 71) with the CinemaStation display.
Configuring the Audio Input Signal Setting Checking the Audio Input Signal Type You can check the information on the audio input signal currently played back on the CinemaStation. STANDBY/ON POWER TV SURROUND AUDIO ANGLE SUBTITLE SELECT MATRIX 6.
CONTROLLING EXTERNAL COMPONENTS Controlling External Components In addition to controlling this unit, you can operate your TV, VCR, CD recorder or MD recorder with the CinemaStation remote control by selecting the appropriate remote control code (refer to “LIST OF REMOTE CONTROL CODES” at the end of this manual). Note Depending on the product, the CinemaStation remote control may not be able to operate the external component. In this case, use the remote control supplied with the product.
Controlling External Components Available operations By carrying out step 1 in “Setting remote control codes” (page 72), you can operate the following functions on your external component using the CinemaStation remote control. ■ TV operations Functions for TV operation Press TV (POWER) for TV operations. 1 TV CH +/– Switches the TV channels. STANDBY/ON POWER TV SURROUND AUDIO ANGLE SUBTITLE SELECT MATRIX 6.
Controlling External Components ■ VCR operations Functions for VCR operation Press VCR for VCR operations. 1 w Rewinds. STANDBY/ON POWER TV SURROUND AUDIO ANGLE SUBTITLE SELECT MATRIX 6.1 REPEAT STEREO A-B SW CENTER NIGHT 3 3 TV (POWER) Sets the remote control to the TV operation mode. SURR SET MENU 2 / (CH–/CH+) Switches the video channels.
Configuring Various Parameters (Set Menu) In the Set Menu, you can configure various parameters for your CinemaStation system. In most cases, you can enjoy AV sources on the CinemaStation with the default settings. However, depending on the speakers or listening environment, you need to configure parameters for your system. ■ Set Menu list You can configure the following parameters by carrying out the “Operating the Set Menu” procedure (page 76).
Configuring Various Parameters (Set Menu) Operating the Set Menu Follow the procedure below to operate the Set Menu to configure parameters. For details on menu items and parameters, refer to pages 77 to 79. STANDBY/ON POWER TV SURROUND AUDIO ANGLE SUBTITLE SELECT MATRIX 6.1 REPEAT STEREO A-B SW CENTER NIGHT 1 Press AMP, then press SET MENU. 2 Press or to select a main menu item in the CinemaStation display, then press or .
Configuring Various Parameters (Set Menu) ■ Setting speaker sizes (Speaker Set) Submenu: BASS Submenu: CENTER Selects the speaker to output a LFE/bass (low tone) signal. LFE stands for Low Frequency Effect and it is used to output bands of 90 Hz and below when Dolby Digital or DTS is active. Sets whether the center speaker is present or not, and sets the size of the center speaker.
Configuring Various Parameters (Set Menu) ■ Adjusting the playback level of the LFE signal (LFE Level) ■ Setting the dynamic range during Dolby Digital playback (D. Range) You can adjust the LFE channel output level while playing a Dolby Digital or DTS signal. Adjust the LFE level to match the performance of the subwoofer and headphones. You can select the dynamic range (spread between the max. and min. volume) of Dolby Digital playback from three levels. Submenu: SP LFE, HP LFE Submenu: SP D.R, HP D.
Configuring Various Parameters (Set Menu) ■ Setting the input mode when powering on (Input Mode) Sets the input mode (page 70) for powering on when playback devices are connected to both digital and analog jacks. Selection items: AUTO, LAST Default setting: AUTO AUTO: When CinemaStation is turned on, the input mode (page 70) automatically sets to “AUTO”. LAST: The last selected input mode is applied.
TROUBLESHOOTING Troubleshooting If there is any problem with your CinemaStation system, check the following items. If you cannot solve your problem with the following remedies or if your problem is not listed below, turn off and unplug the CinemaStation, then consult the nearest authorized YAMAHA dealer or service center. General Problem Power turns on but immediately shuts off Cause The system cable may be connected improperly. The power cable may be connected improperly.
Troubleshooting Problem The center speaker makes no sound The surround speakers make no sound The subwoofer makes no sound The subwoofer makes strange sounds The subwoofer cable may be connected improperly. The speaker setting may be improper. The power of the equipment connected to a CinemaStation’s output jack may be turned off. The sound field effects are not available for recording. You may be trying to make a digital recording of an AM/FM broadcast.
Troubleshooting Problem A digital equipment or highfrequency equipment produces noises The Set Menu configurations have been cleared Cause The CinemaStation may be placed close to the digital equipment or high-frequency equipment. The power to the CinemaStation may be lost more than a week.
Troubleshooting Remote control Problem The remote control does not work for operating the CinemaStation The remote control does not work for operating other AV equipment Cause The remote control may be operated outside the remote control operation range. The remote control sensor on the CinemaStation may be exposed to direct sunlight or lighting (inverted fluorescent lamps). The remote control mode selection may be improper. The batteries may be worn out. You may be trying to operate a system component.
Troubleshooting Disc playback Problem Some button operations do not work Playback does not start or stops immediately when pressing h An audio or subtitle language does not switch No subtitles appear Cause Some discs do not support certain CinemaStation functions. The disc may not be set in the disc tray properly. The disc may be dirty. The disc loaded into the CinemaStation may be not compatible.
Troubleshooting Radio reception ■ FM/AM Problem The Preset Tuning function (page 49) does not work Cause The preset (memory) may have been erased. Solution Preset radio stations again. (page 51) Cause The FM antenna may be connected improperly. The radio station you selected may be far away from your area or radio wave reception is weak in your area. Multipath reflection or other radio interferences may occur. Solution Make sure the FM antenna is connected properly.
ADDITIONAL INFORMATION Additional Information Disc Information The following tables explain the disc types supported by the CinemaStation. Video Discs Type of Disc Disc Logo Mark DVD Video SVCD (Super Video CD) DIGITAL VIDEO Video CD DIGITAL VIDEO Video CDs made by copying an MPEG movie file onto a CD-R or CD-RW JPEG still image playback CinemaStation supports playback of JPEG still images contained on CD-R and CD-RW media.
Additional Information Notes • The following discs cannot be played on the CinemaStation. CD-ROM, DVD-ROM, DVD-RAM, CDV. (This product can play some types of DVD-R (Video format only), DVD-RW (Video format only), DVD+R or DVD+RW discs.) • The CinemaStation cannot play a CD-R, CD-RW, DVD-R, DVD-RW, DVD+R or DVD+RW disc that has not been finalized. Finalizing is a process that prepares a disc for playback on a compatible device. • Only use discs from a reputable manufacturer.
GLOSSARY Glossary Audio formats ■ Dolby Digital Dolby Digital is a digital surround sound system that gives you completely independent multi-channel audio. With 3 front channels (left, center, and right), and 2 surround stereo channels, Dolby Digital provides 5 full-range audio channels. With an additional channel especially for bass effects, called LFE (low frequency effect), the system has a total of 5.1-channels (LFE is counted as 0.1 channel).
Glossary Sound field programs ■ CINEMA DSP (Digital Sound Field Processor) Since the Dolby Surround and DTS systems were originally designed for use in movie theaters, their effect is best felt in a theater having many speakers and designed for acoustic effects. Since home conditions, such as room size, wall material, number of speakers, and so on, can differ so widely, it’s inevitable that there are differences in the sound heard as well.
Glossary ■ Track (CD/Video CD) A CD or Video CD can be divided into a number of segments (tracks). Each division is called a title number. ■ YPAO (YAMAHA Parametric Room Acoustic Optimizer) YPAO is an original YAMAHA system that configures speaker settings such as speaker balance (volume level of each speaker), delay time of each channel, and crossover/ high cut frequency for the subwoofer automatically.
Glossary ■ Pan & Scan and Letterbox In general, DVD Video is produced for viewing on a wide television screen with an aspect ratio of 16:9. This means you can now view most material with the intended aspect ratio on a wide-screen television. This ratio will not fit on a standard television that has an aspect ratio of 4:3. Two picture styles, Pan & Scan and Letterbox, deal with this problem. • Pan & Scan cuts off the left and right portions of the picture to fill the screen.
SPECIFICATIONS Specifications AUDIO SECTION • Front L/R, Center, Surround L/R GENERAL • Video Signal Level Video ...........................................................................1 Vp-p/75 Ω S-Video (Y/C) ......................................... 1 Vp-p/0.286 Vp-p/75 Ω Component (Y/PB, PR)................................ 1 Vp-p/0.7 Vp-p/75 Ω Signal to Noise Ratio .............................................................50 dB • Power Supply U.S.A. and Canada models...........................
LIST OF REMOTE CONTROL CODES TV YAMAHA Admiral Aiko Aiwa Akai Alba AOC Audiovox Belcor Bell & Howell Bestar Blaupunkt Blue sky Bradford Brandt Brocsonic Brokwood Bush Candle Citizen Clatronic Contec Craig Croslex Crown Curtis Mathis CXC Daewood Dayton Dual Dumont Emerson Envision Ferguson First line Fisher Fraba Funai Futuretec GE Gilbralter LG/Goldstar Goodmans Grundig Havard Hitachi ICE Irradio Itt/Nokia JC Penny JVC (Victor) Kendo Kenwood KTV Loewe LXI Magnavox Marantz Matsui MGA Mitsubishi MTC Multitec
UB DVD RECEIVER DVR-S150 © 2004 YAMAHA ELECTRONICS CORPORATION, USA 6660 ORANGETHORPE AVE., BUENA PARK, CALIF. 90620, U.S.A. YAMAHA CANADA MUSIC LTD. 135 MILNER AVE., SCARBOROUGH, ONTARIO M1S 3R1, CANADA YAMAHA ELECTRONIK EUROPA G.m.b.H. SIEMENSSTR. 22-34, 25462 RELLINGEN BEI HAMBURG, F.R. OF GERMANY YAMAHA ELECTRONIQUE FRANCE S.A. RUE AMBROISE CROIZAT BP70 CROISSY-BEAUBOURG 77312 MARNE-LA-VALLEE CEDEX02, FRANCE YAMAHA ELECTRONICS (UK) LTD.