UB DVD RECEIVER DVR-S150 © 2004 YAMAHA ELECTRONICS CORPORATION, USA 6660 ORANGETHORPE AVE., BUENA PARK, CALIF. 90620, U.S.A. YAMAHA CANADA MUSIC LTD. 135 MILNER AVE., SCARBOROUGH, ONTARIO M1S 3R1, CANADA YAMAHA ELECTRONIK EUROPA G.m.b.H. SIEMENSSTR. 22-34, 25462 RELLINGEN BEI HAMBURG, F.R. OF GERMANY YAMAHA ELECTRONIQUE FRANCE S.A. RUE AMBROISE CROIZAT BP70 CROISSY-BEAUBOURG 77312 MARNE-LA-VALLEE CEDEX02, FRANCE YAMAHA ELECTRONICS (UK) LTD.
IMPORTANT SAFETY INSTRUCTIONS CAUTION RISK OF ELECTRIC SHOCK DO NOT OPEN CAUTION: TO REDUCE THE RISK OF ELECTRIC SHOCK, DO NOT REMOVE COVER (OR BACK). NO USER-SERVICEABLE PARTS INSIDE. REFER SERVICING TO QUALIFIED SERVICE PERSONNEL.
IMPORTANT SAFETY INSTRUCTIONS FCC INFORMATION (for US customers) 1. IMPORTANT NOTICE : DO NOT MODIFY THIS UNIT! This product, when installed as indicated in the instructions contained in this manual, meets FCC requirements. Modifications not expressly approved by Yamaha may void your authority, granted by the FCC, to use the product. Compliance with FCC regulations does not guarantee that interference will not occur in all installations.
CAUTION: READ THIS BEFORE OPERATING YOUR UNIT. 1 2 3 4 5 6 7 8 9 10 11 12 13 14 15 16 17 18 19 To assure the finest performance, please read this manual carefully. Keep it in a safe place for future reference. Install this sound system in a well ventilated, cool, dry, clean place with at least 10 cm on the top, 10 cm on the left and right, and 10 cm at the back of DVR-S150 — away from direct sunlight, heat sources, vibration, dust, moisture, and/or cold.
CAUTION: READ THIS BEFORE OPERATING YOUR UNIT. CAUTION Use of controls or adjustments or performance of procedures other than those specified herein may result in hazardous radiation exposure. ¶ The name plate is located on the bottom of the unit.
Contents Introduction ............................................................ 3 About this manual...................................................... 3 Supplied Accessories .............................................. 3 Controls and Functions .......................................... 4 Top and front panels .................................................. 4 Display....................................................................... 5 Remote control.............................................
Contents SOUND OPTIONS Enjoying Sound with Specific Speakers.............. 57 Enjoying 6.1/5.1ch sources with all speakers including a virtual speaker (Matrix 6.1).............. 57 Enjoying 2ch sources with all speakers (Dolby Pro Logic II)............................................ 58 Enjoying DSP programs with the front speakers only (Virtual CINEMA DSP).............................. 59 Enjoying DSP Programs in a Variety of Ways ...................................................................
Introduction About this manual • This manual provides information relevant only to the YAMAHA CinemaStation “DVR-S150”. For information on speakers or other AV equipment, refer to the manual for that product. • In this manual, operations that can be performed using either the DVD receiver or its remote control are explained using the remote control. • Remote control descriptions and illustrations in this manual are based on the U.K. and Europe models unless otherwise specified.
CONTROLS AND FUNCTIONS Controls and Functions Top and front panels Buttons indicated with an asterisk (*) perform different functions depending on the selected mode of operation. 12 3 4 56 7 8 9 0 A 1 STANDBY/ON Turn this unit on. Press to set the unit in the standby mode. (page 19) 2 Opens and closes the disc tray. 3 PROGRESSIVE (MEMORY) [MEMORY (for U.K. and Europe models)] (DVD/CD mode) Switches DVD playback between progressive scan and interlace outputs.
Controls and Functions Display 1 3 DIGITAL PL DSP MATRIX PCM TITLE TRACK CHAP PROGRESSIVE DVD VCD CD B C D 4 5 VIRTUAL SILENT 6 7 8 9 PROG SLEEP REP A-B ALL AUTO ST MEMORY PS TUNED PTY RT CT PTY HOLD E INTRODUCTION 0 A 2 GH F I (U.K. and Europe models only) 1 Decoder indicator Displays the icon for the selected internal decoder. B Playback icon Lights up during disc playback. 2 DSP Lights up when a DSP program is selected. C Pause icon Lights up when disc playback is paused.
Controls and Functions Remote control AMP • DSP program selection • Input selection, etc. DVD/CD • Playback • Subtitle and audio language selection, etc. FM/AM • Radio station tuning • Radio station preset, etc. Amp mode DVD/CD mode Tuner mode CinemaStation has three main operation modes. Before operating functions in each mode, you need to select a mode to change the remote control button assignments. To switch the operation mode • Amp mode: Press AMP. (page 7) • DVD/CD mode: Press DVD/CD.
Controls and Functions ■ Amp mode Operations available only in amp mode STANDBY/ON POWER TV SURROUND ANGLE SUBTITLE SELECT MATRIX 6.1 REPEAT STEREO A-B SW CENTER SURR NIGHT SET MENU 7 8 9 SHIFT INTRODUCTION 1 2 3 AUDIO 1 SURROUND, SELECT Sets Dolby Digital or DTS. Press SURROUND and then SELECT to set Dolby Pro Logic II for 2ch sources. (page 58) 2 NIGHT Sets the CinemaStation to the Night Listening mode. (page 61) TV INPUT TV CH 3 SET MENU Enters the Set Menu.
Controls and Functions ■ DVD/CD mode Operations available only in DVD/CD mode STANDBY/ON 1 Number buttons (1 to 9, 0) Inputs numerals to specify parameters such as track or chapter numbers. POWER TV 1 SURROUND AUDIO ANGLE SUBTITLE SELECT MATRIX 6.1 REPEAT STEREO A-B SW CENTER SURR NIGHT SET MENU 6 3 w, f Fast forwards/fast reverses.
CONNECTING SPEAKERS Connecting Speakers Follow the procedure below to connect speakers to the CinemaStation. Here, the connection example uses the YAMAHA NX-P150 (consisting of four satellite speakers, a center speaker and a subwoofer) and its supplied cables. For information on your speakers, refer to the owner’s manual for the speakers. y PREPARATION You can also use commercially available speakers and cables (see page 11).
Connecting Speakers Connecting speakers (Front/Surround/Center) 1 Connecting a subwoofer Note Insert the cable plug of the speaker cable into the speaker jack of the same color until you hear it click into place. • FRONT R (Red), CENTER (Green), FRONT L (White): Insert the cable plug facing the tub upwards. • SURROUND R (Gray), SURROUND L (Blue): Insert the cable plug facing the tub downwards. Do not connect the power cable of the CinemaStation or subwoofer until all cable connections are completed.
Connecting Speakers Using commercially available speakers or cables 2 Peel away about 10 mm (10/32”) of covering from the tip of the new cable and twist the cable core firmly in a clockwise direction. When using speakers or cables other than those of the YAMAHA NX-P150 (consisting of four satellite speakers, a center speaker and a subwoofer) and its supplied cables, be careful of the following.
CONNECTING A TV Connecting a TV Follow the procedure below to connect your TV to CinemaStation using the supplied video pin cable. If you want to output sound from the speakers connected to CinemaStation, prepare a commercially available audio pin cable to connect them. Also, you can enjoy high-quality pictures with the component video, S-Video, or SCART (U.K. and Europe models only) connection. For information about your TV, refer to the supplied manual.
CONNECTING ANTENNAS Connecting Antennas To enjoy radio on the CinemaStation, you need to connect AM and FM antennas to the CinemaStation. This product includes an AM loop antenna and indoor FM antenna. If there is a problem of weak radio wave reception in your area or you want to improve radio reception, we recommend that you use optional outdoor antennas. For details, consult the nearest authorized YAMAHA dealer or service center.
CONNECTING EXTERNAL AV COMPONENTS Connecting External AV Components If you connect external AV equipment such as a VCR, video camera, or game console to the following AV jacks on the CinemaStation, you can enjoy those AV sources with the CinemaStation. Also, you can record AV sources played on the CinemaStation using the recording equipment. This section provides some examples of other AV equipment connections. For information on your AV equipment, refer to the manual for it.
Connecting External AV Components Connecting a VCR TV If you connect a VCR to the CinemaStation using commercially available audio/video cables, you can enjoy videos with the CinemaStation and record AV sources played on the CinemaStation on the VCR. For information on your VCR, refer to the owner’s manual for the VCR. VCR • Do not connect the power cable of the CinemaStation until all cable connections are completed. • Turn off the AV equipment before connecting it to the CinemaStation.
Connecting External AV Components ■ Digital connections Connecting a game console If you connect a game console to the CinemaStation using a commercially available audio/video cable (for analog connections) or a video cable and optical cable (for digital connections), you can enjoy games or videos with the CinemaStation. For information, refer to the manual supplied with your game console. Follow the procedure below to connect a game console using digital connections.
Connecting External AV Components Connecting a CD recorder or MD recorder 1 Anti-dust cap y • Use a commercially available optical cable (shown below) to connect your CD recorder or MD recorder to the CinemaStation. To make all connections, two optical cables are required. 2 Connect the OPTICAL OUT (DIGITAL AUDIO) jack on the CinemaStation to the optical digital input jack on your recorder using a commercially available optical cable.
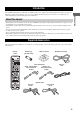
INSTALLING BATTERIES IN THE REMOTE CONTROL Installing Batteries in the Remote Control 1 Press the mark on the battery cover and slide off the cover. 2 Insert the two supplied batteries (AA, R06, UM-3) into the battery compartment. Make sure you insert the batteries according to the polarity markings (+ and –). 3 Close the battery cover. Press % ■ To replace the batteries If the batteries grow old, the effective operation distance of the remote control decreases considerably.
Turning the Power to On/Standby Turning the Power to On/Standby STANDBY/ON POWER STANDBY/ON ( Press STANDBY/ON ( ) once to turn on the CinemaStation. Press STANDBY/ON ( ) once more to place the CinemaStation in standby mode. TV ) SURROUND NIGHT AUDIO ANGLE SUBTITLE SELECT MATRIX 6.1 REPEAT STEREO A-B SW CENTER SURR SHIFT TV INPUT TV CH Selecting an Input Source You can enjoy various AV sources with the CinemaStation.
Adjusting the Volume Level Adjusting the Volume Level Press VOLUME + to increase the volume level and VOLUME – to decrease. TEST ON/OFF VOLUME TV VOL MUTE VOLUME +/– AMP DVD/CD VIDEO VCR TUNER MOVIE MUSIC SPORTS GAME CINEMA Muting the Sound (Mute) TEST ON/OFF VOLUME TV VOL MUTE MUTE VOLUME +/– AMP DVD/CD VCR VIDEO TUNER MOVIE MUSIC CINEMA 20 SPORTS GAME Press MUTE to mute the sound. To restore audio output to the previous volume level, press MUTE again or press VOLUME +/–.
Auto Speaker Setup (YPAO) Auto Speaker Setup (YPAO) With the YAMAHA Parametric Room Acoustic Optimizer (YPAO) feature, you can avoid troublesome speaker setup and achieve highly accurate sound adjustments. The supplied optimizer microphone collects and analyzes the sound that the speakers produce in your actual listening environment. We recommend that you perform YPAO each time when you change the speaker layout or listening position.
Auto Speaker Setup (YPAO) 4 6 Press STANDBY/ON to turn on the CinemaStation. STANDBY/ON ( STANDBY/ON POWER TV ) SURROUND NIGHT AUDIO ANGLE SUBTITLE SELECT MATRIX 6.1 REPEAT STEREO A-B SW CENTER SURR SET MENU Press YPAO once more to continue the setup procedure. “AUTO SETUP” appears in the display, and measurement begins. Test tones are output from each speaker in turn, and the display changes as follows. TEST LEFT TEST CENTER SHIFT TEST RIGHT TV INPUT TV CH TEST R SUR.
Auto Speaker Setup (YPAO) ■ To turn the YPAO mode on/off You can switch between speaker settings configured by YPAO and manual setup by turning on/off the YPAO mode. ON SCREEN START MENU YPAO CH CH ENTER RETURN STATUS ON/OFF TEST ON/OFF VOLUME TV VOL MUTE BASIC OPERATION AMP AMP 1 Press AMP. 2 Press ON/OFF to display the currently selected mode, then press ON/OFF again to select “YPAO ON” or “YPAO OFF”. • YPAO ON: The CinemaStation uses speaker settings configured by YPAO.
Auto Speaker Setup (YPAO) ■ Error and warning messages If an error or warning message appears, check the cause and follow the remedy corresponding to the message, then carry out the setup procedure once more (page 21). Error messages before setup Error message Cause Remedy Connect MIC Optimizer microphone is not connected. • Connect the supplied optimizer microphone to the YPAO MIC jack on the front panel. Unplug HP Headphones are connected. • Unplug the headphones.
Auto Speaker Setup (YPAO) Message Cause Remedy The volume level of the front left speaker is outside the • Readjust the speaker installation so that all speakers are specified range. (No level correction is made.) set in locations with similar conditions. • Check the speaker connections. • Use speakers of similar quality and efficiency. W LEVEL R The volume level of the front right speaker is outside the specified range. (No level correction is made.
Enjoying Sound Field Programs (DSP Programs) Enjoying Sound Field Programs (DSP Programs) Digital Sound Field Processor (DSP) programs feature a variety of sound fields that allow you to enjoy movies and music. At the touch of a button, the DSP program automatically sets your speaker settings, such as reflected sound, reverberant sound and the delay time for each channel to match your audio source. y • You can change the delay time for each DSP program as necessary.
Enjoying Sound Field Programs (DSP Programs) Sports program Press the SPORTS button. SPORTS Live Sports In a live stereo sports broadcast, announcer voices are central, engulfed in the cheers and emotional whirl of the stadium. Game program Press the GAME button. GAME Game Gives TV games extra depth and surround. You can enjoy TV games with monaural or stereo sound.
Setting the Sleep Timer Setting the Sleep Timer If you set the Sleep Timer, the CinemaStation automatically turns to the Standby mode after the specified time. STANDBY/ON Press SLEEP to select the time setting. Each time you press the SLEEP button, the time setting changes as follows: POWER TV SURROUND AUDIO ANGLE SUBTITLE SELECT MATRIX 6.
Changing DVD Settings on the TV (On-Screen Menu) Changing DVD Settings on the TV (On-Screen Menu) You can change the various settings for DVD playback using the menu displayed on the TV screen (On-Screen Menu) connected to the CinemaStation. For details on the available menu items, refer to “On-Screen Menu guide” (page 30). Operating the On-Screen Menu STANDBY/ON Press DVD/CD, then press ON SCREEN to display the On-Screen Menu on your TV.
Changing DVD Settings on the TV (On-Screen Menu) On-Screen Menu guide Main Menu Preferences Toolbar Submenu Function Features Status window Sets the status information display to “On” or “Off”. On: You can display or hide status information using the STATUS button on the remote control. Status information includes disc type and total time or elapsed time of the current track/chapter. Off: Status information does not appear. Picture Video shift Adjusts the screen position (+1 to +7).
Changing DVD Settings on the TV (On-Screen Menu) Main Menu Setup Submenu Access Setting Item Function Sets Disc lock to “On” or “Off”. (page 44) Change PIN Changes the password. (page 45) Enter PIN Enters the password. (page 44) Parental level Sets the Parental Control level (0 to +8). (page 43) Country Selects the country in which you are using the CinemaStation. TV shape Sets the screen aspect of your TV to “4:3 panscan”, “4:3 letterbox”, or “Wide-screen (Widescreen)”.
Supported Disc Types Supported Disc Types You can enjoy movie or music discs with CinemaStation. Since some CinemaStation disc operations are limited to specific disc types, the supported disc types are indicated using the icons shown below. Each icon means that the operation is limited to the corresponding disc type. For information on supported disc standards and disc usage notes, refer to “Disc Information” (page 86) and “Handling a disc” (page 87).
Basic Playback Operations Basic Playback Operations Follow the procedures below to carry out basic disc playback operations. The CinemaStation also provides various useful functions for disc playback. For details, refer to “Useful Playback Operations” (page 34). ■ To advance frame-by-frame DVD-V STANDBY/ON POWER TV SURROUND AUDIO ANGLE SUBTITLE SELECT MATRIX 6.
Useful Playback Operations Useful Playback Operations You can enjoy movie or music discs with various useful features on the CinemaStation. For information on basic disc playback operations, refer to “Basic Playback Operations” (page 33). Specifying an elapsed time for playback (Time Search) 2 Press press or to select “Toolbar”, then . You can specify an elapsed time where you want playback to start. The Time Search feature is only available with the On-Screen Menu (page 29).
Useful Playback Operations Customizing playback order (Program Play) You can customize the playback order for chapters or tracks stored in the disc. Also, you can display the playback order, disable the Program Play feature, or clear all Program Play contents after customizing the playback order. The Program Play feature is available only with the On-Screen Menu (page 29). 3 Press press or to select “Program”, then .
Useful Playback Operations ■ To check Program Play contents STANDBY/ON You can check the chapters (tracks) you stored as Program Play contents. POWER TV SURROUND AUDIO ANGLE SUBTITLE SELECT MATRIX 6.1 REPEAT STEREO A-B SW CENTER NIGHT SET MENU 1 Carry out steps 1 to 3 in the “Customizing playback order (Program Play)” procedure (page 35). 2 Press or to select “Play list” (“Playlist”), then press . 3 Press (tracks).
Useful Playback Operations Repeating playback (Repeat Play) You can repeat single chapter (track), single title, or entire disc. Also, you can set two points (start and end points) to repeat the specified section of a title (track) with A-B Repeat (page 38). Notes • Repeat Play may not work depending on DVD disc types. • Repeat Play does not work while playing back a video CD using the Playback Control feature (page 39). 1 Play back the disc, title, or chapter (track) you want to repeat.
Useful Playback Operations ■ To repeat between two points (A-B Repeat) 1 Play back the title or track that includes the section you want to repeat. For details, refer to “Basic Playback Operations” (page 33). 2 At the position where you want to set as the start point of the repeat section, hold down SHIFT and press A-B. You can repeat the specified section of a title (track) by setting two points (start and end points). Notes • Repeat Play may not work depending on DVD disc types.
Useful Playback Operations Operating disc menus (DVD menu/ Video CD Playback Control) Many DVDs and video CDs include original navigational menus called “DVD menus” and “video CD Playback Control menus”. These menus provide a convenient way to operate the disc. Follow the procedure below to use a DVD menu or video CD Playback Control with the CinemaStation.
Selecting Audio and Subtitle Languages Selecting Audio and Subtitle Languages DVD-V You can select audio and subtitle languages for DVD playback. Also, you can set default languages for DVD playback with the On-Screen Menu. For details on setting default languages, refer to “On-Screen Menu guide” (page 30). Note This selection is available only with multi-language compatible discs. Also, languages available for each disc may vary.
Selecting a Viewing Angle Selecting a Viewing Angle DVD-V You can select a viewing angle for DVD playback. Note This selection is available only with multi-angle compatible discs. Also, viewing angles available for each disc may vary. For information on your disc, refer to the operating instructions in the DVD menu or on its jacket. 1 STANDBY/ON POWER TV ANGLE SUBTITLE SELECT MATRIX 6.
Zooming Images Zooming Images DVD-V You can zoom in a specified part of picture during DVD playback. The Zoom feature is available only with the On-Screen menu (page 29). STANDBY/ON POWER 4 TV SURROUND AUDIO ANGLE SUBTITLE SELECT MATRIX 6.1 REPEAT STEREO A-B SW CENTER NIGHT Press .
Restricting Playback (Parental Control) Restricting Playback (Parental Control) DVD-V You can set playback restrictions for certain discs using Parental Control. Only users who know the password can access the locked discs. Setting the Parental Control level 4 You can restrict playback according to a predetermined level (Parental Control level). For information on the Parental Control level of each disc, refer to the instruction on its jacket. Press press or to select “Enter PIN”, then .
Restricting Playback (Parental Control) Locking discs Playing locked discs You can use this function to lock all video discs to restrict playback. Only those discs you select to unlock in “Playing locked discs” are available for access. STANDBY/ON Follow the procedure below to access a locked disc by entering the password. 1 Load a disc into the disc tray. If the disc is locked, the password input screen appears on the TV screen. 2 Press or to select “Play once” or “Play always”, then press .