7CK-28199-W0_hyoshi 10/28/08 10:39 AM Page 1 OWNER’S MANUAL MANUEL D’UTILSATION MANUAL DEL PROPIETARIO EF6300iSDE EF6300iSE PLEASE READ AND UNDERSTAND THIS MANUAL COMPLETELY BEFORE OPERATING THE MACHINE. LISEZ ATTENTIVEMENT CE MANUEL DANS SON INTEGRALITE AVANT DE FAIRE FONCTIONNER LE MOTEUR. PRINTED ON RECYCLED PAPER IMPRIME SUR PAPIER RECYCLE IMPRESO EN PAPEL RECICLADO LEA DETENIDAMENTE ESTE MANUAL ANTES DE PONER EN FUNCIONAMIENTO EL EQUIPO. PRINTED IN JAPAN 2008911-0.
7CK-28199-W0_hyoshi 10/28/08 10:39 AM Page 2 E F AF00001 AE00001 INTRODUCTION INTRODUCTION Congratulations on your purchase of your new Yamaha. This manual will provide you with a good basic understanding of the operation and maintenance of this machine. If you have any questions regarding the operation or maintenance of your machine, please consult a Yamaha dealer. Nous vous félicitons d’avoir acheté votre Yamaha.
7CK-28199-W0_p00 10/27/08 11:14 AM Page 1 ES AS00001 K A200001 INTRODUCCIÓN 안 내 Enhorabuena por haber adquirido este nuevo producto Yamaha. Este manual le ofrece un buen conocimiento básico del funcionamiento y mantenimiento de este equipo. Si tiene alguna duda acerca del funcionamiento o mantenimiento de este motor, consulte a su concesionario Yamaha. YAMAHA 제품을 구입해 주셔서 감사합니다 . 이 설명서는 제품사용 및 유지 보수 하는데 필요한 기초 자료를 제공합니다 . 제품사용 및 유지보수에 대한 문 의사항이 있으시면 대리점에 연 락 바랍니다 .
7CK-28199-W0_p00 10/27/08 11:14 AM Page 2 E IMPORTANT MANUAL INFORMATION Particularly important information is distinguished in this manual by the following notations. 851-005 The Safety Alert Symbol means ATTENTION! BECOME ALERT! YOUR SAFETY IS INVOLVED! w Failure to follow WARNING instructions could result in severe injury or death to the engine operator, a bystander or a person inspecting or repairing the engine.
7CK-28199-W0_p00 10/27/08 11:14 AM Page 3 ES INFORMACIÓN IMPORTANTE DEL MANUAL En este manual, la información especialmente importante se indica mediante las siguientes notaciones. K 중요 매뉴얼 정보 특히 중요한 정보는 다음의 지시 로 구별할 수 있습니다 . - “ 안 전 주 의 표 지 ”는“ 주 의 ”, “경고 !” ,“안전에 유의하십시오 !” El símbolo de aviso de seguridad sig등을 의미합니다 . nifica: ¡ATENCIÓN! ¡MANTÉNGASE ALERTA! ESTÁ EN JUEGO SU SEGURIDAD. 이“경고”지시를 따르지 않으면 기계 운용자 , 주위의 사람들 , 보 수공이나 수리공 등이 심한 부상 r 이나 사망에 이를 수 있습니다 .
7CK-28199-W0_p00 10/27/08 11:14 AM Page 4 E NOTE: 9 Yamaha continually seeks advancements in product design and quality. Therefore, while this manual contains the most current product information available at the time of printing, there may be minor discrepancies between your engine and this manual. If there is any question concerning this manual, please consult your Yamaha dealer. 9 This manual should be considered a permanent part of this engine and should remain with this engine when resold.
CK-28199-W0_p00 10/27/08 11:14 AM Page 5 ES NOTA: 9 Yamaha introduce continuamente mejoras en el diseño y en la calidad de sus productos. Por ello, aunque este manual contiene la información más reciente sobre el producto de que se dispone en el momento de su impresión, puede haber pequeñas discrepancias entre el motor y la información del manual. Si tiene alguna duda acerca de este manual, consulte a su concesionario Yamaha.
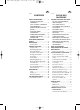
7CK-28199-W0_p00 10/27/08 11:14 AM Page 6 E F AF00041 AE00041 CONTENTS TABLE DES MATIERES SAFETY INFORMATION....................1 EXHAUST FUMES ARE POISONOUS ..................................1 FUEL IS HIGHLY FLAMMABLE AND POISONOUS .........................1 ENGINE AND MUFFLER MAY BE HOT ..........................................3 ELECTRIC SHOCK PREVENTION ................................5 EXTENSION CORD NOTES ..........5 CONNECTION NOTES ..................7 CONNECTION..............................
7CK-28199-W0_p00 10/27/08 11:14 AM Page 7 ES AS00041 K A200041 ÍNDICE 차 례 INFORMACIÓN SOBRE SEGURIDAD ......2 LOS GASES DE ESCAPE SON TÓXICOS..............................................2 EL COMBUSTIBLE ES MUY INFLAMABLE Y TÓXICO ......................2 EL MOTOR Y EL SILENCIADOR PUEDEN ESTAR CALIENTES...............4 PREVENCIÓN DE DESCARGAS ELÉCTRICAS........................................6 NOTAS SOBRE EL USO DE CABLES DE PROLONGACIÓN............................6 NOTAS SOBRE LA CONEXIÓN............
7CK-28199-W0_p00 10/27/08 11:14 AM Page 8 E OPERATION.....................................41 Starting the engine........................41 Stopping the engine......................45 Connection....................................47 Application range ..........................53 PERIODIC MAINTENANCE .............57 Maintenance chart ........................59 Spark plug inspection ...................63 Carburetor adjustment ..................65 Engine oil replacement .................67 Air filter........
7CK-28199-W0_p00 10/27/08 11:14 AM ES FUNCIONAMIENTO ................................42 Arranque del motor.............................42 Parada del motor.................................46 Conexion ............................................48 Margen de aplicación ..........................54 MANTENIMIENTO PERIÓDICO...............58 Tabla de mantenimiento .....................60 Inspección de la bujía..........................64 Ajuste del carburador..........................
7CK-28199-W0_p01-56 10/27/08 11:49 AM Page 1 E AF00071 SAFETY INFORMATION INFORMATIONS DE SÉCURITÉ AE00072 AF00072 EXHAUST FUMES ARE POISONOUS LES GAZ D’ÉCHAPPEMENT SONT TOXIQUES 9 Never operate the engine in a closed area or it may cause unconsciousness and death within a short time. Operate the engine in a well ventilated area. 741-7XFa 741-7XFd 9 Ne faites jamais fonctionner le moteur dans un local fermé.
7CK-28199-W0_p01-56 10/27/08 11:49 AM Page 2 ES K AS00071 A200071 INFORMACIÓN SOBRE SEGURIDAD 안전에 관한 정보 AS00072 A200072 LOS GASES DE ESCAPE SON TÓXICOS 연소 시 나오는 연기는 위험 합니다 . 9 No ponga nunca el motor en marcha en un espacio cerrado, porque los gases de escape pueden provocar pérdida de conocimiento y muerte por asfixia en muy poco tiempo. Utilice el motor en un lugar bien ventilado. 9 밀폐된 공간에서 엔진작동을 하지 마십시오 . 순식간에 죽 음을 초래할 정 도로 위험합 니다 .
7CK-28199-W0_p01-56 10/27/08 11:49 AM Page 3 E F AE01154 AF01154 ENGINE AND MUFFLER MAY BE HOT LE MOTEUR ET LE SILENCIEUX SONT BRÛLANTS 9 Place the machine in a place where pedestrians or children are not likely to touch the machine. 741-7XFe 9 Placez le groupe électrogène à un endroit où les piétons et les enfants ne risquent pas de le toucher. 9 Avoid placing any flammable materials near the exhaust outlet during operation.
7CK-28199-W0_p01-56 10/27/08 11:49 AM Page 4 ES K AS01154 A201154 EL MOTOR Y EL SILENCIADOR PUEDEN ESTAR CALIENTES 엔진과 소음기는 매우 뜨겁습 니다 . 9 Sitúe el equipo en un lugar donde no lo puedan tocar las personas que circulen por ese área. 9 기계는 보행자나 어린 아이 들의 손이 닿지 않는 곳에 보관 하십시오 . 9 Evite situar materiales inflamables cerca de la salida de escape mientras el generador esté en funcionamiento. 9 기계가 동작 중에는 배기구 근처에 가연성 물질을 놓지 마십시오 .
7CK-28199-W0_p01-56 10/27/08 11:49 AM Page 5 E F AE00083 AF00083 ELECTRIC SHOCK PREVENTION PRÉVENTION DES RISQUES D’ÉLECTROCUTION 9 Never operate the engine in rain or snow. 9 Ne faites jamais tourner le moteur sous la pluie ou sous la neige. 741-7XFi 9 Never touch the machine with wet hands or electrical shock will occur. 9 Ne touchez jamais au groupe 9 Connect the ground lead of the machine to the ground (earth) terminal 1 and connect the end to the ground electrode buried in the ground.
7CK-28199-W0_p01-56 10/27/08 11:49 AM Page 6 ES K AS00083 A200083 PREVENCIÓN DE DESCARGAS ELÉCTRICAS 감전 사고 예방 9 No utilice nunca el motor bajo la lluvia o la nieve. 9 비가 오거나 눈이 올 때 엔 진 사용을 금해 주십시오 . 9 No toque el equipo con las manos mojadas para evitar riesgos de descargas eléctricas. 9 기계를 젖은 손으로 만지지 마십시오 . 감전 사고의 위험 이 따릅니다 . 9 Conecte el cable de puesta a tierra de la máquina al terminal de tierra 1 (masa) y conecte el extremo al electrodo de tierra instalado en el suelo.
7CK-28199-W0_p01-56 10/27/08 11:49 AM Page 7 E 1 AF00987 CONNECTION NOTES REMARQUES CONCERNANT LES CONNEXIONS 9 Avoid connecting the generator to commercial power outlet. 9 Avoid connecting the generator in parallel with any other generator. 2 F AE00987 1 Correct 2 Incorrect 9 Ne raccordez pas le groupe électrogène à une prise secteur. 9 Ne raccordez pas le groupe électrogène en parallèle avec un autre groupe électrogène.
7CK-28199-W0_p01-56 10/27/08 11:49 AM Page 8 ES K AS00987 A200987 NOTAS SOBRE LA CONEXIÓN 연결 참고 사항 9 Evite conectar el generador a una toma de corriente comercial. 9 Evite conectar el generador en paralelo con otro generador. 9 발전기와 일반 상업용 전기 선과 연결하지 마십시오 . 9 다른 어떤 발전기와 병행해 서 사용하지 마십시오 .
7CK-28199-W0_p01-56 10/27/08 11:49 AM Page 9 E F AE00062 AF00062 LOCATION OF IMPORTANT LABELS EMPLACEMENT DES ÉTIQUETTES DE SÉCURITÉ Please read the following labels carefully before operating this machine. NOTE: Lisez attentivement les étiquettes suivantes avant de faire fonctionner cette machine. N.B.: Prenez soin des étiquettes de sécurité et d’instructions. Au besoin, remplacez-les. Maintain or replace safety and instruction labels, as necessary.
7CK-28199-W0_p01-56 10/27/08 11:49 AM Page 10 ES K AS00062 A200062 UBICACIÓN DE ETIQUETAS IMPORTANTES 중요한 라벨의 위치 Lea detenidamente las siguientes etiquetas antes de poner en funcionamiento esta máquina. 본 기계를 작동시키기 전에 하기 라벨을 주의깊게 읽어 주십시오 . NOTA: 필요에 따라 안전 및 지침 라벨 을 유지 혹은 교체하여 주십시오 참고사항 : Mantenga o sustituya las etiquetas de instrucciones y seguridad, tal y como sea necesario.
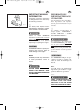
7CK-28199-W0_p01-56 10/27/08 11:49 AM Page 11 E 1 23 1 1 F AE00102 AF00102 DESCRIPTION DESCRIPTION 1 2 3 4 5 6 7 8 1 Poignées de transport Carrying handles (shaded) Fuel tank cap Fuel gauge Muffler Caster lock lever Oil filler cap Oil drain plug Battery (ombrées) 2 Bouchon du réservoir à carbu- rant 3 Jauge de niveau de carburant 4 Silencieux 5 Levier de verrouillage des rou- lettes 6 Bouchon de remplissage d’huile 793-7XF-U0a 7 Bouchon de vidange d’huile 8 Batterie 4 1 8 76 5 793-7X
7CK-28199-W0_p01-56 10/27/08 11:49 AM Page 12 ES K AS00102 A200102 DESCRIPCIÓN 설 명 1 Asas de transporte (sombreadas) 2 Tapón del depósito de combustible 3 Indicador de combustible 4 Silenciador 5 Palanca de bloqueo de arrastre 6 Tapón de llenado de aceite 7 Tapón de drenaje de aceite 8 Batería 1 2 3 4 5 6 7 8 운송 핸들 ( 음영 ) 연료 탱크 캡 연료 게이지 머플러 캐스터 잠금 레버 오일 필러 캡 오일 드레인 플러그 배터리 AS00103 A200103 Panel de control 컨트롤 박스 패널 1 Contador horario 2 Vatímetro 3 Interruptor de CA (interruptor desprovisto d
7CK-28199-W0_p01-56 10/27/08 11:49 AM Page 13 E q w F AE00101 AF00101 CONTROL FUNCTION FONCTION DES COMMANDES AE00869 AF00869 Engine switch Contacteur du moteur The engine switch controls the ignition system. Le contacteur du moteur commande le circuit d’allumage. 1 1 e 763-119 7 “ON” Ignition circuit is switched on. The engine can be started. 2 5 Le circuit d’allumage est mis sous tension. Le moteur peut démarrer. 2 6 « ON » “STOP” Ignition circuit is switched off.
7CK-28199-W0_p01-56 10/27/08 11:49 AM Page 14 ES K AS00101 A200101 FUNCIONES DE CONTROL 컨트롤 기능 A200869 AS00869 Interruptor del motor El interruptor del motor controla el sistema de encendido. 1 7 “ON” 엔진 스위치 엔진 스위치는 점화 시스템을 조 정합니다 . 1 7 “ON” El circuito de encendido está activado. Puede arrancarse el motor. 점화 회로 스위치를 켜짐으로 돌 림 엔진에 시동을 걸 수 있습니다 . 2 2 5 “STOP” 5 “STOP” El circuito de encendido está desactivado. El motor no funcionará. 점화 회로 스위치를 꺼짐으로 돌 림 엔진이 작동되지 않습니다 .
7CK-28199-W0_p01-56 10/27/08 11:49 AM Page 15 E 2 4 1 3 PNL-CAN AF00936 AC switch (N.F.B.) Contacteur CA (sans fusible) (EF6300iSDE) The AC switch (Non-Fuse Breaker) turns off automatically when the load exceeds the generator or the receptacle rated output. (EF6300iSDE) Le contacteur CA (sans fusible) est automatiquement désactivé lorsque la charge dépasse la puissance nominale du groupe électrogène.
7CK-28199-W0_p01-56 10/27/08 11:49 AM Page 16 ES K AS00936 A200936 Interruptor de CA (interruptor desprovisto de fusible) AC 스위치 (N.F.B.) (EF6300iSDE) El interruptor de CA (interruptor desprovisto de fusible) se desconecta automáticamente cuando la carga excede el generador o la salida nominal de la toma. 1 2 l 3 (EF6300iSDE) 부하가 발전기 혹은 리셉터블이 정격 출력을 초과하면 , AC 스위 치 ( 퓨즈 없는 차단기 ) 가 자동 으로 꺼집니다 .
7CK-28199-W0_p01-56 10/27/08 11:49 AM Page 17 E A 1 AF00142 Economy control switch Contacteur de ralenti économique 2 ECON.SW F AE00142 1 I “ON” (: ;) 1 ON OFF 763-124a B 1 2 When the economy control switch is turned to “ON”, the economy control unit controls the engine speed according to the connected load. The results are better fuel consumption and less noise.
7CK-28199-W0_p01-56 10/27/08 11:49 AM Page 18 ES K AS00142 A200142 Interruptor de control económico 경제 조정 스위치 1 1 I “ON” (: ;) Cuando el interruptor de control económico se coloca en la posición “ON”, la unidad de control económico supervisa la velocidad del motor de acuerdo con la carga conectada. Los resultados son la reducción del consumo de combustible y del nivel de ruido.
7CK-28199-W0_p01-56 10/27/08 11:49 AM Page 19 E 1 2 NO SWITCHING DURING OPERATION. 120/240V F Voltage select switch Sélecteur de tension (EF6300iSDE) (EF6300iSDE) cC fF Do not operate the voltage select switch while the engine is running. N’actionnez pas le sélecteur de tension pendant que le moteur tourne. 1 “120/240V” 1 « 120/240V » When the voltage select switch is turned to “120/240V” 1, the generator supplies both 120V and 240V.
7CK-28199-W0_p01-56 10/27/08 11:49 AM Page 20 ES K Selector de tensión 전압 선택 스위치 (EF6300iSDE) (EF6300iSDE) bB No utilice el selector de tensión mientras el motor esté funcionando. 엔진 가동 중에는 전압 선택 스 위치를 사용하지 마십시오 . 1 “120/240V” 1 “120/240V” Cuando el selector de tensión se sitúa 전 압 선 택 스 위 치 가 1 번 en “120/240V” 1, el generador sumi- “120/240V”에 맞춰져 있으면 , 발 전 기 는 120V 와 240V 를 모 nistra tanto 120V como 240V. 두 공급합니다 .
7CK-28199-W0_p01-56 10/27/08 11:49 AM Page 21 E 1 F Hour meter Compteur d’heures The hour meter 1 shows the total number of hours the generator has been run. Le compteur d’heures 1 indique le nombre total d’heures pendant lesquelles le générateur a tourné. Power meter Indicateur de puissance The power meter 1 shows the amount of electric current used by a barmeter. The generator output is normal when the segments of the barmeter appear.
7CK-28199-W0_p01-56 10/27/08 11:49 AM Page 22 ES K Contador horario 시간 미터 El contador horario 1 muestra el número total de horas que ha estado funcionando el generador. 1 번 시간 미터는 발전기가 가동 된 전체 시간을 숫자로 나타내줍 니다 . Vatímetro 파워 미터 El vatímetro 1 muestra el volumen de corriente eléctrica utilizada por un indicador de barras de progreso. La salida del generador es normal cuando aparecen los segmentos del indicador de progreso. NOTA: 1 번 파워 미터는 바 미터가 사 용한 전류의 양을 나타내줍니다 .
7CK-28199-W0_p01-56 10/27/08 11:49 AM Page 23 E 1 763-7XFd F AE01087 AF01087 Overload indicator light (red) Témoin de surcharge (rouge) The overload indicator light 1 comes on when an overload of a connected electrical device is detected, the inverter control unit overheats, or the AC output voltage rises. Then, the electronic breaker will activate, stopping power generation in order to protect the generator and any connected electric devices.
7CK-28199-W0_p01-56 10/27/08 11:49 AM Page 24 ES K AS01087 A201087 Indicador de sobrecarga (rojo) 과부하 지시등 ( 적색 ) El indicador de sobrecarga 1 se ilumina cuando se detecta una sobrecarga en un dispositivo eléctrico conectado, si se calienta excesivamente la unidad de control del inversor o si aumenta la tensión de salida de CA. A continuación, el disyuntor electrónico se activa y detiene la generación de electricidad para proteger el generador y los dispositivos conectados al mismo.
7CK-28199-W0_p01-56 10/27/08 11:49 AM Page 25 E Fuel tank cap Remove the fuel tank cap by turning it counterclockwise. F Bouchon du réservoir à carburant Déposez le bouchon du réservoir de carburant en le tournant dans le sens antihoraire. 707-7XFb Fuel cock knob The fuel cock supplies fuel from the fuel tank to the carburetor. The fuel cock has two positions. 1 ON 7CK-006 1 ON With the knob in this position, fuel flows to the carburetor. Normal using is done with the knob in this position.
7CK-28199-W0_p01-56 10/27/08 11:49 AM Page 26 ES Tapón del depósito de combustible Para retirar el tapón del depósito de combustible, gírelo en sentido contrario a las agujas del reloj. Mando de la llave de paso del combustible La llave de paso suministra combustible del depósito al carburador. La llave de paso del combustible tiene dos posiciones. 1 ON Cuando el mando se encuentra en esta posición, se suministra combustible al carburador.
7CK-28199-W0_p01-56 10/27/08 11:49 AM Page 27 E 1 F Ground (Earth) terminal Borne de masse (terre) It is a terminal which connects the earth line for prevention of electric shock. When the electric device is earthed, always the generator must be earthed. C’est une borne qui connecte le fil de terre pour prévenir les risques d’électrocution. Si l’appareil est mis à la terre, le générateur doit toujours être mis à la terre.
7CK-28199-W0_p01-56 10/27/08 11:49 AM Page 28 ES Terminal de puesta a tierra (masa) Este terminal conecta la línea de tierra para prevenir descargas eléctricas. Si el dispositivo eléctrico está conectado a tierra, el generador siempre deberá estar conectado a tierra. K 접지 ( 어스 ) 단자 감전 방지를 위한 어스선을 연결 하는 단자입니다 . 전기 장치의 어스를 할 때는 발 전기를 항상 어스 해줘야 합니 다.
7CK-28199-W0_p01-56 10/27/08 11:49 AM Page 29 E 741-7XFl 707-7XFc PRÉPARATION AE00857 AF00857 Fuel Carburant w XG 9 Fuel is highly flammable and poisonous. Check “SAFETY INFORMATION” (See page 1) carefully before filling. 9 Do not overfill the fuel tank, otherwise it may overflow when the fuel warms up and expands. 9 After fill the fuel, make sure the fuel tank cap is tightened securely.
7CK-28199-W0_p01-56 10/27/08 11:49 AM Page 30 ES K PREPARACIÓN 준비 AS00857 A200857 Combustible 연료 r 9 El combustible es muy inflamable y tóxico. Lea atentamente el apartado “INFORMACIÓN SOBRE SEGURIDAD” (consulte la página 2) antes de añadir combustible. 9 No añada combustible por encima del nivel indicado para evitar que rebose cuando se caliente y expanda posteriormente. 9 Después de añadir combustible, asegúrese de que el tapón del depósito queda firmemente apretado.
7CK-28199-W0_p01-56 10/27/08 11:49 AM Page 31 E Recommended fuel: Unleaded gasoline Fuel tank capacity: Total: 17.0 L (3.17 US gal, 2.64 lmp gal) 2 1 788-7XFb 3 700-7XFa r 700-103c 700-006 0°C ∂ SAE 10W ç SAE #20 32°F Carburant préconisé: Essence sans plomb Contenance du réservoir: Totale: 17,0 L (2,64 pte. imp.) AE01155 AF01155 Engine oil Huile moteur cC fF The generator has been shipped without engine oil. Do not start the engine till fill with the sufficient engine oil.
7CK-28199-W0_p01-56 10/27/08 11:49 AM Page 32 ES Combustible recomendado: Gasolina sin plomo Capacidad del depósito de combustible: Total: 17 L (3,17 US gal, 2,64 lmp gal) K 권장 오일 : 무연 가솔린 연료 탱크 용량 : 총: 17.0 리터 AS01155 A201155 Aceite de motor 엔진 오일 bB El generador se suministra sin aceite de motor. No arranque el motor hasta que haya añadido suficiente aceite de motor. 발전기는 엔진 오일이 없는 상태 로 운송되므로 , 엔진 오일을 충 분히 주입한 후 엔진의 시동을 걸어야 합니다 . 1. Coloque el generador sobre una superficie plana. 2.
7CK-28199-W0_p01-56 10/27/08 11:49 AM Page 33 E 762-012 2 F AE01083 AF01083 Battery preparation (See page 79) Préparation de la batterie (voir page 79) w XG 9 Electrolyte is poisonous and dangerous since it contains sulfuric acid, which causes severe burns. Avoid any contact with skin, eyes or clothing and always shield your eyes when working near batteries. In case of contact, administer the following FIRST AID. 9 EXTERNAL: Flush with plenty of water.
7CK-28199-W0_p01-56 10/27/08 11:49 AM Page 34 ES K AF01083 A201083 Preparación de la batería (consulte la página 80) 배터리 준비 (80 페이지 참고 ) r 9 El electrolito es tóxico y peligroso, ya que contiene ácido sulfúrico y puede provocar quemaduras graves. Evite que entre en contacto con la piel, los ojos o la ropa y protéjase siempre los ojos cuando trabaje cerca de baterías. En caso de contacto, preste los siguientes PRIMEROS AUXILIOS. 9 EXTERNO: Lave con abundante agua.
7CK-28199-W0_p01-56 10/27/08 11:49 AM Page 35 E 3 4 5 6 7 2. Déposez les écrous papillon 3 et la plaque de batterie 4. 3. Déposez la batterie 5. 4. Remplissez la batterie d’électrolyte. Reportez-vous aux instructions fournies avec l’électrolyte pour la procédure de remplissage. 5. Connect the positive lead (red) 6 to the positive (+) battery terminal 7. 6. Install the battery 5 onto the tray. 7. Install the battery plate 4 and tighten the wing nuts 3. 5.
7CK-28199-W0_p01-56 10/27/08 11:49 AM Page 36 ES K 2. Retire las palomillas 3 y la placa de la batería 4. 3. Retire la batería 5. 4. Llene la batería con el electrolito. Consulte las instrucciones de llenado que se entregan con el electrolito. 2. 3 번 윙 너트와 4 번 배터리 플레이트를 뺍니다 . 3. 5 번 배터리를 뺍니다 . 4. 배터리에 전해액을 넣습니다 . 전해액 주입 지침에 대해서 는 함께 제공된 지침서를 참 고하십시오 . 5. Conecte el cable positivo (rojo) 6 al terminal positivo (+) 7 de la batería. 6. Coloque la batería 5 en la bandeja. 7.
7CK-28199-W0_p01-56 10/27/08 11:49 AM Page 37 E F AE00845 AF00845 PRE-OPERATION CHECK VÉRIFICATIONS AVANT UTILISATION w XG If any item in the Pre-operation check is not working properly, have it inspected and repaired before operating the generator. Si l’un des éléments du contrôle préalable à l’opération ne fonctionne pas correctement, faites-le inspecter et réparer avant d’utiliser le générateur. The condition of a generator is the owner’s responsibility.
7CK-28199-W0_p01-56 10/27/08 11:49 AM Page 38 ES K AS00845 A200845 COMPROBACIÓN PREVIA AL FUNCIONAMIENTO 운전 전 확인사항 r Si cualquier elemento de la comprobación previa a la utilización no funciona correctamente, solicite que lo inspeccionen y reparen ante de utilizar el generador. El estado del generador es responsabilidad del propietario. Los componentes esenciales pueden empezar a deteriorarse rápida e inesperadamente, aunque no se utilice el generador.
7CK-28199-W0_p01-56 10/27/08 11:49 AM Page 39 E The point where abnormality was recognized by use. 9 Check operation. 9 If necessary, consult a Yamaha dealer. - 39 - F Le point où une anomalie a été identifiée lors de l’utilisation. 9 Vérifiez le fonctionnement. 9 Si nécessaire, consultez un concessionnaire Yamaha.
7CK-28199-W0_p01-56 10/27/08 11:49 AM Page 40 ES El punto donde se detectó la anomalía durante el funcionamiento del generador. 9 Compruebe el funcionamiento. 9 Si es necesario, consulte con un distribuidor de Yamaha. K 사용 시 비정상적인 것으로 인식 될 때의 해야 할 일 9 운전 상태를 확인합니다 . 9 필요할 경우 , 야마하 딜러에 게 문의하시기 바랍니다 .
7CK-28199-W0_p01-56 10/27/08 11:49 AM Page 41 E 7CK-005 AF01138 OPERATION FONCTIONNEMENT w XG 9 Never operate the engine in a closed area or it may cause unconsciousness and death within a short time. Operate the engine in a well ventilated area. 9 Before starting the engine, do not connect any electric devices. cC The generator has been shipped without engine oil. Do not start the engine till fill with the sufficient engine oil. Starting the engine 1 1. Turn the economy switch to “OFF”.
7CK-28199-W0_p01-56 10/27/08 11:49 AM Page 42 ES K AS01138 A201138 FUNCIONAMIENTO 작 동 r 9 No utilice nunca el motor en una zona cerrada, ya que podría causar inconsciencia y la muerte en un periodo muy breve. El motor se debe utilizar en zonas bien ventiladas. 9 No conecte ningún dispositivo eléctrico antes de arrancar el motor. 9 폐쇄된 곳에서는 엔진을 절 대 가동해서는 안됩니다 . 폐 쇄된 곳에서 가동하게 되면 순식간에 의식을 잃어서 사 망에 이를 수 있기 때문입니 다 . 엔진은 환기가 잘되는 곳에서 가동해야 합니다 . 9 엔진에 시동을 걸 때는 어떤 전기 장치도 연결하지 않고 걸어야 합니다 .
7CK-28199-W0_p01-56 10/27/08 11:49 AM Page 43 E 3. Turn the fuel cock knob to “ON”. q ON F 3. Tournez le bouton du robinet à carburant sur « ON ». 1 « ON » 1 “ON” OFF 705-073 4. Turn the engine switch to “ON”. 1 1 7 4. Tournez le contacteur moteur sur « ON ». 1 “ON” 7 du « ON » 763-127h q 5. Turn the engine switch to “START”. Take your hand off the switch immediately after the engine starts. 1 763-120a 6 “START” 5. Tournez le contacteur du moteur sur « START ».
7CK-28199-W0_p01-56 10/27/08 11:49 AM Page 44 ES 3. Coloque el mando de la llave de paso del combustible en la posición “ON”. K 3. 연료 콕을“ON”으로 돌림 . 1 “ON” 1 “ON” 4. Ponga el interruptor del motor en la posición “ON”. 1 7 “ON” 5. Ponga el interruptor del motor en “START”. Retire la mano del interruptor inmediatamente después de arrancar el motor. 4. 엔 진 스 위 치 를“ON” 으 로 돌림 . 1 5. 엔 진 스 위 치 를“START” 로 돌림 . 엔진에 시동이 걸리면 스위 치에서 손을 바로 떼십시오 .
7CK-28199-W0_p01-56 10/27/08 11:49 AM Page 45 E Stopping the engine Arrêt du moteur 1. Turn off any electric devices. 2. Disconnect devices. any F 1. Mettez tous les appareils électriques hors tension. electric 2. Débranchez tous les appareils électriques. 7CK-005 3. Turn the engine switch to “STOP”. q 1 5 3. Tournez le contacteur du moteur sur la position « STOP ». “STOP” 1 5 « STOP » 763-120b 4. Turn the fuel cock knob to “OFF”. ON 4.
7CK-28199-W0_p01-56 10/27/08 11:49 AM Page 46 ES Parada del motor 1. Apague los dispositivos eléctricos. 2. Desconecte los dispositivos eléctricos. 3. Ponga el interruptor del motor en la posición “STOP”. 1 5 “STOP” 4. Coloque el mando de la llave de paso del combustible en la posición “OFF”. K 엔진 정지 1. 전기 장치들을 모두 끕니다 . 2. 전기 장치의 연결을 모두 차 단합니다 . 3. 엔 진 스 위 치 를 정 지 로 돌 립 니다 . 1 5 “STOP” 4. 연료 콕 노브를 끕니다 .
7CK-28199-W0_p01-56 10/27/08 11:50 AM Page 47 E AF00839 Connection Raccordement Alternating Current (AC) Courant alternatif (CA) w XG Be sure any electric devices are turned off before plugging them in. Assurez-vous que tous les appareils électriques sont hors tension avant de les raccorder. cC fF 9 Be sure all electric devices including the lines and plug connections are in good condition before connection to the generator. 9 Be sure the total load is within generator rated output.
7CK-28199-W0_p01-56 10/27/08 11:50 AM Page 48 ES K AS00839 A200839 Conexion 연 결 Corriente Alterna (CA) 교류전류 (AC) r Asegúrese de que los dispositivos eléctricos están apagados antes de conectarlo. bB 9 Asegúrese de que todos los dispositivos eléctricos, incluidas las líneas y las conexiones de clavijas, se encuentren en buen estado antes de conectarlos al generador. 9 Asegúrese de que la carga total no excede la salida nominal del generador.
7CK-28199-W0_p01-56 10/27/08 11:50 AM Page 49 E 3. Plug in to AC receptacle. F 3. Branchez sur la prise de courant alternatif (CA). 7CK-006 (EF6300iSDE only) GR NOTE: G X 120V Y W 120V 240V 779-017a 1 To supply both 120V and 240V power sources from the 4-blade plug receptacle needs special knowledge of the wiring plug. Please contact a trained electrician for the wiring of the plugs. (EF6300iSDE uniquement) N.B.
7CK-28199-W0_p01-56 10/27/08 11:50 AM Page 50 ES 3. Enchúfelo a la toma de CA. K 3. AC 리셉터블에 플러그를 낍 니다 . (sólo EF6300iSDE) NOTA: (EF6300iSDE 에만 해당 ) Para suministrar las fuentes de alimentación de 120V y 240V desde la toma de enchufe de 4 patillas, se necesitan conocimientos especiales del conector de cableado. Póngase en contacto con un electricista cualificado para la conexión de los conectores. 4- 날 플 러 그 리 셉 터 블 에 서 120V 와 240V 전 원 을 공 급 하 려면 배선 플러그에 대한전문 지 식이 있어야 합니다 .
7CK-28199-W0_p01-56 10/27/08 11:50 AM Page 51 E NOTE: 1 2 3 If you operate the generator with the voltage select switch in the 120/240V-position, the electric current will be limited for the 120V-receptacles. When you use either receptacle 1 OR 2 AND receptacle 3 at the same time, the total electric current provided will be equal to or even less than 22.9A. For example: If the 240V-receptacle 3 provides 10A, either 120V-receptacles 1 or 2 can be used up to 12.9A. In case the load exceeds 22.
7CK-28199-W0_p01-56 10/27/08 11:50 AM Page 52 ES K NOTA: 참고사항 : Si utiliza el generador con el selector en la posición 120/240V, la corriente eléctrica se limitará para las tomas de 120V. Cuando se utilizan las tomas 1 Ó 2 Y la toma 3 al mismo tiempo, la corriente eléctrica total suministrada equivaldrá o será inferior a 22,9A. Por ejemplo: Si la toma 3 de 240V suministra 10A, se pueden utilizar las tomas 1 y 2 de 120V hasta 12,9A.
7CK-28199-W0_p01-56 10/27/08 11:50 AM Page 53 E F AE00970 AF00970 Application range Plages d’utilisation When using the generator, make sure the total load is within rated output of a generator. Otherwise, generator damage may occur. Lorsque vous utilisez le générateur, assurez-vous la charge totale est conforme à la puissance de sortie nominale d’un générateur. Sinon, vous risquez d’endommager le générateur. A AC 779-006a B Power factor 1 779-006c 0.8 – 0.95 779-006b 0.4 – 0.
7CK-28199-W0_p01-56 10/27/08 11:50 AM Page 54 ES K AS00970 A200970 Margen de aplicación 적용 범위 Cuando utilice el generador, asegúrese de que la carga total no sea superior a su potencia nominal, ya que de lo contrario el generador podría sufrir daños. 발전기를 이용할 때는 , 전체 부 하가 발전기의 정격 출력 내에 있는지 확인해야 합니다 . 그렇지 않을 경우 , 발전기가 고장 날 수 있습니다 . å CA ∫ Factor de potencia ç Rendimiento, 0,85 å AC ∫ 역률 ç 효율 0.85 NOTA: 참고사항 : 9 “—” significa lo que se indica a continuación.
7CK-28199-W0_p01-56 10/27/08 11:50 AM Page 55 E cC F fF 9 Do not overload. The total load of all electrical appliances must not exceed the supply range of the generator. Overloading will damage the generator. 9 When supplying precision equipment, electronic controllers, PCs, electronic computers, microcomputerbased equipment or battery chargers, keep the generator a sufficient distance away to prevent electrical interference from the engine.
7CK-28199-W0_p01-56 10/27/08 11:50 AM Page 56 ES K bB 9 No sobrecargue los aparatos. La carga total de todos los aparatos eléctricos no debe superar el margen de suministro del generador. Las sobrecargas producen daños en el generador. 9 Cuando alimente equipos de precisión, controladores electrónicos, ordenadores, equipos electrónicos, equipos basados en microordenadores o cargadores de baterías, mantenga el generador a una distancia suficiente para evitar interferencias eléctricas con el motor.
7CK-28199-W0_p57-115 10/27/08 11:15 AM Page 57 E F AE00401 AF00401 PERIODIC MAINTENANCE ENTRETIENS PÉRIODIQUES Safety is an obligation of the owner. Periodic inspection, adjustment and lubrication will keep your generator in the safest and most efficient condition possible. The most important points of generator inspection, adjustment, and lubrication are explained on the following pages. La sécurité est une obligation du propriétaire.
7CK-28199-W0_p57-115 10/27/08 11:15 AM Page 58 ES K AS00401 A200401 MANTENIMIENTO PERIÓDICO 정기적 보수 La seguridad es una obligación del propietario. La inspección, el ajuste y la lubricación periódicos garantizarán que el generador se encuentre siempre en el estado más seguro y eficiente posible. Los puntos más importantes de la inspección, ajuste y lubricación del generador se explican en las páginas siguientes. 안전수칙은 사용자가 의무사항입 니다 . 정기 검사 , 조절 및 윤활 작업은 발전기를 가장 안전하고 효율적인 상태로 사용할 수 있도 록 해줍니다 .
7CK-28199-W0_p57-115 10/27/08 11:15 AM Page 59 E å Item © Spark plug ∆ Fuel ¬ Fuel hose ˜ Engine oil œ Air filter element † Muffler screen ∑ Spark arrester Ω Fuel filter F AE00899 AF00899 Maintenance chart Tableau de périodicité des entretiens w XG Stop the engine before starting maintenance work. Arrêtez le moteur avant d’effectuer des travaux d’entretien. cC fF Use only Yamaha specified genuine parts for replacement. Ask an authorized Yamaha dealer for further attention.
7CK-28199-W0_p57-115 10/27/08 11:15 AM Page 60 ES K AS00899 A200899 Tabla de mantenimiento 유지보수 차트 r Pare el motor antes de iniciar los trabajos de mantenimiento. 보수를 시작하기 전에 엔진을 정 지하십시오 . bB Utilice únicamente piezas originales Yamaha cuando haya que cambiar un componente. Para más información, consulte a un concesionario autorizado Yamaha.
7CK-28199-W0_p57-115 10/27/08 11:15 AM Page 61 E å Item ∫ ç ∂ Every Pre´ ƒ operation 6 months 12 months check or 100 Hr or 300 Hr Routine ç Check breather hose for cracks or damage. ∂ Replace if necessary. ƒ Decarbonize cylinder head. é Cylinder head © More frequently if necessary. ˙ Valve î Check and adjust when clearance engine is cold. ˚ Check all fittings and ∆ Fittings/ fasteners. fasteners ¬ Correct if necessary. µ The point where abnormality was recognized by use.
7CK-28199-W0_p57-115 10/27/08 11:15 AM Page 62 ES å ∫ ç ∂ ´ ƒ ∫ ç ∂ é ƒ © ˙ î ∆ ˚ ¬ µ Elemento Rutinaria Comprobaciones previas a la utilización Cada 6 meses o 100 horas 12 meses o 300 horas Tubo respiradero del cárter Comprobar si el tubo respiradero está agrietado o dañado. Si es necesario, cambiar. Culata Eliminar la carbonilla de la culata. Con más frecuencia si fuese necesario. Holgura de la válvula Comprobar y ajustar cuando el motor está frío.
7CK-28199-W0_p57-115 10/27/08 11:15 AM Page 63 E 2 1 788-7XF-U0a 760-7XF a 760-001a F AE01143 AF01143 Spark plug inspection Inspection de la bougie The spark plug is important engine components, which should be checked periodically. La bougie est un composant important du moteur et doit être vérifiée périodiquement. 1. Remove the bolts 1, and then pull outward on the areas of front cover 2 shown. 2. Remove the spark plug cap and then remove the spark plug. 3.
7CK-28199-W0_p57-115 10/27/08 11:15 AM Page 64 ES K AS01143 A201143 Inspección de la bujía 점화 플러그 점검 Las bujías son componentes importantes del motor y deberían comprobarse periódicamente. 점화 플러그는 중요 부품이므로 정기적으로 확인해야 합니다 . 1. Retire los tornillos 1 y a continuación tire hacia afuera de las áreas de la tapa frontal 2 que se muestra. 2. Retire el capuchón y a continuación la bujía. 3. Compruebe si ha sufrido decoloración y retire la carbonilla.
7CK-28199-W0_p57-115 10/27/08 11:15 AM Page 65 E 5. Install the spark plug. Spark Plug Torque: 20.0 N•m (2.0 kgf•m, 14.8 lbf•ft) NOTE: If a torque wrench is not available when installing a spark plug, a good estimate of the correct torque is 1/4-1/2 turn past finger tight. However, the spark plug should be tightened to the specified torque as soon as possible. 6. Install the spark plug cap. 7. Install the front cover and tighten the bolts. F 5. Remontez la bougie.
7CK-28199-W0_p57-115 10/27/08 11:15 AM Page 66 ES 5. Coloque la bujía. Par de la bujía: 20,0 N•m (2,0 kgf•m, 14,8 lbf•ft) NOTA: Si no dispone de una llave dinamométrica para instalar una bujía, una buena estimación del par correcto es 1/4-1/2 vuelta después de apretarla con la mano. Sin embargo, la bujía debería apretarse al par especificado lo antes posible. 6. Coloque el capuchón de la bujía. 7. Coloque la tapa frontal y apriete los tornillos. K 5. 점화 플러그를 장착합니다 . 점화 플러그 토크 : 20.0 N•m (2.0 kg•m, 14.
7CK-28199-W0_p57-115 10/27/08 11:15 AM Page 67 E AF01156 Engine oil replacement Renouvellement de l’huile moteur w Avoid draining the engine oil immediately after stopping the engine. The oil is hot and should be handled with care to avoid burns. 2 1 788-7XFb 8 5 6 7 4 3 700-7XFb F AE01156 1. Place the machine on a level surface and warm up the engine for several minutes. Then stop the engine. 2. Remove the bolts 1, and then pull outward on the areas of rear cover 2 shown. 3.
7CK-28199-W0_p57-115 10/27/08 11:15 AM Page 68 ES K AS01156 A201156 CAMBIO DEL ACEITE DE MOTOR 엔진 오일 교환 r Evite vaciar el aceite del motor inmediatamente después de detenerlo. El aceite está caliente y debe manejarse con cuidado para evitar quemaduras. 엔진 정지 후에는 바로 엔진 오 일이 새지 않도록 해야 합니다 . 오일이 뜨거우므로 화상을 입지 않으려면 주의해서 다뤄야 합니 다. 1. Coloque la máquina en una superficie nivelada y caliente el motor durante varios minutos. A continuación, pare el motor. 2.
7CK-28199-W0_p57-115 10/27/08 11:15 AM Page 69 E 7. Add engine oil to the upper level 1. q 700-006a 0°C 25°C å YAMALUBE 4 (10W-40) ∂ SAE 10W ç SAE #20 32°F ∫ SAE #30 80°F Recommended engine oil: åYAMALUBE 4 (10W-40), SAE 10W-30 or 10W-40 ∫SAE #30 çSAE #20 ∂SAE 10W Recommended engine oil grade: API Service SE type or higher Engine oil quantity: 1.3 L (1.37 US qt, 1.14 lmp qt) cC Be sure no foreign material enters the crankcase. 8. Install the oil filler cap, the rubber cap and the rubber plug.
7CK-28199-W0_p57-115 10/27/08 11:15 AM Page 70 ES 7. Añada aceite de motor hasta el nivel superior 1. Aceite de motor recomendado: åYAMALUBE 4 (10W-40), SAE 10W-30 o 10W-40 ∫SAE #30 çSAE #20 ∂SAE 10W Grado de aceite de motor recomendado: Tipo API Service SE o superior Cantidad de aceite de motor: 1,3 L (1,37 US qt, 1,14 lmp qt) K 7. 엔진 오일을 1 번 상위 레벨 까지 주입합니다 . 권장 엔진 오일 : å YAMALUBE 4 (10W-40), SAE 10W-30 혹은 10W-40 ∫ SAE #30 ç SAE #20 ∂ SAE 10W 권장 등급 엔진 오일 : API Service SE 타입 혹은 그 이상 엔진 오일량 : 1.
7CK-28199-W0_p57-115 10/27/08 11:15 AM Page 71 E 1 3. Remove the air filter cover 1 and foam element 2. 4. Wash the foam element in solvent and dry it. 5. Oil the foam element and squeeze out excess oil. The foam element should be wet but not dripping. 2 Recommended oil: Foam-air-filter oil or SAE #20 motor oil cC Do not wring out the foam element when squeezing it. This could cause it to tear. 6. Insert the foam element into the air filter case.
7CK-28199-W0_p57-115 10/27/08 11:15 AM Page 72 ES 3. Retire la tapa del filtro de aire 1 y el elemento de espuma 2. 4. Lave el elemento de espuma en disolvente y séquelo. 5. Aplique aceite al elemento de espuma y retire el exceso de aceite. El elemento de espuma debe estar húmedo pero no gotear. Aceite recomendado: Aceite para filtro de aceite con espuma o Aceite de motor SAE #20 bB No retuerza el elemento cuando lo apriete, ya que se podría desgarrar. 6.
7CK-28199-W0_p57-115 10/27/08 11:15 AM Page 73 E 741-7XFl 2 F AE01075 AF01075 Muffler screen and spark arrester Grille du silencieux et pareétincelles w XG The engine and muffler will be very hot after the engine has been run. Avoid touching the engine and muffler while they are still hot with any part of your body or clothing during inspection or repair. Le moteur et le silencieux sont brûlants après que le moteur a tourné.
7CK-28199-W0_p57-115 10/27/08 11:15 AM Page 74 ES K AS01075 A201075 Pantalla del silenciador y amortiguador de chispas 머플러 스크린 및 점화 차단기 r El motor y el silenciador estarán muy calientes después de que el motor haya estado en marcha. Durante la inspección o reparación del generador, evite tocar el motor y el silenciador con su cuerpo o con su ropa mientras estén calientes. 엔진 작동 후 엔진과 머플러가 매우 뜨거울 것입니다 . 검사나 보수 중에 엔진과 머플러 가 아직 뜨거운 동안은 이 부분 에 몸이나 옷이 닿지 않도록 주 의하십시오 . 1.
7CK-28199-W0_p57-115 10/27/08 11:15 AM Page 75 E 3. Remove the carbon deposits on the muffler screen and spark arrester using a wire brush. 711-075 cC fF When cleaning, use the wire brush lightly to avoid damaging or scratching of the muffler screen and spark arrester. Lors du nettoyage, utilisez la brosse métallique avec précaution pour éviter d’endommager ou d’érafler la grille du silencieux et le pare-étincelles. 4. Check the muffler screen and spark arrester. Replace them if damaged. 5.
7CK-28199-W0_p57-115 10/27/08 11:15 AM Page 76 ES 3. Retire los depósitos de carbonilla de la pantalla del silenciador y el amortiguador de chispas con un cepillo metálico. K 3. 머 플 러 스 크 린 과 점 화 차 단 기의 탄소 노폐물은 와이어 브러시를 이용하여 제거합니 다. bB Cuando limpie, utilice el cepillo metálico con suavidad para evitar dañar o arañar la pantalla del silenciador y el amortiguador de chispas. 청소를 할 때는 , 와이어 브러시 를 살짝 문질러서 머플러 스크린 및 점화 차단기의 손상 혹은 긁 힘을 방지해야 합니다 . 4.
7CK-28199-W0_p57-115 10/27/08 11:15 AM Page 77 E F AE00471 AF00471 Fuel tank filter Filtre de réservoir d’essence w XG Never use or be near the fuel and solvent while smoking or in the vicinity of an open flame. Ne manipulez pas et ne vous approchez pas de solvants ou d’essence lorsque vous fumez ou que vous vous trouvez à proximité d’une flamme. q 1. Remove the fuel tank cap and filter 1. 2. Clean the filter with gasoline. If damaged, replace it. 3. Wipe the filter and install it. 4.
7CK-28199-W0_p57-115 10/27/08 11:15 AM Page 78 ES K AS00471 A200471 Filtro del depósito de combustible 연료탱크 필터 r Absténgase de manipular el combustible o disolvente mientras fuma o se encuentra cerca de una llama. 1. Retire el tapón del depósito de combustible y el filtro 1. 2. Limpie el filtro con gasolina. Si está dañado, reemplácelo. 3. Seque el filtro e instálelo. 4. Instale el tapón del depósito de combustible. 흡연 중 또는 솔벤트나 연료 근 처에서 사용하지 말아야 하며 화 재가 발생할 수 있는 근처에서는 사용하지 마십시오 . 1.
7CK-28199-W0_p57-115 10/27/08 11:15 AM Page 79 E AF00842 Battery Batterie This generator is equipped with a sealed type (MF) battery, which does not require any maintenance. There is no need to check the electrolyte or to add distilled water. Ce générateur est équipé d’une batterie scellée (MF), qui ne requiert aucun entretien. Il n’est pas nécessaire de vérifier le niveau d’électrolyte ni d’ajouter de l’eau distillée.
7CK-28199-W0_p57-115 10/27/08 11:15 AM Page 80 ES K AS00842 A200842 Batería 배터리 El generador dispone de una batería de tipo hermético (MF) que no necesita mantenimiento alguno. No es necesario comprobar el electrolito ni añadir agua destilada. 본 배터리에는 유지보수가 전혀 필요 없는 봉인된 타입 (MF) 배 터리가 장착돼있기 때문에 , 전극 확인이나 증류수 주입을 할 필요 가 없습니다 . r 9 El electrolito es tóxico y peligroso, ya que contiene ácido sulfúrico y puede provocar quemaduras graves.
7CK-28199-W0_p57-115 10/27/08 11:15 AM Page 81 E AF01057 Recommended battery Batterie recommandée Recommended battery: Capacity: 12V/18Ah Batterie recommandée: Capacité: 12V/18Ah AE01077 AF01077 Fuse replacement Remplacement du fusible w XG Be sure to use specified fuse. A wrong fuse will cause electrical system damage and A FIRE HAZARD. Veillez à utiliser un fusible spécifié. Un fusible incorrect provoquera des dommages au circuit électrique et constitue un DANGER D’INCENDIE.
7CK-28199-W0_p57-115 10/27/08 11:15 AM Page 82 ES K AS01057 A201057 Batería recomendada 권장 배터리 Batería recomendada: Capacidad: 12V/18Ah 권장 배터리 : 용량 : 12V/18Ah AS01077 A201077 Cambio del fusible 퓨즈 교체 r Asegúrese de utilizar el fusible especificado. Un fusible incorrecto podría causar daños en el sistema eléctrico y RIESGO DE INCENDIO. 퓨즈는 규격 용품을 사용해야 합 니다 . 잘못 된 퓨즈를 사용하면 전기 시스템 손상 및 화재 위험 이 생길 수 있습니다 .
7CK-28199-W0_p57-115 10/27/08 11:15 AM Page 83 E q 763-120b AF00601 STORAGE REMISAGE Long term storage of your machine will require some preventive procedures to guard against deterioration. Si vous remisez votre groupe électrogène pendant une période prolongée, il faut prendre certaines mesures préventives afin de le protéger contre toute détérioration. AE01149 AF01149 Drain the fuel Vidangez le carburant 1. Turn the engine switch to “STOP” 1. 2. Remove the fuel tank cap.
7CK-28199-W0_p57-115 10/27/08 11:15 AM Page 84 ES K AS00601 A200601 ALMACENAMIENTO 보 관 El almacenamiento del generador durante una larga temporada requiere ciertos procedimientos preventivos para protegerlo contra deterioro. 장기간 보관시에는 기계의 수명 연장을 위하여 점검 후 보관하십 시오 . AS01149 A201149 Vaciado de combustible 연료배출 1. Ponga el interruptor del motor en la posición “STOP” 1. 2. Retire el tapón del depósito de combustible.
7CK-28199-W0_p57-115 10/27/08 11:15 AM Page 85 E 5. Start the engine and leave it run until it stops. The engine stops in approx. 20 mins. time by running out of fuel. NOTE: 9 Do not connect with any electrical devices. (unloaded operation) 9 Duration of the running engine caries depends on the amount of the fuel left in the tank. 2 F 5. Faites démarrer le moteur et laissez-le tourner jusqu'à ce qu’il s’arrête. Le moteur s’arrête en approx. 20 minutes, après avoir épuisé le carburant. N.B.
7CK-28199-W0_p57-115 10/27/08 11:15 AM Page 86 ES 5. Arranque el motor y déjelo en funcionamiento hasta que se pare. El motor se detiene en aprox. 20 min. al quedarse sin combustible. NOTA: 9 No conecte ningún aparato eléctrico (funcionamiento sin carga). 9 La duración del motor en funcionamiento depende de la cantidad de combustible que quede en el depósito. K 5. 엔 진 에 시 동 을 걸 고 정 지 될 때까지 가동되도록 둡니다 . 엔진은 연료가 떨어짐에 따 라 약 20 분 후 정지됩니다 . 참고사항 : 9 전기 장치와 연결하지 마십 시오 .
7CK-28199-W0_p57-115 10/27/08 11:15 AM Page 87 E F Engine Moteur Perform the following steps to protect the cylinder, piston ring, etc. from corrosion. 1. Remove the spark plug, pour about one tablespoon of SAE 10W30 or 20W40 motor oil into the spark plug hole and reinstall the spark plug only. 2. Turn the engine switch to “START” and crank the engine several seconds with ignition off to coat the cylinder walls with oil. 3. Clean exterior of the generator and apply a rust inhibitor. 4.
7CK-28199-W0_p57-115 10/27/08 11:15 AM Page 88 ES K Motor 엔진 Realice los pasos siguientes para proteger el cilindro, el aro de pistón, etc. contra la corrosión. 1. Retire la bujía, vierta aproximadamente una cucharada de aceite de motor SAE 10W30 ó 20W40 en el orificio de la bujía y vuelva a colocar sólo la bujía. 2. Coloque el interruptor del motor en “START” y arranque el motor durante varios segundos con el circuito de encendido apagado para cubrir las paredes del cilindro con aceite. 3.
7CK-28199-W0_p57-115 10/27/08 11:15 AM Page 89 E 762-003 F AE01086 AF01086 Battery Batterie 1. Remove the battery (See page 33). 2. Store the battery in a cool, dark and dry place. 1. Déposez la batterie (voir page 33). 2. Remisez la batterie à un endroit frais, sombre et sec. Do not store the battery in an excessively warm or cold place [i.e., less than 0°C (30°F) or more than 30°C (90°F)]. Ne remisez pas la batterie à un endroit excessivement chaud ou froid [par ex.
7CK-28199-W0_p57-115 10/27/08 11:15 AM Page 90 ES K AS01086 A201086 Batería 배터리 1. Retire la batería (consulte la página 34). 2. Guarde la batería en un lugar fresco, seco y oscuro. No guarde la batería en un lugar excesivamente caliente o frío [esto es, menos de 0°C (30°F) o más de 30°C (90°F)]. 1. 배터리를 뺍니다 (34 페이지 참고 ). 2. 배 터 리 보 관 은 서 늘 하 고 어 둡고 건조한 곳에 해야 합니 다. 너무 덥거나 혹은 추운 곳에 배 터리를 보관해서는 안됩니다 [ 예 , 0°C (30°F) 이 하 혹 은 30°C (90°F) 이상 ].
7CK-28199-W0_p57-115 10/27/08 11:15 AM Page 91 E 707-7XFc ON OFF AF01151 TROUBLESHOOTING DÉPANNAGE Engine won’t start Le moteur refuse de démarrer 1. Fuel systems No fuel supplied to combustion chamber. o No fuel in tank .... Supply fuel. o Fuel in tank .... Fuel cock knob to “ON”. o Clogged fuel line .... Clean fuel line. o Clogged carburetor .... Clean carburetor. 705-073c 2. Engine oil system Insufficient o Oil level is low .... Add engine oil. 700-006 3.
7CK-28199-W0_p57-115 10/27/08 11:15 AM Page 92 ES K AS01151 A201151 RESOLUCIÓN DE PROBLEMAS 고장의 발견과 수리 El motor no arranca 1. Sistema de combustible No llega combustible a la cámara de combustión. o El depósito no contiene combustible .... Añada combustible. o Combustible en el depósito .... Coloque el mando de la llave de paso del combustible en la posición “ON”. o Tubo de combustible obstruido .... Limpie el tubo de combustible. o Carburador obstruido .... Limpie el carburador. 2.
7CK-28199-W0_p57-115 10/27/08 11:15 AM Page 93 E AE00515 Generator won’t produce power The voltage select switch in the wrong position····Turn the voltage select switch to the right position. A ENGINE DOES NOT START B Turn the engine switch to “ON”, then turn the engine switch to “START”. And check if the starter motor cranks. C Cranks D Does not crank E F Turn the engine switch to “START”, and check if the oil warning light comes on. I G Faulty battery and/or starter motor.
7CK-28199-W0_p57-115 10/27/08 11:15 AM Page 94 F ES K AF00515 AS00515 A200515 Le générateur ne produit pas d’électricité El generador no produce energía 발전기에서 파워 생성이 안됨 Selector de tensión en posición incorrecta.....Gire el selector a la posición correcta. 전압 선택 스위치의 위치가 잘못 됨 … 전압 선택 스위치를 올바 른 위치로 돌립니다 . å EL MOTOR NO ARRANCA ∫ Gire el interruptor del motor a la posición “ON” y a continuación a la posición “START”. Compruebe si arranca el motor de arranque.
7CK-28199-W0_p57-115 10/27/08 11:15 AM Page 95 E L Turn the engine switch to “START” and check the spark plug for spark strength. (See “WARNING”). w 9 To prevent FIRE HAZARDS be sure fuel is not present in the spark plug area. 9 To prevent FIRE HAZARDS be sure to place the spark plug as far way as possible from the spark plug hole and carburetor area. 9 To prevent ELECTRIC SHOCK do not hold spark plug lead with hand while testing. O M Sparks well. N Does not spark or weak.
7CK-28199-W0_p57-115 10/27/08 11:15 AM Page 96 F ¬ Tournez le contacteur du moteur sur « START » et vérifiez la puissance d’étincelage de la bougie. (Voir « AVERTISSEMENT ») XG 9 Pour éviter tout DANGER D’INCENDIE, veillez à ce qu’il n’y ait pas de carburant à proximité de la bougie. 9 Pour éviter tout DANGER D’INCENDIE, veillez à placer la bougie le plus loin possible de l’orifice de la bougie et du carburateur.
7CK-28199-W0_p57-115 10/27/08 11:15 AM Page 97 E F AE00701 AF00701 SPECIFICATIONS SPÉCIFICATIONS AE00702 AF00702 Dimensions Dimensions å Unit ∫ Overall Length ç Overall Width ∂ Overall Height ´ Dry Weight EF6300iSDE mm (in) mm (in) mm (in) kg (lb) EF6300iSE (230V/50Hz) EF6300iSE (220V/60Hz) 780 (30.7) 616 (24.3) 692 (27.
7CK-28199-W0_p57-115 10/27/08 11:15 AM Page 98 ES K AS00701 A200701 ESPECIFICACIONES 사양설명 ( 캐나다 ) AS00702 A200702 Dimensiones 치수 å ∫ ç ∂ ´ å ∫ ç ∂ ´ Unidad Longitud total Anchura total Altura total Peso sin combustible ni lubricante 단위 전체 전체 전체 건조 길이 넓이 높이 중량 AS00703 A200703 Motor 엔진 å Unidad ƒ Tipo © Refrigerado por aire, de 4 tiempos y con válvulas en cabeza ˙ Disposición del cilindro ˆ Inclinado, 1 cilindro ∆ Cilindrada ˚ Diámetro interior x recorrido ¬ Funcionamiento Horas µ Horas
7CK-28199-W0_p57-115 10/27/08 11:15 AM Page 99 E Generator Générateur å Unit ∑ AC Output ≈ Rated voltage ¥ Rated frequency Ω Rated current å Rated output ∫ Safety Device: Type V Hz A kVA EF6300iSE EF6300iSDE (230V/50Hz) 120/240 60 45.8/22.9 5.5 ç Electronic + Mechanical (By metal) 230 50 23.9 5.5 EF6300iSE (220V/60Hz) 220 60 25.0 5.
7CK-28199-W0_p57-115 10/27/08 11:15 AM Page 100 ES K AS00706 A200706 Generador 발전기 å ∑ ≈ ¥ Ω å ∫ ç ∂ å ∑ ≈ ¥ Ω å ∫ ç ∂ Unidad Salida de CA Tensiòn nominal Frequencia nominal Corriente nominal Salida nominal Dispositivo de seguridad: tipo Electrónica + mecánica (metal) Electrónicos 단위 교류출력 정격적인 주파수 정격전류 정력출력 안전장치 : 유형 전자식 + 기계식 ( 금속 이용 ) 전자 Batería 배터리 å Unidad é Tensión ƒ Capacidad å 단위 é 전압 ƒ 용량 - 100 -
7CK-28199-W0_p57-115 10/27/08 11:15 AM Page 101 E INFORMATIONS POUR LE CONSOMMATEUR AE00011 AF00011 Machine identification Identification de la machine The machine serial number is stamped in the location as shown. NOTE: Serial NO. 7CK– 7CK-24163-00 790-7CK-U0b F CONSUMER INFORMATION The first three digits of these numbers are for model identification; the remaining digits are the unit production number. Keep a record of these numbers for reference when ordering parts from a Yamaha dealer.
7CK-28199-W0_p57-115 10/27/08 11:15 AM Page 102 ES K INFORMACIÓN PARA EL CONSUMIDOR 소비자 정보 AS00011 A200011 Identificación de la máquina 기계 지시사항 El número de serie de la máquina está impreso en la ubicación que se indica. 기계의 시리얼 번호는 그림에서 와 같은 위치에 찍혀있습니다 . NOTA: 참고사항 : Los tres primeros dígitos corresponden a la identificación del modelo; los dígitos restantes corresponden al número de fabricación de la unidad.
7CK-28199-W0_p57-115 10/27/08 11:15 AM Page 103 E F AE00051 AF00051 WARRANTY GARANTIE If doubt exists as to the cause and cure of a problem, consult your authorized Yamaha generator dealer. This is especially important during the warranty period as unauthorized, haphazard or improper repairs can void the warranty. Remember that your authorized Yamaha dealer has the special tools, techniques and spare parts necessary for proper repair of your generator.
7CK-28199-W0_p57-115 10/27/08 11:15 AM Page 104 ES K AS00051 A200051 GARANTÍA 보 증 En caso de duda sobre la causa y resolución de un problema, consulte al concesionario autorizado de generadores Yamaha en su localidad. Esto es especialmente importante durante el período de garantía, porque cualquier reparación no autorizada, casual o incorrecta, puede invalidar dicha garantía.
7CK-28199-W0_p57-115 10/27/08 11:15 AM Page 105 E F AE00789 AF00789 EXHAUST EMISSION CONTROL SYSTEM AND COMPONENTS SYSTÈME DE CONTRÔLE DES ÉMISSIONS D'ÉCHAPPEMENT ET COMPOSANTS Item Acronym 9 CARB. ASSY., ... CARB LH. & JT., (Carburetor) CARBURETOR2 9 T.C.I. .................. EI MAGNETO (Electronic ASSY. & Ignition) PLUG, SPARK 9 CRANK- ............. PCV CASE1 & (Positive HEAD, Crankcase CYLINDER1 Ventilation) 9 AIR FILTER ........ ACL (Air ASSY. Cleaner) 9 MUFF.
7CK-28199-W0_p57-115 10/27/08 11:15 AM Page 106 ES K AS00789 A200789 SISTEMA DE CONTROL DE EMISIONES DE ESCAPE Y COMPONENTES 배기 방출 조정 시스템 및 부 품들 Elemento Acrónimo 9 CARB. LH. y JT., ... CARB CARBURADOR 2 (carburador) 9 MAGNETO ............ EI T.C.I. y (encendido BUJÍA electrónico) 9 CÁRTER Y ............ PCV CULATA, (ventilación CILINDRO 1 positiva del cárter) 9 FILTRO DE ........... ACL AIRE (depurador de aire) 9 SILENC., 2, TAPA, MALLA MET. 2 Y AMORTIGUADOR CHISPAS 항목 약어 9 CARB. .........
EF6300iSDE B/W Or - 107 - j h k l W P B B P g W G/R B B/W Or L/W L/R R R Y Y Y f W Y W W WW Y Y W L/Y B/R G/W Y/W R/W L/W Or/W G Y R L Or Y Y Y B M d s R/W L a L R p R Y Y Y Y G L/Y B/R B P Y G Br R R/W Or/W Y/W G/W L/W Br R R Or Y G L Y Y Y Y P Y G L Or P i L Or G Br Y o Br G Or L Y Or L G 2 R/Y B/Y B/Y R/Y u R B Y B/W R Br Br/W R/W G/Y R/B R/W G/Y R/L Y/W L/W L/G P Or 5 5 R Br 3 4 Y L/W G/Y G/R G/Y R R B B L Y G/Y Y G/Y B/W G/R L
1 2 3 4 5 6 7 8 9 0 q w e r t y u i o p a s d f g h j k l ; z x Main coil Control unit AC pilot light Voltage select switch AC switch (N.F.B) AC receptacle (120V) AC receptacle (120/240V) Hour meter/Power meter Engine switch Rectifier regulater Economy control switch Overload indicator light Ground (Earth) terminal Speed limiter assembly Oil warning light Rectifier Diode assembly Control unit Interface unit Fuse Oil level gauge Starter relay Starter motor Battery T.C.I magneto Spark plug T.C.
EF6300iSDE B/W Or - 109 - j h k l W P B B P g W G/R B B/W Or L/W L/R R R Y Y Y f W Y W W WW Y Y W L/Y B/R G/W Y/W R/W L/W Or/W G Y R L Or Y Y Y B M d s R/W L a L R p R Y Y Y Y G L/Y B/R B P Y G Br R R/W Or/W Y/W G/W L/W Br R R Or Y G L Y Y Y Y P Y G L Or P i L Or G Br Y o Br G Or L Y Or L G 2 R/Y B/Y B/Y R/Y u R B Y B/W R Br Br/W R/W G/Y R/B R/W G/Y R/L Y/W L/W L/G P Or 5 5 R Br 3 4 Y L/W G/Y G/R G/Y R R B B L Y G/Y Y G/Y B/W G/R L
Codigo de colores B Br G L Or P R W Y B/R B/W B/Y Br/W G/R G/W G/Y L/G L/R L/W L/Y Or/W R/B R/L R/W R/Y Y/W Negro Marrón Verde Azul Naranja Rosa Rojo Blanco Amarillo Negro/Rojo Negro/Blanco Negro/Amarillo Marrón/Blanco Verde/Rojo Verde/Blanco Verde/Amarillo Azul/Verde Azul/Rojo Azul/Blanco Azul/Amarillo Naranja/Blanco Rojo/Negro Rojo/Azul Rojo/Blanco Rojo/Amarillo Amarillo/Blanco 1 2 3 4 5 6 7 8 9 0 q w e r t y u i o p a s d f g h j k l ; z x 메인 코일 조정 유니트 AC 파이롯트등 전압 선택 스위치 AC 스위치 (N.F.
B/W Or - 111 - f d B/W Or G/R W P B B P s W G/R B B/W Or L/W L/R R R Y Y Y Y Y Y a W Y W W WW Y Y W L/Y B/R G/W Y/W R/W L/W Or/W G Y R L Or W Y W W WW Y Y W B M p o R/W L i L R u R Y Y Y Y G L/Y B/R B P Y G Br R R/W Or/W Y/W G/W L/W Br R R Or Y G L Y Y Y Y P Y G L Or P t L Or G Br Y y Br G Or L Y Or L G 2 R/Y B/Y B/Y R/Y r R B Y B/W R Br G/Y R/B R/W G/Y R/L Y/W L/W L/G R/W Br/W R Br 3 4 Y L/W G/Y G/R 4 G/Y R R B B L Y G/Y Y G/Y B/W G/
1 2 3 4 5 6 7 8 9 0 q w e r t y u i o p a s d f g h j k l Main coil Control unit AC pilot light AC receptacle Hour meter/Power meter Engine switch Rectifier regulater Economy control switch Overload indicator light Ground (Earth) terminal Speed limiter assembly Oil warning light Rectifier Diode assembly Control unit Interface unit Fuse Oil level gauge Starter relay Starter motor Battery T.C.I magneto Spark plug T.C.
B/W Or - 113 - f d B/W Or G/R W P B B P s W G/R B B/W Or L/W L/R R R Y Y Y Y Y Y a W Y W W WW Y Y W L/Y B/R G/W Y/W R/W L/W Or/W G Y R L Or W Y W W WW Y Y W B M p o R/W L i L R u R Y Y Y Y G L/Y B/R B P Y G Br R R/W Or/W Y/W G/W L/W Br R R Or Y G L Y Y Y Y P Y G L Or P t L Or G Br Y y Br G Or L Y Or L G 2 R/Y B/Y B/Y R/Y r R B Y B/W R Br G/Y R/B R/W G/Y R/L Y/W L/W L/G R/W Br/W R Br 3 4 Y L/W G/Y G/R 4 G/Y R R B B L Y G/Y Y G/Y B/W G/
ES Bobina principal Unidad de control Piloto de CA Toma de CA Contador horario/vatímetro Interruptor del motor Regulador del rectificador Interruptor de control económico Indicador de sobrecarga Terminal de puesta a tierra (masa) Limitador de velocidad Piloto de aviso de nivel de aceite Rectificador Conjunto del diodo Unidad de control Interfaz Fusible Indicador del nivel de aceite Relé de arranque Motor de arranque Batería T.C.I. magneto Bujía Unidad T.C.
B/W Or - 115 - f d B/W Or G/R W P B B P s W G/R B B/W Or L/W L/R R R Y Y Y Y Y Y a W Y W W WW Y Y W L/Y B/R G/W Y/W R/W L/W Or/W G Y R L Or W Y W W WW Y Y W B M p o R/W L i L R u R Y Y Y Y G L/Y B/R B P Y G Br R R/W Or/W Y/W G/W L/W Br R R Or Y G L Y Y Y Y P Y G L Or P t L Or G Br Y y Br G Or L Y Or L G 2 R/Y B/Y B/Y R/Y r R B Y B/W R Br G/Y R/B R/W G/Y R/L Y/W L/W L/G R/W Br/W R Br 3 4 Y L/W G/Y G/R 4 G/Y R R B B L Y G/Y Y G/Y B/W G/
1 2 3 4 5 6 7 8 9 0 q w e r t y u i o p a s d f g h j k l Main coil Control unit AC pilot light AC receptacle Hour meter/Power meter Engine switch Rectifier regulater Economy control switch Overload indicator light Ground (Earth) terminal Speed limiter assembly Oil warning light Rectifier Diode assembly Control unit Interface unit Fuse Oil level gauge Starter relay Starter motor Battery T.C.I magneto Spark plug T.C.
B/W Or - 117 - f d B/W Or G/R W P B B P s W G/R B B/W Or L/W L/R R R Y Y Y Y Y Y a W Y W W WW Y Y W L/Y B/R G/W Y/W R/W L/W Or/W G Y R L Or W Y W W WW Y Y W B M p o R/W L i L R u R Y Y Y Y G L/Y B/R B P Y G Br R R/W Or/W Y/W G/W L/W Br R R Or Y G L Y Y Y Y P Y G L Or P t L Or G Br Y y Br G Or L Y Or L G 2 R/Y B/Y B/Y R/Y r R B Y B/W R Br G/Y R/B R/W G/Y R/L Y/W L/W L/G R/W Br/W R Br 3 4 Y L/W G/Y G/R 4 G/Y R R B B L Y G/Y Y G/Y B/W G/
ES Bobina principal Unidad de control Piloto de c.a. Toma de CA Contador horario/vatímetro Interruptor del motor Regulador del rectificador Interruptor de control económico Indicador de sobrecarga Terminal de puesta a tierra (masa) Limitador de velocidad Piloto de aviso de nivel de aceite Rectificador Conjunto del diodo Unidad de control Interfaz Fusible Indicador del nivel de aceite Relé de arranque Motor de arranque Batería T.C.I. magneto Bujía Unidad T.C.
7CK-28199-W0_p57-115 — MEMO — 10/27/08 11:15 AM Page 119
7CK-28199-W0_hyoshi 10/28/08 10:39 AM Page 2 E F AF00001 AE00001 INTRODUCTION INTRODUCTION Congratulations on your purchase of your new Yamaha. This manual will provide you with a good basic understanding of the operation and maintenance of this machine. If you have any questions regarding the operation or maintenance of your machine, please consult a Yamaha dealer. Nous vous félicitons d’avoir acheté votre Yamaha.
7CK-28199-W0_hyoshi 10/28/08 10:39 AM Page 1 OWNER’S MANUAL MANUEL D’UTILSATION MANUAL DEL PROPIETARIO EF6300iSDE EF6300iSE PLEASE READ AND UNDERSTAND THIS MANUAL COMPLETELY BEFORE OPERATING THE MACHINE. LISEZ ATTENTIVEMENT CE MANUEL DANS SON INTEGRALITE AVANT DE FAIRE FONCTIONNER LE MOTEUR. PRINTED ON RECYCLED PAPER IMPRIME SUR PAPIER RECYCLE IMPRESO EN PAPEL RECICLADO LEA DETENIDAMENTE ESTE MANUAL ANTES DE PONER EN FUNCIONAMIENTO EL EQUIPO. PRINTED IN JAPAN 2008911-0.