Lees deze handleiding aandachtig door voordat u deze machine gaat gebruiken.
U1CAD1D0.book Page 1 Tuesday, September 13, 2011 3:36 PM DAU50920 Lees deze handleiding aandachtig door voordat u deze machine gaat gebruiken. Deze handleiding dient bij de machine te blijven als deze wordt verkocht. YAMAHA MOTOR ELECTRONICS CO., LTD. YAMAHA MOTOR ELECTRONICS CO., LTD.
U1CAD1D0.book Page 1 Tuesday, September 13, 2011 3:36 PM INLEIDING DAU10102 Welkom in de wereld van Yamaha! Als eigenaar van de FZ1-S/FZ1-SA profiteert u van de enorme ervaring en technische kennis van Yamaha op het gebied van het ontwerpen en fabriceren van hoogwaardige producten, waarmee Yamaha zijn reputatie van betrouwbaarheid heeft verworven. Neem rustig de tijd om deze handleiding aandachtig door te lezen, zodat u plezier zult hebben van alle functies van uw FZ1-S/FZ1-SA.
U1CAD1D0.book Page 1 Tuesday, September 13, 2011 3:36 PM BELANGRIJKE INFORMATIE IN DE HANDLEIDING DAU10133 Bijzonder belangrijke informatie is in deze handleiding gemarkeerd met de volgende aanduidingen: Dit is het Safety Alert-symbool. Het wordt gebruikt om u te waarschuwen voor risico’s op persoonlijk letsel. Volg alle veiligheidsaanwijzingen bij dit symbool op om mogelijk letsel of overlijden te voorkomen.
U1CAD1D0.book Page 2 Tuesday, September 13, 2011 3:36 PM BELANGRIJKE INFORMATIE IN DE HANDLEIDING DAU36390 FZ1-S/FZ1-SA HANDLEIDING ©2011 door Yamaha Motor Co., Ltd. 1e uitgave, augustus 2011 Alle rechten voorbehouden. Elke vorm van herdruk of onbevoegd gebruik zonder schriftelijke toestemming van Yamaha Motor Co., Ltd. is uitdrukkelijk verboden. Gedrukt in Nederland.
U1CAD1D0.book Page 1 Tuesday, September 13, 2011 3:36 PM INHOUDSOPGAVE VEILIGHEIDSINFORMATIE ..............1-1 BESCHRIJVING ................................2-1 Aanzicht linkerzijde..........................2-1 Aanzicht rechterzijde .......................2-2 Bedieningen en instrumenten..........2-3 FUNCTIES VAN INSTRUMENTEN EN BEDIENINGEN .............................3-1 Startblokkeersysteem .....................3-1 Contactslot/stuurslot .......................3-2 Controle- en waarschuwingslampjes ........
U1CAD1D0.book Page 2 Tuesday, September 13, 2011 3:36 PM INHOUDSOPGAVE Rem- en koppelingshendels controleren en smeren ..............6-29 Middenbok en zijstandaard controleren en smeren ..............6-30 Voorvork controleren ....................6-30 Stuursysteem controleren ............6-31 Controleren van wiellagers ...........6-31 Accu .............................................6-32 Zekeringen vervangen ..................6-33 Koplampgloeilamp vervangen ......
U1CAD1D0.book Page 1 Tuesday, September 13, 2011 3:36 PM VEILIGHEIDSINFORMATIE DAU10289 1 Wees een verantwoordelijke eigenaar Als eigenaar van de machine bent u verantwoordelijk voor de veilige en juiste bediening ervan. Motorfietsen zijn tweewielige voertuigen. Voor een veilig gebruik zijn de toepassing van de juiste rijtechnieken en de ervaring van de bestuurder van belang. Elke bestuurder moet bekend zijn met de volgende vereisten alvorens met deze motorfiets te gaan rijden.
U1CAD1D0.book Page 2 Tuesday, September 13, 2011 3:36 PM VEILIGHEIDSINFORMATIE snelheid aan of gaan onvoldoende schuinliggen voor de rijsnelheid, waardoor ze wijd uit de bocht komen. • Neem altijd de maximumsnelheid in acht en rijd nooit sneller dan de wegcondities en het verkeer toestaan. • Geef altijd richting aan voordat u afslaat of van rijstrook wisselt. Zorg dat andere weggebruikers u kunnen zien. ● De zithouding van de bestuurder en de passagier is belangrijk voor een goede besturing.
U1CAD1D0.book Page 3 Tuesday, September 13, 2011 3:36 PM VEILIGHEIDSINFORMATIE ● Laat de motor niet draaien in slecht ge- 1 ventileerde of deels afgesloten ruimtes zoals schuren of garages. ● Laat de motor niet buiten draaien op plaatsen waar de uitlaatgassen in een gebouw kunnen worden getrokken via openingen zoals ramen en deuren.
U1CAD1D0.book Page 4 Tuesday, September 13, 2011 3:36 PM VEILIGHEIDSINFORMATIE veiligheidsrisico’s voor uzelf of anderen. Het monteren van in de handel verkrijgbare producten of het verrichten van aanpassingen die de ontwerp- of bedieningskenmerken van uw machine wijzigen kan het risico op ernstig letsel of overlijden van uzelf of anderen vergroten. U bent verantwoordelijk voor letsel dat voortvloeit uit wijzigingen aan de machine.
U1CAD1D0.book Page 5 Tuesday, September 13, 2011 3:36 PM VEILIGHEIDSINFORMATIE 1 om te voorkomen dat deze tijdens het transport schuurplekken op de lak veroorzaken. ● Zorg indien mogelijk dat de vering iets door de spanbanden wordt ingedrukt, zodat de motorfiets tijdens het transport niet overmatig kan stuiteren.
U1CAD1D0.book Page 1 Tuesday, September 13, 2011 3:36 PM BESCHRIJVING DAU10410 Aanzicht linkerzijde 2 1. 2. 3. 4. 5. 6. 7. 8. Stelbout voor veervoorspanning voorvork (pagina 3-20) Stelschroef voor inveerdemping voorvork (pagina 3-20) Luchtfilterelement (pagina 6-15) Hoofdzekering (pagina 6-33) Zekering brandstofinjectiesysteem (pagina 6-33) Opbergcompartiment (pagina 3-19) Zadelslot (pagina 3-18) Stelring voor veervoorspanning schokdemperunit (pagina 3-22) 9.
U1CAD1D0.book Page 2 Tuesday, September 13, 2011 3:36 PM BESCHRIJVING DAU10420 Aanzicht rechterzijde 1 2 3 4 5 6 7 8 2 13 1. 2. 3. 4. 5. 6. 7. 8. 12 11 10 9 Boordgereedschapsset (pagina 6-2) Vergrendelingshendel bestuurderszadel (pagina 3-18) Zekeringenkastje (pagina 6-33) Accu (pagina 6-32) Vloeistofreservoir achterrem (pagina 6-24) Olievuldop (pagina 6-11) Stelschroef voor uitveerdemping voorvork (pagina 3-20) Stelbout voor veervoorspanning voorvork (pagina 3-20) 9.
U1CAD1D0.book Page 3 Tuesday, September 13, 2011 3:36 PM BESCHRIJVING DAU10430 Bedieningen en instrumenten 1 2 3 4 5 6 7 8 2 1. 2. 3. 4. 5. 6. 7. 8.
U1CAD1D0.book Page 1 Tuesday, September 13, 2011 3:36 PM FUNCTIES VAN INSTRUMENTEN EN BEDIENINGEN DAU10977 Startblokkeersysteem 3 1. Codeersleutel (rood bovendeel) 2. Standaardsleutels (zwart bovendeel) Dit voertuig is voorzien van een startblokkeersysteem waarmee diefstal kan worden bemoeilijkt door de codering van de standaardsleutels te wijzigen.
U1CAD1D0.book Page 2 Tuesday, September 13, 2011 3:36 PM FUNCTIES VAN INSTRUMENTEN EN BEDIENINGEN DAU10472 Contactslot/stuurslot parkeerlicht gaan branden en de motor kan worden gestart. De sleutel kan niet worden uitgenomen. Om het stuur te vergrendelen 1 2 OPMERKING De koplampen gaan automatisch branden als de motor wordt gestart en blijven aan totdat de sleutel naar “OFF” wordt gedraaid, zelfs als de motor afslaat.
U1CAD1D0.book Page 3 Tuesday, September 13, 2011 3:36 PM FUNCTIES VAN INSTRUMENTEN EN BEDIENINGEN Om het stuur te ontgrendelen DCA11020 LET OP 1 2 Gebruik de parkeerstand niet gedurende langere tijd, anders kan de accu ontladen raken. DAU49391 Controle- en waarschuwingslampjes 3 1. Drukken. 2. Draaien. 1. Controlelampje linker richtingaanwijzers “ ” 2. Controlelampje rechter richtingaanwijzers “ ” 3. Vrijstandcontrolelampje “ ” 4. Controlelampje grootlicht “ ” 5.
U1CAD1D0.book Page 4 Tuesday, September 13, 2011 3:36 PM FUNCTIES VAN INSTRUMENTEN EN BEDIENINGEN DAU11030 Controlelampjes richtingaanwijzers “ ” en “ ” Het bijbehorende controlelampje knippert terwijl de schakelaar voor richtingaanwijzers naar de linker- of rechterstand is gedrukt. DAU11060 Vrijstandcontrolelampje “ ” Dit controlelampje brandt terwijl de versnellingsbak in de vrijstand staat.
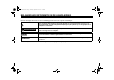
U1CAD1D0.book Page 5 Tuesday, September 13, 2011 3:36 PM FUNCTIES VAN INSTRUMENTEN EN BEDIENINGEN Weergave 3 Condities Wat te doen Onder 39 °C (Onder 103 °F) De aanduiding “Lo” wordt getoond. OK. U kunt rijden. 40–116 °C (104–242 °F) Koelvloeistoftemperatuur wordt getoond. OK. U kunt rijden. 117–134 °C (243–274 °F) Koelvloeistoftemperatuur knippert. Het waarschuwingslampje gaat branden. Breng de machine tot stilstand en laat de motor stationair draaien tot de koelvloeistoftemperatuur daalt.
U1CAD1D0.book Page 6 Tuesday, September 13, 2011 3:36 PM FUNCTIES VAN INSTRUMENTEN EN BEDIENINGEN DAU11534 Waarschuwingslampje motorstoring “ ” Dit waarschuwingslampje gaat branden of knipperen wanneer er een probleem wordt aangegeven in het elektrisch circuit dat de motor controleert. Vraag in dat geval een Yamaha dealer het zelfdiagnosesysteem te controleren. (Zie pagina 3-10 voor uitleg over de werking van het zelfdiagnosesysteem.
U1CAD1D0.book Page 7 Tuesday, September 13, 2011 3:36 PM FUNCTIES VAN INSTRUMENTEN EN BEDIENINGEN DAU3942H Multifunctionele meter 3 1. Koelvloeistoftemperatuurdisplay/inlaatluchttemperatuurdisplay 2. Snelheidsmeter 3. Toerenteller 4. Kilometerteller/ritteller/ritteller brandstofreserve 5. “SELECT”-toets 6. “RESET”-toets 7. Klok 8. Brandstofniveaumeter DWA12422 WAARSCHUWING Zorg dat de machine stilstaat voordat u wijzigingen in de instellingen van de multifunctionele meter gaat aanbrengen.
U1CAD1D0.book Page 8 Tuesday, September 13, 2011 3:36 PM FUNCTIES VAN INSTRUMENTEN EN BEDIENINGEN DCA10031 LET OP Laat de motor niet draaien terwijl de toerenteller in de rode zone wijst. Rode zone: 12000 tpm en hoger Klok 3. Als de uuraanduiding begint te knipperen, drukt u op de “RESET”-toets om de uren in te stellen. 4. Druk op de “SELECT”-toets en de minutenaanduiding zal gaan knipperen. 5. Druk op de “RESET”-toets om de minuten in te stellen. 6.
U1CAD1D0.book Page 9 Tuesday, September 13, 2011 3:36 PM FUNCTIES VAN INSTRUMENTEN EN BEDIENINGEN Brandstofniveaumeter Weergave koelvloeistoftemperatuur Luchtaanzuigtemperatuurmodus 1. Brandstofniveaumeter 1. Weergave koelvloeistoftemperatuur 1. Weergave luchtaanzuigtemperatuur De brandstofniveaumeter geeft aan hoeveel brandstof in de tank aanwezig is. De displaysegmenten van de brandstofniveaumeter verdwijnen richting “E” (leeg) naarmate het brandstofniveau verder daalt.
U1CAD1D0.book Page 10 Tuesday, September 13, 2011 3:36 PM FUNCTIES VAN INSTRUMENTEN EN BEDIENINGEN ● Als de sleutel naar “ON” wordt ge- draaid, wordt automatisch de koelvloeistoftemperatuur weergegeven, zelfs als de luchtaanzuigtemperatuur werd weergegeven voordat de sleutel naar “OFF” werd gedraaid. ● Als de weergave luchtaanzuigtemperatuur wordt geselecteerd, wordt gedurende 1 seconde “A” weergegeven, gevolgd door de luchtaanzuigtemperatuur.
U1CAD1D0.book Page 11 Tuesday, September 13, 2011 3:36 PM FUNCTIES VAN INSTRUMENTEN EN BEDIENINGEN Regelmodus voor de helderheid van het LCD-display en de toerenteller 5. Druk op de “SELECT”-toets om het geselecteerde helderheidsniveau te bevestigen. De weergave keert weer terug naar de vorige modus. 3 1. 2. 3. 4.
U1CAD1D0.book Page 12 Tuesday, September 13, 2011 3:36 PM FUNCTIES VAN INSTRUMENTEN EN BEDIENINGEN DAU1234A Stuurschakelaars Links DAU12380 DAU12711 Lichtsignaalschakelaar “ ” Druk deze schakelaar in om met de koplampen een lichtsignaal te geven. Startknop “ ” Druk deze knop in om via de startmotor de motor rond te draaien. Zie pagina 5-1 voor startinstructies voordat u de motor start. DAU12400 Dimlichtschakelaar “ / ” Zet deze schakelaar op “ ” voor grootlicht en op “ ” voor dimlicht. DAU12460 1.
U1CAD1D0.book Page 13 Tuesday, September 13, 2011 3:36 PM FUNCTIES VAN INSTRUMENTEN EN BEDIENINGEN DAU12820 Koppelingshendel DAU12871 Schakelpedaal DAU26823 Remhendel De remhendel bevindt zich aan de rechterstuurgreep. Trek de hendel naar het stuur toe om de voorrem te bekrachtigen. 3 1. Koppelingshendel 1. Schakelpedaal De koppelingshendel bevindt zich aan de linkerstuurgreep. Trek de hendel naar het stuur toe om de koppeling te ontkoppelen. Laat de hendel los om de koppeling te laten aangrijpen.
U1CAD1D0.book Page 14 Tuesday, September 13, 2011 3:36 PM FUNCTIES VAN INSTRUMENTEN EN BEDIENINGEN DAU12941 Rempedaal Het Yamaha ABS (anti-blokkeervoorziening remsysteem) bestaat uit een dubbel uitgevoerd elektronisch regelsysteem dat de voorrem en achterrem onafhankelijk aanstuurt. Het ABS wordt bewaakt door een ECU, die in geval van een storing zal terugvallen op handmatig remmen. DWA10090 WAARSCHUWING ● Het ABS-systeem functioneert het 1.
U1CAD1D0.book Page 15 Tuesday, September 13, 2011 3:36 PM FUNCTIES VAN INSTRUMENTEN EN BEDIENINGEN DAU13074 Tankdop DAU13221 OPMERKING Brandstof De tankdop kan alleen worden gesloten met de sleutel in het slot. Bovendien kan de sleutel niet worden uitgenomen als de tankdop niet correct gesloten en vergrendeld is. Controleer of er voldoende brandstof in de brandstoftank aanwezig is. DWA11091 3 WAARSCHUWING 1. Slotplaatje tankdop 2. Ontgrendelen.
U1CAD1D0.book Page 16 Tuesday, September 13, 2011 3:36 PM FUNCTIES VAN INSTRUMENTEN EN BEDIENINGEN terechtkomt, was deze dan af met water en zeep. Als u benzine op uw kleding morst, trek dan andere kleding aan. DAU51170 Tankbeluchtingsslang en overloopslang FZ1-S DAU13321 1. Vulpijp brandstoftank 2. Maximaal brandstofniveau 3. Veeg uitgestroomde brandstof onmiddellijk af.
U1CAD1D0.book Page 17 Tuesday, September 13, 2011 3:36 PM FUNCTIES VAN INSTRUMENTEN EN BEDIENINGEN FZ1-SA DAU13445 Uitlaatkatalysatoren Dit voertuig is uitgerust met uitlaatkatalysatoren in het uitlaatsysteem. DWA10862 2 3 1 1. Tankbeluchtingsslang 2. Oorspronkelijke positie (verfmerkteken) Alvorens de motorfiets te gebruiken: ● Controleer alle slangaansluitingen. ● Controleer alle slangen op scheuren of beschadiging en vervang indien nodig.
U1CAD1D0.book Page 18 Tuesday, September 13, 2011 3:36 PM FUNCTIES VAN INSTRUMENTEN EN BEDIENINGEN DAU39324 Zadels Duozadel Verwijderen van het duozadel 1. Steek de sleutel in het zadelslot en draai linksom. 3 2. Neem de sleutel uit. Bestuurderszadel 1. Zadelslot 2. Ontgrendelen. Verwijderen van het bestuurderszadel 1. Verwijder het duozadel. 2. Druk de hendel van het bestuurderszadel onder de achterzijde van het bestuurderszadel naar rechts zoals getoond en verwijder dan het zadel. 1.
U1CAD1D0.book Page 19 Tuesday, September 13, 2011 3:36 PM FUNCTIES VAN INSTRUMENTEN EN BEDIENINGEN 2. Installeer het duozadel. DAU50850 Opbergcompartiment OPMERKING Controleer of de zadels stevig zijn vergrendeld alvorens te gaan rijden. 1 CYCLELOK-slot niet in het opbergcompartiment is opgeborgen, maak dan de riemen vast om het niet te verliezen. 3 1. Opbergcompartiment Het opbergcompartiment bevindt zich onder het duozadel. (Zie pagina 3-18.
U1CAD1D0.book Page 20 Monday, January 9, 2012 2:06 PM FUNCTIES VAN INSTRUMENTEN EN BEDIENINGEN DAU39671 Achteruitkijkspiegels De achteruitkijkspiegels van dit voertuig kunnen naar voren of naar achteren worden ingeklapt om het parkeren in smalle ruimten te vergemakkelijken. Klap de spiegels terug in hun oorspronkelijke stand voordat u gaat rijden.
U1CAD1D0.book Page 21 Tuesday, September 13, 2011 3:36 PM FUNCTIES VAN INSTRUMENTEN EN BEDIENINGEN Afstelling veervoorspanning: Minimum (zacht): 8 Standaard: 5.5 Maximum (hard): 0 3 Uitgaande demping De uitgaande demping wordt alleen afgesteld op de rechtervorkpoot. Draai om de uitgaande demping te verhogen en zo de vering stugger te maken de stelschroef in de richting (a). Draai om de uitgaande demping te verlagen en zo de vering zachter te maken de stelschroef in de richting (b).
U1CAD1D0.book Page 22 Tuesday, September 13, 2011 3:36 PM FUNCTIES VAN INSTRUMENTEN EN BEDIENINGEN men; het werkelijke aantal klikken vormt echter wel altijd het complete afstelbereik. Voor een precieze afstelling is het aan te raden het aantal klikken van elk veerdempingsinstelmechanisme te controleren en de specificaties dienovereenkomstig aan te passen.
U1CAD1D0.book Page 23 Tuesday, September 13, 2011 3:36 PM FUNCTIES VAN INSTRUMENTEN EN BEDIENINGEN Uitgaande demping Draai om de uitgaande demping te verhogen en zo de vering stugger te maken de stelschroef in de richting (a). Draai om de uitgaande demping te verlagen en zo de vering zachter te maken de stelschroef in de richting (b).
U1CAD1D0.book Page 24 Tuesday, September 13, 2011 3:36 PM FUNCTIES VAN INSTRUMENTEN EN BEDIENINGEN DAU15151 Bagageriembevestiging DAU41941 Zijstandaard Dit model is uitgerust met het Yamaha EXUP-systeem (regelsysteem voor uitlaatdruk). Dit systeem verhoogt het motorvermogen door een klep die de binnendiameter van de uitlaatpijp reguleert. De stand van de EXUP-klep wordt door een computergestuurde servomotor constant aangepast overeenkomstig het motortoerental.
U1CAD1D0.book Page 25 Tuesday, September 13, 2011 3:36 PM FUNCTIES VAN INSTRUMENTEN EN BEDIENINGEN laat het repareren door een Yamaha dealer als de werking niet naar behoren is. 3 DAU44902 Startspersysteem Het startspersysteem (waarvan de zijstandaardschakelaar, de koppelingshendelschakelaar en de vrijstandschakelaar deel uitmaken) heeft de volgende functies.
U1CAD1D0.book Page 26 Tuesday, September 13, 2011 3:36 PM FUNCTIES VAN INSTRUMENTEN EN BEDIENINGEN WAARSCHUWING Met de motor uit: 1. Beweeg de zijstandaard omlaag. 2. De motorstopknop moet in de stand “ ” staan. 3. Draai de sleutel naar aan. 4. Schakel de versnellingsbak in de vrijstand. 5. Druk op de startknop. Start de motor? ● Bij deze inspectie moet de machine op de middenbok worden gezet.
U1CAD1D0.book Page 1 Tuesday, September 13, 2011 3:36 PM VOOR UW VEILIGHEID – CONTROLES VOOR HET RIJDEN DAU15596 Inspecteer uw machine voor elk gebruik om te waarborgen dat deze in een veilige werkende staat is. Volg altijd de schema’s en procedures voor inspectie en onderhoud in de gebruikershandleiding. DWA11151 WAARSCHUWING Onvoldoende inspectie of onderhoud van de machine vergroot het risico op ongeval of schade. Rijd niet met de machine als u een probleem hebt gevonden.
U1CAD1D0.book Page 2 Tuesday, September 13, 2011 3:36 PM VOOR UW VEILIGHEID – CONTROLES VOOR HET RIJDEN ITEM CONTROLES PAGINA Achterrem • Controleer de werking. • Als de koppeling zacht of sponzig aanvoelt, vraag dan een Yamaha dealer het hydraulisch systeem te ontluchten. • Controleer de remblokken op slijtage. • Vervang indien nodig. • Controleer het vloeistofniveau in het reservoir. • Vul indien nodig het voorgeschreven type remvloeistof bij tot aan het voorgeschreven niveau.
U1CAD1D0.book Page 3 Tuesday, September 13, 2011 3:36 PM VOOR UW VEILIGHEID – CONTROLES VOOR HET RIJDEN ITEM 4 CONTROLES PAGINA Middenbok, zijstandaard • Controleer of de werking soepel is. • Smeer indien nodig de scharnierpunten. Framebevestigingen • Controleer of alle moeren, bouten en schroeven stevig zijn vastgezet. • Zet indien nodig vast. — Instrumenten, verlichting, signaleringssysteem en schakelaars • Controleer de werking. • Corrigeer indien nodig.
U1CAD1D0.book Page 1 Tuesday, September 13, 2011 3:36 PM GEBRUIK EN BELANGRIJKE RIJ-INFORMATIE DAU15951 DAU47150 DAU44728 Starten van de motor Lees de gebruikershandleiding zorgvuldig door om u vertrouwd te maken met alle bedieningselementen. Als u de werking van een functie of bedieningselement niet begrijpt, vraag dan uw Yamaha dealer om uitleg.
U1CAD1D0.book Page 2 Tuesday, September 13, 2011 3:36 PM GEBRUIK EN BELANGRIJKE RIJ-INFORMATIE DCA11833 DAU16671 Schakelen LET OP ● Rijd niet lange tijd met afgezette Als een waarschuwings- of controlelampje niet gaat branden wanneer de sleutel naar “ON” wordt gedraaid, of wanneer een waarschuwings- of controlelampje niet dooft, zie dan pagina 3-3 voor een controle van het circuit van het betreffende waarschuwings- of controlelampje. 5 2. Schakel de versnellingsbak in de vrijstand.
U1CAD1D0.book Page 3 Tuesday, September 13, 2011 3:36 PM GEBRUIK EN BELANGRIJKE RIJ-INFORMATIE DAU16810 Tips voor een zuinig brandstofverbruik Het brandstofverbruik is vooral afhankelijk van uw rijstijl. Hierna volgen enkele tips om het brandstofverbruik te verlagen: ● Schakel snel en soepel door en vermijd hoge toerentallen terwijl u accelereert. ● Geef geen gas tijdens het terugschakelen en voorkom dat de motor onbelast met een hoog toerental draait.
U1CAD1D0.book Page 4 Tuesday, September 13, 2011 3:36 PM GEBRUIK EN BELANGRIJKE RIJ-INFORMATIE DAU17213 Parkeren Zet om te parkeren de motor af en neem dan de sleutel uit het contactslot. DWA10311 WAARSCHUWING ● De motor en het uitlaatsysteem 5 kunnen zeer heet worden, parkeer dus op een plek waar voetgangers of kinderen niet gemakkelijk met deze onderdelen in aanraking kunnen komen en brandwonden kunnen oplopen.
U1CAD1D0.book Page 1 Tuesday, September 13, 2011 3:36 PM PERIODIEK ONDERHOUD EN AFSTELLINGEN DAU17244 DWA15122 DAU17302 WAARSCHUWING Door periodiek inspecties, afstellingen en smeerbeurten uit te laten voeren, zorgt u ervoor dat uw machine in zo veilig en efficiënt mogelijke conditie blijft. De eigenaar/bestuurder van de machine is verplicht de optimale veiligheid te waarborgen. Op de volgende pagina’s wordt de belangrijkste informatie met betrekking tot inspecties, afstellingen en smeerbeurten gegeven.
U1CAD1D0.book Page 2 Tuesday, September 13, 2011 3:36 PM PERIODIEK ONDERHOUD EN AFSTELLINGEN DAU17542 Boordgereedschapsset 1. Boordgereedschapsset 6 De boordgereedschapsset bevindt zich onder het duozadel. (Zie pagina 3-18.) De onderhoudsinformatie in deze handleiding en het gereedschap in de boordgereedschapsset zijn bedoeld om u te ondersteunen bij het uitvoeren van preventief onderhoud en kleinere reparaties.
U1CAD1D0.book Page 3 Tuesday, September 13, 2011 3:36 PM PERIODIEK ONDERHOUD EN AFSTELLINGEN DAU46861 OPMERKING ● De jaarlijkse controles horen eenmaal per jaar te worden uitgevoerd, behalve wanneer in plaats daarvan een onder- houdsbeurt op kilometerbasis of, voor Groot-Brittannië, op mijlbasis wordt verricht. ● Herhaal de onderhoudsintervallen vanaf 50000 km (30000 mi), beginnend vanaf 10000 km (6000 mi).
U1CAD1D0.book Page 4 Tuesday, September 13, 2011 3:36 PM PERIODIEK ONDERHOUD EN AFSTELLINGEN KILOMETERSTAND NR. ITEM 6 * Luchtinlaatsysteem CONTROLE OF ONDERHOUDSBEURT 1000 km (600 mi) • Controleer de luchtafsluitklep, de membraanklep en de slang op beschadiging. • Vervang indien nodig het volledige luchtinlaatsysteem.
U1CAD1D0.book Page 5 Tuesday, September 13, 2011 3:36 PM PERIODIEK ONDERHOUD EN AFSTELLINGEN DAU1770C Algemeen smeer- en onderhoudsschema KILOMETERSTAND NR. 1 2 ITEM CONTROLE OF ONDERHOUDSBEURT 1000 km (600 mi) 10000 km (6000 mi) 20000 km (12000 mi) 30000 km (18000 mi) 40000 km (24000 mi) JAARLIJKSE CONTROLE √ Luchtfilterelement • Vervangen. Koppeling • Controleer de werking. • Afstellen.
U1CAD1D0.book Page 6 Tuesday, September 13, 2011 3:36 PM PERIODIEK ONDERHOUD EN AFSTELLINGEN KILOMETERSTAND NR. ITEM CONTROLE OF ONDERHOUDSBEURT 9 * Achterbrug • Controleer op een correcte werking en overmatige speling. 10 • Controleer de spanning, uitlijning en conditie van de aandrijfketting. • Stel de ketting af en smeer deze grondig met een speciale smering voor o-ringkettingen. Aandrijfketting 11 * Balhoofdlagers • Controleer de lagers op speling en oppervlakteruwheid.
U1CAD1D0.book Page 7 Tuesday, September 13, 2011 3:36 PM PERIODIEK ONDERHOUD EN AFSTELLINGEN KILOMETERSTAND NR. ITEM 20 * Schokdemperunit CONTROLE OF ONDERHOUDSBEURT 1000 km (600 mi) 10000 km (6000 mi) 20000 km (12000 mi) 30000 km (18000 mi) 40000 km (24000 mi) • Controleer op een correcte werking en olielekkage. √ √ √ √ √ √ √ √ √ √ √ √ 21 * Relaisarm achterwielophanging en scharnierpunten verbindingsarm • Controleer de werking. 22 Motorolie • Verversen.
U1CAD1D0.book Page 8 Tuesday, September 13, 2011 3:36 PM PERIODIEK ONDERHOUD EN AFSTELLINGEN DAU18680 OPMERKING ● Luchtfilter • Het luchtfilter op dit model is voorzien van een geolied papieren filterelement. Reinig dit niet met perslucht, om het niet te beschadigen. • Het luchtfilterelement moet u vaker vervangen als u vaak in extreem vochtige of stoffige gebieden rijdt. ● Hydraulisch remsysteem • Controleer regelmatig het remvloeistofniveau en vul indien nodig bij.
U1CAD1D0.book Page 9 Tuesday, September 13, 2011 3:36 PM PERIODIEK ONDERHOUD EN AFSTELLINGEN DAU18771 Panelen verwijderen en aanbrengen Bij het uitvoeren van sommige onderhoudswerkzaamheden die in dit hoofdstuk worden beschreven, moeten de afgebeelde panelen worden verwijderd. Neem deze paragraaf telkens door om een paneel te verwijderen of aan te brengen. 1. Paneel C DAU40031 Panelen A en B Verwijderen van een paneel Verwijder de bouten en de schroeven en trek daarna het paneel los zoals afgebeeld.
U1CAD1D0.book Page 10 Tuesday, September 13, 2011 3:36 PM PERIODIEK ONDERHOUD EN AFSTELLINGEN FZ1-SA DAU19652 Controleren van de bougies Bougies vormen belangrijke onderdelen van de motor die periodiek moeten worden gecontroleerd, bij voorkeur door een Yamaha dealer. Omdat bougies door verhitting en neerslag altijd langzaam slijten, moeten de bougies worden verwijderd en gecontroleerd volgens de tijden genoemd in het periodieke smeer- en onderhoudsschema.
U1CAD1D0.book Page 11 Tuesday, September 13, 2011 3:36 PM PERIODIEK ONDERHOUD EN AFSTELLINGEN Voordat een bougie wordt aangebracht moet de elektrodenafstand met een draadvoelmaat worden gemeten; breng indien nodig de elektrodenafstand op specificatie. verder te draaien. De bougie moet echter zo snel mogelijk naar het juiste aanhaalmoment worden aangedraaid. DCA10840 LET OP 1. Elektrodenafstand Elektrodenafstand: 0.7–0.8 mm (0.028–0.
U1CAD1D0.book Page 12 Tuesday, September 13, 2011 3:36 PM PERIODIEK ONDERHOUD EN AFSTELLINGEN 2 1 1. 2. 3. 4. 6 Olievuldop Kijkglas olieniveau Merkstreep maximumniveau Merkstreep minimumniveau 4. Als de motorolie beneden de merkstreep voor minimumniveau staat, vul dan voldoende olie, van de aanbevolen soort, bij tot het correcte niveau. Om de motorolie te verversen (met of zonder vervanging van oliefilterpatroon) 1. Zet de machine op een vlakke ondergrond. 2.
U1CAD1D0.book Page 13 Tuesday, September 13, 2011 3:36 PM PERIODIEK ONDERHOUD EN AFSTELLINGEN Aanbevolen motorolie: Zie pagina 8-1. Oliehoeveelheid: Zonder vervanging van oliefilterpatroon: 2.90 L (3.07 US qt, 2.55 Imp.qt) Met vervanging van oliefilterpatroon: 3.10 L (3.28 US qt, 2.73 Imp.qt) OPMERKING 1. Momentsleutel Aanhaalmoment: Oliefilterpatroon: 17 Nm (1.7 m·kgf, 12 ft·lbf) 8. Monteer de olieaftapplug met een nieuwe pakking en zet de plug vast met het voorgeschreven aanhaalmoment.
U1CAD1D0.book Page 14 Tuesday, September 13, 2011 3:36 PM PERIODIEK ONDERHOUD EN AFSTELLINGEN DAU20070 Koelvloeistof Voor iedere rit moet het koelvloeistofniveau worden gecontroleerd. Ook moet de koelvloeistof worden ververst volgens de intervalperioden vermeld in het periodieke smeer- en onderhoudsschema. DAU40044 Controleren van het koelvloeistofniveau 1. Zet de machine op de middenbok.
U1CAD1D0.book Page 15 Tuesday, September 13, 2011 3:36 PM PERIODIEK ONDERHOUD EN AFSTELLINGEN DAU40054 DAU33031 De koelvloeistof verversen De koelvloeistof moet volgens de intervalperioden vermeld in het periodieke smeeren onderhoudsschema ververst worden. Laat de koelvloeistof verversen door een Yamaha dealer. WAARSCHUWING! Probeer nooit om de radiatorvuldop te verwijderen als de motor warm is.
U1CAD1D0.book Page 16 Tuesday, September 13, 2011 3:36 PM PERIODIEK ONDERHOUD EN AFSTELLINGEN tank in de oorspronkelijke positie terug te plaatsen of de brandstofslangen niet beschadigd zijn. Als een brandstofslang beschadigd is, start de motor dan niet maar laat een Yamaha dealer de slang vervangen, anders kan brandstoflekkage ontstaan met brandrisico tot gevolg. [DWA11361] 6 6. Verwijder het luchtfilterdeksel door de schroeven te verwijderen.
U1CAD1D0.book Page 17 Tuesday, September 13, 2011 3:36 PM PERIODIEK ONDERHOUD EN AFSTELLINGEN 13. Monteer de panelen. 14. Breng het bestuurderszadel aan. FZ1-SA DAU34301 Afstellen van het stationair toerental Het stationair toerental moet als volgt worden gecontroleerd en eventueel afgesteld volgens de intervalperioden vermeld in het periodieke smeer- en onderhoudsschema. De motor moet warm zijn om deze afstelling te verrichten.
U1CAD1D0.book Page 18 Tuesday, September 13, 2011 3:36 PM PERIODIEK ONDERHOUD EN AFSTELLINGEN DAU21384 OPMERKING Als het voorgeschreven stationair toerental niet haalbaar is volgens de hierboven beschreven werkwijze, vraag dan een Yamaha dealer de afstelling uit te voeren. De vrije slag van de gasgreep controleren 1. Vrije slag van gasgreep 6 De vrije slag van de gasgreep dient bij de binnenrand van de gasgreep 3.0–5.0 mm (0.12–0.20 in) te bedragen.
U1CAD1D0.book Page 19 Tuesday, September 13, 2011 3:36 PM PERIODIEK ONDERHOUD EN AFSTELLINGEN DAU21775 Banden Let ten aanzien van de voorgeschreven banden op het volgende voor een optimale prestatie, levensduur en veilige werking van uw motorfiets. Bandenspanning De bandenspanning moet voor elke rit worden gecontroleerd en indien nodig worden bijgesteld.
U1CAD1D0.book Page 20 Tuesday, September 13, 2011 3:36 PM PERIODIEK ONDERHOUD EN AFSTELLINGEN ● Gebruik uitsluitend de hierna ver- Bandeninformatie OPMERKING melde bandventielen en luchtventielbuisjes om bij hoge rijsnelheden een te lage bandspanning te voorkomen. De slijtagelimiet voor bandprofieldiepte is voor diverse landen verschillend. Neem altijd de lokale voorschriften in acht.
U1CAD1D0.book Page 21 Tuesday, September 13, 2011 3:36 PM PERIODIEK ONDERHOUD EN AFSTELLINGEN ● Gebruik bij vervanging uitsluitend het voorgeschreven type banden. Bij andere banden is het risico op een klapband bij zeer hoge rijsnelheden niet denkbeeldig. ● Gloednieuwe banden bieden op sommige typen wegdek relatief weinig grip totdat ze zijn “ingereden”.
U1CAD1D0.book Page 22 Tuesday, September 13, 2011 3:36 PM PERIODIEK ONDERHOUD EN AFSTELLINGEN DAU37913 OPMERKING Als de voorgeschreven vrije slag niet kan worden gehaald op de hierboven beschreven wijze, vraag dan een Yamaha dealer het inwendig koppelingsmechanisme te controleren. Vrije slag van remhendel controleren 1 1. Geen vrije slag remhendel 6 Aan het uiteinde van de remhendel mag geen vrije slag aanwezig zijn.
U1CAD1D0.book Page 23 Tuesday, September 13, 2011 3:36 PM PERIODIEK ONDERHOUD EN AFSTELLINGEN DAU50750 Remlichtschakelaars (voor modellen met ABS) DAU50760 Remlichtschakelaars (voor modellen zonder ABS) Het remlicht, dat wordt geactiveerd door het rempedaal en de remhendel, moet oplichten nét voordat de remmen aangrijpen. Laat de remlichtschakelaars indien nodig door een Yamaha dealer afstellen.
U1CAD1D0.book Page 24 Tuesday, September 13, 2011 3:36 PM PERIODIEK ONDERHOUD EN AFSTELLINGEN indicator de remschijf bijna raakt, vraag dan een Yamaha dealer de remblokken als set te vervangen. DAU46291 Remblokken achterrem DAU43112 Controleren van remvloeistofniveau Achterrem (FZ1-S) Controleer alvorens te gaan rijden of de remvloeistof boven de merkstreep voor minimumniveau staat. Meet het remvloeistofniveau en let erop dat de bovenzijde van het reservoir horizontaal staat.
U1CAD1D0.book Page 25 Tuesday, September 13, 2011 3:36 PM PERIODIEK ONDERHOUD EN AFSTELLINGEN Aanbevolen remvloeistof: DOT 4 DWA16010 dampbelvorming kan optreden en vuil de hydraulisch bediende kleppen van de ABS eenheid kan verstoppen. WAARSCHUWING DCA17640 Onjuist uitgevoerd onderhoud kan resulteren in verlies van remvermogen. Neem de volgende voorzorgsmaatregelen in acht: ● Bij een te laag remvloeistofniveau kan lucht binnendringen in het remsysteem, waardoor de remprestaties afnemen.
U1CAD1D0.book Page 26 Tuesday, September 13, 2011 3:36 PM PERIODIEK ONDERHOUD EN AFSTELLINGEN DAU22760 Spanning aandrijfketting De spanning van de aandrijfketting moet voorafgaand aan elke rit worden gecontroleerd en indien nodig worden bijgesteld. DAU22794 Aandrijfketting controleren op spanning 1. Zet de motorfiets op de middenbok. 2. Schakel de versnellingsbak in de vrijstand. 3. Meet de spanning van de aandrijfketting zoals getoond. 6 1. Spanning aandrijfketting Spanning aandrijfketting: 20.0–30.
U1CAD1D0.book Page 27 Tuesday, September 13, 2011 3:36 PM PERIODIEK ONDERHOUD EN AFSTELLINGEN Aanhaalmomenten: Wielasmoer: 150 Nm (15 m·kgf, 108 ft·lbf) Borgmoer: 16 Nm (1.6 m·kgf, 12 ft·lbf) 7. Zorg ervoor dat de kettingspanners in dezelfde stand staan, dat de spanning van de aandrijfketting correct is en dat de aandrijfketting soepel beweegt. DAU23025 Aandrijfketting reinigen en smeren aandrijfketting, deze kunnen stoffen bevatten die de O-ringen kunnen beschadigen.
U1CAD1D0.book Page 28 Tuesday, September 13, 2011 3:36 PM PERIODIEK ONDERHOUD EN AFSTELLINGEN DAU23114 DAU23095 Kabels controleren en smeren De werking van alle bedieningskabels en de conditie van alle kabels moet voorafgaand aan elke rit worden gecontroleerd en de kabel en kabeleinden moeten indien nodig worden gesmeerd. Vraag een Yamaha dealer een kabel te controleren of te vervangen wanneer deze is beschadigd of niet soepel beweegt.
U1CAD1D0.book Page 29 Tuesday, September 13, 2011 3:36 PM PERIODIEK ONDERHOUD EN AFSTELLINGEN Aanbevolen smeermiddel: Lithiumvet DAU23143 Rem- en koppelingshendels controleren en smeren De werking van de rem- en de koppelingshendel moet voorafgaand aan elke rit worden gecontroleerd en de hendelscharnierpunten moeten indien nodig worden gesmeerd.
U1CAD1D0.book Page 30 Tuesday, September 13, 2011 3:36 PM PERIODIEK ONDERHOUD EN AFSTELLINGEN DAU23213 Middenbok en zijstandaard controleren en smeren Aanbevolen smeermiddel: Lithiumvet DAU23272 Voorvork controleren De conditie en de werking van de voorvork moeten als volgt worden gecontroleerd volgens de intervalperioden vermeld in het periodieke smeer- en onderhoudsschema. Om de conditie te controleren Controleer de binnenste vorkbuizen op krassen, beschadigingen en overmatige olielekkage.
U1CAD1D0.book Page 31 Tuesday, September 13, 2011 3:36 PM PERIODIEK ONDERHOUD EN AFSTELLINGEN DAU45511 Stuursysteem controleren DAU23291 Controleren van wiellagers Losse of versleten balhoofdlagers kunnen gevaarlijk zijn. De werking van het stuursysteem moet als volgt worden gecontroleerd volgens de intervalperioden vermeld in het periodieke smeer- en onderhoudsschema. 1. Zet de machine op de middenbok. WAARSCHUWING! Ondersteun de machine zorgvuldig om omvallen en mogelijk letsel te voorkomen.
U1CAD1D0.book Page 32 Tuesday, September 13, 2011 3:36 PM PERIODIEK ONDERHOUD EN AFSTELLINGEN DAU50210 Accu 1. Positieve accukabel (rood) 2. Negatieve accukabel (zwart) 3. Accu 6 De accu bevindt zich onder het zadel. (Zie pagina 3-18.) Dit model is voorzien van een VRLA (Valve Regulated Lead Acid)-accu. De elektrolyt hoeft niet te worden gecontroleerd en er hoeft geen gedistilleerd water te worden bijgevuld.
U1CAD1D0.book Page 33 Tuesday, September 13, 2011 3:36 PM PERIODIEK ONDERHOUD EN AFSTELLINGEN 4. Controleer na installatie of de accukabels correct zijn aangesloten op de accupolen. DCA16530 LET OP Houd de accu steeds opgeladen. Stallen van een ontladen accu kan leiden tot permanente accuschade.
U1CAD1D0.book Page 34 Tuesday, September 13, 2011 3:36 PM PERIODIEK ONDERHOUD EN AFSTELLINGEN 6 FZ1-SA FZ1-SA 1. 2. 3. 4. 1. 2. 3. 4. Hoofdzekering Zekeringenkastje Zekering brandstofinjectiesysteem Reservezekering brandstofinjectiesysteem 1. Draai de contactsleutel naar “OFF” en schakel het betreffende elektrische circuit uit. 2. Haak de accuriem los en verwijder daarna de accukap.
U1CAD1D0.book Page 35 Tuesday, September 13, 2011 3:36 PM PERIODIEK ONDERHOUD EN AFSTELLINGEN 1 2 3 1. Kap van startmotorrelais 2. Zekering brandstofinjectiesysteem 3. Reservezekering brandstofinjectiesysteem 4. Verwijder de doorgebrande zekering en breng een nieuwe zekering met de voorgeschreven ampèrewaarde aan. WAARSCHUWING! Gebruik geen zekeringen met een hogere amperage dan aanbevolen om ernstige schade aan het elektrische systeem en mogelijk brand te voorkomen.
U1CAD1D0.book Page 36 Tuesday, September 13, 2011 3:36 PM PERIODIEK ONDERHOUD EN AFSTELLINGEN DAU24115 Gloeilamp in remlicht/achterlicht vervangen 1. Verwijder het duozadel. (Zie pagina 3-18.) 2. Verwijder de gloeilampfitting van het remlicht/achterlicht (samen met de gloeilamp) door deze linksom te draaien. 1. Raak het glas van de gloeilamp niet aan. 1. Maak de koplampstekker los en verwijder dan de gloeilampkap. 6 1. Gloeilamphouder 3.
U1CAD1D0.book Page 37 Tuesday, September 13, 2011 3:36 PM PERIODIEK ONDERHOUD EN AFSTELLINGEN DAU24313 DAU24204 Gloeilamp in richtingaanwijzer vervangen 1. Verwijder de lamplens van de richtingaanwijzer door de schroeven te verwijderen. Gloeilamp in kentekenverlichting vervangen 1 1. Verwijder de lampeenheid voor kentekenverlichting door de schroeven los te draaien. 2 1. Gloeilamp kentekenverlichting 2. Gloeilampfitting kentekenverlichting 1. Lamplens richtingaanwijzer 2. Schroef 2.
U1CAD1D0.book Page 38 Tuesday, September 13, 2011 3:36 PM PERIODIEK ONDERHOUD EN AFSTELLINGEN DAU27014 Parkeerlichtgloeilamp vervangen Dit model is voorzien van twee parkeerlichten. Vervang een parkeerlichtgloeilamp als volgt als deze is doorgebrand. 1. Verwijder paneel B (als u de linker parkeerlichtgloeilamp vervangt) of paneel A (als u de rechter parkeerlichtgloeilamp vervangt). (Zie pagina 6-9.) 2.
U1CAD1D0.book Page 39 Tuesday, September 13, 2011 3:36 PM PERIODIEK ONDERHOUD EN AFSTELLINGEN 4. Monteer aan beide zijden de remslanghouders door de bout en de moer aan te brengen. 5. Haal het voertuig van de middenbok, zodat het voorwiel op de grond staat en klap daarna de zijstandaard omlaag. 6. Zet de wielas, de voorwielasklembout en de remklauwbouten vast met de voorgeschreven aanhaalmomenten. 3 2 1 1. Klembout voorwielas 2. Wielas 3. Remklauwbout 2. Zet de machine op de middenbok. 3.
U1CAD1D0.book Page 40 Tuesday, September 13, 2011 3:36 PM PERIODIEK ONDERHOUD EN AFSTELLINGEN DAU44801 Achterwiel (voor modellen zonder ABS) DWA14840 WAARSCHUWING 2. Zet de machine op de middenbok. 3. Verwijder de wielasmoer. 4. Draai de borgmoer los aan beide zijden van de achterbrug. Wielen van ABS-modellen moeten door een Yamaha-dealer verwijderd en gemonteerd worden. 7. Ondersteun de remklauwsteun, trek de wielas uit en verwijder dan het wiel.
U1CAD1D0.book Page 41 Tuesday, September 13, 2011 3:36 PM PERIODIEK ONDERHOUD EN AFSTELLINGEN ● Kijk of er voldoende afstand tussen de remblokken is voordat u het wiel aanbrengt. Aanhaalmomenten: Wielasmoer: 150 Nm (15 m·kgf, 108 ft·lbf) Borgmoer: 16 Nm (1.6 m·kgf, 12 ft·lbf) 1. Sleuf 2. Borging 2. Breng de aandrijfketting aan op het achtertandwiel. 3. Breng de wielasmoer aan. 4. Haal de machine van de middenbok, zodat het achterwiel op de grond staat en klap daarna de zijstandaard omlaag. 5.
U1CAD1D0.book Page 42 Tuesday, September 13, 2011 3:36 PM PERIODIEK ONDERHOUD EN AFSTELLINGEN DWA15141 WAARSCHUWING Rook niet tijdens het controleren van het brandstofsysteem en let erop dat er geen open vuur of vonken in de omgeving zijn, inclusief waakvlammen van geisers of ovens. Benzine en benzinedampen kunnen vlam vatten of exploderen, met ernstig letsel of schade aan eigendommen tot gevolg.
U1CAD1D0.book Page 43 Tuesday, September 13, 2011 3:36 PM PERIODIEK ONDERHOUD EN AFSTELLINGEN DAU42503 Storingzoekschema’s Startproblemen of slechte werking van de motor 1. Brandstof Controleer het brandstofniveau in de brandstoftank. Er is voldoende brandstof aanwezig. Controleer de compressie. Er is geen brandstof aanwezig. Vul brandstof bij. De motor start niet. Controleer de compressie. 2. Compressie Er is compressie. Controleer de ontsteking. Er is geen compressie.
U1CAD1D0.book Page 44 Tuesday, September 13, 2011 3:36 PM PERIODIEK ONDERHOUD EN AFSTELLINGEN Oververhitte motor DWAT1040 WAARSCHUWING ● Verwijder de radiatorvuldop niet terwijl de motor en de koelvloeistofradiator nog heet zijn. Hete vloeistof en stoom kunnen naar buiten spuiten en zo ernstige brandwonden veroorzaken. Wacht tot de motor is afgekoeld.
U1CAD1D0.book Page 1 Tuesday, September 13, 2011 3:36 PM VERZORGING EN STALLING VAN DE MOTORFIETS DAU37833 Matkleur, let op DAU26014 Verzorging DCA15192 LET OP Sommige modellen zijn uitgerust met matkleurige onderdelen. Raadpleeg een Yamaha dealer voor advies over wat voor producten gebruikt moeten worden om het voertuig te reinigen. Het gebruik van een borsteltje, chemische producten of reinigingsmiddelen tijdens het reinigen van deze onderdelen kan het oppervlak bekrassen of beschadigen.
U1CAD1D0.book Page 2 Tuesday, September 13, 2011 3:36 PM VERZORGING EN STALLING VAN DE MOTORFIETS ● Gebruik geen bijtende chemische 7 reinigingsmiddelen op kunststof delen. Vermijd het gebruik van doeken of sponzen die in contact zijn geweest met bijtende of schurende reinigingsmiddelen, oplosmiddelen of thinner, brandstof (benzine), roestverwijderingsmiddelen of corrosieremmers, remvloeistof, antivries of elektrolyt.
U1CAD1D0.book Page 3 Tuesday, September 13, 2011 3:36 PM VERZORGING EN STALLING VAN DE MOTORFIETS 5. 6. 7. 8. ook op verchroomde en vernikkelde componenten, om zo corrosie te voorkomen. Gebruik oliespray als universeel schoonmaakmiddel om nog achtergebleven vuil te verwijderen. Werk kleine lakbeschadigingen door steenslag e.d. bij. Zet alle gelakte oppervlakken in de was. Laat de motorfiets volledig drogen alvorens deze te stallen of af te dekken.
U1CAD1D0.book Page 4 Tuesday, September 13, 2011 3:36 PM VERZORGING EN STALLING VAN DE MOTORFIETS 7 2. Vul de brandstoftank en voeg een stabilisatoradditief (indien verkrijgbaar) toe om roestvorming in de tank en achteruitgang van de brandstof te voorkomen. 3. Voer de volgende stappen uit om de cilinders, de zuigerveren etc. te beschermen tegen corrosie. a. Verwijder de bougiedoppen en de bougies. b. Giet een theelepel motorolie in elk bougiegat. c.
U1CAD1D0.book Page 1 Tuesday, September 13, 2011 3:36 PM SPECIFICATIES Afmetingen: Totale lengte: 2140 mm (84.3 in) Totale breedte: 770 mm (30.3 in) Totale hoogte: 1205 mm (47.4 in) Zadelhoogte: 815 mm (32.1 in) Wielbasis: 1460 mm (57.5 in) Grondspeling: 135 mm (5.31 in) Kleinste draaicirkel: 3000 mm (118.
U1CAD1D0.book Page 2 Tuesday, September 13, 2011 3:36 PM SPECIFICATIES 2e: 2.063 (33/16) 3e: 1.762 (37/21) 4e: 1.522 (35/23) 5e: 1.350 (27/20) 6e: 1.208 (29/24) Chassis: Type frame: Diamantframe Spoorhoek: 25.00 graad Naspoor: 109 mm (4.
U1CAD1D0.book Page 3 Tuesday, September 13, 2011 3:36 PM SPECIFICATIES Laadsysteem: Wisselstroomdynamo met permanente magneten Accu: Model: YTZ14S Voltage, capaciteit: 12 V, 11.2 Ah Koplamp: Type gloeilamp: Halogeenlamp Gloeilampen voltage, wattage × aantal: Koplamp: 12 V, 60 W/55 W × 2 Achterlicht/remlicht unit: 12 V, 5.0 W/21.0 W × 1 Voorste richtingaanwijzer: 12 V, 10.0 W × 2 Achterste richtingaanwijzer: 12 V, 10.0 W × 2 Parkeerlicht: 12 V, 5.0 W × 2 Kentekenverlichting: 12 V, 5.
U1CAD1D0.book Page 1 Tuesday, September 13, 2011 3:36 PM GEBRUIKERSINFORMATIE DAU48612 Identificatienummers DAU26400 DAU26470 Voertuigidentificatienummer Modelinformatiesticker 1. Voertuigidentificatienummer 1. Modelinformatiesticker Het voertuigidentificatienummer is ingeslagen op de balhoofdbuis. Noteer dit nummer in het daartoe bestemde vakje. De modelinformatiesticker is onder het bestuurderszadel bevestigd aan het frame. (Zie pagina 3-18.
U1CAD1D0.book Page 1 Tuesday, September 13, 2011 3:36 PM INDEX A Aandrijfketting, reinigen en smeren ...... 6-27 ABS (voor modellen met ABS) ............. 3-14 ABS-waarschuwingslampje (voor modellen met ABS) ..................... 3-6 Accu...................................................... 6-32 Achteruitkijkspiegels ............................. 3-20 Antidiefstal-alarmsysteem (optie) ......... 3-11 Gloeilamp richtingaanwijzer, vervangen ...........................................
U1CAD1D0.book Page 2 Tuesday, September 13, 2011 3:36 PM INDEX Tankdop ................................................ 3-15 U Uitlaatkatalysatoren .............................. 3-17 V Veiligheidsinformatie............................... 1-1 Verzorging............................................... 7-1 Voertuigidentificatienummer ................... 9-1 Voor- en achterremblokken controleren.......................................... 6-23 Voorvork, afstellen ................................
U1CAD1D0.
PRINTED IN THE NETHERLANDS 2011.