AB INTEGRATED AUDIO SYSTEM SYSTÈME AUDIO INTÉGRÉ ISX-800 OWNER’S MANUAL MODE D’EMPLOI BEDIENUNGSANLEITUNG MANUALE DI ISTRUZIONI
CAUTION: READ THIS BEFORE OPERATING YOUR UNIT. 1 2 3 4 5 6 7 8 9 10 11 12 13 14 15 16 17 i En To assure the finest performance, please read this manual carefully. Keep it in a safe place for future reference. Install this unit in a well ventilated, cool, dry, clean place – away from direct sunlight, heat sources, vibration, dust, moisture and cold. For proper ventilation, allow the following minimum clearances. Top: 15 cm (6 in) Rear: 2.
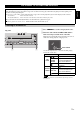
CONTENTS USING THE ALARM FUNCTION ............................................14 USING THE SLEEP TIMER .....................................................17 TONE CONTROL.....................................................................17 ADJUST BRIGHTNESS OF FRONT PANEL DISPLAY .........17 TROUBLESHOOTING .............................................................18 NOTES ON DISCS AND USB DEVICES.................................20 SPECIFICATIONS .......................................................
NAMES OF PARTS AND THEIR FUNCTIONS Top panel AUTO 2 SET 2 SOURCE + BEEP BEEP 1 1 SOURCE DIMMER CLOCK ALARM TYPE USB LABEL SIDE iPod VOLUME 1 a 2 3 4 SOURCE ALARM 5 6 SNOOZE SLEEP 7 PRESET DISPLAY 8 9 j kl m n g SNOOZE/SLEEP (Power) Set the sleep timer or switch the alarm to snooze mode (P. 16, 17). Press to turn the system on/off. Time is displayed on the front panel even when the system is off.
NAMES OF PARTS AND THEIR FUNCTIONS Front panel display English 1 Play/shuffle/repeat indicator 1 Displays the playback mode (P. 6, 9). b Remote control signal receiver 8 2 3 1 iPod ALL CD 7 USB 4 AUX c Clock indicator Shows the clock hour hand (P. 5). d Source indicator Shows selected source. e Alarm indicator FM Turns on if the alarm has been set (P. 14). DAB f Sleep indicator Turns on if the sleep timer has been set (P. 17).
NAMES OF PARTS AND THEIR FUNCTIONS Remote control a Remote control signal transmitter 1 b 2 (Power) Press to turn the system on/off. 3 c ALARM 4 Switches the alarm on/off. d SNOOZE/SLEEP Set the sleep timer or switch the alarm to snooze mode (P. 16, 17). e Source button 5 Switch the source to be played. When listening to the radio, press RADIO to switch between DAB/FM. f FOLDER Switch the playback folder when playing music on data CDs or USB devices. g 6 / Skip the playback track/file.
ADJUSTING THE CLOCK Setting the time AUTO 2 SET 2 Rear panel SOURCE + BEEP BEEP 1 1 SOURCE DIMMER CLOCK ALARM TYPE SET USB VOLUME LABEL SIDE SOURCE ALARM SNOOZE SLEEP PRESET 2 2 Set the time with / . Set time (flashing) 3 Move the CLOCK switch on the rear panel to CLOCK1 or CLOCK2. y • Connecting an iPod to the iPod dock in step 2 will copy the time on the iPod to the unit.
LISTENING TO iPod Playing the iPod For details on compatible iPod models, refer to “SPECIFICATIONS” (P. 21). 1 Connect an iPod to the iPod dock. Top panel AUTO 2 SET 2 2 Press SOURCE and set iPod as the playback SOURCE + BEEP BEEP 1 1 SOURCE DIMMER CLOCK ALARM TYPE source. 3 Play the iPod by pressing USB VOLUME LABEL SIDE SOURCE ALARM SNOOZE SLEEP / . Playback can be controlled with either the remote control, iPod or the top panel on this unit.
LISTENING TO CD AND USB DEVICES The unit will operate as follows when playing back tracks/files on CD/USB devices. – For audio CD : from the first track of the CD. – For data CD/USB device: from the first track of the folder that contains the track that was played last. • The system turns off automatically 60 minutes after CD/USB device playback is stopped. y For details on playable discs and files, refer to “NOTES ON DISCS AND USB DEVICES” (P. 20).
LISTENING TO CD AND USB DEVICES Listening to a data CD 1 Press SOURCE to set CD as the playback source. Top panel AUTO 2 SET 2 2 Insert the data CD into the Disc slot with the SOURCE + BEEP BEEP 1 1 SOURCE DIMMER CLOCK ALARM TYPE label side facing toward the front of the unit. Playback starts automatically. The folder/file number is shown for a while when starting playback or skipping tracks.
LISTENING TO CD AND USB DEVICES Listening to a USB device English 1 Press SOURCE and set USB as the playback Top panel source. AUTO 2 SET 2 SOURCE + BEEP BEEP 1 1 SOURCE DIMMER CLOCK ALARM TYPE 2 Connect a USB device to the USB port. Playback starts automatically. The folder/file number is shown for a while when starting playback or skipping tracks.
LISTENING TO DAB STATIONS DAB (Digital Audio Broadcasting) and DAB+ use digital signals for clearer sound and more stable reception compared to analog signals. DAB+ is based on the original DAB standard but uses a more efficient audio codec. DAB and DAB+ are broadcast in blocks of data called “ensembles” containing up to several radio stations that are simultaneously broadcast. DAB and DAB+ can also include an extensive amount of text information, enabling you to select a station by name.
LISTENING TO DAB STATIONS Switching DAB station information 2 repeatedly. SOURCE + BEEP BEEP 1 SOURCE CLOCK ALARM TYPE Information is displayed in the order shown below. LABEL SIDE NOOZE SLEEP PRESET DISPLAY Text information Ensemble name ( is displayed before the ensemble name.) Status 1 (channel label and frequency) Status 2 (DAB or DAB+ and signal quality) Back to the top. 1 Storing DAB stations (preset) Use the preset function to store your favorite 5 stations.
LISTENING TO FM STATIONS Selecting the FM station 1 Press SOURCE and set FM as the playback source. Top panel AUTO 2 SET 2 SOURCE + BEEP BEEP 1 1 SOURCE DIMMER CLOCK ALARM TYPE Reception frequency FM USB VOLUME LABEL SIDE SOURCE ALARM SNOOZE SLEEP PRESET Using the remote control Press RADIO to switch between DAB/FM. 1 2 2 Press / to tune the FM station. Tuning type Note If you tune to an FM station manually, the sound will be in monaural.
LISTENING TO EXTERNAL SOURCES Selecting a preset FM station 1 Press SOURCE and set FM as the playback source. Top panel 2 SET 2 2 Press PRESET repeatedly to select the preset FM SOURCE + BEEP BEEP 1 1 SOURCE DIMMER CLOCK ALARM TYPE station. Using the remote control USB LABEL SIDE Press PRESET VOLUME SOURCE ALARM 1 SNOOZE SLEEP / . PRESET 2 LISTENING TO EXTERNAL SOURCES Turn the system off before connecting audio cables. Remove the terminal cover before connecting external devices.
USING THE ALARM FUNCTION The unit includes an alarm function (IntelliAlarm) that plays back music sources or set of beeps at the set time in a variety of different methods. The alarm function has following features. 3 types of alarms Select from 3 alarm types, combining music and beep sounds. The selected audio source and beep sound are played at the set time. This mode is recommended for the best possible start to the day.
USING THE ALARM FUNCTION Set the alarm time and alarm type AUTO 2 SET 2 SOURCE + BEEP BEEP 1 1 SOURCE DIMMER CLOCK ALARM TYPE Specify the track, folder or DAB/FM station to be played. If iPod is set as the source: No settings required. USB If CD/USB/DAB/FM is selected as the source: Press PRESET to select the track (audio CD), folder (data CD/USB devise) or DAB/FM station to be played.
USING THE ALARM FUNCTION Turning the alarm on/off 1 Press ALARM. Top panel AUTO 2 SET 2 1 1 DIMMER CLOCK BEEP SOUR ALARM When the alarm is on, the alarm indicator ( ) is shown, and the alarm time is shown for a while. If you press ALARM again, the alarm indicator ( ) and the alarm will turn off. y USB The set alarm time will be saved even if the alarm is turned off. If the alarm is turned on again by pressing ALARM, the alarm will sound with the previously alarm settings.
USING THE SLEEP TIMER You can set the time to turn off the system automatically. 1 Press SNOOZE/SLEEP a number of times to set Top panel 2 SET 2 1 1 DIMMER CLOCK USB BEEP SOURC ALARM T LABEL SIDE the time until the system turns off. The sleep timer can be set to 30, 60, 90 and 120 minutes. When the time is set, the sleep indicator ( ) is shown on the front panel display. y If you press SNOOZE/SLEEP while the sleep timer is activated, the sleep timer setting will be canceled.
TROUBLESHOOTING If there is a problem with the unit, check the following list first. If you cannot resolve the problem with the suggested solutions or if the problem is not listed below, turn off and unplug the system, and consult the nearest authorized Yamaha dealer or service center. General Problem Cause Solution Can’t turn on the unit. The power cable is not connect firmly. The speakers make no sound. The volume may be set to the minimum level. Adjust the volume level.
TROUBLESHOOTING USB device playback Problem Cause The USB device is not recognized. Solution Turn off the system and reconnect the USB device to the unit. Connect an AC adapter if supplied with the device. If the solutions above do not resolve the problem, the USB device is not playable on the unit. The USB indicator flashes twice, and repeated 3 times, after connecting a USB device. “Err” is displayed in the front panel display after connecting a USB device.
NOTES ON DISCS AND USB DEVICES CD information USB device information This unit is designed for use with audio CD, CD-R*, and CD-RW* with the logos followings. This unit supports USB mass storage class devices (e.g., flash memories or portable audio players) using FAT16 or FAT32 format. Notes • Some devices may not work properly even if they meet the requirements. • Do not connect devices other than USB mass storage class devices (such as USB chargers or USB hubs), PCs, card readers, an external HDD, etc.
SPECIFICATIONS PLAYER SECTION iPod (Digital connection) • • • • • Power supply .....................................................AC 100 to 240 V, 50/60 Hz Power consumption ..............................................................................20 W System off consumption......................................................................1.5 W Power save consumption ......................................................... 0.
ATTENTION : VEUILLEZ LIRE CE QUI SUIT AVANT D’UTILISER L’APPAREIL. 1 2 3 4 5 Pour utiliser l’appareil au mieux de ses possibilités, lisez attentivement ce mode d’emploi. Conservez-le soigneusement pour référence. Installez cet appareil dans un endroit frais, bien aéré, sec et propre - à l’abri de la lumière du soleil, des sources de chaleur, des vibrations, des poussières, de l’humidité et du froid. Pour une aération correcte, tenez compte des distances minimales suivantes.
TABLE DES MATIÈRES UTILISATION DE LA FONCTION D’ALARME .......................14 UTILISATION DE LA MINUTERIE ..........................................17 RÉGLAGE DE LA TONALITÉ .................................................17 RÉGLAGE DE LUMINOSITÉ DE L’AFFICHEUR....................17 GUIDE DE DÉPANNAGE ........................................................18 REMARQUES SUR LES DISQUES ET APPAREILS USB.....20 CARACTÉRISTIQUES TECHNIQUES ....................................
NOM DES PARTIES ET LEURS FONCTIONS Panneau supérieur AUTO 2 SET 2 SOURCE + BEEP BEEP 1 1 SOURCE DIMMER CLOCK ALARM TYPE USB LABEL SIDE iPod VOLUME 1 a 2 3 4 SOURCE ALARM 5 6 SNOOZE SLEEP 7 PRESET DISPLAY 8 9 j kl m n g SNOOZE/SLEEP (Alimentation) Règle la minuterie ou bascule l’alarme en mode snooze (P. 16, 17). Appuyez pour allumer/éteindre le système. L’heure est affichée sur le panneau avant même lorsque le système est éteint.
NOM DES PARTIES ET LEURS FONCTIONS Afficheur 1 Indicateur de lecture/mode aléatoire/répétition 1 Affiche le mode de lecture (P. 6, 9). b Capteur de télécommande 8 1 iPod ALL CD 7 USB 4 AUX c Indicateur d’horloge Affiche l’aiguille des heures de l’horloge (P. 5). Français 2 3 d Indicateur de source Indique la source sélectionnée. e Indicateur d’alarme FM S’allume si l’alarme est activée (P. 14). DAB f Indicateur de minuterie S’allume si la minuterie est activée (P. 17).
NOM DES PARTIES ET LEURS FONCTIONS Télécommande a Émetteur de télécommande 1 b 2 (Alimentation) Appuyez pour allumer/éteindre le système. 3 c ALARM 4 Active/désactive l’alarme. d SNOOZE/SLEEP Règle la minuterie ou bascule l’alarme en mode snooze (P. 16, 17). e Touche de sélection de source 5 Change de source de lecture. Quand vous utilisez la radio, appuyez sur RADIO pour alterner entre DAB/FM. f FOLDER Change de dossier lors de la lecture de musique sur CD de données ou dispositifs USB.
RÉGLAGE DE L’HORLOGE Réglage de l’heure 1 Placez le sélecteur CLOCK du panneau arrière sur Panneau supérieur AUTO 2 SET 2 SET. SOURCE + BEEP BEEP 1 1 SOURCE DIMMER CLOCK ALARM TYPE Panneau arrière VOLUME SET LABEL SIDE SOURCE ALARM SNOOZE SLEEP Français USB PRESET 2 2 Réglez l’heure avec / . Réglage de l’heure (clignote) 3 Placez le sélecteur CLOCK du panneau arrière sur CLOCK1 ou CLOCK2.
ÉCOUTE D’UN iPod Lecture de l’iPod Pour plus de détails à propos des modèles d’iPod compatibles, veuillez consulter “CARACTÉRISTIQUES TECHNIQUES” (P. 21). 1 Branchez un iPod au dock pour iPod. Panneau supérieur AUTO 2 SET 2 2 Appuyez sur SOURCE et choisissez iPod comme SOURCE + BEEP BEEP 1 1 SOURCE DIMMER CLOCK ALARM TYPE source de lecture. USB VOLUME 3 Lancez la lecture sur l’iPod en appuyant sur LABEL SIDE SOURCE ALARM SNOOZE SLEEP / .
ÉCOUTE D’UN CD ET D’APPAREILS USB Cette section décrit le fonctionnement de l’appareil pour la lecture de plages/fichiers sur CD/appareils USB. • Quand vous arrêtez puis relancez la lecture du CD/de l’appareil USB, cet appareil reprend la lecture de la dernière plage lue depuis le début. • Si vous appuyez sur la touche de la télécommande quand la lecture est à l’arrêt, la prochaine fois que vous lancez la lecture, l’appareil lit les plages comme suit: – Pour un CD audio: à la première plage du CD.
ÉCOUTE D’UN CD ET D’APPAREILS USB Écoute d’un CD de données 1 Appuyez sur SOURCE pour choisir le CD comme Panneau supérieur AUTO 2 SET 2 source de lecture. SOURCE + BEEP BEEP 1 1 SOURCE DIMMER CLOCK ALARM TYPE 2 Insérez le CD de données dans la fente pour USB VOLUME disque avec l’étiquette tournée vers l’avant de l’appareil. LABEL SIDE SOURCE 1 ALARM SNOOZE SLEEP La lecture commence automatiquement.
ÉCOUTE D’UN CD ET D’APPAREILS USB Écoute d’un appareil USB 1 Appuyez sur SOURCE et choisissez USB comme Panneau supérieur AUTO 2 SET 2 SOURCE + BEEP BEEP 1 1 SOURCE DIMMER CLOCK ALARM TYPE source de lecture. 2 Branchez un appareil USB au port USB.
ÉCOUTE DES STATIONS DAB DAB (diffusion audionumérique) et DAB+ utilisent des signaux numériques pour un son plus net et une réception plus stable par rapport aux signaux analogiques. DAB+ est basé sur la norme DAB originale, mais utilise un codec audio plus efficace. DAB et DAB+ sont diffusés en blocs de données appelés “ensembles”, contenant plusieurs stations radio diffusées simultanément.
ÉCOUTE DES STATIONS DAB Affichage des informations sur la station DAB 1 Vous pouvez sélectionner les informations DAB Panneau supérieur SET 2 affichées en appuyant plusieurs fois sur la touche DISPLAY. SOURCE + BEEP BEEP 1 SOURCE CLOCK ALARM TYPE Les informations affichées changent selon l’ordre suivant. NOOZE SLEEP PRESET DISPLAY 1 Mémorisation de stations DAB (présélections) La fonction Preset vous permet de mémoriser vos 5 stations préférées.
ÉCOUTE DE STATIONS FM Sélection de la station FM 1 Appuyez sur SOURCE et choisissez FM comme Panneau supérieur AUTO 2 SET 2 1 1 SOURCE DIMMER CLOCK ALARM TYPE USB source de lecture. SOURCE + BEEP BEEP Fréquence de la station LABEL SIDE FM VOLUME SOURCE ALARM SNOOZE SLEEP PRESET 1 2 Utilisation de la télécommande Appuyez sur RADIO pour alterner entre DAB/FM. 2 Appuyez sur / pour syntoniser la station FM.
ÉCOUTE DE SOURCES EXTERNES Rappel d’une présélection FM 1 Appuyez sur SOURCE et choisissez FM comme Panneau supérieur AUTO 2 SET 2 source de lecture. SOURCE + BEEP BEEP 1 1 SOURCE DIMMER CLOCK ALARM TYPE 2 Appuyez plusieurs fois sur PRESET pour choisir la présélection voulue. USB LABEL SIDE VOLUME SOURCE ALARM 1 SNOOZE SLEEP Appuyez sur PRESET PRESET / Français Utilisation de la télécommande .
UTILISATION DE LA FONCTION D’ALARME Cet appareil comporte une fonction d’alarme (IntelliAlarm) qui vous permet de lire la source voulue et/ou de déclencher une sonnerie à l’heure prédéfinie. Voici les caractéristiques de la fonction d’alarme. 3 types d’alarmes Les 3 types d’alarmes permettent de combiner de la musique avec la sonnerie. SOURCE + BEEP La source audio sélectionnée et la sonnerie retentissent en même temps. Un mode recommandé pour commencer la journée sur le bon pied.
UTILISATION DE LA FONCTION D’ALARME Réglage de l’heure du réveil et du type d’alarme 5 (si vous avez choisi un type d’alarme autre que Panneau supérieur AUTO 2 SET 2 BEEP) Sélectionnez la plage, le dossier ou la station DAB/FM voulu pour le réveil. SOURCE + BEEP BEEP 1 1 SOURCE DIMMER CLOCK ALARM TYPE Si vous avez choisi iPod comme source: aucun réglage n’est nécessaire.
UTILISATION DE LA FONCTION D’ALARME Activation/désactivation de l’alarme 1 Appuyez sur ALARM. Panneau supérieur AUTO 2 SET 2 1 1 DIMMER CLOCK BEEP SOUR ALARM Quand l’alarme est activée, le témoin d’alarme ( ) s’allume et l’heure de l’alarme s’affiche quelques instants. Si vous appuyez à nouveau sur ALARM, l’indicateur d’alarme ( USB Le réglage d’heure du réveil est mémorisé même si vous désactivez l’alarme.
UTILISATION DE LA MINUTERIE Vous pouvez régler l’heure à laquelle le système doit s’arrêter automatiquement. 1 Appuyez plusieurs fois sur SNOOZE/SLEEP pour Panneau supérieur AUTO 2 SET 2 1 1 DIMMER CLOCK USB BEEP SOURC ALARM T LABEL SIDE choisir le délai avant la mise hors tension du système. Vous pouvez choisir un délai de 30, 60, 90 et 120 minutes. Quand le réglage est effectué, le témoin de minuterie ( ) s’affiche sur la face avant.
GUIDE DE DÉPANNAGE Si cet appareil ne semble pas fonctionner normalement, vérifiez les points de la liste suivante. Si l’anomalie constatée n’est pas mentionnée, ou bien si les mesures suggérées sont sans effet, mettez le système hors service, débranchez le cordon d’alimentation et adressez-vous au revendeur ou service après-vente Yamaha le plus proche. Généralités Anomalies Impossible de mettre l’appareil sous tension. Les haut-parleurs n’émettent aucun son. Le son est subitement coupé.
GUIDE DE DÉPANNAGE Lecture d’un appareil USB Anomalies Causes possibles Un fichier MP3/WMA sur l’appareil USB L’appareil USB n’est pas détecté. ne peut pas être lu. Un appareil USB incompatible est connecté à l’appareil. L’appareil USB ne contient aucun fichier lisible. “Err” apparaît sur l’afficheur après la connexion d’un appareil USB. Un appareil USB incompatible est connecté à l’appareil. Une surtension est détectée.
REMARQUES SUR LES DISQUES ET APPAREILS USB Informations sur les disques Cet appareil est conçu pour lire des CD audio, CD-R*, et CD-RW* comportant les logos suivants. * CD-R/RW au format ISO 9660 y De façon générale, cet appareil est capable de lire les disques portant les logos ci-dessus. Les logos sont imprimés sur les disques et sur leur pochette. Remarques • Ne mettez pas d’autres types de disques dans cet appareil. Vous risqueriez sinon de l’endommager.
CARACTÉRISTIQUES TECHNIQUES SECTION LECTEUR iPod (connexion numérique) • • • • • Alimentation....................................................... CA 100 à 240 V, 50/60 Hz Consommation .....................................................................................20 W Consommation lorsque le système est désactivé.................................1,5 W Consommation en mode d’économie d’énergie.................. 0,5 W ou moins Dimensions 410 mm 410 mm CD • Supports ...............................
VORSICHT: VOR DER BEDIENUNG DIESES GERÄTES DURCHLESEN. 1 2 3 4 5 6 7 8 9 10 11 12 13 14 i De Um optimales Leistungsvermögen sicherzustellen, lesen Sie bitte die Anleitung aufmerksam durch. Bewahren Sie die Anleitung danach für spätere Nachschlagzwecke sorgfältig auf. Installieren Sie dieses Gerät an einem gut belüfteten, trockenen, sauberen Ort - entfernt von direktem Sonnenlicht, Wärmequellen, Erschütterungen, Staub, Feuchtigkeit und Kälte.
INHALTSVERZEICHNIS VERWENDEN DER WECKFUNKTION .........................................14 VERWENDUNG DES SLEEP-TIMERS..........................................17 TONREGELUNG ........................................................................17 EINSTELLEN DER HELLIGKEIT DES BEDIENFELDDISPLAYS ....17 FEHLERBEHEBUNG ..................................................................18 HINWEISE ZU DISCS UND USB-GERÄTEN .................................20 TECHNISCHE DATEN.....................................
NAMEN UND FUNKTIONEN DER TEILE Oberseite AUTO 2 SET 2 SOURCE + BEEP BEEP 1 1 SOURCE DIMMER CLOCK ALARM TYPE USB LABEL SIDE iPod VOLUME 1 a 2 3 4 SOURCE ALARM 5 6 SNOOZE SLEEP 7 PRESET DISPLAY 8 9 j kl m n g SNOOZE/SLEEP (Netzschalter) Stellt den Sleep-Timer ein oder aktiviert den SchlummerModus des Weckers (S. 16,17). Schaltet das System ein/aus. Die Zeit wird auch bei ausgeschaltetem System angezeigt.
NAMEN UND FUNKTIONEN DER TEILE Bedienfelddisplay 1 Anzeige Wiedergabe/Zufallswiedergabe/ 1 Wiederholungswiedergabe Zeigt den Wiedergabemodus an (S. 6, 9). b Empfänger Fernbedienungssignal 8 2 3 1 iPod ALL c Uhranzeige Zeigt den Stundenzeiger der Uhr an (S. 5). CD 7 USB 4 d Wiedergabequellenanzeige Zeigt die gewählte Wiedergabequelle an. AUX e Weckanzeige FM Deutsch Leuchtet bei aktiviertem Wecker (S. 14). DAB f Sleep-Anzeige Leuchtet bei aktiviertem Sleep-Timer (S. 17).
NAMEN UND FUNKTIONEN DER TEILE Fernbedienung a Sender des Fernbedienungssignals 1 b 2 (Netzschalter) Schaltet das System ein/aus. 3 c ALARM 4 Stellt den Wecker ein/aus. d SNOOZE/SLEEP Stellt den Sleep-Timer ein oder aktiviert den SchlummerModus des Weckers (S. 16, 17). e Wiedergabequellentaste 5 Wählt die Wiedergabequelle. Wenn Sie Radio hören, drücken Sie RADIO, um zwischen DAB/FM umzuschalten. f FOLDER Wechselt den Wiedergabeordner während der Wiedergabe einer Daten-CD oder eines USB-Geräts.
EINSTELLEN DER UHR Einstellen der Zeit 1 Stellen Sie den CLOCK-Schalter auf der Rückseite Oberseite AUTO 2 SET 2 auf SET. SOURCE + BEEP BEEP 1 1 SOURCE DIMMER CLOCK ALARM TYPE Rückseite USB VOLUME SET LABEL SIDE SOURCE ALARM SNOOZE SLEEP PRESET 2 Stellen Sie die Zeit mit / Deutsch 2 ein. Eingestellte Zeit (blinkt) 3 Stellen Sie den CLOCK-Schalter auf der Rückseite auf CLOCK1 oder CLOCK2.
WIEDERGABE EINES iPod Wiedergabe des iPod Einzelheiten zu den kompatiblen iPod-Modellen finden Sie unter „TECHNISCHE DATEN“ (S. 21). 1 Schließen Sie einen iPod an das iPod-Dock an. Oberseite AUTO 2 SET 2 2 Drücken Sie SOURCE und stellen Sie iPod als SOURCE + BEEP BEEP 1 1 SOURCE DIMMER CLOCK ALARM TYPE Wiedergabequelle ein. 3 Drücken Sie USB VOLUME LABEL SIDE SOURCE ALARM SNOOZE SLEEP / , um die Wiedergabe des iPod zu beginnen.
WIEDERGABE VON CDs ODER USB-GERÄTEN Titel/Dateien von CDs/USB-Geräten werden folgendermaßen wiedergegeben. • Wenn die Wiedergabe einer CD/eines USB-Geräts gestoppt wird, beginnt die Wiedergabe beim nächsten Mal am Anfang des zu dem Stopp-Zeitpunkt wiedergegebenen Titels. • Wenn Sie bei angehaltener Wiedergabe auf der Fernbedienung drücken, werden die Titel beim nächsten Wiedergabestart folgendermaßen wiedergegeben: – Für Audio-CDs: – Für Daten-CDs/USB-Geräte: vom ersten Titel der CD.
WIEDERGABE VON CDs ODER USB-GERÄTEN Wiedergabe einer Daten-CD 1 Drücken Sie SOURCE, um CD als Oberseite AUTO USB VOLUME 2 SET 2 Wiedergabequelle zu wählen. SOURCE + BEEP BEEP 1 1 SOURCE DIMMER CLOCK ALARM TYPE 2 Legen Sie die Daten-CD so in den Disc-Schacht ein, dass die beschriftete Seite zur Vorderseite des Geräts zeigt. LABEL SIDE SOURCE 1 ALARM SNOOZE SLEEP Die Wiedergabe startet automatisch.
WIEDERGABE VON CDs ODER USB-GERÄTEN Wiedergabe eines USB-Geräts 1 Drücken Sie SOURCE, um USB als Oberseite AUTO 2 SET 2 SOURCE + BEEP BEEP 1 1 SOURCE DIMMER CLOCK ALARM TYPE Wiedergabequelle zu wählen. 2 Schließen Sie ein USB-Gerät an den USBAnschluss an. USB VOLUME SOURCE ALARM SNOOZE SLEEP PRESET 1 Ordnernummer USB Deutsch 2 Die Wiedergabe startet automatisch. Nach Wiedergabestart oder Vorspringen zum nächsten Titel wird für kurze Zeit die Ordner-/Dateinummer angezeigt.
WIEDERGABE VON DAB-RADIOSENDERN Bei DAB (Digital Audio Broadcasting) und DAB+ werden digitale Signale genutzt, um im Vergleich zu analogen Signalen einen besseren Klang und einen stabileren Empfang zu gewährleisten. DAB+ basiert auf dem ursprünglichen DAB-Standard, nutzt aber einen effizienteren Audio-Codec. DAB und DAB+ werden in Datenblöcken übertragen, den sogenannten „Ensembles“, die mehrere Radiosender enthalten, die gleichzeitig übertragen werden.
WIEDERGABE VON DAB-RADIOSENDERN Umschalten der DAB-Radiosender-Informationen 1 Wählen Sie die DAB-Informationen, indem Sie Oberseite SET 2 DISPLAY wiederholt drücken. SOURCE + BEEP BEEP 1 SOURCE CLOCK ALARM TYPE Die Informationen werden in der untenstehenden Reihenfolge angezeigt.
WIEDERGABE VON FM-RADIOSENDERN Auswählen des FM-Senders 1 Drücken Sie SOURCE, um FM als Oberseite AUTO 2 SET 2 1 SOURCE DIMMER CLOCK ALARM TYPE USB Wiedergabequelle zu wählen. SOURCE + BEEP BEEP 1 Empfangsfrequenz LABEL SIDE FM VOLUME SOURCE ALARM SNOOZE SLEEP PRESET 1 2 Bei Verwendung der Fernbedienung Drücken Sie RADIO, um zwischen DAB/FM umzuschalten. 2 Drücken Sie Hinweis Wenn Sie einen Sender manuell wählen, wird der Ton in Mono wiedergegeben.
WIEDERGABE VON EXTERNEN QUELLEN Auswählen eines voreingestellten FM-Senders Oberseite AUTO 2 SET 2 1 Drücken Sie SOURCE, um FM als SOURCE + BEEP BEEP 1 1 SOURCE DIMMER CLOCK ALARM TYPE Wiedergabequelle zu wählen. 2 Drücken Sie PRESET wiederholt, um einen USB VOLUME voreingestellten FM-Sender zu wählen. LABEL SIDE SOURCE ALARM SNOOZE SLEEP Bei Verwendung der Fernbedienung PRESET Drücken Sie PRESET 1 / .
VERWENDEN DER WECKFUNKTION Das Gerät verfügt über eine Weckfunktion (IntelliAlarm), die zu einer festgelegten Zeit Musikquellen und/oder eine Reihe von Pieptönen abspielt. Die Weckfunktion verfügt über die folgenden Funktionen. 3 Wecktypen Wählen Sie aus 3 verschiedenen Wecktypen und kombinieren Sie Musik mit Pieptönen. SOURCE + BEEP Die ausgewählte Audioquelle und der Piepton werden zur gleichen Zeit wiedergegeben. Dieser Modus empfiehlt sich für einen bestmöglichen Start in den Tag.
VERWENDEN DER WECKFUNKTION Einstellen der Weckzeit und des Weckertyps Hinweise Oberseite AUTO USB VOLUME 6 2 SET 2 SOURCE + BEEP BEEP 1 1 SOURCE DIMMER CLOCK ALARM TYPE 5 (wenn ein anderer Weckertyp als BEEP gewählt ist) LABEL SIDE SOURCE ALARM 4 17 • Wenn die gewählte nicht angeschlossen oder eingelegt ist, kann der gewählte Titel/Ordner nicht wiedergegeben werden. • Wenn die Audioquelle zum eingestellten Weckzeitpunkt nicht wiedergegeben werden kann (weil z. B.
VERWENDEN DER WECKFUNKTION Ein-/Ausschalten des Weckers 1 Drücken Sie ALARM. Oberseite AUTO 2 SET 2 1 1 DIMMER CLOCK BEEP SOUR ALARM Bei aktiviertem Wecker leuchtet die Weckanzeige ( ) auf, und die Weckzeit wird für eine gewisse Zeit angezeigt. Wenn Sie ALARM erneut drücken, werden die Alarmanzeige ( USB Die Weckzeit bleibt auch dann gespeichert, wenn Sie die Weckfunktion ausschalten.
VERWENDUNG DES SLEEP-TIMERS Sie können die Zeit einstellen, zu der sich das Gerät automatisch ausschaltet. 1 Drücken Sie SNOOZE/SLEEP mehrmals, um die Oberseite AUTO 2 SET 2 1 1 DIMMER CLOCK USB BEEP SOURC ALARM T LABEL SIDE Ausschaltzeit des Geräts einzustellen. Der Sleep-Timer kann auf 30, 60, 90 und 120 Minuten eingestellt werden. Nachdem die Zeit eingestellt wurde, wird die Sleep-Anzeige ( ) auf dem Bedienfelddisplay angezeigt.
FEHLERBEHEBUNG Wenn ein Problem mit diesem Gerät auftritt, prüfen Sie als erstes die folgende Liste. Falls Sie die Störung nicht mithilfe der folgenden Abhilfemaßnahmen beheben können, oder die Störung nachfolgend nicht aufgelistet ist, schalten Sie dieses Gerät aus, ziehen Sie den Netzstecker und wenden Sie sich an Ihren nächsten autorisierten Yamaha-Fachhändler oder Yamaha-Kundendienst. Allgemeines Problem Das Gerät lässt sich nicht einschalten. Die Lautsprecher bleiben stumm.
FEHLERBEHEBUNG Problem Mögliche Ursache Im Bedienfelddisplay wird „Err“ angezeigt, Beim Gerät ist ein Fehler aufgetreten. nachdem eine Disc eingesetzt wurde. Lösung Werfen Sie die Disc mit aus. USB-Gerät-Wiedergabe Problem Die MP3-/WMA-Datei auf dem USBGerät wird nicht wiedergegeben. Die USB-Anzeige blinkt zweimal (3 Wiederholungen), nachdem das USBGerät angeschlossen wurde. Lösung Schalten Sie das System aus, und schließen Sie das USB-Gerät erneut an das Gerät an.
HINWEISE ZU DISCS UND USB-GERÄTEN Informationen zu CDs Das Gerät wurde zur Verwendung mit Audio-CDs, CD-R* und CD-RW* mit den folgenden Logos entwickelt. Informationen zu USB-Geräten Dieses Gerät unterstützt USB-Massenspeichergeräte (z. B. FlashSpeicher oder tragbare Audiogeräte), die das Format FAT16 oder FAT32 verwenden. Hinweise * CD-R/RW mit ISO 9660-Format y Dieses Gerät kann Discs wiedergeben, auf denen eines der oben abgebildeten Logos aufgedruckt ist.
TECHNISCHE DATEN PLAYER-BEREICH iPod (Digitalanschluss) • Kompatible iPod-Modellen ...................................................... iPod touch (1., 2., 3. und 4. Generation) iPod classic iPod nano (2., 3., 4., 5. und 6. Generation) • Kompatible iPhone-Modellen ........................................................................................................iPhone 4 iPhone 3GS iPhone 3G iPhone ALLGEMEINES • • • • • Stromversorgung ...........................
ATTENZIONE: PRIMA DI USARE QUEST’UNITÀ. 1 2 3 4 5 6 7 8 9 10 11 12 13 14 15 16 17 i It Per assicurarsi le migliori prestazioni dell’unità, leggere questo manuale per intero. Conservarlo poi in un luogo sicuro per poterlo riutilizzare al momento del bisogno. Installare l’unità in una posizione ben ventilata, fresco asciutta e pulita - lontano da luce solare diretta, fonti di calore, vibrazioni, polvere, umidità e freddo. Per un’adeguata entilazione mantenere le seguenti distanze.
INDICE USO DEL TIMER PER LO SPEGNIMENTO ...........................17 CONTROLLO TONO ...............................................................17 REGISTRAZIONE DELLA LUMINOSITÀ SUL DISPLAY DEL PANNELLO ANTERIORE........................................................17 RISOLUZIONE DEI PROBLEMI ..............................................18 NOTE SUI DISCHI E I DISPOSITIVI USB ...............................20 DATI TECNICI..........................................................................
NOME DEI COMPONENTI E RELATIVE FUNZIONI Pannello superiore AUTO 2 SET 2 SOURCE + BEEP BEEP 1 1 SOURCE DIMMER CLOCK ALARM TYPE USB LABEL SIDE iPod VOLUME 1 a 2 3 4 SOURCE ALARM 5 6 SNOOZE SLEEP 7 PRESET 8 DISPLAY 9 j kl m n g SNOOZE/SLEEP (Alimentazione) Impostare il timer per lo spegnimento o commutare la sveglia sulla modalità snooze (P. 16, 17). Premere per accendere/spegnere il sistema. Quando il sistema è spento, sul pannello anteriore viene visualizzato l’orario.
NOME DEI COMPONENTI E RELATIVE FUNZIONI Display del pannello anteriore 1 Indicatore di riproduzione/riproduzione 1 casuale/ripetizione Visualizza la modalità di riproduzione (P. 6, 9). b Ricevitore del segnale del telecomando 8 2 3 1 iPod ALL c Indicatore orologio Mostra la lancetta delle ore dell’orologio (P. 5). CD 7 USB 4 d Indicatore della sorgente Visualizza la sorgente selezionata. AUX e Indicatore della sveglia FM Si accende se la sveglia è stata impostata (P. 14).
NOME DEI COMPONENTI E RELATIVE FUNZIONI Telecomando a Trasmettitore del segnale del telecomando 1 b 2 (Alimentazione) Premere per accendere/spegnere il sistema. 3 c ALARM 4 Attiva/disattiva la sveglia. d SNOOZE/SLEEP Per impostare il timer per lo spegnimento o commutare la sveglia sulla modalità snooze (P. 16, 17). e Pulsante della sorgente 5 Per commutare sulla sorgente di riproduzione. Ascoltando la radio, per passare tra DAB e FM premere RADIO.
REGOLAZIONE DELL’OROLOGIO Impostazione dell’ora 1 Spostare l’interruttore CLOCK del pannello Pannello superiore AUTO 2 SET 2 posteriore su SET. SOURCE + BEEP BEEP 1 1 SOURCE DIMMER CLOCK ALARM TYPE Pannello posteriore SET USB VOLUME LABEL SIDE SOURCE ALARM SNOOZE SLEEP PRESET 2 2 Impostare l’ora mediante / . 3 Spostare l’interruttore CLOCK del pannello posteriore su CLOCK1 o CLOCK2. y • Il collegamento dell’iPod alla relativa base al punto 2 copia l’ora dell’iPod sull’unità.
ASCOLTO DELL’iPod Riproduzione con l’iPod Per i dettagli sui modelli di iPod compatibili, fare riferimento a “DATI TECNICI” (P. 21). 1 Collegare l’iPod alla base iPod. Pannello superiore AUTO 2 SET 2 2 Premere SOURCE e impostare l’iPod come SOURCE + BEEP BEEP 1 1 SOURCE DIMMER CLOCK ALARM TYPE sorgente per la riproduzione. 3 Attivare l’iPod premendo USB / . LABEL SIDE La riproduzione può essere controllata sia con il telecomando, l’iPod o con il pannello di controllo di questa unità.
ASCOLTO DI CD E DISPOSITIVI USB Riproducendo brani/file da CD/dispositivi USB, l’unità funziona nella seguente modalità. • In caso di arresto del CD/del dispositivo USB che viene riprodotto, la traccia riprodotta in quel momento ricomincia alla ripresa della riproduzione. • Premendo sul telecomando mentre la riproduzione è interrotta, al successivo avvio l’unità riproduce le tracce come segue: – Per i CD audio: dal primo brano del CD.
ASCOLTO DI CD E DISPOSITIVI USB Ascolto di un CD dati 1 Premere SOURCE per impostare il CD come Pannello superiore sorgente di riproduzione. AUTO 2 SET 2 SOURCE + BEEP BEEP 1 1 SOURCE DIMMER CLOCK ALARM TYPE 2 Inserire il CD dati nell’alloggiamento con il lato dell’etichetta rivolto verso la parte anteriore dell’unità. USB VOLUME LABEL SIDE SOURCE 1 ALARM SNOOZE SLEEP La riproduzione si avvia automaticamente.
ASCOLTO DI CD E DISPOSITIVI USB Ascolto di un dispositivo USB 1 Premere SOURCE e impostare l’USB come Pannello superiore sorgente di riproduzione. AUTO USB VOLUME 2 SET 2 SOURCE + BEEP BEEP 1 1 SOURCE DIMMER CLOCK ALARM TYPE 2 Collegare un dispositivo USB alla porta USB. La riproduzione si avvia automaticamente. Il numero della cartella/del file brano viene visualizzato per un attimo quando inizia la riproduzione o si saltano i brani.
ASCOLTO DI STAZIONI DAB DAB (Digital Audio Broadcasting - Trasmissioni audio digitali) e DAB+ utilizzano segnali digitali per un audio più chiaro e una ricezione più stabile rispetto ai segnali analogici. DAB+ si basa sullo standard DAB originale, ma utilizza un codec audio più efficace. DAB e DAB+ vengono trasmessi in blocchi di dati, detti “ensemble”, contenenti anche diverse stazioni radio, trasmesse contemporaneamente.
ASCOLTO DI STAZIONI DAB Attivazione delle informazioni sulle stazioni DAB 1 Selezionare DAB premendo DISPLAY più volte. Pannello superiore SET 2 Le informazioni vengono visualizzate nell’ordine indicato qui di seguito. SOURCE + BEEP BEEP 1 SOURCE CLOCK ALARM TYPE Informazioni testuali Il nome dell’ensemble ( viene visualizzato prima del nome dell’ensemble.) Status 1 (indicazione del canale e frequenza) Status 2 (DAB o DAB+ e qualità del segnale) Torna in alto.
ASCOLTO DI STAZIONI RADIO IN FM Memorizzare la stazione FM 1 Premere SOURCE e impostare FM come sorgente Pannello superiore AUTO 2 SET 2 1 SOURCE CLOCK ALARM TYPE USB per la riproduzione. SOURCE + BEEP BEEP 1 DIMMER Frequenza di ricezione LABEL SIDE FM VOLUME SOURCE ALARM SNOOZE SLEEP PRESET 1 2 Uso del telecomando Per passare tra DAB e FM premere RADIO 2 Premere / per sintonizzare la stazione in FM.
ASCOLTO DI SORGENTI ESTERNE Selezione di una stazione FM preselezionata 1 Premere SOURCE e impostare FM come sorgente Pannello superiore AUTO 2 SET 2 di riproduzione. SOURCE + BEEP BEEP 1 1 SOURCE DIMMER CLOCK ALARM TYPE 2 Premere più volte PRESET per selezionare la stazione FM preselezionata. USB LABEL SIDE Uso del telecomando VOLUME SOURCE ALARM 1 SNOOZE SLEEP Premere PRESET PRESET / .
USO DELLA FUNZIONE SVEGLIA L’unità comprende una funzione di sveglia (IntelliAlarm) che riproduce sorgenti musicali o imposta tonalità all’ora stabilita in una gamma di metodi diversi. La funzione sveglia ha le seguenti caratteristiche. 3 tipi di sveglia Selezionare tra 3 tipi di sveglia, combinando musica e tonalità. SOURCE + BEEP La sorgente audio e il segnale acustico selezionati vengono riprodotti all’ora impostata. Questa modalità viene consigliata per cominciare la giornata al meglio.
USO DELLA FUNZIONE SVEGLIA Impostare l’ora e il tipo di sveglia Pannello superiore AUTO 2 SET 2 SOURCE + BEEP BEEP 1 1 SOURCE DIMMER CLOCK ALARM TYPE Note • Se la sorgente selezionata non è collegata o inserita, non è possibile riprodurre la traccia/cartella selezionata. • Se non è possibile la riproduzione della sorgente all’ora impostata per la sveglia (ad es. l’iPod non è collegato), viene riprodotta la tonalità.
USO DELLA FUNZIONE SVEGLIA Attivazione/disattivazione della sveglia 1 Premere ALARM. Pannello superiore Quando la sveglia è attivata, ne viene visualizzato l’indicatore AUTO 2 SET 2 1 1 DIMMER CLOCK BEEP SOUR ALARM ( ) e per alcuni istanti l’ora. Premendo nuovamente ALARM, l’indicatore della sveglia ( spengono. USB y LABEL SIDE L’ora impostata della sveglia viene salvata anche dopo lo spegnimento della stessa.
USO DEL TIMER PER LO SPEGNIMENTO È possibile impostare l’ora di spegnimento automatico del sistema. 1 Premere SNOOZE/SLEEP alcune volte finché il Pannello superiore AUTO 2 SET 2 1 1 DIMMER CLOCK USB sistema non si spegne. BEEP SOURC ALARM T LABEL SIDE Il timer per lo spegnimento può essere impostato su 30, 60, 90 e 120 minuti. Quando è stato impostato il tempo l’indicatore di spegnimento appare ( ) sul display del pannello anteriore.
RISOLUZIONE DEI PROBLEMI Se c’è un problema nell’unità, verificare innanzitutto l’elenco che segue. Qualora non si riuscisse a risolvere il problema applicando le soluzioni suggerite, o se il problema non rientra fra quelli elencati qui di seguito, spegnere l’unità e staccare la spina, quindi rivolgersi al più vicino rivenditore o centro di assistenza autorizzato Yamaha. Problemi di carattere generale Problema Impossibile accendere l’unità. Non esce alcun suono dagli altoparlanti.
RISOLUZIONE DEI PROBLEMI Riproduzione di un dispositivo USB Problema I file MP3/WMA nel dispositivo USB non vengono riprodotti. Causa Il dispositivo USB non è stato riconosciuto. Dopo la connessione di un dispositivo USB È stato collegato un dispositivo USB non compatibile all’unità. si ripete per 3 volte il doppio lampeggio dell’indicatore dell’USB. Il dispositivo USB non contiene file riproducibili.
NOTE SUI DISCHI E I DISPOSITIVI USB Informazioni sui CD Informazioni sui dispositivi USB Questa unità è progettata per l’uso con CD, CD-R* e CD-RW* con i seguenti loghi. * CD-R/RW formato ISO 9660 y Quest’unità può riprodurre dischi contrassegnati da uno dei loghi sopra riportati. I loghi sono stampati sui dischi e sulla relativa custodia. Note • Non caricare in quest’unità altri tipi di dischi. Farlo potrebbe danneggiarla. • Un CD-R/RW può essere riprodotto solo se finalizzato.
DATI TECNICI SEZIONE LETTORE iPod (Connessione digitale) • iPod compatibili ......................................................iPod touch (1a, 2a, 3a e 4a generazione) iPod classic iPod nano (2a, 3a, 4a, 5a e 6a generazione) • iPhone compatibili ........................................................................................................iPhone 4 iPhone 3GS iPhone 3G iPhone DATI GENERALI • • • • • Alimentazione ...............................................
CAUTION Use of controls or adjustments or performance of procedures other than those specified herein may result in hazardous radiation exposure. AVERTISSEMENT L’utilisation de commandes et l’emploi de réglages ou de méthodes autres que ceux décrits ci-dessous, peuvent entraîner une exposition à un rayonnement dangereux. VORSICHT Die Verwendung von Bedienelementen oder die Einstellung bzw.
ii
© 2011 Yamaha Corporation Printed in China WY78640