
manual

38 En
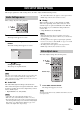
DVD SETUP MENU OPTIONS
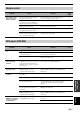
2 Select “Video Adjust”, and then press
ENTER.
The Video Adjust menu appears on-screen.
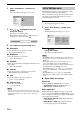
3 Use /// and ENTER to select and
change the settings.
The settings are explained below.
The Brightness, Contrast, Hue, and Chroma Level
settings can be adjusted by using / .
4 Press SETUP to close the Setup menu.
■ Sharpness
Adjusts the sharpness of edges in the picture.
• Fine, Standard (default), Soft.
■ Brightness
Adjusts the brightness of the picture.
• –20 to +20 (default: 0)
■ Contrast
Adjusts the contrast between the lightest and darkest areas
of the picture.
• –16 to +16 (default: 0)
■ Gamma
Adjusts the appearance of dark areas of the picture.
• High, Medium, Low, Off (default).
■ Hue
Adjusts the balance between green and red.
• green 9 to red 9 (default: 0)
■ Chroma Level
Adjusts the color saturation.
• –9 to +9 (default: 0)
Notes
• The effects of the Video Adjust settings depends on the source
material and your TV, and in some cases may not be that visible.
• The Sharpness setting does not apply to video output by the
HDMI jack.
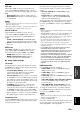
The Initial Settings menu contains digital audio output,
video, language, display, and other settings.
When a menu item is grayed out, it means that it cannot
currently be changed. The Initial Settings cannot be
changed during disc playback.
1 Press DISC and then SETUP.
The Setup menu appears on-screen.
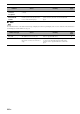
2 Select “Initial Settings”, and then press
ENTER.
The Initial Settings menu appears on-screen.
3 Use / / / and ENTER to select and
change the settings.
The settings are explained below.
Notes
• The HDMI Resolution and HDMI Color settings only need to
be changed if you’ve connected an HDMI component to the
HDMI jack.
• The Component Out settings cannot be changed if you’ve
connected an HDMI component to the HDMI jack.
• The Component Out settings may change automatically due to
the HDMI Resolution and HDMI Color settings.
• While HDMI Audio is set to on (☞p.15), or a component is
connected to the HDMI jack, only the Digital Out setting is
available.
• When HDMI Audio is set to on (☞p.15), 96 kHz PCM is
downsampled to 48 kHz regardless of the 96 kHz PCM Out
setting.
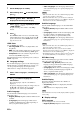
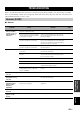
■ Digital Audio Out settings
Digital Out
Turns the OPTICAL DIGITAL OUT on and off.
• On (default): OPTICAL DIGITAL OUT is on.
• Off: OPTICAL DIGITAL OUT is off.
Dolby Digital Out
Turns Dolby Digital to PCM conversion on and off. If
you’ve connected the OPTICAL DIGITAL OUT to your
AV receiver/decoder and it doesn’t support Dolby Digital,
select Dolby Digital > PCM.
• Dolby Digital (default): Dolby Digital signals are
output as they are.
• Dolby Digital > PCM: Dolby Digital signals are
converted and output as 2-channel PCM.
Sharpness
Brightness
Contrast
Gamma
Hue
Chroma Level
Video Adjust
Fine
Standard
Soft
Brightness min max 0
Initial Settings menu
Video Output
Language
Display
Options
Initial Settings
Digital Audio Out Digital Out
Dolby Digital Out
DTS Out
96 kHz PCM Out
MPEG Out
On
Dolby Digital
DTS
96kHz > 48kHz
MPEG > PCM