UCGBA
IMPORTANT SAFETY INSTRUCTIONS I CAUTION RISK OF ELECTRIC SHOCK DO NOT OPEN CAUTION: TO REDUCE THE RISK OF ELECTRIC SHOCK, DO NOT REMOVE COVER (OR BACK). NO USER-SERVICEABLE PARTS INSIDE. REFER SERVICING TO QUALIFIED SERVICE PERSONNEL.
FCC INFORMATION (for US customers) 1. IMPORTANT NOTICE: DO NOT MODIFY THIS UNIT! This product, when installed as indicated in the instructions contained in this manual, meets FCC requirements. Modifications not expressly approved by Yamaha may void your authority, granted by the FCC, to use the product. Compliance with FCC regulations does not guarantee that interference will not occur in all installations.
CAUTION: READ THIS BEFORE OPERATING THIS UNIT • To assure the finest performance, please read this manual carefully. Keep it in a safe place for future reference. • Install this unit in a well ventilated, cool, dry, clean place - away from direct sunlight, heat sources, vibration, dust, moisture, and/or cold. Avoid ventilation space of at least 30 cm on the top, 20 cm on the left and right, and 10 cm on the back of this unit.
CAUTION: READ THIS BEFORE OPERATING THIS UNIT For US customers Allen voor klanten in Nederland Bij dit product zijn batterijen geleverd. Wanneer deze leeg zijn, moet u ze niet weggooien maar inleveren als KCA. This equipment complies with FCC radiation exposure limits set forth for uncontrolled equipment.
CONTENTS Getting started Features of the MusicCAST server ................................8 About this manual ..........................................................8 What is the MusicCAST system? ...................................9 Supplied accessories ...................................................10 Controls and functions (YAMAHA standard) ................11 Front panel .............................................................11 Rear panel .....................................................
Selecting a recording format .................................. 88 Setting recording speed ......................................... 88 Setting the Recording auto level function ............... 88 Deleting a CD-RW (Initialization) ................................. 89 Setting AV receiver parameters ................................. 122 Turning the Auto Levelling function on and off .......... 124 Setting the screen display ..........................................
Getting started Features of the MusicCAST server The MusicCAST system uses a wireless network to connect the MusicCAST server and MusicCAST clients, which call up and play songs stored in the MusicCAST server. You can use a MusicCAST client anywhere where it can receive wireless network signals from the MusicCAST server. Feature include • High speed storage of CDs to the internal hard disk drive.
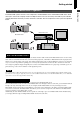
Getting started What is the MusicCAST system? Speaker Speaker MusicCAST server MusicCAST client TV/Monitor Speaker AV receiver Speaker What is the MusicCAST server? The MusicCAST server acts as a storage space for music and other audio material. The MusicCAST server can store many music CDs on its internal hard disk drive, which it can then play back, or distribute to MusicCAST clients for playback at a distance.
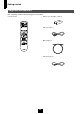
Getting started Supplied accessories After unpacking, check that the following parts are included.
Getting started Controls and functions (YAMAHA standard) Getting started Front panel 1 2 3 4 5 67 8 D E F G H I 9 0 A J B K C L M N 1 STANDBY/ON Switches the MusicCAST server between standby and power on modes. Press and hold STANDBY/ON for two seconds to place all MusicCAST clients in sleep mode and place the MusicCAST server in standby mode. A CLIENT STATUS indicators Light when MusicCAST clients connected to the MusicCAST server are activated and able to play back songs.
Getting started K LEVEL control Controls the volume level of the output to your headphones. L ANALOG REC LEVEL control Controls the recording level when recording from a source connected to the ANALOG IN jacks. M Front panel door N Front panel diaplay Displays information on the operations and status of the MusicCAST server.
Getting started Rear panel Getting started 1 VIDEO jacks 5 AUDIO jacks • OPTICAL (digital) IN jack Connects to the optical digital output jack on an external component to receive signals from the component over a digital optical connection. NOTE The MusicCAST server does not record any video signal. Video signals from the S VIDEO IN and VIDEO IN jacks are passed directly to the S VIDEO OUT and VIDEO OUT jacks respectively, and are not processed in the MusicCAST server at all.
Getting started Remote control 6 SONG STATISTICS Displays the Song Statistics screen on the on-screen display. 7 EXT. INPUTS Displays the External Input screen on the on-screen display. 8 RECORDING Displays the Recording screen on the on-screen display. 1 2 3 4 5 6 7 8 N O P Q R S T 9 0 A B C D H I U V W X Y Z [ \ ] ^ a b J c E F G 9 0 REPEAT Cycles through the MusicCAST server repeat modes. A Accesses the previous track in the playback group you are listening to.
Getting started O ALL SONGS Displays the All Songs screen on the on-screen display. Getting started P GENRES Displays the Genres screen on the on-screen display. Q CD Displays the CD screen on the on-screen display. R BOOKMARKS Displays the Bookmarks screen on the on-screen display. S CLIENT PLAYBACK Displays the Client Playback screen on the on-screen display. T AV RECEIVER Displays the AV Receiver screen on the on-screen display. U TIME Cycles the time display mode on the Play Information screen.
Getting started Preparing the remote controls ■ Using the remote control Preparing the MusicCAST server remote control ■ Inserting the batteries 1 Remove the cover on the underside of the remote control. 2 Insert two AA batteries into the battery compartment, checking that the positive (+) and negative (–) terminals on the batteries correspond to the polarity markings on the case. Signal receiver 3 Slide the cover back until it snaps into place. Approx.
Getting started Checking your system connections Router YAMAHA To Internet TV/Monitor MusicCAST client LAN VIDEO AUDIO PS/2 KEYBOARD (OPTIONAL) Keyboard MusicCAST client Speaker AV receiver Speaker Component check list ❍ TV/monitor Allows you to carry out all operations on the MusicCAST server from the on-screen display. ❍ MusicCAST client Plays any of the songs stored in the MusicCAST server.
Getting started MusicCAST server standby and power modes The MusicCAST server has four different standby and power modes, and uses each in a specific set of circumstances. The MusicCAST server consumes power in all modes, however standby modes generally consume less power than when the MusicCAST is in power on mode. The following diagram illustrates the MusicCAST server standby and power on modes, and the actions required to move between them.
Getting started Using this manual SECTION TITLE CONTENT 1 Getting started Use the manual, check your system connections, and learn about the basic operations of the MusicCAST server. 2 Storing music on the MusicCAST server Store CDs and audio material from external components connected to the MusicCAST server. Enter information on material that you have stored, such as artist, album, genre, or song titles.
Getting started Operating the MusicCAST server Use the remote control and the television connected to your MusicCAST server to carry out the procedures described in this manual. If you connect your MusicCAST server to a television, you can search for CD titles, artist names, and other data on screen. You can also set all the other parameters used to operate the MusicCAST system from this on-screen display.
Storing music on the MusicCAST server You can gain easy access to all of the songs in your CD collection, and play them back in multiple locations using MusicCAST clients if you store them on the hard disk drive in the MusicCAST server. Storing them together with the relevant album, artist, genre, and song titles enables you to quickly and simply search for songs you want to listen to and play them back.
Storing music on the MusicCAST server 4 Press TOP MENU. 8 Place a CD in the MusicCAST server in the disc tray. The Top Menu screen appears on the on-screen display. Place the CD in the tray label-side up, aligned with the grooves on the disc tray. 5 Use / to move the cursor to “Recording” and press SELECT. 9 Press OPEN/CLOSE to close the disc tray. The Recording screen appears on the on-screen display. The MusicCAST server reads the information on the CD. This operation can take a few seconds.
Storing music on the MusicCAST server • If the MusicCAST server finds more than one applicable entry in the Gracenote CDDB: The following screen appears on the on-screen display: The CD contents display screen When you load a CD, the MusicCAST server reads its type and volume, and looks for the names of the songs, album, artist, and genre in its built-in Gracenote CDDB® database.
Storing music on the MusicCAST server Storing a CD Store a CD on the hard disk drive of the MusicCAST server. 5 5 2,3 2,3 3 Use / / / to move the cursor to “Start” and press SELECT. 1 Follow the procedure described on page 21 to display the contents of a CD on the on-screen display. The MusicCAST server begins storing songs on its hard disk drive. The following screen appears on the on-screen display during recording: 2 Select the songs you want to store.
Storing music on the MusicCAST server 4 When storage is complete, the following screen appears on the on-screen display: Auto-storing CDs You can also use an automatic procedure to store CDs on your MusicCAST server. 1 Load a CD into the disc tray. • To check the content you have just stored, choose “Open stored album page” and press SELECT. • To store another CD, choose “Store another CD” and press SELECT. - The disc tray automatically opens.
Storing music on the MusicCAST server Recording audio material from an external component on the MusicCAST server The MusicCAST server can record material from external components such as MD and record players. It can also perform such functions as automatically finding gaps between songs in audio material and synchronize the starting and stopping of recording with playback from external components. Check component connections Connect the source component to the MusicCAST server.
Storing music on the MusicCAST server Recording 1 1 4, 5, 6, 7, 8, 9, 10, 11 1 Press STANDBY/ON to turn the MusicCAST server power on. 2 Turn the power of the TV/monitor connected to the MusicCAST server on, and set it to display the MusicCAST on-screen display. (refer to your TV/monitor manual for instructions on how to configure your TV/monitor). 4, 5, 6, 7, 8, 9, 10, 11 3 HINT You can also access the Recording screen by pressing RECORDING.
Storing music on the MusicCAST server 7 Set the recording level as necessary. Adjusting the recording level See page 28 for an explanation on adjusting recording levels. 8 Adjust the recording mode as necessary. Use / / / to move the cursor to an appropriate recording type and press SELECT. See page 29 for more information. There are different methods for adjusting recording levels for each source. Select the appropriate method for your recording source from those listed here.
Storing music on the MusicCAST server When recording from an analog source The MusicCAST server records anything from components connected to its analog input jacks as an analog source. The MusicCAST server has three recording modes. You can use when recording material from an external component. Select the recording mode that best suits your purpose. • “Manual” You must start and stop recording, divide tracks and carry out all other necessary functions manually.
Playback You can listen to music stored on the MusicCAST server, using album, artist, genre, or song title to search for the songs you want. During playback, the MusicCAST server displays the name of the song playing, and a left and right level meter at the bottom of the on-screen display. • Check that the MusicCAST server is correctly connected to an amplifier and speakers. • Switch the power of the amplifier connected to the MusicCAST server on before attempting to listen to any material.
Playback The Songs screen displays the format of each song. “PCM” indicates that the MusicCAST server has both PCM and MP3 copies of the song stored in its hard disk drive. “MP3” indicates that the MusicCAST server only has an MP3 version of the song stored. In addition, the following icons may appear beside the song title: 3 Use / to move the cursor to “Artists” and press SELECT. The Artists screen appears on the on-screen display.
Playback ■ To playback all songs from an artist: HINT • You can access the Artists screen directly by pressing ARTISTS. • You can set the MusicCAST server to play the next album by the select artist when playback of the current album is complete (see page 44). • You can set the MusicCAST server to repeatedly play songs by the same artist (repeat playback, page 46). You can also set it to play songs from the selected artist in random order (random playback, page 47).
Playback 3 Use / to move the cursor to “Albums” and press SELECT. There are two Play Information screens available during playback. Use / to switch between them. See page 39 for a detailed explanation of the playback screens. The albums stored in the MusicCAST server appear on screen in alphabetical order. The screen can display 10 albums at a time. Use / to scroll the display up or down to see more albums. Press MENU to return to the list screen. Pressing PLAY INFO. displays the Play Information screen.
Playback Selecting a song by its genre 1 2,3,4, 5,6 1 2,3,4,5,6 1 Press TOP MENU. 3 Use / to move the cursor to “Genres” and press SELECT. The Top Menu screen appears on the on-screen display. The genres stored in the MusicCAST server appear on screen in alphabetical order. The screen can display 10 genres at a time. Use / to scroll the display up or down to see more genres. 2 Use / to move the cursor to “Library” and press SELECT. The Library screen appears on the on-screen display.
Playback 5 Use / to select an album and press SELECT. All of the songs on the album you select appear on the onscreen display. HINT ■ To stop playback Press 6 Use / to select a song and press SELECT. The Play Information screen appears on the on-screen display and playback begins. . ■ To temporarily halt playback Press . Press again to resume playback. ■ To playback all songs from a genre: In step 3 of the previous procedure, press SUB MENU, use / / / to select “Play”, and press SELECT.
Playback Selecting a song by its name 1 2,3,4 1 2,3,4 1 Press TOP MENU. 3 Use / to move the cursor to “All Songs” and press SELECT. The Top Menu screen appears on the on-screen display. The Songs screen appears on the on-screen display. 2 Use / to move the cursor to “Library” and press SELECT. The songs stored in the MusicCAST server appear on screen in alphabetical order. The screen can display 10 songs at a time. Use / to scroll the display up or down to see more songs.
Playback There are two Play Information screens available during playback. Use / to switch between them. See page 39 for a detailed explanation of the playback screens. Press MENU to return to the list screen. Pressing PLAY INFO. displays the Play Information screen. HINT The MusicCAST server does not display album, artist, or genre information on the all songs selection menu. You can use the song linking function to open the Album screen for a song you select from the Songs screen.
Playback Selecting a song from the list of bookmarks The MusicCAST server stores a list of songs that you attach bookmarks to, which you can access for easy reference and playback. See page 53 for an explanation of how to assign bookmarks. 1 Press TOP MENU. 4 Use The Top Menu screen appears on the on-screen display. / to select a song and press SELECT. The Play Information screen appears on the on-screen display and playback begins. 2 Use / to move the cursor to “Library” and press SELECT.
Playback The Play Information screen If you choose a song and press SELECT, or if you press PLAY INFO. during playback, information on the current song appears on the on-screen display. Use / to switch between the two available Play Information screens. The Play Information screen time display The above screen displays the album, artist, and genre to which the current song is assigned.
Playback To use the sub menu: 1 Press SUBMENU. The Play Information screen submenu appears on the onscreen display. 2 Use / / / to move the cursor to the sub menu field you want to select and press SELECT. The selected setting changes. 3 To close the sub menu, move the cursor to and press SELECT to close the submenu, or alternatively press SUB MENU.
Playback Playback of songs from a preselected list (Playlist) You can make lists (playlists) of your favorite songs from songs you have stored on the MusicCAST server. You can also include albums, artists, and genres in playlists. Additionally, since the MusicCAST server can make CDs from playlists, they are useful when making original CDs. The MusicCAST server divides playlists into groups. You can adjust the classification method for each playlist.
Playback 4 Use / to select a collection and press SELECT. There are two Play Information screens available during playback. Use / to switch between them. See page 39 for a detailed explanation of the playback screens. All of the playlists in the MusicCAST server assigned to the collection you select appear in alphabetical order on the onscreen display. The screen can display 10 items at once. Use / to scroll the display up or down to see more playlists. Press MENU to return to the list screen.
Playback Searching for a specific part of a song (Search) Search forward Press during playback. Playback resumes when you stop pressing . Search backward NOTE You can also use the search function when you have paused playback using . Skipping to another song Skipping to the next song Skipping to the previous song Press . Press repeatedly to advance to successive songs in the playback group. Press twice. Press repeatedly to return to previous songs in the playback group.
Playback Groups The MusicCAST server lets you playback songs with various associations. The following associations, called Groups, are available: • • • • • • • Album Artist Genre Playlist Bookmark, All songs Recorded songs Song Statistics The selection criteria you use to choose a song for playback also defines the playback group. Using the library screens to choose selection criteria to listen to selects all songs within the selected group for playback.
Playback Listening to Playlists Select an artist from the Artists screen (see page 30) and either press , or press SUB MENU, select “Play” and press SELECT. Select a playlist from the playlist list screen (see page 41) and either press , or press SUB MENU, select “Play” and press SELECT.
Playback Repeat Playback You can set the MusicCAST server to repeat playback of songs, albums, artists, and playlists. REPEAT PLAY INFO. PLAY INFO. 1 Press PLAY INFO. to display the Play Information screen. 2 Press REPEAT. The repeat mode changes with each press. • “Repeat-all” repeats playback of all songs within the current group. • “Repeat-single” repeats playback of the currently playing song, or of the currently selected song.
Playback Random Playback You can set the MusicCAST server to play back songs from albums, artists, genres, and playlists in random order. Playback RANDOM PLAY INFO. PLAY INFO. 1 Press PLAY INFO. to display the Play Information screen. 2 Press RANDOM. The repeat mode changes with each press. • “Random-on” indicates that random playback of all songs within the current group is active. • “Random-off” indicates that the random playback function is not active.
Playback Using the MusicCAST server to listen to CDs You can use the MusicCAST server as a standard CD player to listen to CDs. 1 Press OPEN/CLOSE to open the disc tray. If there is already a CD in the MusicCAST server, skip directly to step 4. 2 Place the CD in the MusicCAST server in the disc tray. Place the CD in the tray label-side up, aligned with the grooves on the disc tray. 6 Use / to move the cursor to “CD”and press SELECT.
Playback 7 Use / to select a song and press SELECT. The Play Information screen appears on the on-screen display and playback begins. Playback There are two Play Information screens available during playback. Use / to switch between them. See page 39 for a detailed explanation of the playback screens. Press MENU to return to the list screen. Pressing PLAY INFO. displays the Play Information screen. Playback stops when the MusicCAST server has played back all songs on the CD.
Playback Using the MusicCAST server to listen to external components You can listen to material from external components, such as MD players, connected to the MusicCAST server. 4 Use / to select “Input monitor” and press SELECT. Check that the external component is correctly connected to the MusicCAST server before you carry out this procedure. A screen prompting you to choose an input appears on the onscreen display. 1 Press TOP MENU. The Top Menu screen appears on the on-screen display.
Playback Listening to songs recorded from external components You can listen to songs stored on the MusicCAST server recorded from external components. 1 Press TOP MENU. The Top Menu screen appears on the on-screen display. Playback The screen also displays the date and time the songs were recorded. 2 Use / to move the cursor to “Library” and press SELECT. NOTE The Library screen appears on the on-screen display. You may need to set the correct date and time on the MusicCAST server.
Playback Listening to MP3 CDs Use the MusicCAST server to listen to MP3 CDs. 4 Press TOP MENU. 1 Press OPEN/CLOSE to open the disc tray. If there is already a CD in the MusicCAST server, skip directly to step 4. The Top Menu screen appears on the on-screen display. 2 Place the CD you wish to store in the MusicCAST server in the disc tray. Place the CD in the tray label-side up, aligned with the grooves on the disc tray. 5 Use / to move the cursor to “Library” and press SELECT.
Playback 7 Use / to move the cursor to an album and press SELECT. The names of all of the songs in the album appear on the onscreen display. 8 Use / to move the cursor to the song you want to listen to and press SELECT. HINT Press BACK to return to the previous screen. Move the cursor to “ROOT” and press SELECT to playback all the songs on the disc. Playback of the song you select begins. Bookmarking songs for listening These marks are called “bookmarks”.
Playback 3 Use / to move the cursor to “Bookmark” and press SELECT. 4 Use / to move the cursor to “Delete” and press SELECT. The Bookmark screen appears on the on-screen display. The Delete Sub Menu appears on the on-screen display. The screen can display 10 bookmarks at a time. Use / scroll the display up or down to see more bookmarks. to 4 Use / to select a song to listen to and press SELECT. The Play Information screen appears on the on-screen display and playback begins.
Playback 4 Use / and SELECT to place a check in the “Delete all” checkbox. 5 Use / to move the cursor to “OK” and press SELECT. The MusicCAST server deletes all bookmarks. Use / to move the cursor to “Quit” and press SELECT to exit from the submenu. Playback using the “Song Statistics” screen 1 Press TOP MENU. The Top Menu screen appears on the on-screen display. 3 Use / to move the cursor to “Song Statistics” and press SELECT. The Song Statistics screen appears on the on-screen display.
Playback There are two Play Information screens available during playback. Use / to switch between them. See page 39 for a detailed explanation of the playback screens. ■ To stop playback Press . ■ To temporarily halt playback Press . Press again to resume playback. Displaying library item properties on screen Carry out the following procedure to display useful information about library items on the on-screen display.
Editing Editing capabilities of the MusicCAST server The MusicCAST server organizes the songs it stores by song, artist, album, and genre name. Although you can store songs without providing this information, finding the songs listen is much easier if the relevant names are stored together with the songs. The MusicCAST server provides a variety of methods of assigning this information to songs. Where such data exists, it assigns names obtained from its built-in Gracenote CDDB database to songs.
Editing ■ Genre list (Genres) screen SUB MENU FIELD CONTENT PAGE Play Play material from the currently selected genre. 34 Add to playlist Add the currently selected genre to a playlist. 75 Edit title Enter or edit the name of the currently selected genre. 68 Delete Delete the currently select genre from the MusicCAST server database. 69 New genre Create a new genre in the MusicCAST server database. 68 Set program Registers surround program settings to the currently selected genre.
Editing Editing album details Create an album from songs within the MusicCAST server, and edit or delete existing albums in the MusicCAST server database. Opening the album editing screen (sub menu) 3 Use / to move the cursor to “Albums” and press SELECT. The Albums screen appears on the on-screen display. Follow the procedure below to open the album editing screen, and edit album details. 1 Press TOP MENU. The Top Menu screen appears on the on-screen display.
Editing Creating a new album Changing an album name You can create an album out of songs you select from those stored in the MusicCAST server. You can change the name of albums stored in the MusicCAST server database. This is useful in cases such as when the MusicCAST server is not able to obtain any album name data during the storage process, or when you record material from an external component.
Editing Deleting an Album Moving an album to another artist You can delete an album from the MusicCAST server database. 1 Press TOP MENU. The Top Menu screen appears on the on-screen display. 1 Follow the procedure described on page 59 “Opening the album editing screen” to display the album editing screen. 2 Use / to move the cursor to “Delete” and press SELECT. The following screen appears. Editing 2 Use / to move the cursor to “Library” and press SELECT.
Editing 4 Use / to move the cursor to an artist and press SELECT. Moving an album to another genre The albums of the artist you select appear on the on-screen display. 1 Press TOP MENU. The Top menu screen appears on the on-screen display. 5 Use / to move the cursor to the album you want to move and press SUB MENU. 2 Use / to move the cursor to “Library” and press SELECT. The Sub Menu appears on the on-screen display. The Library screen appears on the on-screen display.
Editing 4 Use / to move the cursor to a genre and press SELECT. The albums of the genre you select appear on the on-screen display. NOTE You can create a new genre from the movement Sub Menu. Use / to move the cursor to “New genre”, press SELECT, and enter the name of the new genre. Move the cursor to “OK”, and press SELECT. The new genre appears in the selection list. Editing 5 Use / to move the cursor to the album you want to move and press SUB MENU. The Sub Menu appears on the on-screen display.
Editing Editing artist details Create a new artist, and edit or delete existing artists in the MusicCAST server database. 3 Use / to move the cursor to “artists” and press SELECT. Opening the artist editing screen (sub menu) The Artists screen appears on the on-screen display. Follow the procedure below to open the artist editing screen, and edit artist details. 1 Press TOP MENU. The Top Menu screen appears on the on-screen display. HINT You can access the Artists screen directly by pressing ARTISTS.
Editing Creating a new artist Changing an artist name You can create a new artist and store it in the MusicCAST server database. You can change the name of artists stored in the MusicCAST server database. This is useful in cases such as when the MusicCAST server is not able to obtain any artist name data during the storage process, or when you record material from an external component. 1 Follow the procedure described on page 64 “Opening the artist editing screen” to display the artist editing screen.
Editing Deleting an artist You can delete an album from the MusicCAST server database. 1 Follow the procedure described on page 64 “Opening the artist editing screen” to display the artist editing screen. 2 Use / to move the cursor to “Delete” and press SELECT. The following screen appears. 3 Use / to move the cursor to “OK” and press SELECT. The MusicCAST server deletes the selected artist and all related albums and songs from its database.
Editing Editing Genre details Create a new genre, and edit or delete existing genres in the MusicCAST server database. Opening the genre editing screen (sub menu) 4 Use / to move the cursor to the genre you want to edit, and press SUB MENU. The Sub Menu appears on the on-screen display. Follow the procedure below to open the genre editing screen, and edit artist details. 1 Press TOP MENU. The Top Menu screen appears on the on-screen display. Editing NOTE You can move or delete genres during playback.
Editing Creating a new genre Changing a genre name You can create a new genre and store it in the MusicCAST server database. You can change the name of genres stored in the MusicCAST server database. This is useful in cases such as when the MusicCAST server is not able to obtain any genre name data during the storage process, or when you record material from an external component. 1 Follow the procedure described on page 67 “Opening the genre editing screen” to display the genre editing screen.
Editing Deleting a genre You can delete a genre from the MusicCAST server database. 1 Follow the procedure described on page 67 “Opening the genre editing screen” to display the genre editing screen. 2 Use / to move the cursor to “Delete” and press SELECT. The following screen appears. Editing 3 Use / to move the cursor to “OK” and press SELECT. The MusicCAST server deletes the selected genre, album, and song data from its database. NOTE To delete the PCM files only, use / to move the cursor to “Del.
Editing Editing songs Edit song names and delete songs from the database on your MusicCAST server. 3 Use / to move the cursor to “All songs” and press SELECT. Opening the song editing screen (Sub menu) The Genres screen appears on the on-screen display. Follow the procedure below to open the song editing screen, and edit song details. 1 Press TOP MENU. The Top Menu screen appears on the on-screen display. HINT You can access the Songs screen directly by pressing ALL SONGS.
Editing Changing a song name Deleting a song You can change the names of songs stored in the MusicCAST server database. This is useful in cases such as when the MusicCAST server is not able to obtain any song name data during the storage process, or when you record material from an external component. You can delete a song from the MusicCAST server database. 1 Follow the procedure described on page 70 “Opening the song editing screen” to display the song editing screen.
Editing Editing songs recorded from external components The MusicCAST server does not automatically store any song, album, artist, or genre information when it records material from external components. You can add this information to songs you create using the editing functions described in this section, and store the songs in the MusicCAST server library. Assigning a name to a song recorded from an external component also automatically starts the procedure of encoding the song into MP3 format.
Editing 5 Use / to move the cursor to the song you want to edit, and press SUB MENU. The Sub Menu appears on the on-screen display. 4 When you finish entering the song name, use / / / to move the cursor to “OK” and press SELECT. The display returns to the song list. Select “Cancel” and press SELECT to return to the Sub Menu without changing the name. Press BACK to return to the previous screen. Deleting a song You can delete a song from the MusicCAST server database.
Editing Moving a song You can move songs to different artists, albums, or genres. This moving process also automatically starts the procedure of encoding songs recorded from external components into MP3 format. 1 Follow the procedure described on page 70 to display the song editing screen. 2 Use / to move the cursor to “Move to” and press select. The destination selection screen appears in the Sub Menu. 3 Use / to move the cursor to the album you want to move the song to and press SELECT.
Editing Making playlists Make and store lists (playlists) of your favorite songs and albums on the MusicCAST server for easy access. The MusicCAST server stores playlists in 10 groups, called collections. You can make up to 1007 playlists, each containing up to 999 items, and assign them to collections in any way you like. Carry out the procedure below to create a playlist. 1 5, 10 1 Press TOP MENU. The Top Menu screen appears on the on-screen display.
Editing 5 Press SUB MENU to display the Sub Menu. 6 Use / / / to move the cursor to “New Playlist” and press SELECT to open the playlist name entry screen. 9 Use / to move the cursor to the name of the playlist you created and press SELECT. The following screen appears on the on-screen display. The playlist name entry screen appears on the on-screen display. 7 Use / / / to select characters and enter the playlist name. See page 78 for an explanation of how to enter characters.
Editing 12 Select songs to add to the playlist. • Using artist names to select songs. Select “Artists”, choose an artist, and then select a song. The songs you select appear on the left of the on-screen display, in the order you select them in. If you select on Artist, move the cursor to “add” and press SELECT, the MusicCAST server adds all of songs from artist to the playlist. • Using album names to select songs. Select “Albums”, choose an album, and then select a song.
Editing Using the on-screen keyboard to enter characters This section explains how to use the on-screen keyboard to enter characters on all entry screens. If you connect a PS/2 keyboard to the MusicCAST server, you can use it to enter characters directly from these screens. See page 79 for a detailed explanation. 1 Use / / SELECT. / to select a character, and press The selected character appears in the character palette. You can carry out the following procedures from this screen.
Editing Using a PS/2 keyboard with the MusicCAST server You can use a PS/2 keyboard connected to the PS/2 port on the front panel of the MusicCAST server to enter and edit information in the MusicCAST server whenever the on-screen keyboard appears on the on-screen display. You can also use the keyboard to duplicate certain functions that you would normally carry out with the remote control or front panel controls.
Creating CDs Use the MusicCAST server to make original CDs containing songs you select from those stored in its database. You can also use it to duplicate directly any CDs you own. The CD-Rs and CD-RWs produced by the MusicCAST server can be played in most general-purpose CD player. Some CD and DVD players cannot play CDs recorded using the MusicCAST server. Consult your CD player manual for further details.
Creating CDs 4 Press TOP MENU. The Top Menu screen appears on the on-screen display. 8 Use / to move the cursor to “Record songs from library” and press SELECT. A list of songs designated for recording appears on the onscreen display. 5 Use / to move the cursor to “Recording” and press SELECT. The Recording screen appears on the on-screen display. 9 Use / / / to move the cursor to “Collect Songs” and press SELECT. The Library Menu appears on the on-screen display.
Creating CDs • To select songs from a playlist Select “Playlists” and then the song you want to record. The name of the song you select appears on the left of the display. Song names appear in the order you select them. HINT Moving the cursor to one of the icons listed below and press SELECT to produce the effect described: • To select songs from the “Song statistics” list Select “Song Statistics”, select a classification, and then the song you want to record.
Creating CDs 11 Repeat step 10 until you have selected all the songs you wish to record. If you want to cancel a selected song, use / / / to select the song you want to cancel, then move the cursor to “Delete” and press SELECT. Selecting “Clear all songs” and pressing SELECT cancels all songs. 12 When you have finished selecting songs, use / / / to select “Start” and press SELECT. Recording starts, and a progress bar appears on the on-screen display.
Creating CDs Removing a song from the recording list 1 Follow the procedure described on page 81 to display the list of songs designated for recording. 2 Use / / / to select a song to cancel. 3 Use / / / to select “Delete”. 4 Press SELECT. The name of the song you select is displayed in red. 5 Use / to select “OK” and press SELECT. The song you select is deleted in the name of the next song in the list turns red.
Creating CDs Recording a CD to a CD-R (Duplicating a CD) Use the MusicCAST to duplicate directly any CDs you own. The CDs that the MusicCAST server creates cannot be copied. 1, 3, 8 4 1, 3, 8 5, 6, 7, 9 4 5, 6, 7, 9 2 Place the CD you want to duplicate in the disc tray. The Recording screen appears on the on-screen display. 3 Press OPEN/CLOSE to close the disc tray. Pushing the disc tray gently causes it to close. Wait until the MusicCAST server finishes reading the disc. 4 Press TOP MENU.
Creating CDs 7 Use / to move the cursor to “CD Duplicate” and press SELECT. • When you push SELECT to cancel recording, the MusicCAST server deletes the data that had been transferred up to the point of cancellation. • Due to the rules imposed by the SCMS (Serial Copy Management System) the MusicCAST server cannot duplicate tracks which do not allow digital copying.
Creating CDs What is Finalization? Finalization is the processing of CD-Rs and CD-RWs so that standard CD players, and CD-RW capable players can read them. You cannot use the MusicCAST server to add songs to a finalized CD-RW. Initialize the CD-RW to make it recordable (see page 89). 12 Once duplication is complete, the MusicCAST server finalizes the CD-R/CD-RW. The MusicCAST server stops when it completes the duplication action process.
Creating CDs Setting recording parameters You can adjust the quality and speed of the recording process using the settings described in this section. Setting recording speed Select “x1” under the “Speed” heading to record at normal playback speed, and “Best effort” to record at the fastest speed possible under current conditions. Setting the Recording auto level function Use / / / and SELECT to set the parameters. When you are finished, use / / / to select “OK” and press SELECT.
Creating CDs Deleting a CD-RW (Initialization) Delete previously recorded material from a CD-RW and re-record new material onto it. This process of deletion is called “initialization”. 1 Carry out steps 1 to 3 on page 80 to load the CD-RW you want to initialize into the MusicCAST server. 5 Use / to move the cursor to either “quick mode” or “normal mode” and press SELECT. • quick mode: The quickest method of initializing a CD-RW.
Using the MusicCAST with a YAMAHA AV receiver If you connect a YAMAHA receiver to your MusicCAST server using a cross type RS-232C cable, the MusicCAST server can control the volume, change inputs and effect programs, and perform other operations in combination with the receiver, as well as transmit radio broadcasts from YAMAHA AV receivers to MusicCAST clients. RS-232C RS-232C 1 Press TOP MENU. 3 Use / to move the cursor to the parameter you want to change.
Using the MusicCAST with a YAMAHA AV receiver [ Automatically adjusting AV receiver surround effect settings for a genre You can set the MusicCAST receiver to automatically change the surround program settings on a YAMAHA AV receiver for each genre it plays back. This allows you to choose the setting that most suits a specific genre. Carry out the following procedure to set a surround sound effect for a genre.
Controlling MusicCAST clients Remotely control any MusicCAST clients connected to your MusicCAST server. This function allows you to operate multiple MusicCAST clients simultaneously, and to check what specific MusicCAST clients are playing. Checking the status of a MusicCAST client You can check the current status of any MusicCAST client connected to the MusicCAST server. 1 Press TOP MENU. 3 Use / to move the cursor to the MusicCAST client you want to check and press .
Controlling MusicCAST clients MusicCAST client playback from the MusicCAST server Start playback on any MusicCAST client connected to the MusicCAST server. 1 Press TOP MENU. The on-screen display can display details for up to 5 MusicCAST clients simultaneously. Use / to view the details of other MusicCAST clients. The Top Menu screen appears on the on-screen display. 3 Use / to move the cursor to the MusicCAST client you wish to operate and press SELECT. 4 Select a playback method.
Controlling MusicCAST clients 3 Press SUB MENU. 4 Use / to move the cursor to “Lock On/Off” and press SELECT. The Sub Menu appears on the on-screen display.
Controlling MusicCAST clients Controlling the MusicCAST client Sleep mode from the MusicCAST server Switch MusicCAST clients between sleep and power on modes using the MusicCAST server. 1 Carry out the procedure described on page 92 to display the Client Playback screen. 3 Press SUB MENU. 2 Use / to move the cursor to select a MusicCAST client. 4 Use / to move the cursor to “Sleep / On” and press SELECT. The Sub Menu appears on the on-screen display.
Controlling MusicCAST clients 6 When you have finish entering the new MusicCAST client name, use / / / to move the cursor to “OK” and press SELECT to confirm the new name and close the Sub Menu. Select “Cancel” to close the Sub Menu without changing the name.
Using the Timer function for playback and recording Use the Timer function to automatically start playback on the MusicCAST server or MusicCAST clients, start recording on the MusicCAST server, or place MusicCAST components in standby or sleep modes at the time you set in the Timer Setup screen on the MusicCAST server. MusicCAST Server Timer functions Setting playback Timer details for the MusicCAST server 4 Use / to move the cursor to “Playback Timer” and press SELECT.
Using the Timer function for playback and recording 9 Select an item to start playback from. • Using artist names Select “Artists”, choose an artist, move the cursor to “select” and press SELECT. Timer playback will start from this artist. Starting recording on the MusicCAST server at a preset time • Using album names Select “Albums”, choose an album, move the cursor to “select” and press SELECT. Timer playback will start from this album. 1 Press TOP MENU.
Using the Timer function for playback and recording 4 Use / / / to move the cursor to “Use recording timer” and press SELECT. 10 Use / to move the cursor to “OK” and press SELECT. The Recording Timer screen appears on the on-screen display. The Timer recording function activates and the MusicCAST server returns to the prevous screen. Select “Cancel” to return to the previous screen without activating the Timer recording function.
Using the Timer function for playback and recording 3 Use / to move the cursor to “Server Timer Functions” and press SELECT. The Server Timer Functions screen appears on the on-screen display. 4 Use / to move the cursor to the “Activate” checkbox and press SELECT. A tick appears in the “Activate” checkbox. To deactivate the Timer function, use / to move the cursor to the “Activate” checkbox and press SELECT again. NOTE You can also activate and to deactivate the Timer function by pressing TIMER.
Using the Timer function for playback and recording MusicCAST client Timer functions Setting playback Timer details for MusicCAST clients 4 Use / to move the cursor to the name on the MusicCAST client you want to set to the Timer for and press SELECT. The client timer setting screen appears on the on-screen display. 1 Press TOP MENU. The Top Menu screen appears on the on-screen display. 2 Use / to move the cursor to “Timer Setup” and press SELECT.
Using the Timer function for playback and recording Activating the Timer function You must activate the Timer function separately from setting the actual Timer details in order to use the MusicCAST client playback Timer. The Timer will not function if you do not activate it, even if you set other parameters on the Timer function screens. 4 Use / / / to move the cursor to the checkbox beside the name off the MusicCAST client whose Timer you wish to activate and press SELECT.
Using the Timer function for playback and recording Pressing SELECT when the cursor is on a selection option such as “Artists” moves selection one level deeper into the selection menu. For example pressing SELECT the cursor is on an artist displays all albums linked to this artist for selection. During the selection process, the icons to the right of the selection list have the following functions: Return one level up the selection menu. Close the selection menu.
Configuring the MusicCAST network The MusicCAST server stores all data used in your MusicCAST system, and distributes it to MusicCAST clients for playback. MusicCAST clients do not store or record any music data. All components in the MusicCAST system use a Local Area Network (LAN) for transmission and reception data. The MusicCAST system can use both wired and wireless network connections to transmit music data. Both types of connections transmit the same data, but use different methods to do so.
Configuring the MusicCAST network What is a wired network connection, and when should I use one? Wired networks use cables (called LAN cables or CAT-5 cables) connected between components to transfer data to a central network component (a network hub), which then transfers the data on to the appropriate destination. To use wired connections in the MusicCAST system you need to physically connect your MusicCAST clients and servers to a hub with LAN cables.
Configuring the MusicCAST network MusicCAST network configuration The MusicCAST server and MusicCAST clients are equipped with an Auto Configuration function that makes configuring network settings on both the MusicCAST server and MusicCAST clients a quick and easy process. Alternatively you can set all relevant network parameters manually if you wish.
Configuring the MusicCAST network 3 If the following screen appears on your MusicCAST client on-screen display, use / on the MusicCAST client remote control or front panel to select the server ID that appears on the top right of the MusicCAST server on-screen display. 6 Use / / / to move the cursor to “OK” and press SELECT to save the changes you have made and complete the Auto Configuration process. The MusicCAST server restarts its network hardware. This can take a few minutes.
Configuring the MusicCAST network MusicCAST Server network “Expert Settings” This section explains the purpose and function of each screen in the MusicCAST server network setting menus available in the “Expert Settings section”. Usually, the Auto Configuration functions of the MusicCAST server and client will enable you to successfully connect all of your MusicCAST components. However, you can also use the screens detailed in this section to configure the MusicCAST network manually if necessary.
Configuring the MusicCAST network 2 Use / to move the cursor to “IP Address” and press SELECT. The IP Address screen appears on the on-screen display. ■ Setting the IP address of the MusicCAST server • What is an IP address? Each component on a network uses an address to identify itself to other components on the same network. The address consists of four numbers and looks like this: 1 Carry out the procedure described on page 108 to display the IP Address screen on the onscreen display.
Configuring the MusicCAST network ■ Setting the MusicCAST server to obtain an IP DHCP service screen address from a DHCP server You can set the MusicCAST server to obtain an IP address from a DHCP server. In this case the MusicCAST server also automatically obtains Subnet Mask, Default Gateway, and DNS Server settings.
Configuring the MusicCAST network To set the ESSID and WEP parameters on this screen use / / / to move the cursor to the appropriate field and press SELECT, then use the on screen keyword or a PS/2 keyboard to enter the appropriate setting. Move the cursor to “OK” and press SELECT to confirm your setting, or select “Cancel” and press SELECT to exit the screen without making any changes. Wireless LAN screen Use this screen to set the wireless LAN parameters for the MusicCAST system wireless network.
Configuring the MusicCAST network 3 Use / to move the cursor to “Network” and press SELECT. The Network screen appears on the on-screen display. Wireless LAN screen This screen shows the following information about the status of the wireless network connections in the MusicCAST system network: • Communication Quality The quality of the signal the MusicCAST client is receiving. • Signal Level The strength of the signal the MusicCAST client is receiving.
Configuring the MusicCAST network MusicCAST client ID manual configuration Use this screen to manually enter the ID slof the MusicCAST clients you wish to connect to the MusicCAST server. Refer to page 55 of the MCX-A10 owner’s manual for more information on how to check the ID of your MusicCAST client. Carry out the following procedure to enter a MusicCAST client ID: 1 Press TOP MENU. The Top Menu appears on the on-screen display. 4 Use / to move the cursor to “Manual Configuration” and press SELECT.
Configuring the MusicCAST network 6 When you have finished setting codes, use / / / to move the cursor to “OK” and press SELECT to confirm the settings you have made and exit the screen. To exit the screen without making any changes move the cursor to “Cancel” and press SELECT. You should now set the following parameters on the MusicCAST client 1 Server ID (for both wired and wireless connections).
System setup This section explains how to configure the MusicCAST system settings. You can set each parameter using the setting screens on the on-screen display. System Setup menus The system setup section contains the following menus: • on-screen display (page 124) Select the menu page the MusicCAST server displays when you turn it on. • Network Configure MusicCAST network settings to enable MusicCAST clients to connect to the MusicCAST server, and to connect the MusicCAST server to the Internet.
System setup Setting menu Date / Time Parameter group Parameter name Expert settings - DHCP Service MusicCAST server DHCP service OFF Range start 192.168.1.2 Use NTP Server Parameter setting No Synchro Interval 12 hour Time zone U/C : - 5:00 B : 0:00 G : + 1:00 A : + 10:00 J : + 9:00 Day Light Saving Manual Setup Video Out Date 1.1.2003 Time 0:00:00 Delay before halting display 30 sec.
System setup Opening the system setting screens 1 2 2 1 Press TOP MENU The Top Menu screen appears on the on-screen display. 1 2 Use / to move the cursor to “System Setup” and press SELECT. The System Setup screen appears on the on-screen display. There are 15 parameters in all. Use / to select the parameter you wish to alter. Setting the date and time Use this screen to set the date and time settings in the MusicCAST server.
System setup 3 Set the date and time. • To set the date and time manually Remove the check from the “Use NTP server” checkbox, and use / / / to move the cursor to the field you want to set. Use / / / to change the setting. Refer to page 78 for an explanation of how to use the character entry screen. When you finish entering the address, use / / / to move the cursor to “OK” and press select. Select “Cancel” to return to the Date/Time screen without changing any settings.
System setup Setting the video output parameters You can change the manner in which the MusicCAST outputs the on-screen display to the TV/monitor. You can set it to always output the display, or to automatically turn the display off when you are not using it. 1 Follow the procedure described on page 117 “Opening the system setting screens” to display the System Setup screen. When the MusicCAST server is set in Type 2 mode, pressing and holding MENU or PLAY INFO.
System setup 3 Set the connection parameters. Use / / / and SELECT to place a check in the checkbox of the function you want the MusicCAST server to use. You can select multiple options if necessary. • Perform CD lookups automatically The MusicCAST server automatically refers to the Gracenote CDDB for information every time you load a CD in the disc tray. • Use MusicCAST server database The MusicCAST server uses the Gracenote CDDB stored on its internal hard disk to search for CD information.
System setup Set the MusicCAST server data storage format Set the format which the MusicCAST server uses to store songs. 1 Follow the procedure described on page 117 “Opening the system setting screens” to display the System Setup screen. 2 Use / to move the cursor to “Recording” and press SELECT. The Recording screen appears on the on-screen display. 3 Use / / HINT Press BACK to return to the previous screen.
System setup Setting AV receiver parameters Set the parameters for use with an AV receiver connected to the MusicCAST server with an RS-232C cable. ■ Audio connection settings • Check that the MusicCAST server and the AV receiver are connected correctly. • You can check that the AV receiver you use is controllable from the MusicCAST server on page 133. Set the AV receiver input on the AV receiver connected to the MusicCAST server.
System setup • Synchronize power ON/OFF with the MusicCAST The AV receiver will turn on when you turn the MusicCAST server on. • Change surround program for each genre played. The MusicCAST server will automatically change the surround program on the AV receiver to suit the song it is playing back. To automatically change the surround settings on the AV receiver, you first need to register surround information to the songs recorded on the MusicCAST server (see page 91).
System setup Turning the Auto Levelling function on and off Turn Auto Levelling function on or off. Auto Levelling automatically produces or increases the base volume of playback to a theoretical average in order to eliminate any large differences in the volume at which songs were recorded. 1 Follow the procedure described on page 117 “Opening the system setting screens” to display the System Setup screen.
System setup Enabling PCM format playback on MusicCAST clients Turn PCM format distribute to MusicCAST clients on or off, and designate the client the MusicCAST server distributes PCM format songs to. Songs distribute with a PCM format generally have a better sound quality than MP3 format songs. NOTE • The MusicCAST server can distributes songs in PCM format to one MusicCAST client only.
System setup Setting up a PS/2 keyboard Connect a standard PS/2 keyboard to the PS/2 keyboard jack on the front panel of the MusicCAST server to make entering characters and numbers easier. Use this screen to configure the MusicCAST server for the keyboard you wish to connect to it. NOTE Disconnect the MusicCAST server from the AC outlet before attempting to connect the PS/2 keyboard. 1 Follow the procedure described on page 117 “Opening the system setting screens” to display the System Setup screen.
System setup 3 Use / / / to select a standby mode, and press SELECT. 4 Use / / / to move the cursor to “OK” and press SELECT. The display returns to the System Setup screen. Select “Cancel” to return to the System Setup screen without changing any settings. • “Mode 1” You can only activate the MusicCAST server from the remote control or the MusicCAST server.
System setup Deleting data from the hard disk drive You can delete the PCM data, or all of the song data stored on theMusicCAST server, from the hard disk drive. You cannot recover data once you delete it. Check that deleting this data will not inconvenience anyone who uses the MusicCAST server. 1 Follow the procedure described on page 117 “Opening the system setting screens” to display the System Setup screen. • “Delete all PCM data” Deletes all PCM song data stored on the MusicCAST server.
System setup 3 Press OPEN/CLOSE to open the disc tray. 4 Place the update CD in the disc tray. The MusicCAST server checks the update CD content. 5 Use / to move the cursor to “Start” and press SELECT. If the MusicCAST system can verify the validity of the update CD the start update prompt appears on the on-screen display. The System Update screen appears on the on-screen display, and the system update process begins. 6 Follow the directions on the on-screen display.
Checking system information Use the following procedures and menus to check the version of firmware in your MusicCAST server, the amount of available space on the hard disk drive, and other information related to the MusicCAST system. Opening the system information screens 1 2 1 2 1 Press TOP MENU. The Top Menu screen appears on the on-screen display. 2 Use / to move the cursor to “Information” and press SELECT. The Information screen appears on the on-screen display.
Checking system information Checking hard drive capacity Check the amount of available space on the hard drive and the amount of time left for you to record songs with.The figures displayed are not exact and should only be used as a guide. 1 Follow the procedure described on page 130 “Opening the system setting screens” to display the Information screen. 2 Use / to move the cursor to “Hard Drive capacity” and press SELECT. The Hard Drive capacity screen appears on the on-screen display.
Checking system information Checking MP3 encoding status The MusicCAST server automatically converts all songs stored to MP3 format (see page 25). You can check the status of any songs the MusicCAST server is currently encoding, as well as the names of the songs that have yet to be encoded. 1 Follow the procedure described on page 130 “Opening the system information screens” to display the Information screen.
Checking system information Checking AV receivers the MusicCAST server can control You can display a list of AV receivers that you can control from the MusicCAST server. 1 Follow the procedure described on page 130 “Opening the system information screens” to display the Information screen. 2 Use / to move the cursor to “Controllable YAMAHA AV receivers” and press SELECT. A list of receivers you can control from the MusicCAST server appears on the on-screen display.
Appendix CD/CD-R/CD-RW compatible with this unit ■ Discs that can be used for recording on this unit Be sure to use only CD-R and CD-RW discs made by reliable manufacturers. CD-R and CD-RW digital audio discs that display either of the following marks can be used with this unit.
Appendix ■ Handling of discs ■ To prevent a malfunction of this unit Heed the following notes on handling of discs to avoid any cause for a recording failure, a loss of the recorded data, or a malfunction of this unit. • This compact disc recorder is designed for use with CDs (including 8cm [3”] discs) bearing the , , or marks only. Never attempt to load any other type of disc into this unit. • CDs are not subjected to wear during play.
Appendix Rules of digital recording and notes on system Rules of digital recording Notes on system ■ SCMS-Serial Copy Management System ■ Number of recordable discs and tracks and their length As a digital audio component, this unit conforms with the Serial Copy Management System (SCMS) standards. The Serial Copy Management System restricts copies made by recording digital signals to first-generation copies only. The digital program sources that have been recorded cannot be digitally recorded again.
Appendix TROUBLESHOOTING Refer to the chart below when the MCX-1000 does not appear to be functioning correctly. If the problem you are experiencing is not listed below or if the instructions listed next to the problem do not help, set the MCX-1000 to standby mode, disconnect the power cord from the AC outlet, and contact the nearest authorized YAMAHA dealer or service center. SYMPTOM CAUSE REMEDY PAGE (SETUP GUIDE) The MCX-1000 does not turn on when you press STANDBY/ON.
Appendix SYMPTOM CAUSE REMEDY PAGE Auto Configuration has not finished. → Carry out the Auto Configuration process. 106 The network settings are incorrect. → Check the network settings. 108 The MCX-1000 is not turned on. → Turn the MCX-1000 on. There are no songs which the MCX-1000 has finished encoding to MP3 format in the MCX-1000 library. → Wait until MP3 encoding is complete. 132 Surroundings are interfering with wireless network signals (for wireless connections only).
Appendix CAUSE REMEDY The time setting on the MCX1000 is in correct. SYMPTOM The power cord has been disconnected from an AC outlet for more than 1 minute. → The MCX-1000 holds backup data for no longer than 1 minute after the power cord is disconnected from the AC outlet. Disconnecting it for longer than this will reset the internal clock. Reconnect the power cord within one minute of disconnection. There is a gap between MP3 songs. MP3 songs are encoded individually.
Appendix Terms used in this manual This manual uses a number of terms that, though not specific to the MusicCAST system, are not in general everyday use. In addition, some terms are used in a slightly unusual context. These words are listed alphabetically and in context below, along with an explanation of their meaning. ■ Advanced AudioMASTER Playback ■ Album A collection of songs in the MusicCAST database assigned to a particular artist, and given a name. Each album is assigned to an artist.
Appendix ■ DNS server ■ CD-R A computer that is running a DNS service (see DNS). An abbreviation of Compact Disc Recordable. A small plastic disc identical to a CD in appearance, onto which a device such as the MusicCAST server can record data. The MusicCAST server can only record to Audio type CD-R media. ■ ESS ID The ID of the channel that your MusicCAST system uses to transmit data when using wireless connections.
Appendix Software ■ Database The organized collection of data stored on the hard disk drive in your MusicCAST server. The data is arranged in a logical manner so that it is easy to access, manage, and update. ■ Menu A display consisting of a multiple choice style list of options that you can choose from. Menus are displayed on the on-screen displays of the MusicCAST client and server.
Appendix Specifications ■ Audio Performance ■ General Frequency response................................... 5 to 20,000 Hz, ±0.5 dB S/N ratio (EIAJ) Playback.......................................................................... 105 dB Recording.......................................................................... 92 dB Total harmonic distortion (1 kHz) Playback........................................................................ 0.004 % Recording................................................
Appendix Index A Creating CDs ........................................................... 80 Activating MusicCAST the Timer function ................99 Activating the Timer function ..................................102 ACTIVE indicator .....................................................13 album editing screen ................................................59 album name .............................................................60 ALBUMS ..............................................................
Appendix GROUP ...............................................................45 Group Play ...............................................................39 Groups .....................................................................44 new album ............................................................... 60 new artist ................................................................. 65 NTP server ............................................................ 117 H O Handling of discs ................
Appendix Selecting a song by its name ...................................36 Server ID ................................................................112 Signal Level ...........................................................112 Skipping group .........................................................45 Skipping to another song .........................................43 Sleep ........................................................................18 sleep modes .............................................
This document is printed on chlorine free (ECF) paper with soy ink. YAMAHA YAMAHA YAMAHA YAMAHA YAMAHA YAMAHA YAMAHA ELECTRONICS CORPORATION, USA 6660 ORANGETHORPE AVE., BUENA PARK, CALIF. 90620, U.S.A. CANADA MUSIC LTD. 135 MILNER AVE., SCARBOROUGH, ONTARIO M1S 3R1, CANADA ELECTRONIK EUROPA G.m.b.H. SIEMENSSTR. 22-34, 25462 RELLINGEN BEI HAMBURG, F.R. OF GERMANY ELECTRONIQUE FRANCE S.A. RUE AMBROISE CROIZAT BP70 CROISSY-BEAUBOURG 77312 MARNE-LA-VALLEE CEDEX02, FRANCE ELECTRONICS (UK) LTD.