UCABG MCX-2000 Digital Audio Server Setup Guide
IMPORTANT SAFETY INSTRUCTIONS 1 Read these instructions. CAUTION RISK OF ELECTRIC SHOCK DO NOT OPEN 2 Keep these instructions. 3 Heed all warnings. 4 Follow all instructions. CAUTION: TO REDUCE THE RISK OF ELECTRIC SHOCK, DO NOT REMOVE COVER (OR BACK). NO USER-SERVICEABLE PARTS INSIDE. REFER SERVICING TO QUALIFIED SERVICE PERSONNEL.
COMPLIANCE INFORMATION STATEMENT (DECLARATION OF CONFORMITY PROCEDURE) Responsible Party: Address: Telephone: Fax: Type of Equipment: Model Name: Yamaha Electronics Corporation, U.S.A. 6660 Orangethorpe Avenue Buena Park, CA 90620 714-522-9105 714-670-0108 Digital Audio Server MCX-2000 This device complies with Part 15 of the FCC Rules.
CAUTION: READ THIS BEFORE OPERATING THIS UNIT • To assure the finest performance, please read this manual carefully. Keep it in a safe place for future reference. • Install this unit in a well ventilated, cool, dry, clean place — away from direct sunlight, heat sources, vibration, dust, moisture, and/or cold. Avoid ventilation space of at least 30 cm on the top, 20 cm on the left and right, and 10 cm on the back of this unit.
CAUTION: READ THIS BEFORE OPERATING THIS UNIT For US customers FCC WARNING Change or modifications not expressly approved by the party responsible for compliance could void the user’s authority to operate the epuipment. Allen voor klanten in Nederland Bij dit product zijn batterijen geleverd. Wanneer deze leeg zijn, moet u ze niet weggooien maar inleveren als KCA. This equipment complies with FCC radiation exposure limits set forth for uncontrolled equipment.
CAUTION Use of controls or adjustments or performance of procedures other than those specified herein may result in hazardous radiation exposure. ATTENTION L’emploi de commandes, de réglages ou un choix de procédures différents des spécifications de cette brochure peut entraîner une exposition à d’éventuelles radiations pouvant être dangereses. WE87940–C–0 FM ANT MODEL NO. MCX–2000 100–240V, 0.5–0.
Welcome to MusicCAST MusicCAST is a new, convenient home audio network featuring playback of digital music streams. It consists of a MCX-2000 music server and its dedicated clients (MCX-A10 or MCX-C15, sold separately). With all your music sources—including CDs and radio broadcasts—brought together in a single server unit, each person in the house can enjoy their own music, anytime, on demand.
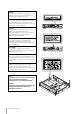
Preparing Items Find and take out the following items from the MusicCAST product packages. (See Owner’s Manual for a complete list of supplied items.) 1 2 3 4 5 6 7 8 9 0 1 1 2 2 3 3 4 Remote control (1) MCX-2000 unit (1) Power cable (1) Options AA batteries (2) Video pin cable (RCA pin) (1) MCX-A10 Audio pin cable (1) n MCX-C15 MCX-CA15 If you’re using an MCX-C15, also prepare a network hub and two network cables (CAT5 straight cables) for connecting with the MCX-2000.
Remote Control Features and Operations You can use the supplied remote control to peform most of the MCX-2000 operations (such as selecting a menu item or determining a setting value). Prepare the remote control before operations. Setting Batteries Set batteries inside the remote control as shown below. 1 3 2 1 Remove the bottom cover of the remote control. 2 Set two AA batteries (supplied) in appropriate directions, according to the illustration in the compartment.
Top Menu Easy Setup Creating a MusicCAST Network The Easy Setup feature lets you quickly create a MusicCAST network. There are several types of MusicCAST networks. Here we explain how to configure the most basic network that’s comprised of a single MCX-2000 server and one or more clients. Wireless client (MCX-A10) MCX-2000 n 10 Network hub Wired client (MCX-C15) Your clients and network hub should be turned off at this point. Turn them on later when you’re asked to do so in the Easy Setup process.
1 With Easy Setup, you can quickly and easily configure your desired MusicCAST network just by following the simple onscreen instructions (page 27). To create a network comprised of an MCX-2000 with clients, specify the options listed below. When the proper settings have been made, a simple diagram of your system appears in the display. Enter the following settings: • • • • • Language: Select a language used for screen messages. Date and Time: Set the current date and time.
3 Following the screen message, start Auto Configuration on each client. Use the front-panel cursor controller to select Top Menu > Setup > Network > Auto Configuration, and then press the PLAY button. The clients start searching for the music server (MCX-2000). PUSH SELECT PUSH SELECT PUSH SELECT PLAY n You can use the cursor controller on a client’s front panel in the same way as the cursor controller on the MCX-2000 remote control.
5 When the screen shows all clients (IDs) you are using, go to the next screen for updating their firmware. This process is necessary to use them with the MCX-2000. On each client, select Top Menu > Setup > System > System Update, and then press the PLAY button. When the firmware update is complete, each client displays the above message and automatically restarts itself. When you go to the next screen, you can see the updated firmware version.
2 Press the CD AUTO STORE button on the MCX-2000 front panel (the tray will close automatically). The RECORDING indicator (at the left of the front panel display) lights in red, followed by the ENCODING indicator lighting in green. CD AUTO STORE button MCX-2000 n The RECORDING indicator lights up while the MCX-2000 is importing CD songs in (uncompressed) PCM format. The ENCODING indicator lights up while the MCX-2000 is encoding PCM songs to MP3 format.
5 From one of your clients, select Top Menu > Library > Music Archive. You can see the same menu items — Artists, Albums, Genres and All Songs as found in the MCX-2000 screen. Select one of them and confirm the client display also shows the artist name, album title, genre or a list of songs from the music CD you just imported on the MCX-2000. When “All Songs” is selected: n If the display on a client is dimmed and shows the current time, press the controller stick.
© 2005 YAMAHA ELECTRONICS CORPORATION, USA 6660 ORANGETHORPE AVE., BUENA PARK, CALIF. 90620, U.S.A. YAMAHA CANADA MUSIC LTD. 135 MILNER AVE., SCARBOROUGH, ONTARIO M1S 3R1, CANADA YAMAHA ELECTRONIK EUROPA G.m.b.H. SIEMENSSTR. 22-34, 25462 RELLINGEN BEI HAMBURG, GERMANY YAMAHA ELECTRONIQUE FRANCE S.A. RUE AMBROISE CROIZAT BP70 CROISSY-BEAUBOURG 77312 MARNE-LA-VALLEE CEDEX02, FRANCE YAMAHA ELECTRONICS (UK) LTD. YAMAHA HOUSE, 200 RICKMANSWORTH ROAD WATFORD, HERTS WD18 7GQ, ENGLAND YAMAHA SCANDINAVIA A.B.
UCABG MCX-2000 Digital Audio Server OWNER’S MANUAL
Table of Contents Table of Contents.................................................2 Preface ..................................................................3 What’s Included...................................................................................... 4 Feature Overview ................................................................................... 4 Audio Playback Functions........................................................................ 4 Audio Recording Functions...................
Preface Thank you and congratulations on your purchase of the Yamaha MCX-2000 Digital Audio Server! The MCX-2000 is a music server that enhances the concept of MusicCAST, a digital music delivery method over a personal network. MusicCAST delivers a new listening style for the digital era.
What’s Included The MCX-2000 product package contains the following items. When you open the box, first check they have all been included. If something is missing, please contact the dealer from whom you purchased the product.
Audio Recording Functions The MCX-2000 incorporates a large-capacity 160GB hard disk drive, allowing up to 200 hours of digital recording in linear PCM format (16-bit/44.1kHz) or up to 2,000 hours in MP3 format (160kbps bit rate). Recordable audio sources include commercial music CDs, external audio signals, and radio programs from the built-in FM tuner.
Music Streaming Functions Once songs are archived (recorded) on the MCX-2000 hard drive, you can stream them to up to 15 clients via the MusicCAST network. The MCX-2000 can deliver the same music to each client simultaneously (broadcast). It can also deliver different songs to different clients at the same time, at the request of each client. In addition, the MCX-2000 supports remote control of clients via the MusicCAST network, allowing you to operate them without having to go to each unit individually.
Preparations and Setup This section explains how to connect peripheral devices to your MCX-2000 and set it up as a music server, and how to create a MusicCAST network in conjunction with clients (MCX-A10 or MCX-C15, sold separately). Panel Descriptions: MCX-2000 Front Panel 1 2 3 4 5 7 6 8 CLIENT STATUS DIGITAL AUDIO SERVER MCX-2000 BROADCAST 1 2 6 7 TIMER STANDBY/ON RECORDING CD AUTO STORE PS/2 KEYBOARD PHONES & 4 8 9 5 MENU/ PLAY INFO.
9 RADIO button Press this button to fast access the last selected radio station. Every time you press this button, the radio type cycles through FM, XM, Internet Radio and Presets (XM is for US model only). ) Cursor controller Delivers the same functions with the center controller on the remote control. You can move the highlight (selection) onto a target item by pushing the center stick upward, downward, leftward or rightward.
Back Panel 1 2 4 3 6 5 T T T WE87930-U-1 FM ANT YAMAHA CAUTION MODEL NO. MCX–2000 RS–232C XM MCX–2000 RISK OF ELECTRIC SHOCK DO NOT OPEN AC IN W_LAN ANT ^ MADE IN MALAYSIA THIS PRODUCT COMPLIES WITH DHHS RULES 21 CFR SUBCHAPTER J APPLICABLE AT DATE OF MANUFACTURE YAMAHA CORPORATION 10-1 NAKAZAWA-CHO, HAMAMATSU-SHI, SHIZUOKA-KEN, JAPAN MANUFACTURED BY YEM (M) MANUFACTURED: OUT L IN T % 75Ω UNBAL.
7 ANALOG OUT jacks (stereo) 9 OPTICAL OUT jack (stereo) Audio playback signals on the MCX-2000 are output from these jacks. Use the supplied optical digital cable (or one purchased separately) to connect the OPTICAL OUT jack to a digital audio input on an external device. Use the supplied stereo pin cable (or one purchased separately) to connect the ANALOG OUT jacks to analog audio input jacks on an external device.
Panel Descriptions: Remote Control 1 1 IR transmitter Infrared (IR) remote control signals are transmitted from here. When operating the remote control, point this part at the IR receiver on the target unit. POWER STAMDBY/ON £ AMP/TV TV ™ AMP TIMER OPEN/CLOSE RANDOM REPEAT 2 4 PLAY INFO. button Press this button to show the Play Information (song data) screen for the current song on the TV monitor.
% Playback control buttons You can control playback on the MCX-2000 using: • Pause button ( e ) to pause or resume playback of the current song • Skip backward button ( b ) to go to the beginning of the previous song (or the current song during playback) • Skip forward button ( a ) to go to the beginning of the next song • Stop button ( s ) to stop playback of the current song and rewind to its beginning • Backward button ( w ) to scrub playback toward the beginning of the current song • Forward button ( f)
Connecting External Devices Connect all relevant devices referring to the section “Panel Descriptions” (page 7) and the setup illustration below. Make sure each device is turned off before making connections. IN VIDEO IN L Video pin cable (supplied) R Audio pin cable (supplied) T T T WE87930-U-1 FM ANT CAUTION YAMAHA MODEL NO. MCX–2000 RS–232C XM MCX–2000 RISK OF ELECTRIC SHOCK DO NOT OPEN AC IN W_LAN ANT 75Ω UNBAL.
You can call up any necessary operation by selecting a menu item from the Top Menu. In addition, when you turn on the MCX-2000 for the first time after purchase, or after the system reset operation (page 103), the Easy Setup screen (page 27) will appear instead of the Top Menu screen. n If the indicator light of the STANDBY/ON button turns amber or red, press the button to continue working on the MCX-2000.
When you press the power switch on a client, it immediately establishes a network connection with the MCX-2000 and enters active mode. (The corresponding CLIENT STATUS indicator lights up on the MCX-2000.) The client shows Top Menu in the backlit display, and gets ready to play a streamed song from the MCX-2000. As mentioned above, even in sleep mode, the MCX-2000 can still respond to a request from any registered client. This is because the MCX-2000 maintains network connections with clients.
Remote Control Features and Operations You can use the supplied remote control to do most of the MCX-2000 operations (such as selecting a menu item or determining a setting value). Prepare the remote control before operations. Setting Batteries Set batteries inside the remote control as shown below. 1 3 2 1 Remove the bottom cover of the remote control. 2 Set two AA batteries (supplied) in appropriate directions, according to the illustration in the compartment.
Using as a Universal Remote Control The supplied remote control can be used as a universal (multi-platform) remote control, letting you operate TV monitors from other manufacturers. The remote control supports TV monitors from manufacturers (brands) in the following list. So, if your TV monitor is applicable, select and register the corresponding preset setting to enable the universal control feature.
Philips 25 Pioneer 26 35 Portland 56 97 Proscan 21 Proton 50 Quasar 34 35 Radio Shack 87 93 97 RCA 21 34 56 Runco 20 30 71 SABA 23 65 66 Sampo 80 81 97 Samsung 39 48 62 75 Sanyo 33 73 79 95 Schneider 96 Scott 97 Sharp 32 39 92 Siemens 29 Signature 16 Sony 63 Sylvania 25 Symphonic 17 18 19 Telefunken 64 65 66 Thomson 23 66 Toshiba 26 67 Videch 42 97 Wards 16 32 39 Zenith 16 61 71 n 54 55 68 31 41 51 93 60 70 97 5
Menu Operation Basics The MCX-2000 has a menu tree that categorizes all commands, functions and settings relevantly. You can access them by simply selecting a necessary menu item starting with Top Menu. For example, if you want to listen to a music CD, select Library from Top Menu, and then select CD in the next screen. 1 Set a music CD in the MCX-2000 first, and then press the TOP MENU button on the remote control to view the Top Menu screen.
4 Now you learned how to go back and forth between screens. Re-select Library from Top Menu, and then select CD as target audio source. Your TV monitor and the built-in display will show a list of songs from the music CD. TV monitor: Built-in display: 5 You can start playing the CD, from the first song in the list, by pressing the Play button on the remote control or on the MCX-2000 front panel.
Submenu is context-sensitive, so available menu commands may change depending on which screen or item you open the menu from. You can always do relevant operations to the current selection, such as song playback or recording when you open the Submenu from the CD song list screen. We urge you to check what commands are available from which item or screen every time you find “Submenu” in the lower right corner of a screen.
MCX-2000 Menu Tree This helpful menu tree shows all of the operation screens of the MCX-2000 in hierarchical order. Page numbers are given for convenient reference.
Configuring Your MusicCAST Network After connecting necessary devices and cables to the MCX-2000 music server and clients (optional MCX-A10 or MCX-C15, or both), you can now configure a MusicCAST network customized for your specific needs. The MusicCAST network uses standard wired and wireless PC networking technologies, and the MCX-2000 allows both wired and wireless connections at the same time.
During automatic configuration of a MusicCAST network, the MCX-2000 utilizes a technique called DHCP (Dynamic Host Configuration Protocol) to assign a unique IP address to each client (DHCP server feature) and define where they are in the MusicCAST network. Once the music server and clients have a unique address in the MusicCAST network, they can find each other, and music streaming and other network communication becomes possible.
Configuring a MusicCAST-only Network The simplest and easiest way is to network the MCX-2000 and its clients in a wireless configuration. In a wireless MusicCAST network, the MCX-2000 can stream music to up to five clients within a range of 30 meters from the server. This is ideal for most houses, since the MusicCAST network can extend to any room without using a single network cable. With the wireless setup, you don’t need to place the MCX-2000 and clients on the same floor.
Configuring a MusicCAST Network for PC Network and Internet Access Recently, many people are enjoying music using their computers. If you’re managing a music collection on a Windows PC, you can also listen to songs from the collection on the MCX-2000. To enable this, just start networking between that PC and the MCX-2000 (page 31). If you already have a home network, simply connect the MCX-2000 to that network using a standard network cable.
Using Easy Setup You have many options to set up the MCX-2000 (setting parameters), and they serve as switch or data to make the MCX-2000 the best music server for you. So, you need to understand what each parameter does and set it up appropriately to create your MusicCAST network as purposed. You can manually set up all parameters one by one, but it’s so painful. That’s why we’ve prepared the Easy Setup feature as one of menu items.
Easy Setup Overview Date and Time Move the highlight to a parameter you want to edit, and press the SELECT button. Scroll and display a desired value, and determine it using the SELECT button. n The MCX-2000 can get an accurate time from a public time server on the Internet (page 91). MusicCAST System Configuration Select from Stand-alone (no MusicCAST network) or Together with Clients (to enable music streaming).
Network Connection (with clients) Select from MusicCAST Only (no PC or Internet access) or PC Network Integration (to enable PC or Internet access). Network Configuration Available network configuration options may vary according to your selections. Select from Automatic (with Internet access), Automatic (without Internet access) or Manual. It’s recommended to select one of the Automatic settings (depending on your need) if you’re unfamiliar with networking.
For the MCX-2000 to access the Internet via an existing PC network According to the diagram, connect the MCX-2000 Ethernet port to the network hub (or the one equipped with your router) using a standard network cable (CAT5 straight cable). Also, connect all wired clients (using a network cable for each) to the network hub connected to the MCX-2000. n When you have specified to use the MCX-2000 as a stand-alone unit with PC or Internet access, Easy Setup finishes after setting up network parameters.
Automatic Configuration of a MusicCAST Network Your MusicCAST network is created when you register clients to the MCX-2000. Once this process is complete, the MCX-2000 and clients can quickly resume network connections even after you reconnect their power cable or awake the MCX-2000 from standby mode (page 14). n This section describes the procedure of Client Registration that’s also available as a final step of Easy Setup (page 27).
Preparation on the MCX-2000 1 Select Top Menu > Setup > Network. 2 From the Network menu, select Client Registration > Auto Configuration. 3 Open the Submenu in the Auto Configuration screen. Select Start from the menu. MCX-2000 continues searching clients for 30 minutes When the MCX-2000 starts searching available clients, register them within 30 minutes. With this screen shown on the MCX-2000, go and prepare each client.
Preparation on Each Client 1 Turn on the client. The front panel display lights up, showing the initial screen, followed by a “Connecting...” message. n If the client display shows the current time without backlight, it’s in sleep mode. If this is the case, press the center stick of the cursor controller. The client wakes up and shows the above message. 2 The “Connecting...” message indicates the client is searching a MusicCAST server to establish a network connection.
Automatic Registration of Clients Before configuring a MusicCAST network through automatic Client Registration, be sure to connect any wired clients to the network hub connected to the MCX-2000. (If you want to integrate your MusicCAST network into an existing PC network, connect both the MCX-2000 and wired clients to the PC network hub.) 1 On each client, press the front panel Play button as the Auto Configuration screen is shown. Notice the client display shows the following messages in a short period.
Manual Configuration of a MusicCAST Network There may be a case you need to assign a fixed IP address to the MCX-2000 and clients to integrate a MusicCAST network into a PC network that has no DHCP server. You can solve it by manually configure some or all of network parameters of the MCX-2000 and clients. We explain here several points you should remember when configuring a MusicCAST network manually.
System Unique Information MCX-2000 Client (1) Client (2) Client (3) Client (4) SV-_ _ _ _ _ CL-_ _ _ _ _ CL-_ _ _ _ _ CL-_ _ _ _ _ CL-_ _ _ _ _ Server/Client ID DHCP Server / DHCP Client / Manual DHCP Client / Manual DHCP Client / Manual DHCP Client / Manual DHCP Client / Manual (Specify a valid IP address below with Manual.) (Specify a valid IP address below with Manual.) (Specify a valid IP address below with Manual.) (Specify a valid IP address below with Manual.
IP Address 1 2 3 1 Setting Method Specifies a DHCP operation of the MCX-2000. When the MCX-2000 has a ‘wired’ connection to a PC network and finds a DHCP server there, it enters DHCP Client mode and gets an IP address from the server. (Accordingly, clients will also get an IP address from the same server.) If the MCX-2000 finds no DHCP server in the connected network, it automatically enters DHCP Server mode. (Clients will get an IP address from the MCX-2000.
Wireless LAN 1 2 3 1 Wireless LAN If you use the wireless functions in your MusicCAST network (or you have a client wirelessly communicating with the MCX-2000), specify ON to enable the wireless access point feature built into the MCX-2000. 2 ESS ID, WEP Key ESS ID is a name of the wireless network configured by the MCX-2000 wireless access point feature, and WEP Key is a password for clients to log onto the network.
Settings on Each Client 1 Turn on the client. The front panel display lights up, showing the initial screen, followed by a “Connecting...” message. n If the client display shows the current time without backlight, it’s in sleep mode. If this is the case, press the center stick of the cursor controller. The client wakes up and shows the above message. 2 The “Connecting...” message indicates the client is searching a MusicCAST server to establish a network connection.
Mode Specify how this client can connect to a MusicCAST network. With Wireless, its wireless network port is only enabled, disabling its wired (Ethernet) network port. With Auto, the client connects to the MCX-2000 via either active network port (factory setting). When using the wireless port, the ESS ID and WEP Key parameters should be configured according to the target MCX-2000 server. When you select and determine a value, the “Press PLAY to system restart, STOP to cancel.” message is shown.
DHCP Specify ON to automatically get an IP address from the MCX-2000 or a DHCP server (or an equivalent router function) in your PC network (factory setting), or OFF to manually specify on this client. When you select OFF, you need to specify appropriate values to the IP Address and Subnet Mask parameters. When you select either value, the “Please wait.” message is shown. When your setting is stored, you will go back to the Manual Setup menu.
ESS ID Specify the ESS ID for the wireless network created by the target MCX-2000. You can confirm the MCX-2000 ESS ID, by selecting Top Menu > Setup > Network > Advanced Settings > Wireless LAN. When you have finished, select and determine Save & Network Restart. When the “Please wait.” message is shown and your setting is stored, you will go back to the Manual Setup menu. If you abort your change, select Cancel or push the controller stick leftward.
Manual Registration of Clients Unlike automatic registration (page 34), configuring a MusicCAST network through manual registration is completed with setup on the MCX-2000 only. 1 Select Top Menu > Setup > Network. 2 From the Network menu, select Client Configuration > Manual Configuration. 3 Input each client ID to one of the Client 1 to Client 15 columns (up to 15 units), while viewing the setup chart. You can input your client ID to any column.
Move the highlight (selection) using the up and down arrow buttons on the cursor controller, press the SELECT button to select a column. Input a 5-digit ID number after “CL-”. Use the left and right arrow buttons to move between digits, and the up and down arrow buttons to select a character. When you’ve finished, press the SELECT button to determine it. n While you’re moving the highlight (not actually editing), you can access the Submenu.
Updating Client Firmware To fully enjoy music streaming over a MusicCAST network, you must first update all of your MusicCAST clients to match up to the latest features the MCX-2000 delivers. Update each client firmware in the following procedure. (You don’t need to operate the MCX-2000.) n If you already updated the client firmware using Easy Setup, this process isn’t necessary. 1 Select Top Menu > Setup > System > System Update.
Applications Once you’ve finished setting up your MCX-2000 (and MusicCAST clients), you can start using it as a music server. This section explains how you can play and record audio sources on the MCX-2000, and stream music to the clients over the MusicCAST network. CD Select this when listening to a CD set in the MCX-2000. Supported CDs are music CDs (CD-DA) and MP3 CDs (CD ROM).
2 From this menu screen, you can select an archived song in a specific category. Try tracking down each category from the menu. The first four categories (Artists, Albums, Genres and All Songs) let you sift applicable songs out from the music archive. For example, a song titled “Blue in Black” from the “Chelsea” album of a jazz group called “Alley Cats” can be found from any one of the first four categories (menu items).
3 Move the selection (highlight) to a list item from each screen (artist, album, genre, playlist or statistic information). If you press the Play button on the remote control or the MCX-2000 front panel, you can start playback with the first song in the current group. Otherwise, press the SELECT button on the remote control for further sifting.
Alphabetical index search Buttons Unlike the PAGE scroll buttons, the Alphabetical index search buttons only work with lists that sort items in alphabetical order. If you select All Songs for the search category, you will always have an alphabetical list of all archived songs, and this list may be long enough—spanning across multiple screens, depending on how many songs you have.
Adding a Bookmark to a Song Play Information and Controls Starting from one of the four categories in the Music Archive menu, you can continue sifting and finally reach a song-level list view. Press the BOOKMARK button on the remote control, or select Bookmark from the Tool menu. A sky-blue arrow appears at the left of a song name that’s currently selected. It’s the bookmark.
Broadcast: Streams a song currently played on the MCX-2000 to MusicCAST clients specified in a dialog box (page 89). Recall Play: Makes the MCX-2000 start ‘continued’ playback of a song currently playing on a client specified in a dialog box (page 90). n Create and enjoy a wide variety of playback patterns by combining repeat, random and group playback modes.
3 When you set a music CD, a “Reading data” message appears in the screen and the MCX-2000 starts querying the CDDB database. (See the CDDB logo animation shown in the upper left corner of the screen.) If appropriate CD data is found, the MCX-2000 will present a CD song list. 1 2 3 5 4 6 1 2 3 4 5 6 7 8 4 Move the selection (highlight) to a song you want, and then press the SELECT or Play button on the remote control, or select Play from the Submenu.
From the folder list view, you can press the Play button on the remote control or select Play from the Submenu to start playback from the first song in the current folder (album). Otherwise, you can press the SELECT button on the cursor controller to open the current folder (album) to see a list of contained songs. Retrieving Song Data When you select “CD” for the playback source, the MCX-2000 automatically searches and displays song data such as song title, artist name and album title.
Listening to a Radio Broadcast Before listening to the radio on the MCX-2000, you need to do some preparation for each radio type—connecting the supplied antenna for the FM radio (page 4), or making the MCX-2000 accessible to the Internet, if you want to listen to Internet radio broadcasts (page 31).
Every time you press the skip backward or forward button (b/a), you can manually decrease or increase the frequency to search for an available station. Manual tuning Listening to XM Radio (US model only) The MCX-2000 U.S. model comes standard with an XM Satellite Radio tuner.
Activating Your XM Satellite Radio Account Receiving XM Radio Broadcasts To sign up for an XM Satellite Radio service account, you need to have your XM Satellite Radio ID number. Follow the procedure below to check your ID number, and then access the website (activate.xmradio.com) or call 1-800-XM-RADIO (1-800-967-2346) to sign up for the service. (A major credit card is required.
The Submenu commands in the Play Information screen for the XM radio: Channel Search and Direct Access Playback: Provides the same tuning and playback control functions as available on the remote control. So, you can control these functions using the cursor controller on the front panel or from a PS/2 keyboard (only with cursor and enter keys). On-screen buttons shown in gray provide no function for XM radio control; the same buttons on the remote control don’t work either.
Also in the Submenu, you can select Direct Access if you know the desired channel number. Direct Access entry dialog Specify the desired channel number by pressing the on-screen numeric buttons, followed by OK. Press CLR to clear your entry. Wait for a few seconds until the MCX-2000 automatically tunes in to that channel. n Pressing any buttons other than the numeric buttons cancels Direct Access entry.
Listening to Internet Radio In addition to retrieving the latest CD information from the online CDDB database (page 53) and accurate date and time data from a public time server (page 91), the MCX-2000 can also receive online radio broadcasts by accessing to the Internet. Since the MCX-2000 comes with several Internet radio sites preassigned, you can enjoy listening to online radio programs right away once you’ve set up the unit for Internet access (page 31).
1 Select the Save to Preset command from the Submenu. A group selection dialog box appears, where you can assign the current radio station into a specific group. Current radio station (FM frequency, etc.) 3 Move the selection (highlight) to the desired position, and then press the SELECT button on the cursor controller. The selected position flashes several times with a station code. When you return to the Play Information screen, registration is complete.
2 Press the SELECT button to view a list of radio stations registered in the selected group. Getting the most out of the Presets List Preset radio stations Since the MCX-2000 remembers which radio station is last played (selected) at multiple levels—for each group, and for the entire Presets list, you can quickly access radio stations you frequently listen to.
Registering FM Stations Automatically to the Presets List You can search for an FM radio station in the Play Information screen, which is a basic radio tuning function. In the Preset station list screen, you can use a similar scanning process to locate all available stations within a specific frequency range and register them all in the Presets list—in a single automatic process. This lets you easily create your own FM preset list.
Playing External Audio Signals As a music server designed to seamlessly integrate all of your audio sources, the MCX-2000 comes standard with analog and digital audio input connectors on the back panel (ANALOG IN and OPTICAL IN). If you have already connected them to the relevant audio output connectors on external equipment (page 9), you can simply select and play external audio signals as another audio source of the MCX-2000. Of course, you can also record them into the music archive (page 69).
Playing Audio Content on the Computer If your MCX-2000 has network connectivity to a Windows PC (page 26) that you’re using to manage music files, you virtually have a ‘second’ music server. Your MCX-2000 works as a client to your Windows PC and can search, select and play MP3, WAV and Windows Media Audio (WMA) music files and playlists (text files with the M3U extension) collected or created on that PC over the network.
4 When you start playback of an MP3, WAV or WMA audio file from the PC, the MCX-2000 shows the Play Information screen as follows. 3 4 5 6 When using the Network Content feature, you should remember the following: • WMA audio files are shown as PCM in the Play Information screen. It’s because the DiXiM Media Server converts WMA audio into PCM format before it’s streamed to the MCX-2000.
Recording Audio Sources You can expand your music archive by recording (or importing) songs and other audio programs from commercial music CDs, external audio signals, and FM radio programs from the built-in tuner. You can record these audio sources to the MCX-2000 internal hard drive with up to 200 hours in linear PCM format (16-bit/44.1kHz) or up to 2,000 hours in MP3 format (160kbps bit rate) by default.
3 The MCX-2000 shows “Checking disc...” in yellow and starts querying to the CDDB database. If appropriate CD data is found, the MCX-2000 will present a list of song names. 1 2 3 5 4 6 1 2 3 4 5 6 7 4 If there is a song you don’t want to import, move the selection (highlight) to that song, and remove the check mark by pressing the SELECT button on the remote control. You can restore the mark by pressing the SELECT button again. You can also use the Select all or Clear command for your selection.
6 When all selected songs are imported, the MCX-2000 shows the following dialog box, asking what you want to do next. 3 When the RECORDING indicator goes off, the MCX-2000 shows the following dialog box, asking what you want to do next. Open stored album page: Select this to automatically locate the album you’ve just imported. You can browse and play the songs from the album like other archived songs (page 46). Open stored album page: Select this to automatically locate the album you’ve just imported.
Recording from FM Radio or External Audio Signals Any incoming audio signals can serve as recordable audio sources for the MCX-2000. If you’ve appropriately set up the FM antenna (page 4) or connect external audio equipment to the analog and/or digital input jacks (page 9), you can record their sounds at any time using the same recording interface. 2 Press the SELECT button on the remote control at the first parameter in the recording screen—Preset or Input, then specify the target FM station or input.
2 SYNCHRO. Type This parameter is only available when SYNCHRO. is selected for Track Marking above. Select Full Auto if you want fully automatic recording. With this option selected, the MCX-2000 starts recording as soon as it detects the first track gap from incoming signals, and inserts a track mark at the second and following track gap points, then stops recording if a level of silence is maintained for a predefined period.
7 When the recording is finished automatically, or manually using the relevant Submenu command, you can now exit the recording screen to confirm the recorded results. Select Top Menu > Library > Music Archive > Statistics > Recently Stored Albums. Duplicating a Music CD This function is useful when you want to make a backup copy of your music CD (CD-DA). When you create an original compilation CD, you can also create as many copies as you want (page 73) ONLY during that creation process.
4 When the image file is created, the MCX-2000 shows the following dialog box. To continue the process, open the tray and set a CD-R/RW disc for audio recording with “Change disc and proceed with recording” selected. Select OK in the dialog box. 6 When the MCX-2000 detects an appropriate blank disc, it automatically starts writing the image file on that disc. . 7 When the CD duplication process is finished, the MCX-2000 shows the following dialog box, asking what you want to do next.
Recording Archived Songs to a CD As long as you’re keeping PCM song data in the MCX-2000 internal hard drive (factory setting), you can create an original music CD based on a playlist or an album from your music archive at any time. It’s another great feature the MCX-2000 delivers as your music collection center. According to your selection, the MCX-2000 shows a dialog box, where you can search for the desired album or playlist in the same manner you search for a song in the music archive.
4 A list of songs will be shown in white (only when “Ready to record” is shown). If you want, edit the album title and/or artist name for the CD you’re going to create using the following two commands from the Submenu. 6 When the CD recording process is finished, the MCX-2000 shows the following dialog box, asking what you want to do next. Either command opens the character palette.
Editing the Library PS/2 Keyboard As you collect more music and audio and expand your MCX-2000 library, you may feel like arranging the content for various purposes—for example, manually edit song data of your favorite CD because it’s too new to retrieve correct data from CDDB, or because it’s a homemade demo CD from your musician friend.
Web Browser If you’ve configured your MCX-2000 to be accessible from your PC network, you can edit existing text information in your music archive using a standard web browser that’s running on a computer in the PC network. Text information includes song data (artist name, album title, song title, etc.), playlist name, Internet radio station name and URL, as well as group and station names from the Presets radio list. This feature is very useful when you need to edit a large amount of text information.
Editing Song Data Changing Song Attributes Each archived song has unique song data—a series of ‘attributes’ including artist name, album title, genre name and song title—and you can combine these attributes together to use as keywords when finding a song from the music archive.
Change Artist: Lets you change the artist for the current album (Music Archive > Artists > selected artist’s album list view). Change Album: Lets you change the album for the current song (Music Archive > Albums > selected album’s song list view; Music Archive > Artists > Albums > selected album’s song list view; Music Archive > Genres > Albums > selected album’s song list view). Change Genre: Lets you change the genre for the current album (Music Archive > Genres > selected genre’s album list view).
Change Genre dialog box In the Change Genre dialog box, move the selection (highlight) to Fusion and then press the SELECT button on the remote control. Confirm the current album moved under Fusion. Change Album dialog box In the Change Album dialog box, you can select a target album by navigating down from Artists, Albums or Genres. In this case, you know the target album title (VB Works) so that it’s easiest to navigate down from Albums and select VB Works directly from an album list view.
5 When the above procedure is finished, select Top Menu > Library > Music Archive > Artists for the artist list view screen. Notice that the ‘previous’ artists, Jazzy Rocks, Jazzy Pops and Pop Rockers, have no associated albums or songs. Empty — album and song counts are zero (0) Here, we’ve shown the general concepts of editing your MCX-2000 music archive. Proper use of the Submenu commands such as New, Change and Delete (...) help you re-organize your music collection.
3 Select the Delete PCM data from the Submenu. A dialog box appears, where you can specify target songs. Delete PCM Data dialog box 4 Move the selection (highlight) to a song whose PCM data you want to delete, and add a check mark by pressing the SELECT button on the remote control. You can remove the mark by pressing the SELECT button again, if you want to keep the song’s PCM data.
Using a Playlist 3 Confirm the new playlist appears in the Playlists screen. The playlists on the MCX-2000 give you new and creative ways to enjoy the songs you’ve stored to your music archive. Each playlist simply lets you combine and arrange archived songs as you like, but a finished playlist can be used in many ways. Not only can playlist songs be played on the MCX-2000 itself, but they can also be streamed to any MusicCAST client (page 88), if required, along with the timer playback feature (page 89).
Editing a Playlist Each song title in the playlist is simply a reference point (link) to its original song data. In other words, the actual song data is not affected when you add, remove or move songs to the playlist; only the links are changed. The MCX-2000 even allows you to add or remove links while playing the current playlist, and the unit continues playing according to a resulting playlist. n You cannot edit a playlist that’s being used to create (record) your original CD.
Registering an Internet Radio Station The MCX-2000 comes with five Internet radio stations preassigned. But, not to mention, there’re hundreds of thousands of online radio stations all over the Internet, and you may already enjoy some of them on your computer. Now you can even add your favorite online radio stations to the MCX-2000 library, and enjoy them together with other audio sources. 3 Specify a new radio site using the following two Submenu commands. Either command opens the character palette.
Renaming Items from the Radio Presets List You may have already registered a number of radio stations using the Save to Preset command while listening (page 59), or using the FM Auto Preset command (page 62) when you previously opened the Presets list screen to cover all FM stations in your area. These two commands are convenient, but they simply add radio stations to the Presets list, leaving default names such as Group and Station (or FM frequency for an FM station).
5 When you return to the station list view, repeat step 2 for other stations. You can repeat steps 2 to 5 above to completely rename up to 100 radio stations from 10 station groups—however, that’s too laborious and time-consuming (if you do it at a time). A much easier and faster way is to rename items on a computer, using a web browser (page 76). Click Select for a station list view.
Operating a Client Remotely Once you’ve created a MusicCAST network, each MusicCAST client becomes able to access the MCX-2000 and share most audio sources on the server, including the music archive, FM radio stations and audio signals from external inputs. In fact, each client automatically retrieves the latest catalog of songs, artists, albums, genres and radio stations, and lets you initiate audio streaming by selecting an audio source on the client side (client request).
Selecting the Client Audio Source Furthermore, when selecting a client by pressing the SELECT button on the remote control, you can specify the audio source to be streamed to that client in the following screen. When selecting Radio, the MCX-2000 shows the Presets radio station list. You can select a preset FM station for the selected client in the same manner as for the MCX-2000 (page 60).
Setting the Timer Playback At the lower section in the client source menu screen, you can access the timer playback feature for clients, the same feature available for the MCX-2000 when you select Top Menu > Setup > Timer. When you select Timer, the timer playback list screen appears, where you can create up to 10 timer programs by specifying a playlist or a preset radio station to be played at the specified time on the specified date.
Recall Play This feature lets you relay the audio source being played (or last selected) on a MusicCAST system to another MusicCAST system. When you select the Recall Play command, the MCX-2000 shows the Recall Play dialog box with a list of MusicCAST clients. Recall Play dialog box for the MCX-2000 Submenu in the client list screen (page 87) provides access to the Recall Play feature on each MusicCAST client.
Other Features Correcting Date and Time Automatically Your MCX-2000 is fully functional simply configured with Easy Setup. But, it becomes more convenient and useful if you fine tune the unit to suit your need. If you have a broadband Internet connection and already made it accessible from the MCX-2000 via your PC network (page 26), you may want this configuration to fully work.
Setting Date and Time Manually Selecting the Time Display 1 Select Top Menu > Setup > Date/Time > Manual Setup. 1 Select Top Menu > Setup > Date/Time > Time Display. n If you specified to use an NTP server (ON) in the Auto Setup screen, manual setup is disabled. (You will see an alert message telling so.) 2 Change each parameter value as needed. 2 Change each parameter value as needed, and specify the current date and time.
Using the Online CDDB Database The MCX-2000 incorporates a part of Gracenote CDDB database and uses it to retrieve and display song data for music CDs (factory setting). The online CDDB database is, however, always being updated according to the latest CD releases in the whole world. So, if you have an Internet connection and make it accessible from the MCX-2000, you can be sure to retrieve song data for your CDs. 3 When you select OK, the “Saving...” message is shown.
Front Panel Display Screen Saver 1 From the User Interface menu, select Front Panel Display. 1 From the User Interface menu, select Screen Saver. 2 Change each parameter value as needed. 2 Change each parameter value as needed. 1 Backlight Make the display backlight either Bright or Dark. 1 Use Screen Saver Specify whether you use the screen saver. Select ON if you want the screen display to go off after the specified duration even while the MCX-2000 is active (factory setting).
Language 1 From the User Interface menu, select Language. Selecting Playback Options Select any desired audio source at any time, or program your own playlists with any combination of songs from the music archive — these are the best part of listening experience on the MCX-2000. You can use two playback options to make such listening experience, literally, more seamless. 1 Select Top Menu > Setup > Playback. 2 You have just one parameter, Language, for this setting.
Selecting Recording Options Regardless of its type, such as music CD, radio or external input, the MCX-2000 records or imports an audio source using common manners and formats. For optimum archiving, the MCX-2000 provides two recording options. n PCM is an uncompressed, raw audio format while MP3 is a compressed audio format. The MCX-2000 uses a CD-quality, 16-bit/ 44.1 kHz stereo PCM format, which creates digital audio data of about 10 megabytes per minute (1411.2 kbps data rate).
Using the Timer Playback The MCX-2000 lets you program when your favorite music or radio station automatically starts playing — using the timer playback feature. It opens more possibilities to how to use the MCX-2000 and MusicCAST clients in your personal life (or even business). If you’ve programmed a playlist named Wake-up BGM, you can start every morning with songs in that playlist.
When you add a new timer program, the playback timer is automatically turned on. It keeps active as long as the program list contains programs. In addition, you can manually turn off or on the playback timer using the Timer command from the Submenu.
2 Move the selection (highlight) to each parameter below and specify how you want both units to work together. 3 Select OK to save your settings. Now the MCX-2000 is ready for synchronized operations with the AV receiver. 1 Synchronize receiver power ON/OFF with the MCX-2000 If you’ve specified to link the MCX-2000 genres to the AV receiver surround programs, open the genre list screen by selecting Top Menu > Library > Music Archive > Genres.
Managing an Existing MusicCAST Network Wireless LAN Network activities, such as streaming music to clients over a MusicCAST network or editing the music archive using a computer in a PC network, are very essential part of how you can use the MCX-2000 in your daily life. This section explains the MCX-2000 networking on the system side. Read this section when you want to know how to check the networking status of the MCX-2000 and each client and how to initialize network parameters for troubleshooting.
2 To initialize the MCX-2000 network parameters and recall their factory settings, select the Rest command from the Submenu. 3 A confirmation dialog box appears. When you select OK, the “Network rebooting...” message is shown and the MCX-2000 restarts itself.
Viewing System Information MP3 Encode Schedule 1 From the System Utilities menu, select System Information. 2 Select each item to see relevant information. Version The ENCODING indicator on the MCX-2000 front panel lights up while the unit is converting the recorded audio into MP3 format. In this screen, you can view a list of song titles in MP3 conversion schedule. The first song in the list is currently in conversion process and shown with “Encoding” on the right of its title.
Resetting the MCX-2000 for Factory Settings 1 From the System Utilities menu, select System Reset. Updating the MCX-2000 Firmware Notes on Firmware update When you update the MCX-2000 firmware, be sure to read the document that comes with the firmware update CD. This document contains the latest information on new features and any changes after updating the firmware, other important notices or additional procedure to the following update process.
Limiting Local Operations on the MCX-2000 1 From the System Utilities menu, select Lock Function. The password entry dialog box appears, prompting you to enter a predefined password. Select OK after entry. Password entry dialog box 4 CD tray open Limits access to the built-in CD drive and the Open/Close button operations on the remote control and MCX-2000 front panel. 5 Password Define your own password to lock off functions specified above. Your password must be up to 14 characters (case sensitive).
Compatible Media (CD/CD-R/CD-RW) Discs that can be used for recording on this unit Be sure to use only CD-R and CD-RW discs made by reliable manufacturers. CD-R and CD-RW digital audio discs that display either of the following marks can be used with this unit.
Handling of discs To prevent a malfunction of this unit Heed the following notes on handling of discs to avoid any cause for a recording failure, a loss of the recorded data, or a malfunction of this unit. • Do not use any non-standard shaped CDs (heart, flower shaped, etc.) available on the market, because they are off balance in their weight.
About Digital Recording with MusicCAST Rules of Digital Recording SCMS-Serial Copy Management System As a digital audio component, this unit conforms with the Serial Copy Management System (SCMS) standards. The Serial Copy Management System restricts copies made by recording digital signals to first-generation copies only. The digital program sources that have been recorded cannot be digitally recorded again.
Troubleshooting Refer to the chart below when the MCX-2000 doesn’t appear to be functioning correctly. If the problem you are experiencing is not listed below or if the instructions listed next to the problem don’t help, set the MCX-2000 to standby mode, disconnect the power cable from the AC outlet, and contact the nearest authorized YAMAHA dealer or service center. Symptom Cause Remedy The MCX-2000 does not turn on when you press STANDBY/ON.
Symptom Cause Remedy Surroundings are interfering with wireless network signals (for wireless connections only). Try using a different wireless network channel, or use a wired network connection. The network is extremely congested (for wired network connections). Place your MusicCAST components under a different subnet.
Symptom 110 Cause Remedy Playback from a wireless client is interrupted or unstable. Audio streaming from the MCX-2000 is affected with a device that uses the same 2.4 GHz radio signal range (such as microwave oven, wireless handset, or other wireless access point). Relocate the client or connect it to the MCX-2000 using a network cable. Little ‘longer’ silence between songs during PCM audio playback (streaming).
Glossary This manual uses a number of terms that, though not specific to the MusicCAST system, are not in general everyday use. In addition, some terms are used in a slightly unusual context. These words are listed alphabetically and in context below, along with an explanation of their meaning. Playback Album A collection of songs in the MusicCAST database assigned to a particular artist, and given a name. Each album is assigned to an artist. By default, each CD you store in the server stored as an Album.
Subnet mask Hard disk drive A number identifying the group within a network to which a particular component belongs. The component within your server used to store the audio material from your CDs as data. Hard disk drive capacity is expressed in gigabytes, with a larger number denoting more storage capacity. TCP/IP An abbreviation of Transmission Control Protocol/Internet Protocol, a system of coding information that allows it to be shared efficiently on a network.
Specifications ■ Audio Performance • Frequency response............................................................................. 20 to 20,000 Hz, ±0.5 dB • S/N ratio (EIAJ) Playback.................................................................................................................... 100 dB Recording .................................................................................................................... 92 dB • Total harmonic distortion (1 kHz) Playback..........................
Index Numerics Duplicate a CD ...................................................................... 66 10/100 indicator .....................................................................10 E A AC IN socket ............................................................................9 Access Timeout .....................................................................93 Album ...................................................................................111 Alphabetical index search buttons .......
MusicCAST System Configuration .........................................28 MusicCAST-only Network ......................................................25 MUTE button ..........................................................................11 N Network ................................................................................111 Network cable ......................................................................111 Network Configuration ...........................................................
© 2005 YAMAHA ELECTRONICS CORPORATION, USA 6660 ORANGETHORPE AVE., BUENA PARK, CALIF. 90620, U.S.A. YAMAHA CANADA MUSIC LTD. 135 MILNER AVE., SCARBOROUGH, ONTARIO M1S 3R1, CANADA YAMAHA ELECTRONIK EUROPA G.m.b.H. SIEMENSSTR. 22-34, 25462 RELLINGEN BEI HAMBURG, GERMANY YAMAHA ELECTRONIQUE FRANCE S.A. RUE AMBROISE CROIZAT BP70 CROISSY-BEAUBOURG 77312 MARNE-LA-VALLEE CEDEX02, FRANCE YAMAHA ELECTRONICS (UK) LTD. YAMAHA HOUSE, 200 RICKMANSWORTH ROAD WATFORD, HERTS WD18 7GQ, ENGLAND YAMAHA SCANDINAVIA A.B.