
User Manual
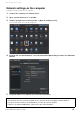
Table Of Contents
- Information
- About Yamaha LAN Monitor
- Contents
- Terminology
- Steps to use the software
- Software operating requirements
- Notes
- Notes regarding device detection
- Notes regarding SWX2100/SWR2100P series PoE switch detection
- Notes regarding the power supply interruption function for the Yamaha PoE switch
- Notes regarding a slave with the stack function enabled
- Notes on printing and print preview of the “Whole map”
- Notes regarding detection of Dante-enabled devices
- Notes regarding when using macOS10.15.x or later
- Installing and uninstalling Yamaha LAN Monitor
- Starting and exiting Yamaha LAN Monitor
- Yamaha LAN Monitor screen structure
- Network settings on the computer
- Basic operation
- Menu bar
- Toolbar and display area
- Map screen
- List screen
- Configuring the device
- Update the firmware
- Import/Export the CONFIG
- Troubleshooting

Installing and uninstalling Yamaha LAN Monitor
Yamaha LAN Monitor for Mac User Guide
6
Installing and uninstalling Yamaha LAN Monitor
Installation
Follow the steps below to install Yamaha LAN Monitor.
1. Double-click the downloaded zip file and extract it to any location.
2. Double-click “Yamaha LAN Monitor VX.X.X.pkg” (where X is the version number) in the
expanded directory.
The Yamaha LAN Monitor setup dialog box appears.
3. Perform the installation as directed in the screen.
NOTE
• If the following dialog box appears, click [OK].
• When the uninstallation of Yamaha LAN Monitor is completed, a dialog box will ask you to uninstall the Dante Discovery
/ Dante Control and Monitoring functions.
If you use Yamaha switches on the Dante network and if you have not installed the Dante Control and Monitoring
functions, install these functions in addition to the WinPcap function.
• If a dialog box appears prompting you to install Rosetta, follow the instructions in the dialog box. Yamaha LAN Monitor
cannot be used on a Mac with an Apple M1 processor if Rosetta is not installed.
4. Restart the computer.
Uninstallation
1.
Double-click “Uninstall Yamaha LAN Monitor” in the folder that was expanded during
installation.
The Yamaha LAN Monitor uninstallation dialog box appears.
2. Perform the uninstallation according to the onscreen instructions.
NOTE
• If the “User Account Control” dialog box appears, click [Yes].
• When the uninstallation of Yamaha LAN Monitor is completed, a dialog box will ask you to uninstall the Dante Discovery
/ Dante Control and Monitoring functions. Perform the uninstallation as directed in the screen. However, the Dante
Discovery/Dante Control and Monitoring function will not be properly uninstalled if another application that uses this
function (such as Dante Controller) is currently installed.
• WinPcap and Dante Discovery / Dante Control and Monitoring functions will not be uninstalled. If you want to uninstall
these functions as well, make sure that other applications are not using them, and then uninstall them individually using
[Uninstall] or [Uninstall or change].
3. Restart the computer.