Owner’s Manual EN
SPECIAL MESSAGE SECTION This product utilizes batteries or an external power supply (adapter). DO NOT connect this product to any power supply or adapter other than one described in the manual, on the name plate, or specifically recommended by Yamaha. WARNING: Do not place this product in a position where anyone could walk on, trip over, or roll anything over power or connecting cords of any kind.
FCC INFORMATION (U.S.A.) 1. IMPORTANT NOTICE: DO NOT MODIFY THIS UNIT! This product, when installed as indicated in the instructions contained in this manual, meets FCC requirements. Modifications not expressly approved by Yamaha may void your authority, granted by the FCC, to use the product. 2. IMPORTANT: When connecting this product to accessories and/or another product use only high quality shielded cables. Cable/s supplied with this product MUST be used. Follow all installation instructions.
PRECAUTIONS PLEASE READ CAREFULLY BEFORE PROCEEDING Please keep this manual in a safe and handy place for future reference. WARNING Always follow the basic precautions listed below to avoid the possibility of serious injury or even death from electrical shock, short-circuiting, damages, fire or other hazards. These precautions include, but are not limited to, the following: glasses) containing liquids which might spill into any openings.
Handling caution • Do not insert a finger or hand in any gaps on the instrument. Yamaha cannot be held responsible for damage caused by improper use or modifications to the instrument, or data that is lost or destroyed. • Never insert or drop paper, metallic, or other objects into the gaps on the panel. This could cause physical injury to you or others, damage to the instrument or other property, or operational failure. Always turn the power off when the instrument is not in use.
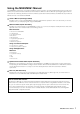
Introduction Thank you for purchasing the Yamaha MX49/MX61 Music Synthesizer. Please read this owner’s manual carefully before using the instrument in order to take full advantage of its various features. When you have finished reading the manual keep it in a safe, accessible place, and refer to it when you need to better understand an operation or function.
Using the MX49/MX61 Manual Your MX49/MX61 synthesizer comes with four different reference guides—the Owner’s Manual (this book), the Reference Manual, the Synthesizer Parameter Manual, and the Data List. While the Owner’s Manual is packaged together with the synthesizer as a hardcopy booklet, the Reference Manual, Synthesizer Parameter Manual, and Data List are provided as PDF documents on the bundled CD-ROM.
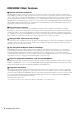
MX49/MX61 Main Features Dynamic, MOTIF-based Sounds The MX49/MX61 contains a wide range of dynamic and authentic waveforms derived directly from the world famous Yamaha MOTIF (including the realistic instrument sounds of acoustic piano, electric piano, synthesizer, drums, and many others). These give you exceptionally high-quality sound for playing and recording in various musical genres.
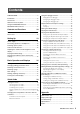
Contents PRECAUTIONS ......................................................4 Using the Arpeggio function ................................. 22 Introduction .............................................................6 Playing back the Arpeggio ...................................... 22 Changing the Arpeggio tempo ................................ 23 Changing the Arpeggio type ................................... 23 Accessories.............................................................
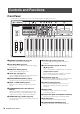
Controls and Functions Front Panel (The illustration is of the MX49; however, the controls and terminals of the MX61 are the same.) 1 2 4 5 8 9 ! @ 6 7 ) # %$ G2 A2 B2 C3 ^ * & 3 C2 D2 E2 F2 1 [MASTER VOLUME] knob (page 14) Adjusts the volume of the overall sound. 2 Pitch Bend Wheel (page 21) Bends the pitch of the notes up or down while playing the keyboard. 3 Modulation Wheel (page 21) Controls vibrato applied to the sound.
Controls and Functions ( B F G H I J A D C K C5 & [SELECT] button (page 24) Calls up the display from which you can select a Performance. * LCD (Liquid Crystal Display) (page 14) The backlit LCD indicates the parameters and values related to the currently selected operation or function. ( [DATA] dial (page 16) Changes the selected value in the display.
Controls and Functions Rear Panel 1 2 3 1 DC IN jack (page 13) Connect the supplied power adaptor to this connector. 2 P (Standby/On) switch (page 13) Press to turn the power On (O) or set to Standby (N). 3 MIDI [IN]/[OUT] terminals (page 37) MIDI [IN] is for receiving control or performance data from another MIDI device. MIDI [OUT] is for transmitting all control, performance and playback data from this instrument to another MIDI device.
Setting Up Power supply Make connections for the supplied power adaptor (page 44) in the following order. Before you connect the power adaptor, make sure that the power of this instrument is set to Standby status (N). 1 Wrap the DC output cable of the power adaptor around the cable clip (as shown below), then connect the plug of the adaptor to the DC IN jack on the rear panel.
Setting Up Auto Power Off function To prevent unnecessary power consumption, this instrument features an Auto Power Off function that automatically turns the power off if the instrument is not operated for a specified period of time. In the default settings, the power will be turned off if this instrument is not operated for 30 minutes. If you wish to disable the Auto Power Off function, turn the power on while holding down the lowest key on the keyboard.
Setting Up Resetting User Memory to the initial factory settings The original factory settings of this synthesizer’s User Memory can be restored as described here. The Performances, User Voices, and Utility settings of the User Memory will be reset to the initial factory settings. This operation is especially handy when you’ve unintentionally deleted or overwritten the Performances or Utility settings.
Basic Operation and Displays Moving the cursor The display cursor indicates a selected item and is shown in the three following types. Arrow type Selected item AP c001:CncrtGrand STR:081:Amb*Pizza This flashing triangular cursor indicates the selected item’s line. You can move the cursor up or down by using the Cursor [u]/[d] buttons.
Basic Operation and Displays Selecting a page The display to be edited may consist of multiple pages. In this case, the upper (s)/ lower (a) icons are indicated at the bottom left of the display. You can select a page by using the Cursor [u]/[d] buttons. Leaving the current display If you wish to return to the previous display from the current display, press [EXIT]. In order to return to the top display, press [EXIT] repeatedly.
Quick Guide Playing the Voices Selecting a Voice for Part 1 The MX49/MX61 consists of 16 Parts. Voices, which are the basic sounds and building blocks of the MX49/MX61, are assigned to each Part. After the instrument is turned on, the top display which appears shows the Voices of only Parts 1 and 2. With the default settings, playing the keyboard will sound only the Voice for Part 1. Select the desired Voice from the various preset Voices and play it.
Quick Guide Selecting a Voice for Part 2 Combining Voices (Layer) Here, you’ll learn how to select a Voice for Part 2 as well as Part 1. By setting the Voices of Part 1 and Part 2 in the top display, you can alternate between the two Voices as you play without the sound unnaturally cutting off. You can select separate Voices for Parts 1 and 2, and play both Voices together in a layer. 1 Voice for Part 1 Press the Cursor [d] button to select Part 2. Only Part 2 can now be sounded.
Quick Guide 4 To cancel the Layer function, press [LAYER] again. 3 To change the Split Point, simultaneously hold down [SPLIT] and press the desired key. The [LAYER] lamp turns off, and only the Part 1 Voice sounds. Split Point + HINT Creating a thick, textured sound by layering Voices By slightly increasing/decreasing the value of the “Detune” parameter for one Part after assigning synthesizer Voices to Parts 1 and 2, you can create a powerful lead synthesizer sound.
Quick Guide Changing the tonal qualities of the Voice with the controllers Knobs [A] – [D] The MX49/MX61 features various controllers which let you change the sound of the instrument in real time. These include the Knobs, Pitch Bend Wheel, and Modulation Wheel. You can also control various functions by using external controllers connected to the corresponding jacks on the rear panel.
Quick Guide External Controllers The Arpeggio function lets you create arpeggios (broken chords) by simply playing the appropriate notes on the keyboard. For example, you could play the notes of a triad—the root, third, and fifth—and the Arpeggio function will automatically create a variety of interesting arpeggio-type phrases. You can set different Arpeggio types for each Part, and apply the Arpeggio function up to two Parts simultaneously.
Quick Guide 3 Select “03:Arp Select” with the Cursor [u]/ [d] buttons, then press [ENTER]. Changing the Arpeggio tempo This calls up the Edit display related to the Arpeggio for the Part. 1 Press [TEMPO]. 2 While playing back the Arpeggio from the keyboard, change the tempo with the [DATA] dial. Part01 d 03:Arp*Select 4 Press [PIANO] (1). This calls up the Edit display for Part 1. (Other Parts can be selected by pressing the appropriate number button 1 – 16.
Quick Guide Keyboard Octave/ Transpose settings Octave The OCTAVE [-]/[+] button lets you shift the pitch of the keyboard in octaves, up to a maximum of three. For example, you may want to shift the pitch down lower to get extra bass notes, or shift up to get higher notes for leads and solos. Pressing the [-] and the [+] buttons together at the same time will return the setting to the initial value (0). The current octave range can be confirmed via the status of the lamp of the OCTAVE [-]/[+] buttons.
Quick Guide NOTE The 128 Performances are divided into eight groups (A – H), each of which consist of sixteen Performances. To select these groups of Performances, simultaneously hold down [SHIFT] and use the [DATA] dial or [INC/ YES]/[DEC/NO] buttons. 3 Play the keyboard. If the lamp of the [R/K] (Play/Pause) button flashes before playing the keyboard, playing the keyboard starts the Rhythm Pattern (Key On Start function). In this case, play the keyboard with the Rhythm Pattern.
Quick Guide Changing the tempo for the Rhythm Pattern + 1 Press [TEMPO]. 2 Press [R/K] (Play/Pause) to play back the Rhythm Pattern, then rotate the [DATA] dial to change the tempo. NOTE If you wish to cancel this standby status, press [J] (Stop). 2 Play the keyboard. The Rhythm Pattern starts at the same time. 3 Press [J] (Stop) to stop the Rhythm Pattern.
Quick Guide Playing the keyboard along with Songs 3 Press [EXT. SONG]. 4 Press the Cursor [u] button repeatedly if necessary to call up the 1st page, then rotate the [DATA] dial to select the desired MIDI data. MIDI data and audio data contained in the USB flash memory can be played back as a “Song” on the MX49/ MX61. MIDI and audio data MIDI data is comprised of your keyboard performance information and is not a recording of the actual sound itself.
Quick Guide 9 Press [J] (Stop) to stop the MIDI data. 6 Play the keyboard along with the audio data. 7 To pause the audio data, press [R/K] (Play/ Pause). To resume playback, press [R/K] (Play/Pause) again. 8 Press [J] (Stop) to stop the audio data. Playing back audio data of the USB flash memory 1 Connect the USB flash memory in which the audio data is stored.
Quick Guide Using USB flash memories 2 By connecting the instrument to a USB flash memory, you can save data you’ve created to the connected device, as well as read data from the connected device. Press the play button on the connected music player. The song data of the music player is played back from the instrument. NOTE Use the external device’s volume control to adjust the desired level balance with this instrument.
Quick Guide 3 NOTE You can also edit each effect parameter in the 3rd or Press the Cursor [u] button if necessary to select “01:Chorus Eff,” then press [ENTER]. later pages. For details about each parameter, see the “Synthesizer Parameter Manual” PDF document. The Chorus effect setting display is called up. 4 Press the Cursor [u] buttons repeatedly if necessary to call up the 1st page, then use the Cursor [l]/[r] buttons and the [DATA] dial to change the Chorus effect category/ type.
Quick Guide Changing the Insertion Effect of the Voice (Voice Edit) 6 The Insertion effect display of the Voice Edit is called up. You can edit parameters of the Voice assigned to each Part. The Voice parameters are in the Voice Edit displays (those having “Voice” or “DrumKit” indications in the display names). In this example, we’ll change the Insertion effect settings. 1 Press [EXIT], then use the Cursor [u]/[d] buttons to select “05:Voice Insert Eff”/ ”06:Drumkit Ins Eff.” Finally, press [ENTER].
Quick Guide Changing the Controller Set for the Voice (Voice Edit) You can assign different functions for the controllers (Knobs, Modulation Wheel, etc.) to each Voice. Each Voice can have up to six sets which determine the available controllers for the Voice and their functions. The controller assignments are called a “Controller Set.” In this example, we’ll change the Controller Set of the Voice assigned to the Part.
Quick Guide Storing a Voice (Voice Store) Storing a Performance (Performance Store) The edited Voice parameters can be stored as a User Voice separately from a Performance. Moreover, these stored User Voices can be assigned to a different Part or Performance. When you are satisfied with the Performance you’ve created, store the new settings to internal memory (as a Performance).
Quick Guide Changing Voices smoothly while performing When you change a Voice assigned to a Part or select a different Performance, the sound of the previous Voice/ Performance will be cut off, replaced abruptly by the newly selected Voice/Performance. In live performance situations, you probably want to avoid this.
Quick Guide NOTE Adjusting the display brightness Making Global System Settings (Utility settings) To adjust the brightness of the display, simultaneously hold down [UTILITY] and press [INC/YES]/[DEC/NO]. Pressing [UTILITY] calls up the Utility display, from which you can make global system settings. For details about the Utility settings, see the “Reference Manual” PDF document.
Quick Guide Saving settings to USB flash memory Loading the settings from a USB flash memory You can save all data of the User memory—containing Performances, created User Voices, and Utility settings— to USB flash memory as an “All” file (extension: .X5A). 1 Connect the USB flash memory to the USB [TO DEVICE] terminal. 1 Connect a USB flash memory to the USB [TO DEVICE] terminal. 2 Press [FILE]. 2 Press [FILE]. 3 Use the Cursor [u]/[d] buttons to select “02:Load,” then press [ENTER].
Quick Guide 6 If you’ve set “Type” to “Performance” in step 5, select the desired Performance number, then press [ENTER]. Connecting an external MIDI instrument If you’ve set “Type” to something other than “Performance” in step 5, go on to step 8. With a standard MIDI cable (available separately), you can connect an external MIDI instrument, and transmit MIDI data between the MX49/MX61 and the connected instrument.
Quick Guide HINT MIDI Transmit and Receive channels – Changing the Performances remotely HINT MIDI Transmit and Receive Channels – Sounding only an external tone generator The MIDI Receive channels for Parts 1 – 16 of the MX49/MX61 are fixed to 1 – 16. Make sure to match the MIDI Transmit channels of the external MIDI instrument with the MIDI Receive channels of the MX49/MX61.
Appendix Shift Function List Some of the important functions and operations on the instrument can be executed with convenient panel control shortcuts. Simply hold down the [SHIFT] button and press the indicated button (as described below). Operation Function [SHIFT] + [INC]/[DEC]/[DATA] dial Increases/decreases the value by 10. (Program number in the Play mode; parameter value in the Edit mode) In the Performance Select display, this switches among the Performance groups.
Appendix LCD indication 40 Description Illegal file. The file specified for loading is unusable by this instrument or cannot be loaded in the current status. Illegal format. The format of the file specified for playback is SMF Format 1 or an audio data format other than WAV. Use SMF Format 0 MIDI data or WAV format audio data. Incompatible USB device. A USB device which cannot be used with this instrument has been connected to the USB [TO DEVICE] terminal.
Appendix Troubleshooting No sound? Wrong sound? When a problem like this occurs, please check the following points before assuming that the product is faulty. Many problems can be solved by executing the Factory Set operation (page 15), after backing up your data to an USB flash memory (page 36). If the problem persists, consult your Yamaha dealer. No Sound. Is this instrument properly connected to related external equipment (e.g.
Appendix Distorted sound. Are the effect settings appropriate? Use of certain effects at certain settings may produce distortion. [EDIT] Select “02:Part” [ENTER] Select “05:Voice Insert Eff”/“05:DrumKit Insert Eff” [ENTER] Are the filter settings appropriate? Excessively high filter resonance settings can cause distortion.
Appendix Cannot start the Arpeggio. Check whether [ARP] is turned on or off. Are the Arpeggio switches for both Part and Common set to on? [EDIT] Select “02:Part” [ENTER] Select “03:Arp Select” [ENTER] “Switch” [EDIT] Select “01:Common” [ENTER] Select “04:Arp Switch” [ENTER] “Switch” Is the MIDI Sync parameter set to “internal” or “auto” (using internal clock)? [UTILITY] Select “02:MIDI” [ENTER] “MIDI Sync” Cannot stop the Arpeggio.
Appendix Specifications Keyboard Tone Generator block Sequencer block Others MX49 49 keys (Initial touch) MX61 61 keys (Initial touch) Tone Generator AWM2 Polyphony 128 notes Multi-timbral Capacity 16 parts (Internal) Wave Approx.
Appendix Index A J [ARP] button ..................................................................... 11, 23 [JOB] button ............................................................................10 Arpeggio ................................................................................. 22 Audio data .............................................................................. 27 Auto Power Off function .......................................................... 14 [AUX IN] jack ...................
Appendix S Save ........................................................................................ 36 [SELECT] button ............................................................... 11, 24 [SHIFT] button ................................................................... 11, 39 SMF ......................................................................................... 27 Song ........................................................................................ 27 Speaker ........................
Yamaha Web Site (English) http://www.yamahasynth.com/ Yamaha Downloads http://download.yamaha.com/ Yamaha Manual Library http://www.yamaha.co.jp/manual/ U.R.G., Digital Musical Instruments Division © 2012 Yamaha Corporation 210MWTY*.