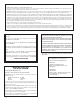
Getting Started Guide Manuel de l’utilisateur Kurzanleitung Guía de introducción 1 2 3 4 5 6 7 8 10 9 11 12 13 14 15 16 L R L ST IN R 2TR IN PAD 20dB 20dB 20dB 20dB 20dB 20dB 20dB 20dB 20dB 20dB 20dB 20dB 20dB 20dB 20dB 20dB –16 –60 –16 –60 –16 –60 –16 –60 –16 –60 –16 –60 –16 –60 –16 –60 –16 –60 –16 –60 –16 –60 –16 –60 –16 –60 –16 –60 –16 –60 –16 –60 GAIN GAIN GAIN GAIN GAIN GAIN GAIN GAIN GAIN GAIN GAIN GAIN GAIN GAIN GAIN GAIN 0 10 LEVE
FCC INFORMATION (U.S.A.) 1. IMPORTANT NOTICE: DO NOT MODIFY THIS UNIT! This product, when installed as indicated in the instructions contained in this manual, meets FCC requirements. Modifications not expressly approved by Yamaha may void your authority, granted by the FCC, to use the product. 2. IMPORTANT: When connecting this product to accessories and/or another product use only high quality shielded cables. Cable/s supplied with this product MUST be used. Follow all installation instructions.
i Important Information Please read the following before operating ProMix 01. Safety Information • Make sure the ProMix 01 power cord is not located in a position where it is likely to be walked on or pinched by other equipment. • Make sure ProMix 01 is earthed correctly. • Do not expose ProMix 01 to direct sunlight, extremes of temperature or humidity, excessive dust or vibration, or severe shocks. • The ambient temperature where ProMix 01 is sited should be between 10˚C and 35˚C (50˚F and 95˚F).
ii Copyright © 1994 Yamaha Corporation. All rights reserved. No part of the ProMix 01 software or its user manuals may be reproduced or distributed in any form or by any means without the prior written authorization of Yamaha Corporation. Trademarks All trademarks are the property of their respective holders. Cable Notes ProMix 01 offers superb sonic quality. So the last thing you want is signal degradation due to cheap or corroded connectors.
iii Contents 1 Welcome to ProMix 01 . . . . . . . . . . . . 1 Welcome to ProMix 01 . . . . . . . . . . . . . . . . . . . . . . . . . . . . 2 ProMix 01 User Guides . . . . . . . . . . . . . . . . . . . . . . . . . . . . 2 Installation . . . . . . . . . . . . . . . . . . . . . . . . . . . . . . . . . . . . . . . 2 Top & Rear . . . . . . . . . . . . . . . . . . . . . . . . . . . . . . . . . . . . . . 3 ProMix 01 Sonic Spec . . . . . . . . . . . . . . . . . . . . . . . . . . . . . .
iv 6 Mixing and Automation . . . . . . . . . . 41 General Mix Procedure . . . . . . . . . . . . . . . . . . . . . . . . . . . What is ProMix 01 Automation . . . . . . . . . . . . . . . . . . . . An Automation System . . . . . . . . . . . . . . . . . . . . . . . . . . . Mix Scenes & Automation . . . . . . . . . . . . . . . . . . . . . . . . . Real-Time Automation . . . . . . . . . . . . . . . . . . . . . . . . . . .
Welcome to ProMix 01 1 1 Welcome to ProMix 01 In this chapter... Welcome to ProMix 01 . . . . . . . . . . . . . . . . . . . . . . . . . ProMix 01 User Guides . . . . . . . . . . . . . . . . . . . . . . . . . Installation . . . . . . . . . . . . . . . . . . . . . . . . . . . . . . . . . . . Top & Rear . . . . . . . . . . . . . . . . . . . . . . . . . . . . . . . . . . . ProMix 01 Sonic Spec . . . . . . . . . . . . . . . . . . . . . . . . . . ProMix 01 General Features . . . . . . . . . . . . . . . . . .
2 Chapter 1: Welcome to ProMix 01 Welcome to ProMix 01 Thank you for purchasing and welcome to—ProMix 01—the world’s first affordable programmable digital mixer. With superb sonic performance, full MIDI control, and a powerful feature set, ProMix 01 is a mixer for life—whatever your application—be it keyboard mixing, MIDI studio, live sound, commercial installation, sub-mixer, theater, post production, hard disk recording, and so on. ProMix 01 User Guides ProMix 01 is supplied with two user guides.
Top & Rear 3 Top & Rear 1 2 3 4 5 6 7 8 11 10 9 12 13 14 15 16 L R L ST IN R 2TR IN MONITOR OUT LEVEL control 20dB PAD switch GAIN control CUE/2TR IN switch PAD 20dB 20dB 20dB 20dB 20dB 20dB 20dB 20dB 20dB 20dB 20dB 20dB 20dB 20dB 20dB 20dB –16 –60 –16 –60 –16 –60 –16 –60 –16 –60 –16 –60 –16 –60 –16 –60 –16 –60 –16 –60 –16 –60 –16 –60 –16 –60 –16 –60 –16 –60 –16 –60 GAIN GAIN GAIN GAIN GAIN GAIN GAIN GAIN GAIN GAIN GAIN GAIN GAIN GAIN G
4 Chapter 1: Welcome to ProMix 01 ProMix 01 Sonic Spec • Linear 20-bit 64-times oversampling A/D converters (CH, ST IN) • Linear 20-bit 8-times oversampling D/A converters (ST OUT) • 105dB dynamic range (typical) • Frequency response of 20Hz–20kHz +1, –3dB ProMix 01 General Features • 16 input channels (eight XLR, eight phone jack—all balanced) • Continuously variable gain control • 20dB input pad • 48V phantom power for condenser microphones • Stereo input channel • Balanced XLR stereo outputs • 50 scen
ProMix 01 Key Features 5 ProMix 01 Key Features This section looks at some ProMix 01 key features; what they mean to you and how you can take advantage of them. Scene Memories Until now, the only way to store mix settings was with marker pen and masking tape. ProMix 01 scene memories, however, change all that. They allow you to recall all mix settings (i.e. a mix scene) instantly with just one press of a button, or MIDI Program Change command. And it’s not just mutes and faders, it’s all mix settings.
6 Chapter 1: Welcome to ProMix 01 Digital Benefits You’re probably already familiar with the many benefits of digital audio, but what exactly are the benefits for digital audio mixing? Well, an audio mixer has the job of combining audio signals from various sources, at differing levels and impedances, usually into a stereo signal. And it must do this without introducing any new distortions and noise.
ProMix 01 Key Features 7 Internal Effects ProMix 01 features two stereo internal multi-effects processors. A whole range of effects from reverbs to modulation effects are provided. Effects processors are fed via SEND1 and SEND2, and the processed signals are returned via RTN1 and RTN2, respectively. Having internal effects processors means that you don’t have to purchase external units, effect patching is greatly simplified, and your audio data remains in the digital realm.
8 Chapter 1: Welcome to ProMix 01 ProMix 01 Secrets The following points will help you take full advantage of ProMix 01. • Besides the DIGITAL REC OUT, inputs and outputs are analog. • The input channel INPUTs and STEREO OUT are balanced. All other inputs and outputs are unbalanced. • On the PAN LCD function, ST OUT is a balance control, not pan. • When no plugs are inserted into the ST IN phone jacks, the 2TR IN signals are fed through to the stereo input channel.
Getting Started 2 9 Getting Started In this chapter... What You’ll Need . . . . . . . . . . . . . . . . . . . . . . . . . . . . . Basic Setup . . . . . . . . . . . . . . . . . . . . . . . . . . . . . . . . . . Making the Connections . . . . . . . . . . . . . . . . . . . . . . . Power ON/OFF . . . . . . . . . . . . . . . . . . . . . . . . . . . . . .
10 Chapter 2: Getting Started What You’ll Need To perform the following tutorials, you need: • ProMix 01 • A sound source: CD player, drum machine, synth with demo song • An amplifier and speakers, or headphones • Audio connecting cables Basic Setup The following illustration shows how to set up a minimal system that will allow you to perform the following tutorials.
Making the Connections 11 Making the Connections Warning: Before making any connections, make sure that all your equipment is powered OFF. 1. Connect your sound source to input channel 9. It seems more logical to connect to input channel 1. But since inputs 1 through 8 use XLR-type connectors, and it’s doubtful whether you’re going to yell into a microphone for both tutorials, we’ll use input channel 9. If you’re using a stereo sound source, connect to input channel 10 as well.
12 Chapter 2: Getting Started ProMix 01 Getting Started Guide
Basic Mixing Tutorial 13 Basic Mixing Tutorial 3 In this chapter... Setting the Input Level . . . . . . . . . . . . . . . . . . . . . . . . . Applying EQ . . . . . . . . . . . . . . . . . . . . . . . . . . . . . . . . . Using the EQ Library . . . . . . . . . . . . . . . . . . . . . . . . . . CUE LCD Function . . . . . . . . . . . . . . . . . . . . . . . . . . . Setting the CUE Mode . . . . . . . . . . . . . . . . . . . . . . . . . Setting Fader Levels . . . . . . . . . . . . . . . . . . . . . . . . . .
14 Chapter 3: Basic Mixing Tutorial Setting the Input Level ꎹ Presuming that ProMix 01 is powered ON and your music source is running, let’s optimize the input signal level for best performance. 1. Press [METER]. The METER LCD function appears showing channel 9’s signal level. 2. Turn the MONITOR OUT LEVEL control up a little. If you’re using headphones, turn up the PHONES LEVEL control instead. 3. Press channel 9’s [SEL] button. You are now listening to input channel 9. 4.
Applying EQ 15 Applying EQ ꎹ Now we’ll apply a little EQ to channel 9. ProMix 01 EQ is 3-band fully parametric, with variable gain, frequency, and Q. Setting EQ Gain 1. Press [EQ LOW]. The EQ LCD function shown below appears. Initially, the LOW gain (G) parameter is selected. 2. Turn the PARAMETER wheel clockwise to boost. The gain increases in 1dB steps and the EQ curve changes. In the MEMORY area of the display the word EDIT appears highlighted. Don’t worry about it at this stage.
16 Chapter 3: Basic Mixing Tutorial Setting EQ Frequency 1. Press [MID]. The MID gain (G) parameter is selected. 2. Set the gain to –10dB. 3. Press [MID] again. The MID frequency (F) parameter is selected. 4. Use the PARAMETER wheel to sweep through the frequency range. The MID band covers virtually the entire audio spectrum, from 32Hz to 18kHz. Note: Although it may take a little while to draw the EQ curve, the internal EQ circuits reflect your adjustments immediately.
Applying EQ 17 Setting the Q The MID band is a peaking type EQ. The LOW and HIGH bands are initially configured as shelving type EQs. However, they can also be configured as peaking EQs. 1. Press [EQ LOW] to select the LOW gain. 2. Set to –10dB. 3. Press [EQ LOW] twice to select the LOW Q. 4. Turn the PARAMETER wheel one step counterclockwise. The LOW band changes from shelving to peaking with a Q value of 3oct (3 octaves).
18 Chapter 3: Basic Mixing Tutorial Using the EQ Library ꎹ The EQ library is used to store EQ settings. It has 30 preset EQ programs and 20 user EQ programs for you to store your own custom EQ settings. First we’ll look at recalling EQ programs, then how to store your own. Recalling an EQ Program 1. Press [LIBRARY]. The LIBRARY LCD function shown below appears. 2. Using the PARAMETER wheel, select program #26 (TELEPHONE VOICE).
Using the EQ Library 19 Storing an EQ Program ꎹ Now we’ll edit the EQ and store it in the library as a user EQ program. 1. Set the EQ parameters how you like. 2. Press [LIBRARY] to return to the LIBRARY LCD function. 3. Press the [√] cursor button to select STORE. EQ program #31, the first user program, is selected automatically. 4. Press [ENTER]. The LIBRARY NAME display shown below appears. Here you can name your custom EQ program for easy identification.
20 Chapter 3: Basic Mixing Tutorial CUE LCD Function ꎹ So far we’ve been monitoring channel 9 using the MIX CUE mode. In this mode, the channel selected using the [SEL] buttons is monitored. When the CUE LCD function is selected, however, operation is a little different, as we shall see. 1. Press [CUE]. The sound is cut, all [SEL] button LEDs go OFF, and the CUE LCD function shown below appears.
Setting the CUE Mode 21 Setting the CUE Mode ꎹ For the rest of this tutorial and the next, we’ll use the ST FIX CUE mode. In this mode, the MONITOR OUT and PHONES signals are the same as those of the main STEREO OUTPUT. 1. Use the PARAMETER wheel to select ST FIX. ST FIX flashes. 2. Press [ENTER] to confirm the setting. The sound is cut and ST FIX appears highlighted. Any channels that were in the previous CUE MIX are released.
22 Chapter 3: Basic Mixing Tutorial Channel ON/OFF ꎹ The channel [ON] buttons are used to turn channels ON and OFF. This function is sometimes called MUTE. 1. Press channel 9’s [ON] button. The sound is cut and the [ON] button’s LED goes OFF. 2. Press the [ON] button again to turn the channel back ON. Note how the signal level is displayed on the LCD even when the channel is OFF. This is because the meter signal is sourced before the [ON] button.
Advanced Mixing Tutorial 4 23 Advanced Mixing Tutorial In this chapter... Applying Effects . . . . . . . . . . . . . . . . . . . . . . . . . . . . . . Recalling Effects . . . . . . . . . . . . . . . . . . . . . . . . . . . . . . Editing Effects . . . . . . . . . . . . . . . . . . . . . . . . . . . . . . . Storing User Effects . . . . . . . . . . . . . . . . . . . . . . . . . . . Patching in a Compressor . . . . . . . . . . . . . . . . . . . . . . Storing Mix Scenes . . . . . . . . . . . . . . . . . . .
24 Chapter 4: Advanced Mixing Tutorial Applying Effects ꎹ ProMix 01 features two stereo effects processors: Effect1 and Effect2. There are 30 preset effects programs and 10 user effects programs for you to store your own custom effects. Here we’ll apply Effect1 to channel 9. 1. Press [SEND1]. The SEND1 LCD function shown below appears and the channel fader goes to its minimum position. Even though the fader has moved to its minimum position, you can still hear the sound.
Editing Effects 25 Editing Effects ꎹ You can edit the preset effects programs and then store them as user effects programs. Here we explain just the editing procedure. You’re free to set the parameter values as you like. Feel free to experiment. 1. Select and recall an effects program as described page 24. 2. Press the [®] cursor button to select EDIT, as shown below. 3. Press [ENTER]. An edit display similar to the one shown below appears. 4.
26 Chapter 4: Advanced Mixing Tutorial Storing User Effects ꎹ There are 10 user effects programs for you to store your own settings. Here we explain how to store. 1. Press the [√] cursor button twice to select STORE. Effects program #31, the first user program, is selected automatically and its name and number flash. 2. Press [ENTER]. The EFFECT NAME display shown below appears. Here you can name your effects program for easy identification. Program names can be up to 15 characters long. 3.
Patching in a Compressor 27 Patching in a Compressor ꎹ ProMix 01 features three stereo dynamics processors, for compression, limiting, gating and ducking. Here we’ll patch a compressor into the stereo output to add some punch. 1. Press [COMP]. The COMP LCD function shown below appears. 2. Use the cursor buttons to select PATCH. 3. Use the PARAMETER wheel to select STEREO. STEREO flashes. 4. Press [ENTER] to confirm. Dynamics processor #1 is patched into the stereo outputs and the sound is compressed.
28 Chapter 4: Advanced Mixing Tutorial Storing Mix Scenes ꎹ ProMix 01 scene memories allow you to store and recall all mix settings, collectively called a mix scene, with just one press of a button. Scene memory refers to the RAM memories in ProMix 01, while mix scene refers to the collective mix settings that are stored in a scene memory. Up to 50 mix scenes can be stored. 1. Press [STORE]. A message saying you that mix scene 00 is read only may appear briefly.
Recalling Mix Scenes 29 Recalling Mix Scenes ꎹ Now we’ll take a look at recalling mix scenes. Since you’ve stored only one mix scene so far, first we’ll recall mix scene 00 to reset all the mix settings, then recall mix scene #01 to return to our previous mix settings. Unlike mix scenes 01 to 50, mix scene 00 is read-only and is used to reset all mix settings. You cannot store it.
30 Chapter 4: Advanced Mixing Tutorial Where to Go from Here? That’s the end of the tutorials. In the Basic Tutorial you leaned how to set input levels, apply EQ, use the EQ library, set CUE modes, set faders, use the [ON] buttons, and set the pan. You should now have a good understanding of ProMix 01’s basic mixing functions. In the Advanced Tutorial you leaned how to apply, recall, edit, and store effects; patch in a dynamics processor; and store and recall mix scenes.
Application Examples 5 31 Application Examples In this chapter... Live Performance . . . . . . . . . . . . . . . . . . . . . . . . . . . . . Onstage Keyboard Mixing . . . . . . . . . . . . . . . . . . . . . . MIDI Studio . . . . . . . . . . . . . . . . . . . . . . . . . . . . . . . . . Multitracking . . . . . . . . . . . . . . . . . . . . . . . . . . . . . . . . 32 34 36 38 This chapter shows ProMix 01 in action in some real-life working applications, probably its mainstream applications.
32 Chapter 5: Application Examples Live Performance Front of house main speakers Stage monitors Power amp Power amp Graphic EQ SEND4 STEREO OUT SEND3 Headphones DIGITAL REC OUT ANALOG REC OUT 2TR IN Inputs 1–8 Mics ProMix 01 Getting Started Guide Inputs 9–16 Line level sources DAT
Live Performance 33 This example shows ProMix 01 in a live performance application. Eight balanced microphones can be connected to input channels 1 through 8, and 48V phantom power is available for condenser type microphones. Eight line level sources can be connected to input channels 9 through 16. Apart from the phantom power and connector type, however, inputs 1 through 16 all feature the same head amplifier.
34 Chapter 5: Application Examples Onstage Keyboard Mixing Powered monitors Effects processor 88 SEND4 SEND3 ST IN MONITOR OUT Headphones STEREO OUT To front of house console MIDI sequencer MIDI OUT MIDI IN Inputs 1–8 Inputs 9–16 MIDI THRU To other MIDI instruments 20 P128 MIDI Foot controller Talkback mic Synths/tone generators/samplers ProMix 01 Getting Started Guide
Onstage Keyboard Mixing 35 This example shows ProMix 01 in an onstage keyboard mixing application. Line-level sources are connected directly to inputs channel 9 through 16. With the correct connectors, line-level sources can also be connected to input channels 1 through 8. Balanced microphones for foldback or miking up a rotary-type speaker cabinet can also be connected.
36 Chapter 5: Application Examples MIDI Studio Monitors Power amp Effects processor 88 SEND4 SEND3 ST IN MONITOR OUT Headphones DIGITAL REC OUT DAT 2TR IN ANALOG REC OUT MIDI sequencer MIDI OUT MIDI IN Inputs 1–8 Inputs 9–16 MIDI THRU Mics ProMix 01 Getting Started Guide Main MIDI keyboard To other MIDI synths /tone generators/samplers
MIDI Studio 37 This example shows ProMix 01 in a MIDI studio application. This could be a home or project studio. Balanced microphones for vocals are connected to input channels 1 through 8, and 48V phantom power is available for condenser type microphones. Line-level sources are connected to input channels 9 through 16. Apart from the phantom power and connector type, however, inputs 1 through 16 all feature the same head amplifier.
38 Chapter 5: Application Examples Multitracking Monitors Tape outputs to ProMix inputs MIDI IN Power amp Patchbay /routing selector Graphic EQ SEND4 SEND3 ST OUT MONITOR OUT Headphones DIGITAL REC OUT DAT 2TR IN ANALOG REC OUT MIDI sequencer MIDI OUT MIDI IN Inputs 1–8 Inputs 9–16 MIDI THRU Mics ProMix 01 Getting Started Guide Main MIDI keyboard To other MIDI synths /tone generators/samplers
Multitracking 39 This example shows ProMix 01 in a multitrack recording application. It is basically the same as the MIDI Studio application with the addition of a multitrack recorder. Although not specifically designed for use as a recording mixer, multitrack recording with ProMix 01 is possible with a little patching. In the illustration, an analog multitrack tape recorder is shown. This could, however, just as well be a hard disk recorder.
40 Chapter 5: Application Examples ProMix 01 Getting Started Guide
Mixing and Automation 6 41 Mixing and Automation In this chapter... General Mix Procedure . . . . . . . . . . . . . . . . . . . . . . . . What is ProMix 01 Automation . . . . . . . . . . . . . . . . . An Automation System . . . . . . . . . . . . . . . . . . . . . . . . Mix Scenes & Automation . . . . . . . . . . . . . . . . . . . . . . Real-Time Automation . . . . . . . . . . . . . . . . . . . . . . . .
42 Chapter 6: Mixing and Automation General Mix Procedure This section is for users who are relatively new to audio mixing. It provides a general mix procedure for successful ProMix 01 mixing. • Reset all controls—this is simple on ProMix 01, just recall mix scene memory 00. Don’t forget to reset the GAIN controls, PAD switches, and monitor controls by hand, though.
General Mix Procedure 43 • Balance levels—once you’ve optimized the input levels, applied some corrective EQ, and positioned instruments using pan, you’re ready to balance the levels. You should already have some idea of how you want the mix to sound. This will, obviously, depend on the application and the instruments being mixed. Start with all faders at about 0dB. This is an optimum setting with regard to mixer performance and leaves you with some headroom to increase levels later.
44 Chapter 6: Mixing and Automation • Apply effects—this really depends on your application. In the studio, you’ll probably have time to experiment with effects. In a live situation, however, where the show must go on, you may not have time to experiment. At venues with irregular acoustic properties you may spend all your time trying to make a bad sound sound good. Adding effects at this stage may just complicate the situation.
What is ProMix 01 Automation 45 What is ProMix 01 Automation In conjunction with a MIDI sequencer or controlling computer, ProMix 01 provides total mix automation. MIDI Program Change messages are used to recall mix scenes, providing snapshot mix automation. And MIDI Control Change messages are used to control virtually all mix parameters in real time, providing dynamic mix automation. An Automation System The following illustration shows a basic system for ProMix 01 automation. For simple automation (i.
46 Chapter 6: Mixing and Automation Mix Scenes & Automation To recall mix scenes using a MIDI sequencer you need to: • Set the PROGRAM Tx and Rx parameters on the MIDI SETUP LCD function to ON. • Set the MIDI Tx and Rx Channels. ProMix 01 will now transmit a program Change message when the [RECALL] button is pressed. And will recall a mix scene when a Program Change message is received, so long as that Program Change message is assigned to a mix scene, of course.
Real-Time Automation 47 • When recalling a mix scene during a mix, try to choose a point when the parameters to be changed aren’t being used. For example, turn channels ON before the sound source starts, and turn them OFF when it has finished. Also try to adjust fader levels before a sound starts. Nothing sounds worse than abrupt level changes halfway through a guitar solo, or the sudden disappearance of a fading guitar solo due to premature muting.
48 Chapter 6: Mixing and Automation On your MIDI sequencer: • Set the MIDI THRU (or ECHO BACK) function to OFF. Otherwise, you’ll have a MIDI feedback loop. That is, MIDI data transmitted by ProMix 01 will pass through the sequencer and back to ProMix 01, which is not recommended. Some Sequencers allow you to set MIDI THRU to OFF on just one MIDI Channel. • Some sequencers have MIDI filters that can filter out incoming Control Change messages.
VS73120 IP 95 01 5000 AP Printed in Japan YAMAHA CORPORATION P.O.