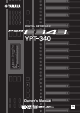
DIGITAL KEYBOARD Owner’s Manual EN
SPECIAL MESSAGE SECTION This product utilizes batteries or an external power supply (adapter). DO NOT connect this product to any power supply or adapter other than one described in the manual, on the name plate, or specifically recommended by Yamaha. WARNING: Do not place this product in a position where anyone could walk on, trip over, or roll anything over power or connecting cords of any kind.
Information for Users on Collection and Disposal of Old Equipment and used Batteries These symbols on the products, packaging, and/or accompanying documents mean that used electrical and electronic products and batteries should not be mixed with general household waste. For proper treatment, recovery and recycling of old products and used batteries, please take them to applicable collection points, in accordance with your national legislation and the Directives 2002/96/EC and 2006/66/EC.
About the Manuals In addition to this Owner’s Manual, the following Online materials (PDF files) are available. MIDI Reference Contains MIDI-related information, such as the MIDI Implementation Chart. MIDI Basics (only in English, French, German and Spanish) Contains basic explanations about what MIDI is and can do. Computer-related Operations Contains instructions about computer-related functions.
Thank you for purchasing this Yamaha Digital Keyboard! We recommend that you read this manual carefully so that you can fully take advantage of the advanced and convenient functions of the instrument. We also recommend that you keep this manual in a safe and handy place for future reference. Contents About the Manuals................................................ 4 Included Accessories............................................ 4 Formats and functions ..........................................
PRECAUTIONS PLEASE READ CAREFULLY BEFORE PROCEEDING Please keep this manual in a safe and handy place for future reference. WARNING Always follow the basic precautions listed below to avoid the possibility of serious injury or even death from electrical shock, short-circuiting, damages, fire or other hazards. These precautions include, but are not limited to, the following: Power supply/AC power adaptor Battery • Do not place the power cord near heat sources such as heaters or radiators.
• When setting up the product, make sure that the AC outlet you are using is easily accessible. If some trouble or malfunction occurs, immediately turn off the power switch and disconnect the plug from the outlet. Even when the power switch is turned off, electricity is still flowing to the product at the minimum level. When you are not using the product for a long time, make sure to unplug the power cord from the wall AC outlet. • Do not insert a finger or hand in any gaps on the instrument.
Panel Controls and Terminals Setting Up Front Panel Song List (page 56) Style List (page 57) Display (page 13) q w e r i t y o !1 !2 !3 !4 q w e r t y [ ] (Standby/On) switch ..................... page 11 [MASTER VOLUME] control ................ page 11 [DEMO] button......................................page 23 [FUNCTION] button ..............................page 33 [METRONOME] button......................... page 14 [TEMPO/TAP] button............................
Panel Controls and Terminals Rear Panel Voice List (page 48) Music Database List (page 58) #0 @0 #2 @5 @6 @7 @8 #3 @3 #1 #4 @4 @9 C5 !5 !6 !7 !8 !9 @0 @1 @2 @3 @4 @5 @6 @7 @8 @9 C6 [START/STOP] button...................pages 17, 22 [REC] button ........................................ page 30 [SONG] button ..................................... page 22 [VOICE] button......................................page 14 [STYLE] button .....................................
Setting Up Installing the batteries Power Requirements Although the instrument will run either from an optional AC adaptor or batteries, Yamaha recommends use of an AC adaptor whenever possible. An AC adaptor is more environmentally friendly than batteries and does not deplete resources. 1 Make sure that the power of the instrument is off (display is blank, except for notation staff). 2 Open the battery compartment cover located on the instrument’s bottom panel.
Setting Up Setting the battery type After installing new batteries and turning the power on, make sure to set the Battery Type appropriately (rechargeable or not) via Function number 042 (page 35). NOTICE • Failure to set the Battery Type may shorten the amount of the battery life. Make sure to set the Battery Type correctly. NOTICE • When the instrument’s sound is output to an external device, first turn on the power to the instrument, then to the external device.
Setting Up Auto Power Off Function To prevent unnecessary power consumption, this instrument features an Auto Power Off function that automatically turns the power off if the instrument is not operated for a specified period of time. The amount of time that will elapse before the power is automatically turned off is set by default to 30 minutes.
Display Items and Basic Operations Display Items Song/Voice/Style Lesson Indication These indicate the operating condition of the instrument. On/Off status This area indicates the lesson related status. This area indicates the on/off status of each function. Each indication is shown when the corresponding function is turned on. Indicates that Keys To Success (page 26) is on. ... Page 12 Indicates that Phrase Repeat (page 29) is on. Notation Normally this indicates the notes you play.
Playing a Variety of Instrument Voices Reference In addition to piano, organ, and other “standard” keyboard instruments, this instrument has a large range of voices that includes guitar, bass, strings, sax, trumpet, drums and percussion, and even sound effects—giving you a wide variety of musical sounds. Selecting a Main Voice 1 Press the [VOICE] button. The Voice number and name will be shown.
Playing a Variety of Instrument Voices Split Point ... default setting: 54 (F#2) Layering a Dual Voice In addition to the Main Voice, you can layer a different Voice over the entire keyboard as a “Dual Voice.” 1 36 Press the [DUAL] button to turn Dual on. 001 2 Press the [DUAL] button again to exit from Dual.
Playing a Variety of Instrument Voices Adding Harmony How to sound each Harmony Type You can add harmony notes to the Main Voice. 1 Press the [HARMONY] button to turn Harmony on. If you don’t want to have a Harmony effect or harmony notes, press the [HARMONY] button again to turn Harmony off. 001 • Harmony type 01 to 05 Press the right-hand keys while playing chords in the auto accompaniment range of the keyboard when the Auto Accompaniment is on (page 17).
Playing Styles This instrument includes the Auto Accompaniment feature that plays appropriate “Styles” (rhythm + bass + chord accompaniment). You can select from a huge variety of Styles covering a wide range of musical genres. 1 Press the [STYLE] button, then use the number buttons [0]–[9], [+], [-] to select the desired Style. The Style List is provided on the front panel, or in the Style List (page 57). 4 Style Number 002 Play a chord in the Auto Accompaniment range to start playback.
Playing Styles Using the Music Database If you have difficulty finding and selecting the desired Style and Voice, use this feature. From the Music Database, just selecting the favorite music genre calls up the ideal settings. 1 Press the [MUSIC DATABASE] button. Both the Auto Accompaniment and Synchro Start are automatically turned on. 001 2 3 Registering a Style File In addition to the Preset Styles, you can register an external Style file (“.
Playing Styles Style Variations—Sections 7 Each Style consists of “Sections” that allow you to vary the arrangement of the accompaniment to match the song you are playing. These instructions cover a typical example for using the Sections. After the Intro finishes, play the keyboard according to the progression of the Song you are playing. Play chords with your left hand while playing melodies with your right hand, and press the [MAIN/AUTO FILL] button as necessary.
Playing Styles Chord Types for Style Playback For users who are new to chords, this chart conveniently shows how to play common chords in the Auto Accompaniment range of the keyboard. Since there are many useful chords and many different ways to use them musically, refer to commercially available chord books for further details. indicates the root note.
Playing Styles Looking Up Chords Using the Chord Dictionary Dict. 001 The Dictionary function is useful when you know the name of a certain chord and want to quickly learn how to play it. 1 2-2. Press the key labeled “M7” in the section between “CHORD TYPE ” and “ROOT.” The notes you should play for the specified chord (root note and chord type) are conveniently shown in the display, both as notation and in the keyboard diagram.
Playing Songs You can simply enjoy listening to the internal Songs, or use them with just about any of the functions, such as Lesson. Song Category The Songs are organized by category as listed below. These demonstration songs showcase the various sounds of the instrument. Each of these songs has two variations: an easy one which even beginners can practice with ease, and another more challenging version.
Playing Songs BGM Playback With the default setting, pressing the [DEMO] button will play back only three internal Demo Songs repeatedly. This setting can be changed so that, for example, all internal Songs automatically play back, letting you use the instrument as a background music source. 1 Song Fast Forward, Fast Reverse, and Pause Like the transport controls on an audio player, this instrument lets you fast forward (FF), rewind (REW) and pause (PAUSE) playback of the Song.
Playing Songs A-B Repeat Turning Each Part On/Off You can play back only a specific section of a Song repeatedly by setting the A point (start point) and B point (end point) in one-measure increments. A B As indicated above the panel buttons (shown below), a Song consists of two Parts, which can be turned on or off individually by pressing the corresponding button, L or R. Repeat playback of this section 1 Start playback of the Song (page 22).
Playing an External Audio Device with the Built-in Speakers You can output the sound of an external audio device, such as a portable music player, with the built-in speakers of this instrument by connecting it via a cable. This lets you play the keyboard along with playback of your music player. 1 Turn off the power for both the external audio device and this instrument. 2 Connect the audio device to the instrument’s [AUX IN] jack.
Using the Song Lesson Feature You can practice the preset Songs using these lesson functions: “Keys to Success,” “Listening, Timing, Waiting” and “Phrase Repeat.” Keys to Success helps you master a Song, whereas Listening, Timing, Waiting helps you first master the timing and then in playing the correct notes. Phrase Repeat lets you select and repeatedly practice a specific phrase in the Song. If you’re using a keyboard instrument for the first time, we suggest you start with Keys to Success.
Using the Song Lesson Feature 6 Confirm the evaluation in the current Step. When the current Step reaches the end, your performance will be evaluated and your score (from 0–100) is shown in the display. 068 Confirming the Passing Status You can confirm the passing status of each Song simply by selecting a Song and each Step. When Step is selected Step01 Excellen 001 Displayed when you’ve passed the Step.
Using the Song Lesson Feature Listening, Timing and Waiting 3 Lesson 1—Listening In this Lesson, you need not play the keyboard. The model melody/chords of the part you selected will sound. Listen to it carefully and remember it well. Lesson 2—Timing In this Lesson, simply concentrate on playing the notes with the correct timing. Even if you play wrong notes, the correct notes shown in the display will sound. Press the [1 LISTENING 2 TIMING 3 WAITING] button to start playback of the Song Lesson.
Using the Song Lesson Feature Keys to Success with Listening, Timing or Waiting You can combine the Keys to Success lesson (page 26) with the Listening, Timing or Waiting lesson (page 28). 1 Enable the Keys to Success lesson. Refer to Steps 1–3 on page 26. 2 Select the desired Step via the [+]/[-] buttons, then press the [1 LISTENING 2 TIMING 3 WAITING] button repeatedly to select the desired lesson. The selected lesson playback starts under the Keys to Success mode.
Recording Your Performance You can record up to 5 of your performances as User Songs (User 1–5: Song numbers 103–107). The recorded User Songs can be played back on the instrument. Track Structure of a Song User Song Number You can record your performance to the following two tracks of a User Song individually or simultaneously. rEC User 1 001 Track 1: Your melody performance is recorded to this track.
Recording Your Performance Recording to a Specified Track 1 2 Make the desired settings, such as those of Voice or Style. If you want to record the melody performance, turn ACMP off (page 17). If you want to record Style playback, turn ACMP on (page 17). Clearing a User Song 1 Press the [SONG] button then select the desired User Song by using the Number buttons. 2 Press and hold the [REC] button for longer than a second. A confirmation message appears.
Memorizing Your Favorite Panel Settings This instrument has a Registration Memory feature that lets you memorize your favorite settings for easy recall whenever they’re needed. Up to nine complete setups can be memorized and assigned to each number button 1–9. Memorizing Panel Settings to the Registration Memory 1 Make the desired settings such as those for Voice and Style. 2 Press and hold down the [REGIST MEMORY] button for longer than a second. “MemNo.?” appears on the display. MemNo.
The Functions The Functions settings provide access to a range of detailed instrument parameters such as Tuning, Split Point, Voices and Effects. 1 Press the [FUNCTION] button several times until the desired item appears. Each time the [FUNCTION] button is pressed, the Function number increases one by one. You can also decrease the Function number by one when you press the [-] button briefly while holding down the [FUNCTION] button. Set the value by using the number buttons [0]–[9], [+], [-].
The Functions Function Number Function name Display Range/Settings Default Value Descriptions Main Voice (page 14) 009 Volume M.Volume 000–127 * Determines the volume of the Main Voice. 010 Octave M.Octave -2 – +2 * Determines the octave range for the Main Voice. 011 Chorus Depth M.Chorus 000–127 * Determines how much of the Main Voice’s signal is sent to the Chorus effect. Selects a Dual Voice. Dual Voice (page 15) 012 Dual Voice D.Voice 001–550 * 013 Volume D.
The Functions Function Number Function name Display Range/Settings Default Value Descriptions Lesson (page 26) 035 Lesson Track (R) R-Part GuideTrack1–16, OFF 1 Determines the guide track number for your right hand lesson. The setting is only effective for Songs in SMF format 0 transferred from a computer. 036 Lesson Track (L) L-Part GuideTrack1–16, OFF 2 Determines the guide track number for your left hand lesson.
Using with a Computer or iPad/iPhone Connecting to a computer This instrument supports MIDI (Musical Instrument Digital Interface) and can transmit/receive keyboard performance information (MIDI messages) or Song/ Style data (MIDI files) to/from the computer connected via a USB cable. For details on using a computer with this instrument, refer to the “Computerrelated Operations” (page 4) on the website. USB terminal Data that can be transferred from a computer to this instrument (and vice versa).
Troubleshooting Appendix Problem Possible Cause and Solution When the instrument is turned on or off, a popping sound is temporarily produced. This is normal and indicates that the instrument is receiving electrical power. When using a mobile phone, noise is produced. Using a mobile phone in close proximity to the instrument may produce interference. To prevent this, turn off the mobile phone or use it further away from the instrument.
Song Book Sample This score is provided with the part of the song book (free downloadable scores). The song book contains not only the scores for all internal songs (excepting Songs 1–3) but also music terms and important points for your practice. To obtain the Song Book, complete the user registration at the following website. Yamaha Online Member https://member.yamaha.com/myproduct/regist/ * The Song book is provided in English, French, German and Spanish.
Song Book Sample Before Playing... Sit Correctly Finger Numbering 3 2 4 3 2 4 5 5 1 1 Left Right Sit near the middle of the keyboard.
Song Book Sample Song No.004 Song No.004 Basic Für Elise With Step Map Play with both hands as if gently telling a story. It might help to sing or hum the melody as you play. Similar melody lines and rhythms are repeated in this song, so there aren’t as many sections to practice as you might think. Enjoy learning each section as you build proficiency. From here...
Song Book Sample Song No.004 Song No.004 ...to here Für Elise Basic Für Elise Basic From here... ...
Song Book Sample Für Elise Basic Song No.004 Für Elise Basic Let’s start with a warm-up exercise using three fingers of the right hand. ise Warm-up Exercise - “The Semitone Mystery” ed for this us erc ex Finge rs Song No.004 Right We’ll start by ascending and descending the white and black keys. Check out the illustrations until you understand how the fingers are supposed to move, then get started! You’ll find it easier to play if you bend your fingers slightly.
Song Book Sample Song No.004 Song No.004 Für Elise Basic Für Elise Basic Diligent Practice Time Right! Now that we’re warmed up let’s try playing along with the orchestra in 3/4 time. The melody will be built up little by little. Compare each line... notice that many of the shapes formed by the notes are very similar.
Song Book Sample Song No.004 Für Elise Basic Song No.004 Für Elise Basic M i d d l e Left hand Warm-up Exercise - “Basic Accompaniment” E A E A And now a warm-up exercise for the left hand. It’s important to spread your fingers widely from the start. Don’t play the black keys too strongly. Diligent Practice Time Connect the notes smoothly, as if the left hand were passing them to the right hand.
Song Book Sample Song No.004 Song No.004 Für Elise Basic Für Elise Basic First Half Review You’ve reached the halfway step! Have you learned all the material provided in the preceding steps? Now let’s go back and play through all the first-half exercises. If you find that you’re having trouble playing any of the material, go back and review the steps using the Step Map as a guide.
Song Book Sample Song No.004 Für Elise Basic Song No.004 Für Elise Basic Left hand Jump to the next E! And again! Warm-up Exercise - “The Jump Competition” The first note has a staccato dot. Spread your fingers wide and jump quickly to the next note! M i d d l e E ngers! se fi You can play t with only the his “EEEEE!” The only note in this step is E! Make the connection between the left and right hands as smooth as possible.
Song Book Sample Song No.004 Song No.004 Für Elise Basic Für Elise Basic “Left! Right! Left! Right!” Play “D E” repeatedly, alternating the left and right hands. Have the next hand ready in position to play D so you won’t have to rush. Left Right Second Half Review Try playing all the way through the second half. As we did after the first half, if there are places you can’t play with confidence go back and review the steps.
Voice List Maximum Polyphony The instrument has 32-note maximum polyphony. This means that it can play a maximum of up to 32 notes at once, regardless of what functions are used. Auto accompaniment uses a number of the available notes, so when auto accompaniment is used the total number of available notes for playing on the keyboard is correspondingly reduced. The same applies to the Split Voice and Song functions.
Voice List Voice No.
Voice List XGlite Voice List Voice No.
Voice List Voice No.
Voice List Voice No.
Drum Kit List •“ ” indicates that the drum sound is the same as “Standard Kit 1”. • Each percussion voice uses one note. • The MIDI Note # and Note are actually one octave lower than keyboard Note # and Note. For example, in “141: Standard Kit 1”, the “Seq Click H” (Note# 36/Note C1) corresponds to (Note# 24/Note C0).
Drum Kit List C1 C#1 D1 E1 F1 D#1 F#1 G1 G#1 A1 B1 C2 A#1 C#2 D2 E2 F2 D#2 F#2 G2 G#2 A2 B2 C3 A#2 C#3 D3 E3 F3 D#3 F#3 G3 G#3 A3 B3 C4 A#3 C#4 D4 E4 F4 D#4 F#4 G4 G#4 A4 B4 C5 A#4 C#5 D5 E5 F5 D#5 F#5 G5 G#5 A5 B5 C6 54 A#5 Voice No.
Drum Kit List * Actual keyboard notes of the SFX Kit 1 and 2 are one octave lower than the ones described in the list below.
Song List Song No. 001 002 003 004 005 006 007 008 009 010 011 012 013 014 015 016 017 018 019 020 021 022 023 024 025 026 027 028 029 030 031 032 033 034 035 036 037 038 039 040 041 042 043 044 045 046 047 048 049 050 Song Name Top Picks Demo 1 (Yamaha Original) Demo 2 (Yamaha Original) Demo 3 (Yamaha Original) Learn to Play Für Elise (Basic) (L. v. Beethoven) Für Elise (Advanced) (L. v.
Style List Style No. Style Name Style No. Style Name Style No.
Music Database List MDB No. MDB Name MDB Name MDB No.
Effect Type List Harmony Types No. 01 Harmony Type Duet 02 Trio 03 Block Description If you want to sound one of the harmony types 01–05, play keys to the right side of the Split Point while playing chords in the left side of the keyboard after turning Auto Accompaniment on. One, two or three notes of harmony are automatically added to the note you play. When playing back a Song that includes chord data, harmony is applied whichever keys are played.
Specifications Size/Weight Keyboard Display Voices Effects Accompaniment Styles Dimensions (W x D x H) Weight Number of Keys Touch Response Display Backlight Language Tone Generation Tone Generating Technology Polyphony Number of Polyphony (Max.
Index A H A-B Repeat ................................... 24 AC Power Adaptor ...................... 10 ACMP ........................................... 17 audio device ................................. 25 Auto Accompaniment ................. 17 AUTO FILL ................................. 19 Auto Power Off ...................... 12, 35 AUX IN .................................... 9, 25 AUX IN Volume .......................... 33 Harmony .......................................16 Harmony Type ...............
(US only) LIMITED 1-YEAR WARRANTY ON PORTABLE KEYBOARDS (NP, NPV, PSRE, EZ, DGX230, DGX530, YPG AND YPT SERIES) Thank you for selecting a Yamaha product. Yamaha products are designed and manufactured to provide a high level of defect-free performance. Yamaha Corporation of America (“Yamaha”) is proud of the experience and craftsmanship that goes into each and every Yamaha product.
For details of products, please contact your nearest Yamaha representative or the authorized distributor listed below. Pour plus de détails sur les produits, veuillez-vous adresser à Yamaha ou au distributeur le plus proche de vous figurant dans la liste suivante. Para obter detalhes de produtos, entre em contato com o representante mais próximo da Yamaha ou com o distribuidor autorizado relacionado a seguir. NORTH AMERICA CANADA Yamaha Canada Music Ltd.