D I G I TA L P I A N O P-35 Owner’s Manual EN
SPECIAL MESSAGE SECTION PRODUCT SAFETY MARKINGS: Yamaha electronic products may have either labels similar to the graphics shown below or molded/stamped facsimiles of these graphics on the enclosure. The explanation of these graphics appears on this page. Please observe all cautions indicated on this page and those indicated in the safety instruction section. CAUTION RISK OF ELECTRIC SHOCK DO NOT OPEN CAUTION: TO REDUCE THE RISK OF ELECTRIC SHOCK. DO NOT REMOVE COVER (OR BACK).
Thank you for purchasing this Yamaha Digital Piano! We recommend that you read this manual carefully so that you can fully take advantage of the advanced and convenient functions of the instrument. We also recommend that you keep this manual in a safe and handy place for future reference. Contents Accessories............................................................. 3 About the Manuals .................................................. 4 PRECAUTIONS ......................................................
About the Manuals In addition to this Owner’s Manual, the following Online materials (PDF files) are available. MIDI Reference Contains MIDI-related information, such as the MIDI Implementation Chart. MIDI Basics (only in English, French, German and Spanish) Contains basic explanations about what MIDI is and can do. To obtain the documents above, access the Yamaha Manual Library, enter your model name in the Model Name area, then click [SEARCH]. Yamaha Manual Library http://www.yamaha.co.
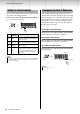
CAUTION Always follow the basic precautions listed below to avoid the possibility of physical injury to you or others, or damage to the instrument or other property. These precautions include, but are not limited to, the following: Power supply/AC power adaptor Connections • Do not connect the instrument to an electrical outlet using a multiple-connector. Doing so can result in lower sound quality, or possibly cause overheating in the outlet.
Panel Controls and Terminals Introduction q w Shows the jacks and terminals as seen when viewed from the rear of the instrument. e r A-1 q[ C0 C1 C2 C3 C4 t y C5 u C6 C7 ] (Standby/On) switch ....................... page 7 For turning the power on or setting to standby. Optional Keyboard Stand w [MASTER VOLUME] slider..................... page 7 For adjusting the volume of the entire sound. e [GRAND PIANO/FUNCTION] button...... page 8 For instantly calling up the Grand Piano 1 Voice.
Setting Up Turning the Power On/Off 1 Connect the AC power adaptor to the DC IN jack. WARNING • Use only the specified adaptor (page 16). Using the wrong adaptor can result in damage to the instrument or overheating. Using Headphones Any pair of stereo headphones with a 1/4” stereo phone plug can be plugged in here for convenient monitoring. The speakers are automatically shut off when a plug is inserted into this jack. 2 Plug the AC power adaptor into an AC outlet.
Selecting & Playing Voices Selecting a Voice Reference Layering Two Voices (Dual) To select the Grand Piano Voice: Simply press [GRAND PIANO/FUNCTION] to instantly call up the Grand Piano 1 Voice--no matter what other Voice is called up or other settings are made. You can play Voices simultaneously across the entire range of the keyboard. 1 Engage Dual. While holding down [GRAND PIANO/FUNCTION], simultaneously press two keys from C0 – A0.
Selecting & Playing Voices Playing Duo This function allows two different players to play the instrument, one on the left and the other on the right, over the same octave range. 1 While holding down [GRAND PIANO/ FUNCTION], press the D3 key to engage Duo. The keyboard is divided into the two sections with the E3 key as the Split Point.
Selecting & Playing Voices Setting the Touch Sensitivity You can specify the Touch Sensitivity (how the sound responds to your playing strength). While holding down [GRAND PIANO/FUNCTION], press one of the A2 – C3 keys. A2 Transposing the Pitch in Semitones You can shift the pitch of the entire keyboard up or down in semitone in order to facilitate playing in difficult key signatures, or to easily match the pitch of the keyboard to the range of a singer or other instruments.
Selecting & Playing Voices Fine-Tuning the Pitch You can fine tune the pitch of the entire instrument in approximately 0.2 Hz increments. This lets you match the keyboard pitch finely to that of other instruments or CD music. To lower the pitch: While holding down [GRAND PIANO/FUNCTION], press the G#6 key repeatedly to lower the pitch in approximately 0.2 Hz increments. To raise the pitch: While holding down [GRAND PIANO/FUNCTION], press the A6 key repeatedly to raise the pitch in approximately 0.
Listening to the Songs Listening to the Demo Songs Listening to the Preset Songs Demo Songs are provided for each of the Voices such as Piano and Organ. In addition to the Demo Songs, Preset Songs are provided for your listening pleasure. 1 1 While holding down [GRAND PIANO/ FUNCTION], press one of the C1 – A1 keys to start playback. This operation starts playback of the Demo Song of the Voice assigned to the pressed key. Starting with the selected Song, playback will continue in sequence.
Using the Metronome The metronome is convenient for practicing with an accurate tempo. 1 While holding down [GRAND PIANO/ FUNCTION], press the E3 key to start the Metronome. Adjusting the Tempo While holding down [GRAND PIANO/FUNCTION], press the F3 – D4 keys (to which numbers 0 – 9 are assigned individually) to specify the three-digit value as a Tempo of the Metronome and Song. To specify “95,” for example, press the F3 (0), D4 (9) and A#3 (5) keys in order while holding down [GRAND PIANO/FUNCTION].
Auto Power Off Function To prevent unnecessary power consumption, this function automatically turns the power off if no buttons or keys are operated for approximately 30 minutes. If desired, you can disable or enable this function.
About MIDI MIDI Capabilities MIDI Settings MIDI functions enable you to transmit performance data between MIDI devices Transmitting performance data to and from another MIDI device MIDI cables (optional) MIDI [OUT] terminal MIDI [IN] terminal MIDI [OUT] terminal Instrument MIDI [IN] terminal MIDI device Setting the MIDI Transmit Channels In any MIDI control setup, the MIDI channels of the transmitting and receiving devices must be matched for proper data transfer.
Troubleshooting Problem Appendix Possible Cause and Solution The instrument does not turn on. The instrument has not been plugged in properly. Securely insert the female plug into the jack on the instrument, and the male plug into a proper AC outlet (page 7). The instrument is automatically turned off even if no operation is done. This is normal. This occurs due to the Auto Power Off function (page 14). Noise is heard from the speakers or headphones.
Quick Operation Guide PIPE ORGAN 1 HARPSICHORD 1 GRAND PIANO 2 E. PIANO 2 STRINGS HARPSICHORD 2 VIBRAPHONE GRAND PIANO 1 GRAND PIANO 2 E. PIANO 2 PIPE ORGAN 1 HARPSICHORD 1 VIBRAPHONE STRINGS Voice Demo E.
FCC INFORMATION (U.S.A.) 1. IMPORTANT NOTICE: DO NOT MODIFY THIS UNIT! This product, when installed as indicated in the instructions contained in this manual, meets FCC requirements. Modifications not expressly approved by Yamaha may void your authority, granted by the FCC, to use the product. 2. IMPORTANT: When connecting this product to accessories and/ or another product use only high quality shielded cables. Cable/s supplied with this product MUST be used. Follow all installation instructions.
For details of products, please contact your nearest Yamaha representative or the authorized distributor listed below. NORTH AMERICA CANADA Yamaha Canada Music Ltd. 135 Milner Avenue, Scarborough, Ontario, M1S 3R1, Canada Tel: 416-298-1311 U.S.A. Yamaha Corporation of America 6600 Orangethorpe Ave., Buena Park, Calif. 90620, U.S.A.