
User Manual
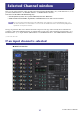
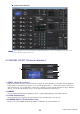
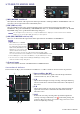
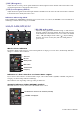
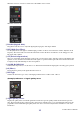
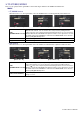
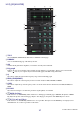
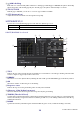
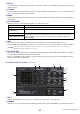
Table Of Contents
- Getting Started
- Main window
- Overview window
- Selected Channel window
- Library window
- Premium Rack Library window
- Patch Editor window
- Virtual Rack window
- Meter window
- Group/Link window
- Scene window
- Custom Fader Bank Setup window
- Custom Fader Bank window
- User Defined Keys Setup window
- User Defined Knobs Setup window
- Sends On Fader window
- Outport Setup window
- Keyboard Shortcuts
- Index

CL Editor Owner’s Manual
31
Here you can set the parameters of the currently selected input channel (INPUT CH 1–72(*), ST IN channels 1–8) or out-
put channel (MIX channels 1–24, MATRIX channels 1–8, STEREO/MONO channels.)
You can access this window in the following ways.
• From the [Windows] menu, choose [Selected Channel] and select “Main View”
• Double-click the channel number, EQ, DYNA1, or DYNA2 button in one of the Overview windows.
By choosing [Selected Channel] from the [Windows] menu and then selecting “Additional View,” you
can view a window for a channel that is not selected. This Additional View is not linked with [SEL] button
operations on the panel of the CL.
The type of parameters that can be edited in this window depends on the type of the currently selected channel. The
parameters of the Selected Channel window are explained below, in the order of input channels (input channels 1–72(*),
ST IN channels 1–8), or output channels (MIX channels 1-24, MATRIX channels 1-8, and STEREO/MONO channels.)
(*) CL3: 1-64, CL1: 1-48
If an input channel is selected
Selected Channel window
NOTE
● INPUT CH window