READ THIS MANUAL CAREFULLY! It contains important safety information.
EBU00776
EE.book Page 1 Friday, August 3, 2007 4:52 PM EVU00010 INTRODUCTION Congratulations on your purchase of the Yamaha YXR66FW. It represents the result of many years of Yamaha experience in the production of fine sporting, touring, and pace-setting racing vehicles. With the purchase of this Yamaha, you can now appreciate the high degree of craftsmanship and reliability that have made Yamaha a leader in these fields.
EE.book Page 1 Friday, August 3, 2007 4:52 PM EVU00021 IMPORTANT MANUAL INFORMATION FAILURE TO FOLLOW THE WARNINGS CONTAINED IN THIS MANUAL CAN RESULT IN SERIOUS INJURY OR DEATH. Particularly important information is distinguished in this manual by the following notations: This is the safety alert symbol. It is used to alert you to potential personal injury hazards. Obey all safety messages that follow this symbol to avoid possible injury or death.
EE.book Page 2 Friday, August 3, 2007 4:52 PM EVU00030 IMPORTANT NOTE ABOUT USE ● ● ● This vehicle is designed and manufactured for off-road use only. Use on public streets, roads, or highways is not only illegal in most areas, it also increases the risk of an accident involving other vehicles. This vehicle does not meet federal motor vehicle safety standards for on-road use. Check the laws and regulations in force before choosing where to operate this vehicle.
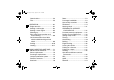
EE.book Page 1 Friday, August 3, 2007 4:52 PM EVU00050 Seat belts .......................................4-14 Glove compartment .......................4-14 Cargo bed ......................................4-15 Front and rear shock absorber adjustment ...................................4-17 Trailer hitch bracket and receiver ........................................4-18 Auxiliary DC jack............................4-19 CONTENTS 1 LOCATION OF THE WARNING AND SPECIFICATION LABELS.......
EE.book Page 2 Friday, August 3, 2007 4:52 PM Control cables ................................. 5-9 Tires ................................................ 5-9 6 OPERATION..................................... 6-1 Engine break-in............................... 6-1 Starting a cold engine ..................... 6-2 Starting a warm engine................... 6-5 Warming up..................................... 6-5 Drive select lever operation and reverse driving...............................
EE.book Page 3 Friday, August 3, 2007 4:52 PM Rough terrain................................. 7-22 Pavement ...................................... 7-22 Water ............................................. 7-22 Loose terrain/slippery terrain......... 7-23 Brush or wooded areas ................. 7-24 Encountering obstacles................. 7-24 8 PERIODIC MAINTENANCE AND ADJUSTMENT.................................. 8-1 Owner’s manual and tool kit............
EE.book Page 4 Friday, August 3, 2007 4:52 PM Wheel removal .............................. 8-42 Tire replacement ........................... 8-43 Wheel installation .......................... 8-44 Battery ........................................... 8-45 Battery maintenance ..................... 8-46 Jump-starting ................................ 8-47 Fuse replacement ......................... 8-49 Replacing a headlight bulb ........... 8-51 Headlight beam adjustment ..........
EE.
EE.book Page 2 Friday, August 3, 2007 4:52 PM Read and understand all of the labels on your vehicle. They contain important information for safe and proper operation of your vehicle. Never remove any labels from your vehicle. If a label becomes difficult to read or comes off, a replacement label is available from your Yamaha dealer. 1 2 3 ! WARNING ! WARNING ! Any part of your body (arms, legs, or head) outside of the vehicle can be crushed by the cage/frame.
EE.book Page 3 Friday, August 3, 2007 4:52 PM 4 5 ! WARNING ! Keep hands, body, and other people away from pinch points when lowering bed. Do not hold the cage/frame while closing bed. Improper tire pressure or overloading the Rhino may cause severe injury or death from loss of control or rollover. YAMAHA OPERATING TIRE PRESSURE: Set with tires cold. RECOMMENDED: FRONT: 70kPa, (.70kgf/cm2), 10psi REAR: MINIMUM: 98kPa, (.98kgf/cm2), 14psi FRONT: 63kPa, (.63kgf/cm2), 9psi REAR: 91kPa, (.
EE.book Page 4 Friday, August 3, 2007 4:52 PM 6 7 ! WARNING Improper use of cargo bed or cage/frame can result in severe injury or death from loss of control, overturn or other accidents. Do not carry passengers in cargo bed. MAX 7.3 INCH (185MM) Maximum load in cargo bed: 181 kg (400 lb). Load or trailer may affect handling and stability: Secure cargo so that it will not shift a loose load YAMAHA could change handling unexpectedly or be thrown forward and strike occupants.
EE.book Page 5 Monday, August 6, 2007 6:58 PM 8 9 ü ü ü ü Head to Toe Safety Checklist Head Body Hands Feet YAMAHA 1-5 Helmet and eye protection. Seatbelt and protective clothing. Inside vehicle and holding the handholds or steering wheel. On floorboard, ready to brace, and door closed.
EE.book Page 6 Friday, August 3, 2007 4:52 PM 0 ! WARNING To reduce risk of accidents and injury or death: Be Prepared • Avoid Rollovers and Crushing Injuries • Wear seat belt, motorcycle helmet, eye protection and protective gear. • Use care when turning: o Turning the steering wheel too far or too fast can result in a rollover or loss of control. Keep your body completely inside the vehicle at all times. Keep both o Slow down before entering a turn. hands on the steering wheel.
EE.book Page 1 Friday, August 3, 2007 4:52 PM EVU00070 SAFETY INFORMATION Be a responsible owner As the vehicle’s owner, you are responsible for the safe and proper operation of your Rhino. While understanding all parts of this manual are important for vehicle ownership, be sure to read this chapter and the instructions in Chapter 7 before operating the Rhino. Also use these two chapters and the labels on the vehicle to instruct new operators and passengers.
EE.book Page 2 Friday, August 3, 2007 4:52 PM Before you operate the Rhino ● Prepare yourself and your passenger: • This vehicle is intended for use only by an operator 16 or older with a valid motor vehicle license. 1 2 3 4 DRIVER UNDER 5 16 6 • This vehicle is designed to carry the driver and one passenger. Never carry passengers in the cargo bed. • Both driver and passenger should wear seat belts properly.
EE.book Page 3 Friday, August 3, 2007 4:52 PM Prepare your vehicle Perform the pre-operation checks each time you use the vehicle to make sure it is in safe operating condition. Failure to inspect or maintain the vehicle properly increases the possibility of an accident or equipment damage. See pages 5-1–5-2 for a list of pre-operation checks. Prepare your load or trailer Carrying loads, towing a trailer, or pulling objects can affect handling, stability, and risk of overturn or other accidents.
EE.book Page 4 Friday, August 3, 2007 4:52 PM While using the Rhino ● Keep your body completely inside the vehicle at all times. Keep both hands on the steering wheel. Be sure passenger is seated, belted, and holding onto the handholds. Close doors before driving. Any part of your body (arms, legs, and head) outside the vehicle can be struck by objects your vehicle is passing or crushed by the vehicle cage/frame in a rollover accident.
EE.book Page 5 Friday, August 3, 2007 4:52 PM ● Avoid rollovers: • Use care when turning: • Turning the steering wheel too far or too fast can result in a rollover. • Avoid sideways sliding, skidding, or fishtailing, and never do donuts. • Slow down before entering a turn and avoid hard braking in a turn. • When making tight turns from a stop or at slow speeds, avoid sudden or hard acceleration.
EE.book Page 6 Friday, August 3, 2007 4:52 PM ● ● ● • Drive straight up and down inclines, not across them. If crossing a hill is unavoidable, drive slowly and turn downhill immediately if you feel the vehicle may tip. • Avoid paved surfaces. Turn gradually and go slowly if you must drive on pavement. This vehicle is designed for off-road use only.
EE.book Page 7 Friday, August 3, 2007 4:52 PM ● ● When loaded with cargo or towing a trailer: • Reduce speed, operate in low gear only, and allow more room to stop. • Avoid hills and rough terrain. Use extreme caution when towing or carrying a load on inclines. • Load trailer properly and use extra care when towing or pulling. Do not tow or pull objects from any part of the vehicle other than the trailer hitch bracket or winch (if installed).
EE.book Page 8 Friday, August 3, 2007 4:52 PM Avoid carbon monoxide poisoning All engine exhaust contains carbon monoxide, a deadly gas. Breathing carbon monoxide can cause headaches, dizziness, drowsiness, nausea, confusion, and eventually death. Carbon monoxide is a colorless, odorless, tasteless gas which may be present even if you do not see or smell any engine exhaust. Deadly levels of carbon monoxide can collect rapidly and you can quickly be overcome and unable to save yourself.
EE.book Page 9 Friday, August 3, 2007 4:52 PM Genuine Yamaha Accessories Choosing accessories for your Rhino is an important decision. Genuine Yamaha Accessories, which are available only from a Yamaha dealer, have been designed, tested, and approved by Yamaha for use on your Rhino. Many companies with no connection to Yamaha manufacture parts and accessories or offer other modifications for Yamaha vehicles. Yamaha is not in a position to test the products that these aftermarket companies produce.
EE.book Page 10 Friday, August 3, 2007 4:52 PM Aftermarket tires and rims The tires and rims that came with your Rhino were designed to match the performance capabilities and to provide the best combination of handling, braking, and comfort. Other tires, rims, sizes, and combinations may not be appropriate. Refer to pages 8-42–8-45 for tire specifications and more information on replacing your tires.
EE.book Page 1 Friday, August 3, 2007 4:52 PM EVU00080 DESCRIPTION 1- E F G H IJ K L D N C 1. Headlights 2. Front shock absorber assembly spring preload adjusting ring 3. Brake fluid reservoir 4. Air filter elements (engine and air intake duct) 5. V-belt case 6. Driver seat 7. Driver seat belt 8. Cargo bed 9. Tail/brake lights 10. Rear shock absorber assembly spring preload adjusting ring 11. Cargo bed release levers 12. Spark plug 13. Door 14. Spark arrester 15. Passenger seat belt 16.
EE.book Page 2 Friday, August 3, 2007 4:52 PM O P Q RS T U The vehicle you have purchased may differ slightly from those shown in the figures of this manual. V 1 2 3 4 5 6 7 Y X W 8 H 9 25. Light switch 26. Steering wheel 27. Starter (choke) 28. Main switch 29. On-Command four-wheel-drive and differential gear lock switches 30. Multi-function meter unit 31. Auxiliary DC jack 32. Drive select lever 33. Parking brake lever 34. Accelerator pedal 35.
EE.book Page 1 Friday, August 3, 2007 4:52 PM EVU00130 INSTRUMENT AND CONTROL FUNCTIONS Functions of the respective switch positions are as follows: ON: All electrical circuits are supplied with power, and the headlights and taillights come on when the light switch is on. OFF: All electrical circuits are switched off. The key can be removed in this position. START: The electric starter is engaged by turning and holding the key in this position. Release the key when the engine starts.
EE.book Page 2 Friday, August 3, 2007 4:52 PM EVU00150 EVU01131 Indicator and warning lights On-Command differential gear lock indicator light “DIFF. LOCK” This indicator light and the On-Command differential gear lock indicator in the display come on when the On-Command differential gear lock switch is set to the “LOCK” position. When the switch is set to “LOCK”, the OnCommand differential gear lock indicator light will flash until the differential gear is locked. 1 2 3 4 5 6 7 8 1.
EE.book Page 3 Friday, August 3, 2007 4:52 PM EVU00170 EVU01161 Neutral indicator light “N” This indicator light comes on when the drive select lever is in the “N” position. On-Command four-wheel-drive/differential gear lock indicator “ ”/“ ” The On-Command four-wheel-drive indicator “ ” comes on when the On-Command fourwheel-drive switch is set to the “4WD” position. DIFF.
EE.book Page 4 Friday, August 3, 2007 4:52 PM EVU00181 EVU01630 Coolant temperature warning light “ ” If the coolant temperature reaches a specified level, this light comes on to warn that the coolant temperature is too hot. If the light comes on during operation, stop the engine as soon as it is safe to do so and allow the engine to cool down for about 10 minutes. (See page 8-59.) Multi-function meter unit NOTICE ● ● The engine may overheat if the vehicle is overloaded.
EE.book Page 5 Friday, August 3, 2007 4:52 PM ● ● ● ● Odometer and tripmeter modes Pushing the “TRIP/ODO” button switches the display between the odometer mode “ODO” and the tripmeter modes “A” and “B” in the following order: ODO → TRIP A → TRIP B → ODO To reset a tripmeter, select it by pushing the “TRIP/ODO” button, and then hold the “TRIP/ ODO” button for at least three seconds. The tripmeters can be used to estimate the distance that can be traveled with a full tank of fuel.
EE.book Page 6 Friday, August 3, 2007 4:52 PM Clock mode Pushing the “ / ” button switches the display between the clock mode “CLOCK” and the hour meter mode “HOUR” in the following order: CLOCK → HOUR → CLOCK Fuel meter The fuel meter indicates the amount of fuel in the fuel tank. The display segments of the fuel meter disappear from “F” (full) towards “E” (empty) as the fuel level decreases. When the “E” segment disappears and the fuel level warning indicator flashes, refuel as soon as possible.
EE.book Page 7 Friday, August 3, 2007 4:52 PM EVU00230 Switches NOTICE Do not use the headlights with the engine turned off for an extended period of time. The battery may discharge to the point that the starter motor will not operate properly. If this should happen, remove the battery and recharge it. EVU00240 Light switch “OFF/ 1. Light switch “OFF/ L / H / L H ” ” Set the switch to “ L ” to turn on the low beam and the taillights.
EE.book Page 8 Friday, August 3, 2007 4:52 PM EVU01183 On-Command four-wheel-drive and differential gear lock switches ● ● 1. On-Command four-wheel-drive switch “2WD”/“4WD” 2. On-Command differential gear lock switch “4WD”/“LOCK” This vehicle is equipped with an On-Command four-wheel-drive switch “2WD”/“4WD” and a differential gear lock switch “4WD”/ “LOCK”. Select the appropriate drive according to terrain and conditions. ● Two-wheel drive (“2WD”): Power is supplied to the rear wheels only.
EE.book Page 9 Friday, August 3, 2007 4:52 PM EVU00260 EVU00270 Accelerator pedal Press the accelerator pedal down to increase engine speed. Spring pressure returns the pedal to the rest position when released. Always check that the accelerator pedal returns normally before starting the engine. Brake pedal Press the brake pedal to slow or stop the vehicle. 1. Brake pedal 1.
EE.book Page 10 Friday, August 3, 2007 4:52 PM EVU00280 Parking brake lever The parking brake lever is located at the right side of the driver’s seat. It will help keep the vehicle from moving while parked. To set the parking brake, pull the lever up completely. To release the parking brake, pull up on the lever, press the release button, and then push the lever all the way down. Spring pressure helps return the lever to the released position. 1. Parking brake lever 4-10 2.
EE.book Page 11 Friday, August 3, 2007 4:52 PM EVU00290 EVU00300 Drive select lever The drive select lever is used to shift the vehicle into the low, high, neutral, and reverse positions. (Refer to pages 6-6–6-7 for the drive select lever operation.) Fuel tank cap Remove the fuel tank cap by turning it counterclockwise. 1. Fuel tank cap 1.
EE.book Page 12 Friday, August 3, 2007 4:52 PM EVU00320 Starter (choke) “ ” Starting a cold engine requires a richer air-fuel mixture. A separate starter circuit supplies this mixture. Move in direction a to turn on the starter (choke). Move in direction b to turn off the starter (choke). Refer to “Starting a cold engine” for proper operation. (See pages 6-2–6-5.) Doors To open a door, simply pull the latch outward. To close a door, push or pull the door inward until it is securely latched.
EE.book Page 13 Friday, August 3, 2007 4:52 PM EVU00330 Seats To remove a seat, pull its seat lock lever upward, lift the front of the seat, and then slide the seat forward and up. 1. Driver seat 3. Seat lock lever (× 2) To install a seat, insert the projections on the rear of the seat into the seat holders and push down on the seat at the front. Make sure the seats are securely latched. WARNING! A loose seat could cause the operator to lose control, or cause the operator or passenger to fall. 2.
EE.book Page 14 Friday, August 3, 2007 4:52 PM EVU00340 EVU01191 Seat belts This vehicle is equipped with three-point seat belts for both the operator and the passenger. Always wear the seat belts properly while riding in the vehicle. See pages 7-6–7-8 for more information. Glove compartment NOTICE To protect from damage, do not put metal products, like tools or sharply edged products, directly in the glove compartment. If they must be stored, wrap them in appropriate cushioning material. a. Unlock.
EE.book Page 15 Friday, August 3, 2007 4:52 PM EVU00351 Cargo bed 1. Cargo bed 3. Cargo hook (× 4) Opening and closing the tailgate 2. Tailgate 1. Tailgate 2. Latch (× 2) To open Unhook the latches, and then lower the tailgate. Maximum load limit: 181 kg (400 lb) For additional loading information, see pages 6-11–6-13. To close Place the tailgate in the original position, and then hook the latches.
EE.book Page 16 Friday, August 3, 2007 4:52 PM Lifting and lowering the cargo bed To lower With hands and fingers clear of pinch points, lower the cargo bed slowly to its original position and be sure it is locked into place. WARNING! Keep hands, body, and other people away from pinch points when lowering bed. Do not hold onto the cage/frame while closing the bed. 1.
EE.book Page 17 Friday, August 3, 2007 4:52 PM EVU00360 Front and rear shock absorber adjustment The spring preload can be adjusted to suit the operating conditions. You can reduce preload for a softer ride, or increase preload if frequent bottoming occurs or when carrying loads. Adjust the spring preload as follows: To increase the spring preload, turn the adjusting ring in direction a. To decrease the spring preload, turn the adjusting ring in direction b.
EE.book Page 18 Friday, August 3, 2007 4:52 PM EVU00370 A special wrench can be obtained at a Yamaha dealer to make this adjustment. Trailer hitch bracket and receiver This vehicle is equipped with a trailer hitch bracket and a 5 cm (2 in) receiver for a standard trailer hitch. Trailer towing equipment can be obtained at a Yamaha dealer. (See pages 6-11–6-13 for precaution information.) Standard position: B A- Minimum (soft) E- Maximum (hard) 1 1. Trailer hitch bracket 1. Special wrench 4-18 2 2.
EE.book Page 19 Friday, August 3, 2007 4:52 PM EVU00380 Auxiliary DC jack The auxiliary DC jack is located at the right side of the front panel. The auxiliary DC jack can be used for suitable work lights, radios, etc. The auxiliary DC jack should only be used when the engine is running. 1. Auxiliary DC jack Maximum rated capacity for the auxiliary DC jack: DC 12 V, 120 W (10 A) 4. When the auxiliary DC jack is not being used, cover it with the cap. 1. Auxiliary DC jack cap 1.
EE.book Page 20 Friday, August 3, 2007 4:52 PM NOTICE ● ● ● Do not use accessories requiring more than the maximum capacity stated above. This may overload the circuit and cause the fuse to blow. If accessories are used without the engine running, the battery will lose its charge and engine starting may become difficult. Do not use an automotive cigarette lighter or other accessories with a plug that gets hot, because the jack can be damaged.
EE.book Page 1 Friday, August 3, 2007 4:52 PM EVU01200 FOR YOUR SAFETY – PRE-OPERATION CHECKS 1- Inspect your vehicle each time you use it to make sure the vehicle is in safe operating condition. Always follow the inspection and maintenance procedures and schedules described in the Owner’s Manual. WARNING Failure to inspect or maintain the vehicle properly increases the possibility of an accident or equipment damage. Do not operate the vehicle if you find any problem.
EE.book Page 2 Friday, August 3, 2007 4:52 PM ITEM ROUTINE Final gear oil/ Differential gear oil • Check for leakage. Accelerator pedal PAGE 5-7, 8-15–8-18 1 • Check for proper accelerator pedal operation. 5-8 2 Seat belts • Check for proper operation and belt wear. 5-8 3 Steering • Check for proper operation. 5-8 Fittings and fasteners • Check all fittings and fasteners. 5-8 Lights and switches • Check for proper operation.
EE.book Page 3 Friday, August 3, 2007 4:52 PM EVU00390 Front and rear brakes Brake fluid leakage Check to see if any brake fluid is leaking out of the pipe joints or the brake fluid reservoir. Apply the brakes firmly for one minute. If there is any leakage, have the vehicle inspected by a Yamaha dealer. Brake pedal Check for correct brake pedal free play. If the brake pedal free play is incorrect, have a Yamaha dealer adjust it. (See page 8-37.) Check the operation of the brake pedal.
EE.book Page 4 Friday, August 3, 2007 4:52 PM EVU00400 Fuel Make sure there is sufficient gasoline in the tank. 4. Be sure the fuel tank cap is closed securely. WARNING WARNING Gasoline is poisonous and can cause injury or death. Handle gasoline with care. Never siphon gasoline by mouth. If you should swallow some gasoline or inhale a lot of gasoline vapor, or get some gasoline in your eyes, see your doctor immediately. If gasoline spills on your skin, wash with soap and water.
EE.book Page 5 Friday, August 3, 2007 4:52 PM Your Yamaha engine has been designed to use regular unleaded gasoline with a pump octane number ([R+M]/2) of 86 or higher, or research octane number of 91 or higher. If knocking or pinging occurs, use a different brand of gasoline or premium unleaded fuel. Unleaded fuel will give you longer spark plug life and reduced maintenance cost. Recommended fuel: Unleaded gasoline only Fuel tank capacity: 30.0 L (6.60 Imp gal, 7.
EE.book Page 6 Friday, August 3, 2007 4:52 PM EVU00410 Engine oil Make sure the engine oil is at the specified level. Add oil as necessary. (See pages 8-10– 8-14.) 1 NOTICE ● ● In order to prevent clutch slippage (since the engine oil also lubricates the clutch), do not mix any chemical additives with oil. Do not use oils with a diesel specification of “CD” or oils of a higher quality than specified. In addition, do not use oils labeled “ENERGY CONSERVING II” or higher.
EE.book Page 7 Friday, August 3, 2007 4:52 PM EVU00420 EVU00430 Coolant Check the coolant level in the coolant reservoir when the engine is cold (the coolant level will vary with engine temperature). Final gear oil Make sure the final gear oil is at the specified level. Add oil as necessary. (See pages 8-15– 8-16 for details.) Recommended oil: SAE 80 API GL-4 Hypoid gear oil The coolant level is satisfactory if it is between the minimum and maximum level marks on the coolant reservoir.
EE.book Page 8 Friday, August 3, 2007 4:52 PM EVU00450 Accelerator pedal Check to see that the accelerator pedal operates correctly. It must operate smoothly and spring back to the idle position fully when released. Have a Yamaha dealer repair as necessary for proper operation. A crash can damage the restraint systems in your vehicle. A damaged restraint system may not properly protect the person using it, resulting in serious injury or death in a crash.
EE.book Page 9 Friday, August 3, 2007 4:52 PM EVU00480 EVU00500 Lights Check the headlights and tail/brake lights to make sure they are in working condition. Repair as necessary for proper operation. Tires Check tire pressure regularly to make sure it is at the recommended specifications. Also check for wear and damage. EVU00490 EVU00510 Switches Check the operation of all switches. Have a Yamaha dealer repair as necessary for proper operation.
EE.book Page 10 Friday, August 3, 2007 4:52 PM Set tire pressures to the following specifications: ACE-02E Recommended pressure Minimum Maximum Front 70 kPa (0.70 kgf/cm2, 10 psi) 63 kPa (0.63 kgf/cm2, 9 psi) 77 kPa (0.77 kgf/cm2, 11 psi) Rear 98 kPa (0.98 kgf/cm2, 14 psi) 91 kPa (0.91 kgf/cm2, 13 psi) 105 kPa (1.05 kgf/cm2, 15 psi) 1. Tire pressure gauge The tire pressure gauge is included as standard equipment. Make two measurements of the tire pressure and use the second reading.
EE.book Page 11 Friday, August 3, 2007 4:52 PM EVU00520 Tire wear limit When the tire groove decreases to 3 mm (0.12 in) due to wear, replace the tire. a.
EE.book Page 1 Friday, August 3, 2007 4:52 PM EVU00530 OPERATION Engine break-in There is never a more important period in the life of your vehicle than the period between zero and 20 hours. 1- Read the Owner’s Manual carefully to become familiar with all controls. If there is a control or function you do not understand, ask your Yamaha dealer. 1 2 3 For this reason, we ask that you read the following material carefully.
EE.book Page 2 Friday, August 3, 2007 4:52 PM EVU00540 Each full-throttle acceleration sequence should be followed with a substantial rest period for the engine, by cruising at lower r/min so the engine can rid itself of the temporary build-up of heat. If any abnormality is noticed during this period, consult a Yamaha dealer. Starting a cold engine 1. Apply the brake pedal. 2. Shift the drive select lever into the neutral position.
EE.book Page 3 Friday, August 3, 2007 4:52 PM 3. Use the starter (choke) in reference to the figure: Position 1: Cold engine start – ambient temperature below 5 °C (40 °F). Position 2: Cold engine start – ambient temperature at 0 °C (30 °F)–30 °C (90 °F) and warming up position. Position 3: Cold engine start – ambient temperature above 25 °C (80 °F) and warm engine start position. a. Starter (choke) 2. Half open 1. Fully open 3. Closed 4.
EE.book Page 4 Friday, August 3, 2007 4:52 PM If the engine fails to start, release the key, and then try starting it again. Wait a few seconds before the next attempt. Each attempt should be as short as possible, to preserve battery energy. NOTICE: Do not crank the engine more than 5 seconds on each attempt, or starter damage could occur. Wait at least 5 seconds between each operation of the electric starter to let it cool.
EE.book Page 5 Friday, August 3, 2007 4:52 PM EVU00561 6. With the vehicle still in neutral, continue warming up the engine until it idles smoothly, and return the starter (choke) to position 3 before riding. Failure to do so may result in poor performance and premature wearing of the rear brake and V-belt. Warming up To get maximum engine life, always warm up the engine before starting off.
EE.book Page 6 Friday, August 3, 2007 4:52 PM Drive select lever operation and reverse driving 2. Apply the brake pedal, then shift by moving the drive select lever along the shift guide. Make sure that the drive select lever is completely shifted into position. NOTICE Do not shift without coming to a complete stop and waiting for the engine to return to normal idle speed. Damage to the engine or drive train may occur. Shifting: neutral to high and high to low 1. Stop the vehicle.
EE.book Page 7 Friday, August 3, 2007 4:52 PM Shifting: neutral to reverse WARNING Before you shift into reverse, make sure there are no obstacles or people behind you. When it is safe to proceed, go slowly. Hitting an obstacle or person could result in serious injury or death. 1. Stop the vehicle. Take your foot off the accelerator pedal and check behind you. 2. Apply the brake pedal. 3. Shift from neutral to reverse or vice versa by moving the drive select lever along the shift guide.
EE.book Page 8 Friday, August 3, 2007 4:52 PM EVU01183 On-Command four-wheel-drive switch and differential gear lock switch You may notice that the vehicle handles differently in 2WD, 4WD, and 4WD-LOCK (“DIFF. LOCK”). For example, you should expect that the vehicle will require more effort to turn in 4WD-LOCK (“DIFF. LOCK”). Always stop the vehicle before changing between 2WD and 4WD or 4WD and 4WD-LOCK (“DIFF-LOCK”).
EE.book Page 9 Friday, August 3, 2007 4:52 PM On-Command differential gear lock switch “4WD”/“LOCK” To lock the differential gear in 4WD, stop the vehicle, make sure the On-Command fourwheel-drive switch is set to “4WD”, move the differential gear lock lever to position b, and then set the switch to “LOCK”. When the differential gear is locked, the differential gear lock indicator light (“DIFF. LOCK”) will come on along with the differential gear lock indicator “ ” in the multi-function display.
EE.book Page 10 Friday, August 3, 2007 4:52 PM EVU01210 ● Driving before the differential gear lock is properly engaged (e.g., when the indicator and indicator light are flashing) will cause the engine speed to be limited until engagement is complete. Parking When parking, stop the engine and shift the drive select lever into the neutral position. Apply the parking brake to help prevent the vehicle from rolling. See pages 7-17–7-18 for more information on parking and parking on a slope.
EE.book Page 11 Friday, August 3, 2007 4:52 PM EVU00630 Loading Take extra precautions when driving with a load or trailer. Follow these instructions and always use common sense and good judgment when carrying cargo or towing a trailer. ● ● ● Prepare your load or trailer WARNING Improper loading or towing can increase the risk of loss of control, an overturn, or other accident: ● Do not exceed the Maximum Loading Limits for the vehicle (see box or vehicle labeling).
EE.book Page 12 Friday, August 3, 2007 4:52 PM Use the hooks equipped on the cargo bed to tie down loads. MAXIMUM LOADING LIMIT ● Vehicle loading limit (total weight of cargo, operator, passenger and accessories and tongue weight): 393 kg (866 lb) ● Cargo bed: 181 kg (400 lb) ● Trailer hitch: Pulling load (total weight of trailer and cargo): 550 kg (1,212 lb) Tongue weight (vertical weight on trailer hitch point): 50 kg (110 lb) Choose a trailer hitch drawbar designed for use with a 5 cm (2 in) receiver.
EE.book Page 13 Friday, August 3, 2007 4:52 PM Operating when loaded with cargo or towing a trailer Drive more slowly than you would without a load. The more weight you carry, the slower you should go. Although conditions vary, it is good practice to keep the vehicle in low gear whenever you are carrying heavier loads or when towing a trailer. Pulling something other than a trailer Yamaha recommends that loads be transported in the bed or in a trailer.
EE.book Page 1 Friday, August 3, 2007 4:52 PM 5UG14004 1- BASIC GUIDE FOR SAFE USE KNOW YOUR VEHICLE This off-road vehicle will handle and maneuver differently from cars, ATVs, go-carts, golfcars and grounds-keeping vehicles. The Rhino has higher ground clearance and other features to handle rugged terrain, and, as a result, can overturn in situations where some vehicles may not. This would include vehicles made primarily for pavement, roads, improved paths, or grounds-keeping.
EE.book Page 2 Friday, August 3, 2007 4:52 PM Doing things with a Rhino that some people do for thrills in other vehicles (such as sideways sliding, skidding, fishtailing, or donuts) have led to side rollovers. These rollovers can result in crushed limbs and other serious injuries or death to drivers or passengers. 1 2 3 4 5 As the owner/operator, it is your responsibility to protect yourself and your passenger from accidents, including rollovers.
EE.book Page 3 Friday, August 3, 2007 4:52 PM Driver requirements ● This vehicle is intended for use only by an operator 16 or older with a valid motor vehicle license. Parents: Many states have implemented new motor vehicle licensing requirements for young drivers. These requirements are in response to the disproportionately high rate of crashes involving youthful drivers.
EE.book Page 4 Friday, August 3, 2007 4:52 PM Passenger requirements This vehicle is designed for the operator and one passenger. Carrying passengers improperly can lead to serious injury or death. As the operator, you are responsible for your passenger. ● Your passenger must be able to place both feet on the floorboard while seated upright with his/her back against the seat back. ● Allow only one passenger in the vehicle and only in the passenger seat. Do not carry any other passengers.
EE.book Page 5 Friday, August 3, 2007 4:52 PM WARNING Do not make changes to the occupant protection system. If you install aftermarket products or have your vehicle modified, you may put yourself and others at greater risk of serious injury or death. You are responsible for any such changes to the vehicle. 1 The Rhino comes with a variety of features to help reduce the risk of driver and passenger injury.
EE.book Page 6 Friday, August 3, 2007 4:52 PM Protective structure The vehicle cage/frame provides a protective structure that helps limit intrusions by branches or other objects and may reduce your risk of injury in accidents. The protective structure will not protect occupants in all rollovers or accidents. Seat belts Seat belts should be worn by both driver and passenger. Driver must be sure that the passenger is belted before driving.
EE.book Page 7 Friday, August 3, 2007 4:52 PM An unbelted occupant may strike the interior of the vehicle, the protective structure, or other objects in an accident or during operation. You may also fall completely out or be partially ejected from the vehicle, which may lead to being crushed between the ground and the vehicle. Wearing the seat belt helps you remain in the vehicle – the doors and handholds are not a substitute for using a seat belt. 1. Seat belt (× 2) 3.
EE.book Page 8 Friday, August 3, 2007 4:52 PM 2. If the latch plate is not positioned in the correct location along the seat belt, squeeze the latch plate ends together along its long edges in order to more easily adjust its location up or down along the length of the belt. 3. Push the latch plate into the buckle until it clicks. Pull up on the latch plate to make sure it is secure. 1. Buckle 4. Put the lap portion of the belt low on your hips.
EE.book Page 9 Friday, August 3, 2007 4:52 PM Doors The doors are designed to reduce the likelihood that you will stick your leg out to stop the vehicle from tipping over or for any other reason in a rollover. The doors may also reduce intrusion of objects into the occupant area. Make sure the doors are securely latched before operation. Do not place your arm or hand on the door during operation. Your hand or arm may be struck by objects or crushed against outside objects or the ground during a rollover.
EE.book Page 10 Friday, August 3, 2007 4:52 PM Seat and hip restraints The seat and hip restraints are designed to help keep you in the vehicle. Do not hold onto hip restraint bar when the vehicle is moving. Your hand or arm may be struck by objects or crushed against outside objects or the ground during a rollover.
EE.book Page 11 Friday, August 3, 2007 4:52 PM Floorboard The floorboard allows you to brace your feet, which helps you keep your body in the vehicle in the event of an accident or rollover. Keep your feet on the floorboard during operation. Steering wheel Keep both hands on the steering wheel. Do not hold the steering wheel with your thumbs inside the rim. Keep your palms on the outside of the steering wheel.
EE.book Page 12 Friday, August 3, 2007 4:52 PM LEARNING TO OPERATE YOUR VEHICLE CORRECT GRIP EXAMPLE Personal protective equipment 1 2 3 4 INCORRECT GRIP EXAMPLE 5 6 1. 2. 4. 6. 7-12 Approved motorcycle helmet Eye protection 3. Long-sleeved shirt or jacket Gloves 5.
EE.book Page 13 Friday, August 3, 2007 4:52 PM Both driver and passenger should wear the following to reduce risk of injury in an accident: ● Approved motorcycle helmet that fits properly ● Eye protection (goggles, helmet face shield, or protective eyewear) ● Over-the-ankle boots, gloves, long-sleeved shirt or jacket, and long pants Wear eye protection when operating or riding the vehicle to reduce the risk of a serious accident or injury.
EE.book Page 14 Friday, August 3, 2007 4:52 PM Getting ready to ride Perform the Pre-Operation Checks on pages 5-1–5-11. Follow the instructions starting on page 6-2 to start the engine. Once it has warmed up and you have turned the choke off, you are ready to begin driving your vehicle. Become familiar with the way the vehicle feels in low and high ranges, first in two-wheel drive (2WD) and then in four-wheel drive (4WD) and four-wheel drive with the differential locked (DIFF. LOCK).
EE.book Page 15 Friday, August 3, 2007 4:52 PM Turning Use care in turns – turning the steering wheel too far or too fast can result in loss of control or a rollover. Slow down before entering turns. When making tight turns from a standstill or at slow speeds, avoid sudden or hard acceleration. Driving aggressively or making abrupt maneuvers even on flat, open areas can cause side rollovers. Avoid sideways sliding, skidding, or fishtailing, and never do donuts.
EE.book Page 16 Friday, August 3, 2007 4:52 PM Accelerating With the engine idling in neutral and your foot on the brake, shift the drive select lever into low or high. NOTICE: Do not shift from low to high or vice versa without coming to a complete stop and waiting for the engine to return to normal idle speed – damage to the engine or drive train may occur. Then release the parking brake. Press the accelerator pedal slowly and smoothly.
EE.book Page 17 Friday, August 3, 2007 4:52 PM Leaving the vehicle Do not get out of the vehicle while the engine is running and the drive select lever is in any gear. There is a risk of injury because: ● The speed of a cold engine may increase enough as it warms up to cause the vehicle to move on its own while the choke is being used. ● Children or others may accidentally press the accelerator pedal. ● Objects tossed into the vehicle may strike the accelerator pedal.
EE.book Page 18 Friday, August 3, 2007 4:52 PM 4. With the brake pedal applied, set the parking brake. 5. Block the front and rear wheels with rocks or other objects. Operation on different surfaces and terrains Go slowly and proceed with caution when operating on an unfamiliar surface or terrain. This vehicle may handle differently in certain types of terrains or on certain surfaces. You may come upon hidden rocks, bumps, or holes without enough time to react.
EE.book Page 19 Friday, August 3, 2007 4:52 PM Hills Choose carefully which hills you attempt to climb or descend. Avoid hills with slippery surfaces or those where you will not be able to see far enough ahead of you. Use common sense and remember that some hills are too steep for you to climb or descend. Use proper driving techniques to avoid rearward, forward, or sideways rollovers on hills and slopes. Drive straight up and down inclines, not across them. If crossing a hill is unavoidable, drive slowly.
EE.book Page 20 Friday, August 3, 2007 4:52 PM Uphill Do not attempt to climb hills until you have mastered basic maneuvers on flat ground. Drive straight up hills, and avoid crossing the side of a hill, which increases your risk of rollover. Practice first on gentle slopes before attempting steeper hills. Always check the terrain carefully before attempting any hill.
EE.book Page 21 Friday, August 3, 2007 4:52 PM Downhill Check the terrain carefully before going downhill. When possible, choose a path that lets you drive your vehicle straight downhill. Choose your path carefully and drive slowly enough to be able to react to obstacles that you encounter. If you are sliding or skidding, try to steer in the direction the vehicle is sliding, to regain control. For example, if you feel the back of the vehicle start to slide to your right, steer to the right.
EE.book Page 22 Friday, August 3, 2007 4:52 PM Rough terrain Operation over rough terrain should be done with caution. ● Look for and avoid obstacles that could cause damage to the vehicle or could lead to a rollover or accident. ● Do not drive in a way that will get the Rhino airborne, as injury, loss of control, and damage to the vehicle could occur.
EE.book Page 23 Friday, August 3, 2007 4:52 PM Loose terrain/slippery terrain When driving on slippery terrain, including wet, muddy, or icy conditions, as well as loose gravel, be aware that you could begin skidding or sliding. To avoid loss of control, slow down and put the Rhino in 4WD before driving on a slippery surface and plan your path to avoid making abrupt maneuvers.
EE.book Page 24 Friday, August 3, 2007 4:52 PM Brush or wooded areas When operating in areas with brush or trees, watch carefully on both sides and above the vehicle for obstacles such as branches that the vehicle might hit, causing an accident. Watch for brush that might enter the vehicle as you pass and strike you or the passenger. Never hold onto the cage/frame. The passenger should always hold onto the handholds with both hands.
EE.book Page 1 Friday, August 3, 2007 4:52 PM EVU00650 PERIODIC MAINTENANCE AND ADJUSTMENT WARNING 1- Turn off the engine when performing maintenance unless otherwise specified. ● A running engine has moving parts that can catch on body parts or clothing and electrical parts that can cause shocks or fires. ● Running the engine while servicing can lead to eye injury, burns, fire, or carbon monoxide poisoning – possibly leading to death. See page 2-8 for more information about carbon monoxide.
EE.book Page 2 Friday, August 3, 2007 4:52 PM EVU00660 Owner’s manual and tool kit You are recommended to put this owner’s manual in the vinyl bag and always carry it underneath the driver seat as shown. Put the owner’s tool kit and tire pressure gauge in the space beside the battery. 1 2 3 4 5 6 1. Owner’s tool kit 2.
EE.book Page 3 Friday, August 3, 2007 4:52 PM If you do not have a torque wrench available during a service operation requiring one, take your vehicle to a Yamaha dealer to check the torque settings and adjust them as necessary.
EE.book Page 4 Friday, August 3, 2007 4:52 PM EVU01640 Periodic maintenance chart for the emission control system ● For vehicles not equipped with an odometer or hour meter, follow the month maintenance intervals. ● For vehicles equipped with an odometer or an hour meter, follow the km (mi) or hours maintenance intervals. However, keep in mind that if the vehicle isn’t used for a long period of time, the month maintenance intervals should be followed.
EE.
EE.book Page 6 Friday, August 3, 2007 4:52 PM ITEM Drive shaft universal joint* Engine mount* Front and rear axle boots* Stabilizer bushings* Fittings and fasteners* Whichever month comes first km (mi) hours ROUTINE • • • • • • • • 1 320 (200) 20 INITIAL 3 1,200 (750) 75 6 2,400 (1,500) 150 EVERY 6 12 2,400 4,800 (1,500) (3,000) 150 300 Lubricate with lithium-soap-based grease. Check for cracks or damage. Check bolt tightness. Check operation. Replace if damaged. Check for cracks or damage.
EE.book Page 7 Friday, August 3, 2007 4:52 PM EVU00680 Hood To open Unhook the hood latches, and then slowly tilt the hood up until it stops. 1. Hood 1.
EE.book Page 8 Friday, August 3, 2007 4:52 PM To close Lower the hood slowly to its original position, and then hook the hood latches. Secure projections 1 on the rear of the hood into slots 2 on the back of the instrument panel. Secure slots 3 on the side of the hood around projections 4 on the frame. 1. Projection (× 2) 3. Slot (× 2) NOTICE ● ● 2. Slot (× 2) 4. Projection (× 2) 8-8 Make sure that all cables and wires are in place when closing the hood.
EE.book Page 9 Friday, August 3, 2007 4:52 PM EVU00691 Console To install 1. Place the console in its original position. 2. Install the parking brake lever boot. 3. Install the seats. To remove 1. Remove the seats. (See page 4-13 for seat removal and installation procedures.) 2. Remove the parking brake lever boot. 3. Pull the console upward (the drive select lever boot will come loose). NOTICE ● ● 1. Console 8-9 When installing the console, be sure not to pinch the cables or wires.
EE.book Page 10 Friday, August 3, 2007 4:52 PM EVU00701 Engine oil and oil filter cartridge Check engine oil level before each operation. In addition, change the oil and the oil filter cartridge at the intervals specified in the periodic maintenance and lubrication chart. 5. Insert the dipstick in the oil filler hole (without screwing it in), and then remove it again to check the oil level. The engine oil should be between the minimum and maximum level marks. To check the engine oil level 1.
EE.book Page 11 Friday, August 3, 2007 4:52 PM 7. Insert the dipstick into the oil filler hole, and then tighten the oil filler cap. 8. Reinstall the console. To change the engine oil (with or without oil filter cartridge replacement) 1. Remove the console. (See page 8-9 for console removal and installation procedures.) 2. Start the engine, warm it up for several minutes, and then turn it off. 3. Place an oil pan under the engine to collect the used oil, and then remove the engine oil filler cap. 4.
EE.book Page 12 Friday, August 3, 2007 4:52 PM Skip steps 5–7 if the oil filter cartridge is not being replaced. 6. Apply a light coat of clean engine oil to the O-ring of the new oil filter cartridge. Make sure the O-ring is seated properly. 5. Remove the oil filter cartridge with an oil filter wrench. An oil filter wrench is available from a Yamaha dealer. 1. O-ring 1. Oil filter cartridge 7.
EE.book Page 13 Friday, August 3, 2007 4:52 PM 9. Add the specified amount of recommended engine oil, and then reinstall the engine oil filler cap and tighten it. NOTICE: Be sure to wipe off spilled oil on any parts after the engine and exhaust system have cooled down. 1. Oil filter cartridge Recommended engine oil: See page 10-2. Oil quantity: Without oil filter cartridge replacement: 1.90 L (1.67 Imp qt, 2.01 US qt) With oil filter cartridge replacement: 2.00 L (1.76 Imp qt, 2.11 US qt) 2.
EE.book Page 14 Friday, August 3, 2007 4:52 PM 10. Start the engine, and then let it idle for several minutes while checking it for oil leakage. If oil is leaking, immediately turn the engine off and check for the cause. 11. Turn the engine off, wait at least ten minutes, and then check the oil level and correct it if necessary. 12. Reinstall the console. NOTICE ● ● In order to prevent clutch slippage (since the engine oil also lubricates the clutch), do not mix any chemical additives with oil.
EE.book Page 15 Friday, August 3, 2007 4:52 PM EVU00710 Final gear oil 3. If the oil is below the brim of the filler hole, add sufficient oil of the recommended type to raise it to the correct level. NOTICE: Be sure no foreign material enters the final gear case. 4. Reinstall the oil filler bolt, and then tighten it to the specified torque. Checking the final gear oil level 1. Park the vehicle on a level surface. 2. Remove the oil filler bolt, and then check the oil level in the final gear case.
EE.book Page 16 Friday, August 3, 2007 4:52 PM Changing the final gear oil 1. Park the vehicle on a level surface. 2. Place a container under the final gear case to collect the used oil. 3. Remove the oil filler bolt and the drain bolt to drain the oil. 5. Add the recommended final gear oil up to the brim of the filler hole. NOTICE: Be sure no foreign material enters the final gear case. Recommended oil: SAE 80 API GL-4 Hypoid gear oil Oil quantity: 0.25 L (0.22 Imp qt, 0.26 US qt) 6.
EE.book Page 17 Friday, August 3, 2007 4:52 PM EVU00721 Differential gear oil 3. Reinstall the differential gear oil filler bolt, and then tighten it to the specified torque. Checking the differential gear oil level 1. Park the vehicle on a level surface. 2. Remove the differential gear oil filler bolt and check the oil level. It should be up to the brim of the filler hole. If the level is low, add sufficient oil of the recommended type to raise it to the specified level.
EE.book Page 18 Friday, August 3, 2007 6:35 PM Recommended oil: SAE 80 API GL-5 Hypoid gear oil Oil quantity: 0.32 L (0.28 Imp qt, 0.34 US qt) 6. Reinstall the differential gear oil filler bolt, and then tighten it to the specified torque. Tightening torque: Differential gear oil filler bolt: 23 Nm (2.3 m·kgf, 17 ft·lbf) 1. Differential gear oil drain bolt 4. Reinstall the differential gear oil drain bolt, and tighten it to the specified torque. 7. Check for oil leakage.
EE.book Page 19 Friday, August 3, 2007 4:52 PM EVU00732 Coolant The coolant level should be checked before each ride. Checking the coolant level 1. Park the vehicle on a level surface. 2. Open the hood. (See pages 8-7–8-8 for hood opening and closing procedures.) 3. Check the coolant level in the coolant reservoir when the engine is cold as the coolant level varies with engine temperature. The coolant should be between the minimum and maximum level marks. 1. Coolant reservoir cap 2.
EE.book Page 20 Friday, August 3, 2007 4:52 PM EVU00740 Changing the coolant The coolant must be changed by a Yamaha dealer at the intervals specified in the periodic maintenance and lubrication chart. Adding water instead of coolant lowers the antifreeze content of the coolant. If water is used instead of coolant, have a Yamaha dealer check the antifreeze content of the coolant as soon as possible. The radiator fan is automatically switched on or off according to the coolant temperature in the radiator.
EE.book Page 21 Friday, August 3, 2007 4:52 PM 5UG14001 Spark plug inspection Removal 1. Lift the cargo bed up. (See pages 4-15– 4-16 for cargo bed lifting and lowering procedures.) 2. Remove the spark plug cap. 1. Rear axle boot (× 2 each side) 1. Spark plug cap 3. Use the spark plug wrench in the tool kit to remove the spark plug as shown.
EE.book Page 22 Friday, August 3, 2007 4:52 PM Inspection The spark plug is an important engine component and is easy to inspect. The condition of the spark plug can indicate the condition of the engine. The ideal color of the porcelain insulator around the center electrode is a medium-tolight tan for a vehicle that is being ridden normally. You should periodically remove and inspect the spark plug because heat and deposits will cause the spark plug to slowly break down and erode.
EE.book Page 23 Friday, August 3, 2007 4:52 PM Installation 1. Measure the electrode gap with a wire thickness gauge and, if necessary, adjust the gap to specification. 3. Install the spark plug and tighten it to the specified torque. If a torque wrench is not available when you are installing the spark plug, a good estimate of the correct torque is one-quarter to one-half turn past finger tight. Have the spark plug tightened to the specified torque as soon as possible. Spark plug gap: 0.8–0.9 mm (0.
EE.book Page 24 Friday, August 3, 2007 4:52 PM 5UG14002 Cleaning the air filter elements 2. Remove the air filter element from the air intake duct grill by pulling it out as shown. Cleaning the intake duct air filter element 1. Remove the air intake duct grill by removing the quick fastener screws. 1. Air filter element 2. Air intake duct grill 3. Remove any large particles from the air filter element by hand. 4. Tap the air filter element to remove as much dust and dirt as possible. 1.
EE.book Page 25 Friday, August 3, 2007 4:52 PM 5. Reinstall the air filter element into the air intake duct grill. 6. Reinstall the air intake duct grill by installing the quick fastener screws. Cleaning the engine air filter element There is a check hose at the bottom of the air filter case. If dust or water collects in this hose, empty the hose and clean the air filter element and air filter case. 1. Air filter case check hose 1. Remove the seats.
EE.book Page 26 Friday, August 3, 2007 4:52 PM 3. Remove the air filter case cover by unhooking the holders. 4. Remove the air filter element. 1. Air filter element 1. Air filter case cover holder (× 4) 2.
EE.book Page 27 Friday, August 3, 2007 4:52 PM 5. Remove the sponge material from its frame. 1. Air filter frame 3. Element retaining plate 6. Wash the sponge material gently but thoroughly in parts cleaning solvent. WARNING! Using gasoline or other flammable solvents to clean the air filter element can cause a fire or explosion, which could lead to serious injury. 7. Squeeze the excess solvent out of the sponge material. NOTICE: Do not twist the sponge material when squeezing it. 2.
EE.book Page 28 Friday, August 3, 2007 4:52 PM 8. Wash the sponge material in warm soapy water to remove remaining solvent, then rinse thoroughly with plain warm water. 9. Squeeze excess water out of the sponge material. NOTICE: Do not twist the sponge material when squeezing it. 10. Allow the sponge material to dry thoroughly. Inspect the sponge material and replace it if damaged. 11.
EE.book Page 29 Friday, August 3, 2007 4:52 PM 2P512001 The air filter element should be cleaned every 20–40 hours. It should be cleaned and lubricated more often if the vehicle is operated in extremely dusty areas. Each time air filter element maintenance is performed, check the air inlet to the air filter case for obstructions. Check the air filter element rubber joint to the carburetor and manifold fittings for an airtight seal.
EE.book Page 30 Friday, August 3, 2007 4:52 PM 5UG14003 EVU00780 V-belt cooling duct check hose The V-belt cooling duct check hose is located under the driver seat. (See page 4-13 for seat removal and installation procedures.) If dust or water collects in the V-belt cooling duct check hose, remove the hose and clean it. V-belt case drain plug The V-belt case drain plug is located under the driver seat. (See page 4-13 for seat removal and installation procedures.
EE.book Page 31 Friday, August 3, 2007 4:52 PM EVU00792 Cleaning the spark arrester 2. Remove the tailpipe by pulling it out of the muffler. 3. Tap the tailpipe lightly, and then use a wire brush to remove any carbon deposits from the spark arrester portion of the tailpipe and inside of the tailpipe housing. WARNING Hot exhaust system may cause burns. To avoid burns or fires, make sure that the engine is stopped and the exhaust system is cool before cleaning spark arrester.
EE.book Page 32 Friday, August 3, 2007 4:52 PM EVU00800 Carburetor adjustment The carburetor is a vital part of the engine and requires very sophisticated adjustment. Most adjusting should be left to a Yamaha dealer who has the professional knowledge and experience to do so. However, the idling speed adjustment may be performed by the owner as a part of the usual maintenance routine. Tightening torque: Tailpipe bolt: 9.5 Nm (0.95 m·kgf, 6.
EE.book Page 33 Friday, August 3, 2007 4:52 PM EVU00810 Idle speed adjustment A diagnostic tachometer must be used for this procedure. 1. Start the engine and warm it up for a few minutes at approximately 1,000 to 2,000 r/min. Occasionally rev the engine to 4,000 to 5,000 r/min. The engine is warm when it responds quickly to the throttle with the choke off. 2. Remove the seats. (See page 4-13 for seat removal and installation procedures.) 3. Remove the console.
EE.book Page 34 Friday, August 3, 2007 4:52 PM Valve clearance The correct valve clearance changes with use, resulting in improper fuel/air supply or engine noise. To prevent this, the valve clearance must be adjusted regularly. This adjustment however, should be left to a professional Yamaha service technician. Brakes Replacement of brake components requires professional knowledge. Brake service should be performed by a Yamaha dealer.
EE.book Page 35 Friday, August 3, 2007 4:52 PM EVU00840 The wheels need to be removed to check the brake pads. (See pages 8-42–8-45 for wheel removal and installation procedures.) Rear brake pad check Each brake pad is provided with wear indicator grooves, which allow you to check the brake pad wear without having to disassemble the brake. To check the brake pad wear, check the wear indicator grooves.
EE.book Page 36 Friday, August 3, 2007 4:52 PM EVU00850 Checking the brake fluid level The brake fluid reservoir is located under the hood. (See pages 8-7–8-8 for hood opening and closing procedures.) Observe these precautions: ● When checking the fluid level, make sure the top of the brake fluid reservoir is level. ● Use only the recommended quality brake fluid. Otherwise, the rubber seals may deteriorate, causing leakage and poor braking performance. Recommended brake fluid: DOT 4 1.
EE.book Page 37 Friday, August 3, 2007 4:52 PM EVU01220 ● ● Brake fluid may deteriorate painted surfaces or plastic parts. Always clean up spilled fluid immediately. Have a Yamaha dealer inspect the brake system if the brake fluid level goes down. Checking the brake pedal Have a Yamaha dealer check the brakes at the intervals specified in the periodic maintenance and lubrication chart. There should be no free play in the brake pedal. The brakes should operate smoothly and there should be no brake drag.
EE.book Page 38 Friday, August 3, 2007 4:52 PM EVU00870 Parking brake lever free play adjustment Periodically check the parking brake lever free play and adjust it if necessary. 1. Shift the drive select lever into low gear “L”. 2. Remove the seats. (See page 4-13 for seat removal and installation procedures.) 3. Remove the console. (See page 8-9 for console removal and installation procedures.) 4. Check the parking brake lever free play.
EE.book Page 39 Friday, August 3, 2007 4:52 PM EVU00880 1. Locknut Brake light switch adjustment The brake light switch, which is activated by the brake pedal, is properly adjusted when the brake light comes on just before braking takes effect. If necessary, adjust the brake light switch as follows. 1. Open the hood. (See pages 8-7–8-8 for hood opening and closing procedures.) 2. Turn the adjusting nut while holding the brake light switch in place.
EE.book Page 40 Friday, August 3, 2007 4:52 PM EVU00890 Cable inspection and lubrication WARNING Damaged cables could restrict operation, which may cause an accident or injury. Inspect control cables frequently and replace damaged cables. Corrosion can result when the outer covering of control cables becomes damaged. Cables can also become frayed or kinked. 1. Brake light switch 2. Adjusting nut Lubricate the cable ends. If the cables do not operate smoothly, ask a Yamaha dealer to replace them.
EE.book Page 41 Friday, August 3, 2007 4:52 PM EVU00900 EVU00910 Brake pedal and accelerator pedal lubrication Lubricate the pivoting parts. Rear knuckle upper and lower pivot lubrication Lubricate the knuckle upper and lower pivots with a grease gun.
EE.book Page 42 Friday, August 3, 2007 4:52 PM EVU00920 EVU00930 Steering shaft lubrication Lubricate the pivot points. Wheel removal 1. Loosen the wheel nuts. 2. Elevate the vehicle and place a suitable stand under the frame. 3. Remove the nuts from the wheel. 4. Remove the wheel. Recommended lubricant: Lithium-soap-based grease 1.
EE.book Page 43 Friday, August 3, 2007 4:52 PM Tire replacement Always use the same size and type of tires recommended in this owner’s manual. The tires that came with your Rhino were designed to match the performance capabilities and to provide the best combination of handling, braking, and comfort. It is best to replace all four tires at the same time. If that is not possible, you must replace the tires in pairs (front or rear) with tires of the same size and type as the originals.
EE.book Page 44 Friday, August 3, 2007 4:52 PM EVU00940 Wheel installation 1. Install the wheel and the nuts. ● The arrow mark on the tire must point toward the rotating direction of the wheel. ● Tapered nuts are used for both the front and rear wheels. Install the nut with its tapered side towards the wheel. 2. Lower the vehicle so that the wheel is on the ground. 3. Tighten the wheel nuts to the specified torque. 1. Arrow mark WARNING Do not reverse the rims on the Rhino to widen the track width.
EE.book Page 45 Friday, August 3, 2007 4:52 PM EVU00950 Battery This vehicle is equipped with a sealed-type battery. Therefore it is not necessary to check the electrolyte or add distilled water in the battery. If the battery seems to have discharged, consult a Yamaha dealer. Wheel nut torque: Front: 55 Nm (5.5 m·kgf, 40 ft·lbf) Rear: 55 Nm (5.5 m·kgf, 40 ft·lbf) NOTICE Do not try to remove the sealing caps of the battery cells. You may damage the battery.
EE.book Page 46 Friday, August 3, 2007 4:52 PM EVU00960 Battery maintenance 1. If the vehicle will not be used for a month or longer, remove the battery and store it in a cool, dark place. Completely recharge the battery before reinstallation. WARNING Avoid battery contact with skin, eyes, or clothing. Shield eyes when working near batteries. Keep out of reach of children. You could be poisoned or severely burned by the sulfuric acid in battery electrolyte.
EE.book Page 47 Friday, August 3, 2007 4:52 PM Jump-starting Jump-starting the vehicle should be avoided. The battery should be removed and charged instead. WARNING To avoid battery explosion and/or serious damage to the electrical system: ● Do not connect the negative lead of the jumper cable to the negative terminal of the battery ● Do not touch the positive lead of the jumper cable to the negative lead. ● Do not reverse the polarity of the jumper cables when connecting to the batteries. 1.
EE.book Page 48 Friday, August 3, 2007 4:52 PM However, if the vehicle must be jump-started, proceed as follows. 1. Turn the key to “OFF”. 2. Open the hood. (See pages 8-7–8-8 for hood opening and closing procedures.) 3. Remove the battery compartment cover. 4. Using a charged 12-volt battery, connect the positive lead of the jumper cable to the positive terminal of the battery in the vehicle and the other end of the positive lead to the positive terminal of the charged battery. 1.
EE.book Page 49 Friday, August 3, 2007 4:52 PM EVU00970 6. Start the engine. (Refer to “Starting a cold engine” on pages 6-2–6-5.) 7. After the engine starts, disconnect the negative lead of the jumper cable from the vehicle and charged battery, and then disconnect the positive lead of the jumper cable from the charged battery and the battery in the vehicle. 8. Reinstall the battery compartment cover. 9. Close the hood. Fuse replacement The main fuse and the fuse box are located under the hood.
EE.book Page 50 Friday, August 3, 2007 4:52 PM Turn the key to “OFF” and turn off the electrical circuit in question. NOTICE To prevent accidental short-circuiting, turn off the main switch when checking or replacing a fuse. 2. Remove the blown fuse, and then install a new fuse of the specified amperage. WARNING! Always use a fuse of the specified amperage. Never use any material in place of the proper fuse. Using an improper fuse can cause damage to the electrical system and may lead to a fire. 1. 3. 5.
EE.book Page 51 Friday, August 3, 2007 4:52 PM EVU01670 Specified fuses: Main fuse: Headlight fuse: Ignition fuse: Auxiliary DC jack fuse: Signaling system fuse: Carburetor warmer fuse: Four-wheel-drive motor fuse: Backup fuse: Replacing a headlight bulb If a headlight bulb burns out, replace it as follows. 1. Lift the hood up. (See pages 8-7–8-8 for hood opening and closing procedures.) 2. Remove the cover at the rear of the headlight by pulling it off. 30.0 A 15.0 A 10.0 A 10.0 A 10.0 A 10.0 A 3.
EE.book Page 52 Friday, August 3, 2007 4:52 PM 3. Remove the headlight bulb holder cover by pulling it off. 4. Remove the headlight bulb holder by pushing it in and turning it counterclockwise. 1. Headlight bulb holder cover 1.
EE.book Page 53 Friday, August 3, 2007 4:52 PM 5. Wait for the headlight bulb to cool before touching or removing it. Remove the bulb by pulling it out. 6. Insert a new headlight bulb into the bulb holder by pushing it in. 7. Reinstall the bulb holder by pushing it in and turning it clockwise. Reinstall the bulb holder cover and the cover at the rear of the headlight. NOTICE: Make sure the headlight bulb holder cover is securely fitted over the bulb holder and seated properly. 8. Close the hood. 9.
EE.book Page 54 Friday, August 3, 2007 4:52 PM EVU00990 EVU01000 Headlight beam adjustment Tail/brake light bulb replacement If a tail/brake light bulb burns out, replace it as follows: 1. Remove the quick fastener screws and bolts from panel A (if replacing the left tail/brake light bulb) or panel B (if replacing the right tail/brake light bulb). NOTICE It is advisable to have a Yamaha dealer make this adjustment. To raise the beam, turn the adjusting screw in direction a.
EE.book Page 55 Friday, August 3, 2007 4:52 PM 2. Lift the cargo bed up. (See page 4-16 for cargo bed lifting and lowering procedures.) 3. Remove the panel. 4. Remove the bulb holder (together with the bulb) by turning it counterclockwise. 1. Panel B 1. Tail/brake light bulb holder 1. Quick fastener screw (× 8) 3. Panel A 5. Push the defective bulb in and turn it counterclockwise to remove it from the bulb holder. 6. Push a new bulb in and turn it clockwise to install in the bulb holder. 2.
EE.book Page 56 Friday, August 3, 2007 4:52 PM EVU01010 7. Reinstall the bulb holder (together with the bulb) by turning it clockwise. 8. Install the panel. 9. Lower the cargo bed. 10. Reinstall the quick fastener screws and bolts, and then tighten the bolts to the specified torque. Troubleshooting Although Yamaha vehicles receive an inspection before shipment from the factory, trouble may occur during operation.
EE.book Page 57 Friday, August 3, 2007 4:52 PM WARNING When checking the fuel system, do not smoke and make sure there are no open flames or sparks in the area, including pilot lights from water heaters or furnaces. Gasoline or gasoline vapors can ignite or explode, causing severe injury or property damage.
EE.book Page 58 Friday, August 3, 2007 4:52 PM EVU01020 Troubleshooting charts Starting problems or poor engine performance 1. Fuel There is fuel. Remove the fuel hose from the fuel pump. No fuel. Supply fuel. Check the fuel flow. No fuel. Fuel pump is clogged. Check if there is fuel in the fuel tank. 2. Compression Use the electric starter to see if there is compression. 3. Ignition There is compression. Compression normal. No compression. Ask a Yamaha dealer to inspect.
EE.book Page 59 Friday, August 3, 2007 4:52 PM Engine overheating Wait for the engine to cool before removing the radiator cap. WARNING! If the engine is not cool when removing the radiator cap, hot fluid and steam could blow out under pressure and burn you. Place a thick rag over the cap and remove the cap slowly to allow any remaining pressure to escape. Leakage. Ask a Yamaha dealer to inspect and repair the cooling system. No leakage. Add coolant. (See the text below.
EE.book Page 1 Friday, August 3, 2007 4:52 PM EVU01030 CLEANING AND STORAGE 3. Rinse the dirt and degreaser off with a garden hose. Use only enough pressure to do the job. WARNING! Test the brakes after washing. Apply the brakes several times at slow speeds to let friction dry out the linings. Wet brakes may have reduced stopping ability, increasing the chance of an accident.
EE.book Page 2 Friday, August 3, 2007 4:52 PM EVU01041 4. Once the majority of the dirt has been hosed off, wash all surfaces with warm water and mild, detergent-type soap. An old toothbrush or bottle brush is handy for hard-to-get-at places. 5. Rinse the vehicle off immediately with clean water and dry all surfaces with a clean chamois towel or soft, absorbent cloth. 6. Clean the seats with a vinyl upholstery cleaner to keep the covers pliable and glossy. 7.
EE.book Page 3 Friday, August 3, 2007 4:52 PM 3. Remove the spark plug, pour about one tablespoon of SAE 10W-40 or 20W-50 motor oil in the spark plug hole and reinstall the spark plug. Ground the spark plug wire and turn the engine over several times to coat the cylinder wall with oil. 4. Lubricate all control cables. 5. Block up the frame to raise all wheels off the ground. 6. Tie a plastic bag over the exhaust pipe outlet to prevent moisture from entering. 7.
EE.book Page 1 Friday, August 3, 2007 4:52 PM EVU01050 SPECIFICATIONS 1- Model YXR66FW Dimensions: Overall length Overall width Overall height Seat height Wheelbase Ground clearance Minimum turning radius Basic weight: With oil and full fuel tank Engine: Engine type Cylinder arrangement Displacement Bore × stroke Compression ratio Starting system Lubrication system 2,885 mm (113.6 in) 1,385 mm (54.5 in) 1,853 mm (73.0 in) 818 mm (32.2 in) 1,910 mm (75.2 in) 280 mm (11.0 in) 3,900 mm (154 in) 514.
EE.book Page 2 Friday, August 3, 2007 4:52 PM Model YXR66FW 1 Engine oil: Type: 0 10 30 50 70 90 110 130 ˚F 2 3 YAMALUBE 4 (20W-50) or SAE 20W-50 YAMALUBE 4 (10W-40) or SAE 10W-40 4 5 YAMALUBE 4-CW (5W-30) or SAE 5W-30 -20 -10 0 10 20 30 40 50 ˚C 6 7 Recommended engine oil classification API service SG type or higher, JASO standard MA 8 NOTICE In order to prevent clutch slippage (since the engine oil also lubricates the clutch), do not mix any chemical additives with oil.
EE.book Page 3 Friday, August 3, 2007 4:52 PM Model YXR66FW Final gear case oil: Type Quantity Differential gear case oil: Type Quantity Radiator capacity (including all routes): Air filter: Engine Intake duct Fuel: Type Fuel tank capacity Carburetor: Type/quantity Manufacturer Spark plug: Type/manufacturer Spark plug gap Clutch type: SAE 80 API GL-4 Hypoid gear oil 0.25 L (0.22 Imp qt, 0.26 US qt) SAE 80 API GL-5 Hypoid gear oil 0.32 L (0.28 Imp qt, 0.34 US qt) 2.50 L (2.20 Imp qt, 2.
EE.book Page 4 Friday, August 3, 2007 4:52 PM Model Transmission: Primary reduction system Secondary reduction system Secondary reduction ratio Transmission type Operation Reverse gear Sub transmission ratio Chassis: Frame type Caster angle Trail Tire: Type Size YXR66FW V-belt Shaft drive 41/21 × 24/18 × 33/9 (9.544) V-belt automatic Right hand operation 25/17 (1.471) 35/17 (2.058) 28/19 (1.473) low high Steel tube frame 5.0° 26.0 mm (1.
EE.book Page 5 Friday, August 3, 2007 4:52 PM Model Brakes: System Type YXR66FW Front and rear unified Dual disc brake Single disc brake Foot operation front rear Operation Suspension: Front suspension Rear suspension Shock absorber: Front shock absorber Rear shock absorber Wheel travel: Front wheel travel Rear wheel travel Electrical: Ignition system Generator system Battery type Battery capacity Headlight type: Double wishbone Double wishbone Coil spring/oil damper Coil spring/oil damper 185 mm (7.
EE.
EE.book Page 1 Friday, August 3, 2007 4:52 PM CONSUMER INFORMATION 1- 1. KEY IDENTIFICATION NUMBER: EVU00090 Identification number records Record the key identification number, vehicle identification number, and model label information in the spaces provided for assistance when ordering spare parts from a Yamaha dealer or for reference, in case the vehicle is stolen. ACA-02E 2. VEHICLE IDENTIFICATION NUMBER: ACA-02E 3.
EE.book Page 2 Friday, August 3, 2007 4:52 PM EVU00100 EVU00110 Key identification number The key identification number is stamped on the key, as shown in the following illustration. This number can be used for ordering a new key. Vehicle identification number The vehicle identification number is stamped into the frame. 1 2 3 4 5 6 7 8 9 1. Vehicle identification number The vehicle identification number is used to identify your vehicle. 1.
EE.book Page 3 Friday, August 3, 2007 4:52 PM EVU00121 Model label The model label is affixed to the frame under the driver seat. Record the information on this label in the space provided. This information will be needed to order spare parts from your Yamaha dealer. 1.
EE.
EE.book Page 5 Friday, August 3, 2007 4:52 PM EVU01070 MAINTENANCE RECORD Copies of work orders and/or receipts for parts you purchase and install will be required to document maintenance done in accordance with the warranty. The chart below is printed only as a reminder to you that the maintenance work is required. It is not acceptable proof of maintenance work.
EE.book Page 6 Friday, August 3, 2007 4:52 PM EVU01081 YAMAHA MOTOR CORPORATION, U.S.A. SIDE × SIDE VEHICLE LIMITED WARRANTY Yamaha Motor Corporation, U.S.A. hereby warrants that new Yamaha Side × Side vehicles purchased from an authorized Yamaha Side × Side Vehicle dealer in the continental United States will be free from defects in material and workmanship for the period of time stated herein, subject to certain stated limitations.
EE.book Page 7 Friday, August 3, 2007 4:52 PM EVU01090 YAMAHA EXTENDED SERVICE (Y.E.S.
EE.
B6-yoko.
B6-yoko.
YAMAHA MOTOR CO., LTD. PRINTED IN USA 2007.08-1.